
Onion bread has a rich, savory flavor that adds a delicious twist to any meal. Using a bread machine makes baking this classic favorite easier than ever. We love how the machine does all the hard work while we enjoy the warm aroma filling the kitchen.
This onion bread recipe machine combines the sweetness of caramelized onions with a soft, fluffy texture that’s perfect for sandwiches or as a side. It’s a simple way to elevate your homemade bread game without spending hours kneading dough. Let’s dive into this foolproof recipe that’s sure to become a staple in our baking routine.
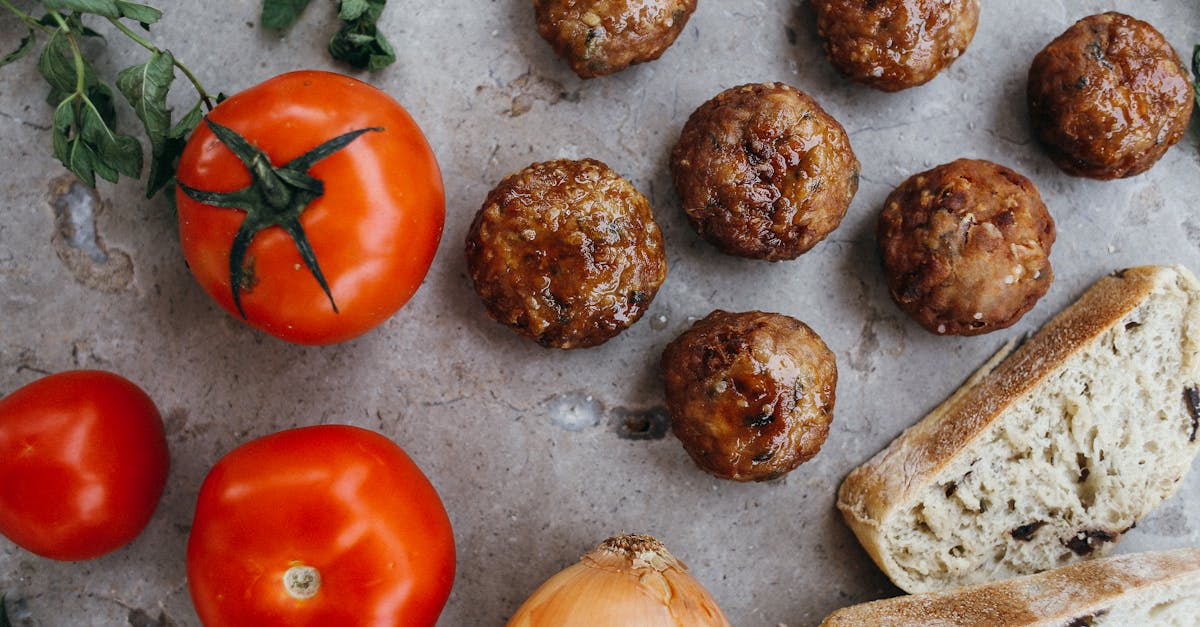
Ingredients
To achieve the perfect Onion Bread using our bread machine, we need to gather a precise balance of dry, wet, and optional ingredients. These components work together to create the ideal texture and flavor profile we love.
Dry Ingredients
We start with the base elements that give structure and body to our bread. Measure carefully for the best results.
- All-purpose flour – 3 cups (for soft yet sturdy texture)
- Instant yeast – 2 ¼ teaspoons (active but quick-rising)
- Salt – 1 ½ teaspoons (balances flavors)
- Sugar – 1 tablespoon (enhances yeast activity and slight sweetness)
- Dried onion flakes – 2 tablespoons (boosts onion essence alongside fresh caramelized onions)
Wet Ingredients
The liquids hydrate the flour and activate the yeast to form a smooth, pliable dough.
- Water – 1 cup, warm at 110°F (optimal yeast activation)
- Olive oil – 2 tablespoons (adds moisture and richness)
- Caramelized onions – 1 cup, cooled (main flavor star, soft texture)
Optional Add-ins
These extras can elevate our Onion Bread Recipe Machine creation with additional flavor or texture.
- Chopped fresh herbs (such as rosemary or thyme) – 1 teaspoon
- Shredded cheddar cheese – ½ cup (melts through for extra indulgence)
- Cracked black pepper – ½ teaspoon (adds subtle heat)
| Ingredient Category | Key Ingredients | Measurement |
|---|---|---|
| Dry | All-purpose flour | 3 cups |
| Instant yeast | 2 ¼ teaspoons | |
| Salt | 1 ½ teaspoons | |
| Sugar | 1 tablespoon | |
| Dried onion flakes | 2 tablespoons | |
| Wet | Water (warm, 110°F) | 1 cup |
| Olive oil | 2 tablespoons | |
| Caramelized onions (cooled) | 1 cup | |
| Optional Add-ins | Fresh herbs (rosemary, thyme) | 1 teaspoon |
| Shredded cheddar cheese | ½ cup | |
| Cracked black pepper | ½ teaspoon |
Let’s ensure all ingredients are prepared and measured accurately before adding them to our machine for the foolproof baking process.
Equipment Needed
To make perfect onion bread using a Bread Machine, having the right equipment ensures consistency and ease throughout the baking process. Below we outline the essential tools that will help us achieve the best results with our Onion Bread Recipe Machine.
Bread Machine
A reliable Bread Machine is indispensable for this recipe. It automates mixing, kneading, rising, and baking, allowing us to focus on preparation while it expertly handles the tough work. Choose a bread machine with:
| Feature | Recommendation |
|---|---|
| Capacity | 1.5 to 2 pounds (ideal for most kitchen needs) |
| Settings | Basic bread, dough, and baking programmable |
| Non-stick Bread Pan | Ensures easy removal of the onion bread |
| Kneading Blades | Durable and easy to clean |
A machine with these features guarantees that our caramelized onion bread comes out soft and fluffy every time.
Measuring Tools
Precise measurements are critical to baking success, especially in recipes involving yeast and hydration balance. We rely on:
- Digital kitchen scale – for accurate flour and ingredient measurements.
- Measuring cups and spoons – to measure liquids like warm water and olive oil.
- Liquid measuring jug – useful for water and oil to ensure exact volume.
Using these tools helps us maintain the perfect ratios required for optimal rise and texture in our onion bread machine recipe.
Mixing Bowls (Optional)
While the bread machine does the mixing, having mixing bowls handy comes in handy for:
- Preparing and cooling caramelized onions before adding them to the machine.
- Combining optional add-ins like herbs or cheese.
- Holding pre-measured ingredients before loading into the bread pan.
We recommend using medium-sized bowls made of glass or stainless steel for easy cleaning and safe food handling. This small extra step lets us keep everything organized and ensures smoother workflow when baking with the Onion Bread Recipe Machine.
Preparation
To ensure our onion bread recipe machine process runs smoothly, careful preparation is essential. We focus on prepping the onions and precisely measuring all ingredients for optimal results.
Preparing the Onions
We start by caramelizing the onions to bring out their deep sweetness and rich flavor, which is vital for the softness and aroma of the bread.
- Slice 2 large onions thinly for even caramelization.
- Heat 2 tablespoons of olive oil in a skillet over medium heat.
- Add the onions and a pinch of salt to draw out moisture.
- Cook slowly, stirring frequently, for 20–25 minutes until onions turn golden brown and soft.
- Remove from heat and let cool completely to prevent unwanted steaming during mixing.
Pro tip: Caramelized onions add moisture and natural sweetness, enhancing the bread’s flavor and texture.
Measuring Ingredients
Accurate measuring of ingredients guarantees our bread machine can balance hydration, yeast activation, and flavor development precisely.
| Ingredient | Quantity | Preparation |
|---|---|---|
| All-purpose flour | 3 cups (360 g) | Sifted |
| Instant yeast | 2 teaspoons | |
| Salt | 1 ½ teaspoons | |
| Sugar | 1 tablespoon | |
| Dried onion flakes | 2 tablespoons | |
| Warm water | 1 cup (240 ml) | 110°F (43°C) |
| Olive oil | 2 tablespoons | |
| Cooled caramelized onions | ½ cup | Prepared above |
| Optional add-ins: | ||
| Fresh herbs (e.g., thyme) | 1 tablespoon chopped | |
| Shredded cheddar cheese | ½ cup | |
| Cracked black pepper | ½ teaspoon |
- Use a digital kitchen scale for dry ingredients and a liquid measuring jug for wet ingredients to maintain precision.
- Always measure liquids at eye level for accuracy.
- Add ingredients to the bread machine in the order recommended by the manufacturer, typically liquids first, then dry ingredients, and yeast last to prevent premature activation.
Remember: Accurate measurement combined with cool caramelized onions prevents overproofing and contributes to the perfect crumb.
Directions
Follow these detailed steps to create perfectly onion bread using your bread machine. Precision and timing ensure that the rich flavors and ideal texture come through every time.
Setting Up the Bread Machine
- Place the bread machine on a stable, flat surface near a power outlet.
- Insert the non-stick bread pan securely into the machine.
- Attach the kneading blade firmly to the bread pan shaft.
- Ensure the bread machine lid is closed properly to maintain consistent heat and humidity during baking.
- Gather all pre-measured ingredients within easy reach to streamline the process.
Adding Ingredients to the Bread Machine
Add ingredients in the exact order recommended to promote proper mixing and yeast activation:
| Ingredient Type | Ingredients |
|---|---|
| Liquids | Warm water (110°F / 43°C), olive oil, cooled caramelized onions |
| Dry Ingredients | All-purpose flour, instant yeast, sugar, salt, dried onion flakes |
| Optional Add-ins | Fresh herbs, shredded cheddar cheese, cracked black pepper |
Important: Always add liquids first to the bread pan. This prevents dry yeast from activating prematurely. Next, layer dry ingredients on top of liquids, creating a slight mound with the flour to shield the yeast from liquid until kneading begins.
Selecting the Right Baking Cycle
- Turn on the bread machine and navigate to the settings menu.
- Select the Basic or White Bread cycle for a soft crumb and golden crust.
- Adjust crust color to Medium or Dark depending on your preference for crustiness.
- Choose loaf size according to your bread pan capacity (usually 1.5 to 2 pounds).
- For enhanced flavor, opt to activate the Preheat or Proofing option if your machine supports it.
Starting the Bread Machine
- Review the ingredients and settings to confirm accuracy.
- Close the lid firmly to lock in heat and moisture.
- Press the Start button to begin the mixing, kneading, rising, and baking cycle.
- During the first 5-10 minutes, monitor the dough consistency through the viewing window if available; it should form a smooth ball and not stick heavily to the pan sides.
- Resist opening the machine during rising and baking phases to maintain optimal baking conditions.
By adhering to these step-by-step directions, we ensure that our onion bread emerges with the perfect texture, an irresistible aroma, and a flavor that complements any meal.
Baking Process
The baking process for our Onion Bread Recipe Machine is crucial to transforming the prepared ingredients into a delicious, aromatic loaf. Paying close attention to the dough mixing and baking times ensures we achieve the perfect texture and flavor.
Monitoring the Dough Mix
Once we start the bread machine, it is essential to monitor the dough mix during the initial kneading phase. This step allows us to adjust consistency if needed and prevents under or over-kneading.
- After 5 to 10 minutes of kneading, open the lid and observe the dough.
- The dough should be smooth, elastic, and slightly tacky but not sticky.
- If the dough appears too dry, add water one tablespoon at a time.
- If it is too wet, sprinkle in a small amount of flour, again one tablespoon at a time.
- Avoid adding large amounts at once to preserve dough balance and yeast activity.
“Perfect dough texture is the foundation of fluffy, well-risen onion bread.”
Be mindful to quickly close the lid to maintain the bread machine’s temperature and humidity settings.
Baking Time and Temperature
The baking phase follows the kneading and rising cycles controlled by our bread machine’s specific settings but here is what we generally expect:
| Process Stage | Duration | Temperature Range |
|---|---|---|
| Kneading | 20 to 30 minutes | Ambient (machine controlled) |
| First Rise | 45 to 60 minutes | 80°F to 90°F |
| Second Rise | 30 to 45 minutes | 90°F to 110°F |
| Baking | 25 to 35 minutes | 350°F to 375°F |
- The exact baking duration depends on crust settings (light, medium, dark) we select on the machine.
- For onion bread we recommend the medium crust setting to retain a golden crust with a tender moist interior.
- The machine heats internally to ensure even baking without hot spots, producing consistent results every time.
During baking, resist opening the bread machine door to maintain heat and ensure even rising and browning.
By carefully monitoring the dough during mixing and trusting our bread machine’s precision in baking time and temperature, we create onion bread that delivers a rich flavor, soft crumb, and perfect crust ideal for any meal or sandwich.
Cooling and Serving
Once our onion bread has finished baking in the bread machine, the cooling and serving steps are crucial to achieving the best texture and flavor. Let’s explore how to properly remove, cool, and serve this delicious bread to enjoy every bite.
Removing the Bread from the Machine
- Unplug the bread machine to ensure safety before handling the bread pan.
- Use oven mitts or a thick kitchen towel to carefully lift the non-stick bread pan from the machine.
- Gently turn the bread pan upside down over a cooling rack. We recommend tapping the bottom and sides lightly to release the loaf.
- If the bread sticks, use a plastic or silicone spatula around the edges to help ease it out without damaging the crust.
Cooling Instructions
Proper cooling prevents sogginess and preserves the bread’s soft crumb.
- Place the loaf on a wire cooling rack to allow air circulation on all sides.
- Let the bread cool completely at room temperature for at least 1 hour. This resting period lets the residual steam escape, avoiding a gummy interior.
- Avoid wrapping the bread while still warm, as trapped moisture can soften the crust.
- If necessary, cover the bread loosely with a clean kitchen towel once cooled to keep it fresh without trapping condensation.
| Step | Action | Duration | Notes |
|---|---|---|---|
| Remove bread | Turn loaf upside down | Immediate | Use oven mitts for safety |
| Cool bread | Place on wire rack | 1 hour + | Cool completely for best texture |
| Cover after cooling | Use clean towel loosely | Optional | Prevents drying but allows airflow |
Serving Suggestions
Our onion bread machine recipe produces a flavorful loaf perfect for diverse meals.
- Sandwiches: Pair with deli meats, fresh lettuce, and mustard for a hearty sandwich.
- Toasts: Slice and toast, then spread with butter or cream cheese for a savory breakfast or snack.
- Sides: Serve warm alongside soups, stews, or roasted vegetables to complement bold flavors.
- Dips: Cube the bread for dipping into olive oil, hummus, or spinach artichoke dip during gatherings.
To slice with precision, use a serrated bread knife and cut horizontally in evenly sized pieces to maintain the soft crumb integrity.
Storage Tips
Proper storage of onion bread ensures we maintain its freshness, flavor, and texture for several days or longer. Here are our best tips to keep your homemade onion bread tasting as delightful as the moment it came out of the machine.
How to Store Onion Bread
To retain the softness and rich aroma of onion bread, follow these steps:
- Cool Completely: After baking, let the bread cool fully on a wire rack. This prevents moisture buildup inside the storage container that could make the crust soggy.
- Wrap Properly: Once cooled, wrap the bread tightly in plastic wrap or place it in a resealable plastic bag to keep air out. For an extra layer of protection, wrap it again in foil.
- Room Temperature Storage: Store the wrapped bread at room temperature in a cool, dry place away from direct sunlight. Avoid refrigerating as it tends to dry out the bread faster.
- Use a Bread Box: If available, keep the bread in a bread box which maintains ideal humidity and air circulation to preserve the crust without drying.
| Storage Method | Duration | Best For |
|---|---|---|
| Wrapped at Room Temp | 2 to 3 days | Daily sandwiches, fresh use |
| Bread Box | 3 to 4 days | Maintaining crust integrity |
| Refrigerator | Not recommended | Avoids but can dry bread |
Freezing Instructions
For longer storage, freezing onion bread is an excellent option to lock in flavor and freshness. Here’s how we do it:
- Slice Before Freezing: Slice the bread before freezing so you can take out only what you need without thawing the whole loaf.
- Wrap Each Slice: Individually wrap slices tightly in plastic wrap or wax paper to prevent freezer burn and moisture loss.
- Container or Bag: Place the wrapped slices in an airtight freezer-safe container or a heavy-duty freezer bag. Remove as much air as possible before sealing.
- Label and Date: Always label your packages with the freezing date to track freshness. Use within 3 months for best taste.
| Freezing Step | Details |
|---|---|
| Preparation | Cool completely and slice before wrapping |
| Wrapping | Plastic wrap / wax paper around individual slices |
| Storage Container | Airtight freezer-safe container or heavy-duty bag |
| Maximum Storage Time | Up to 3 months |
To thaw: Remove the slices you want, let them sit at room temperature for 10 to 15 minutes or toast them directly straight from frozen for a warm crisp bite.
Conclusion
Making onion bread with a bread machine transforms a once time-consuming process into a simple and enjoyable experience. With the right ingredients and careful preparation, we can consistently create bread that’s flavorful and perfectly textured.
This method not only saves us effort but also fills our kitchens with an irresistible aroma that invites everyone to the table. Whether for sandwiches or as a side, homemade onion bread made in a machine is a versatile addition to any meal.
By following these steps and tips, we’re set to enjoy fresh, delicious bread anytime with confidence and ease.
Frequently Asked Questions
What are the main benefits of making onion bread in a bread machine?
Using a bread machine simplifies the baking process by automating mixing, kneading, rising, and baking. It produces soft, fluffy onion bread with rich flavor and a delightful aroma, all with minimal effort and no extensive kneading.
What key ingredients are needed for onion bread in a bread machine?
Essential ingredients include all-purpose flour, instant yeast, salt, sugar, dried onion flakes, warm water, olive oil, and cooled caramelized onions. Optional add-ins like fresh herbs, shredded cheddar cheese, and cracked black pepper can enhance flavor.
How do I properly caramelize onions for the bread?
Slice onions thinly, cook them slowly over low heat until golden brown and soft, then cool completely before adding to the bread machine. This enhances sweetness and prevents extra moisture during mixing.
What features should I look for in a bread machine for making onion bread?
Choose a bread machine with 1.5 to 2-pound capacity, programmable settings, non-stick bread pan, and durable kneading blades. Accurate measuring tools help achieve perfect ingredient ratios.
How should I add ingredients to the bread machine?
Add liquids first (water, oil, caramelized onions), then dry ingredients (flour, yeast, salt, sugar, onions flakes). This promotes proper yeast activation and even mixing.
How do I check if my dough has the right texture during kneading?
After 5-10 minutes of kneading, the dough should be smooth, elastic, and slightly tacky but not sticky. Adjust by adding flour or water in small amounts if needed.
What baking settings work best for onion bread?
Select a medium crust setting with the appropriate baking cycle for white or basic bread. Avoid opening the door during baking to ensure even rising and crust formation.
How should I cool and serve onion bread after baking?
Remove bread from the machine carefully, cool completely on a wire rack to prevent sogginess, then slice with a serrated knife. Serve as sandwiches, toast, or with dips.
What is the best way to store onion bread to keep it fresh?
Cool completely before wrapping tightly in plastic or a resealable bag. Store at room temperature or in a bread box for up to a few days. For longer storage, slice and freeze bread with individual wrap per slice.
Can I add extra flavors to the onion bread recipe?
Yes, you can enhance flavor by adding fresh herbs like rosemary, shredded cheddar cheese, or cracked black pepper according to your taste preferences.