
Oatmeal wraps offer a delicious and nutritious twist on traditional wraps that we can enjoy any time of day. Made with wholesome oats, these wraps bring a subtle nutty flavor and a satisfying texture that pairs perfectly with a variety of fillings. Whether we’re packing a quick lunch or looking for a healthy snack, oatmeal wraps are a versatile choice that keeps things interesting.
Originating from the idea of incorporating more whole grains into our meals, oatmeal wraps are easy to make and naturally gluten-free when using certified oats. They’re a fantastic way to boost fiber intake while staying light and flavorful. Let’s dive into this simple recipe that will quickly become a staple in our kitchen for fresh and healthy meals.
Ingredients
To create our nutritious oatmeal wraps and delicious fillings, we carefully select wholesome and fresh ingredients. Below you will find everything you need to make these versatile wraps perfect for any meal.
For the Oatmeal Wraps
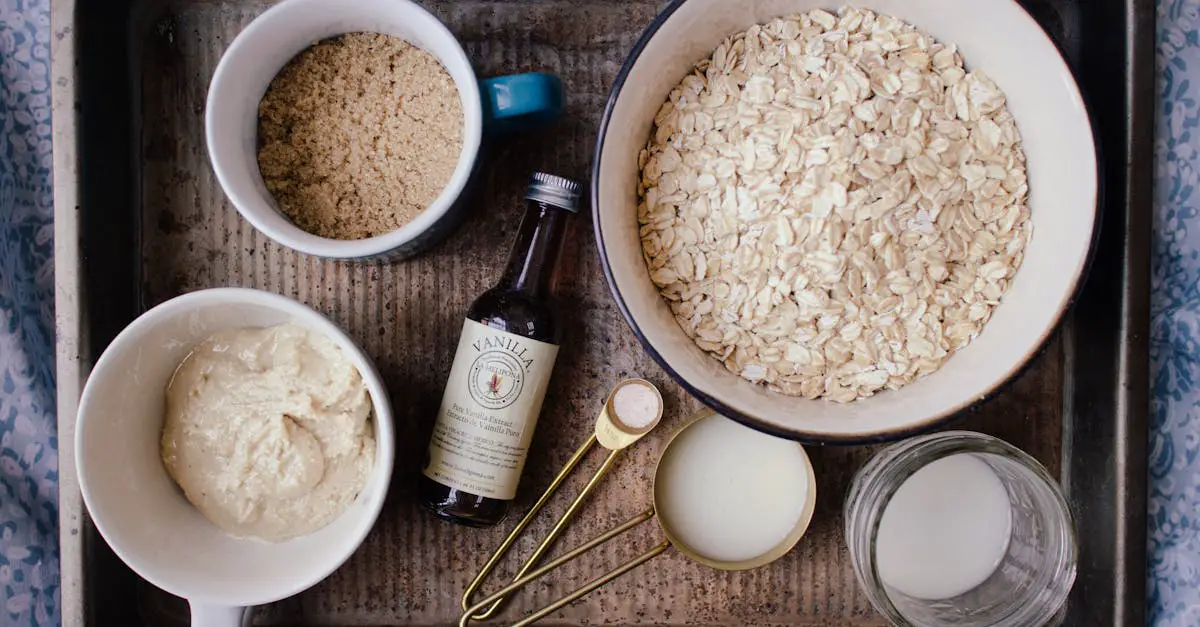
We rely on simple, natural ingredients that give our oatmeal wraps a nutty flavor and satisfying texture:
- 1 cup rolled oats (certified gluten-free for a safe option)
- ½ cup whole wheat flour (or all-purpose flour as a substitute)
- ½ teaspoon baking powder
- ¼ teaspoon salt
- ¾ cup water (adjust as needed for dough consistency)
- 1 tablespoon olive oil (adds flexibility and richness)
For the Filling Options
Our oatmeal wraps recipe pairs beautifully with a variety of savory and sweet fillings. Here are some wholesome ideas to get us started:
| Filling Type | Ingredients | Flavor Profile |
|---|---|---|
| Savory Veggie | Grilled zucchini, roasted red pepper, fresh spinach, hummus | Earthy, creamy, fresh |
| Protein-Packed | Sliced grilled chicken, avocado, tomato, mixed greens | Hearty, creamy, lightly tangy |
| Sweet & Fruity | Greek yogurt, mixed berries, honey, cinnamon | Sweet, tart, warmly spiced |
We can mix and match these fillings to create wrap combinations tailored to any craving—whether it’s a quick lunch or a light dinner.
Equipment Needed
To prepare our delicious Oatmeal Wraps, having the right equipment ready will streamline the process and ensure perfect results every time. Here’s a detailed list of tools we recommend for making these wholesome wraps:
- Food Processor or Blender
Essential for grinding rolled oats into fine oat flour. A high-speed blender also works well.
- Mixing Bowl
Use a medium to large bowl for combining all the ingredients smoothly.
- Measuring Cups and Spoons
Accurate measurements are key, especially for the baking powder and salt.
- Rolling Pin
Needed to roll out the dough thinly and evenly to create tender, flexible wraps.
- Non-stick Skillet or Griddle
A flat surface ensures even cooking with a lovely, slightly toasted texture.
- Spatula
Perfect to flip the wraps gently without tearing.
- Clean Kitchen Towel or Plate with Lid
We use this to cover the wraps as they cook, keeping them warm and soft.
Summary of Equipment Specifications
| Equipment | Purpose | Notes |
|---|---|---|
| Food Processor | Grinding oats into flour | Alternative: high-speed blender |
| Mixing Bowl | Mixing dough ingredients | Medium to large size |
| Measuring Cups/Spoons | Accurate ingredient measurement | Ensures consistent texture |
| Rolling Pin | Rolling out dough | Use lightly floured surface |
| Non-stick Skillet/Griddle | Cooking wraps evenly | Medium heat preferred |
| Spatula | Flipping wraps | Silicone or wooden |
| Kitchen Towel or Plate Cover | Keeping wraps soft | Avoid excess moisture buildup |
Having these tools on hand allows us to create perfectly soft yet sturdy oatmeal wraps ready for any savory or sweet filling.
Instructions
Follow these step-by-step instructions to create delicious and nutritious oatmeal wraps perfect for any meal. Each stage is designed to ensure soft, flavorful wraps and vibrant fillings for a satisfying bite every time.
Preparing the Oatmeal Wrap Batter
- Pulse 1 ½ cups of rolled oats in a food processor or blender until fine, resembling oat flour.
- In a large mixing bowl, combine the ground oats, ½ cup whole wheat flour, 1 teaspoon baking powder, and ½ teaspoon salt. Stir to blend evenly.
- Add 1 tablespoon olive oil and ¾ cup water gradually to the dry mix, stirring as you go.
- Mix until the dough forms a soft, slightly sticky ball. If too dry, add water 1 tablespoon at a time. If too sticky, add a pinch of whole wheat flour.
- Cover the dough with a clean kitchen towel and let it rest for 10 minutes to hydrate and ease rolling.
Cooking the Oatmeal Wraps
- Heat a non-stick skillet or griddle over medium-high heat until hot.
- Divide the rested dough into 6 equal pieces and roll each piece between two sheets of parchment paper into thin circles, about 8 inches in diameter.
- Place one rolled-out dough circle onto the hot skillet.
- Cook each side for 1 to 2 minutes, or until light brown spots appear and the wrap is cooked through but still pliable.
- Use a spatula to flip carefully; avoid tearing.
- Stack cooked wraps on a plate and cover with a kitchen towel to keep warm and soft until serving.
| Step | Time | Visual Cue |
|---|---|---|
| Cooking each side | 1-2 minutes | Light golden brown spots appear |
| Dough resting | 10 minutes | Dough feels pliable and hydrated |
Preparing the Filling
- Choose your preferred filling option from savory veggie, protein-packed, or sweet fruit-based.
- For savory fillings, chop vegetables like grilled zucchini, bell peppers, and fresh greens finely.
- For protein-packed fills, slice grilled chicken or mashed avocado ready for spread.
- For sweet options, mix Greek yogurt with fresh berries and a drizzle of honey.
- Assemble ingredients on a plate or bowl for easy access during wrap assembly.
Assembling the Oatmeal Wraps
- Place a warm oatmeal wrap flat on a clean surface.
- Spread your desired filling evenly across the center, leaving about 1 inch of space at the edges.
- Fold the bottom edge up over the filling, fold in the sides, then roll tightly from bottom to top.
- Serve wraps immediately or wrap in foil for later enjoyment.
- Pair with a side salad or fresh fruit for a complete balanced meal.
Serving Suggestions
To fully enjoy our Oatmeal Wraps, we recommend trying these versatile and delicious serving ideas that highlight their flavor and texture.
- Savory Veggie Delight:
Spread a layer of creamy hummus on the wrap. Add grilled zucchini strips, roasted red peppers, fresh spinach, and a sprinkle of crumbled feta cheese. Roll tightly and slice in half for an easy portable lunch.
- Protein-Packed Wrap:
Layer slices of grilled chicken breast, ripe avocado, shredded lettuce, and a drizzle of Greek yogurt mixed with lemon juice and herbs. This combo boosts flavor and keeps us energized throughout the day.
- Sweet & Fruity Breakfast Wrap:
Spread Greek yogurt inside the wrap. Top with mixed berries such as blueberries and strawberries, a drizzle of honey, and a sprinkle of chopped nuts or granola. Roll gently for a nourishing start to our morning.
- Classic Mediterranean-Inspired Wrap:
Combine falafel, chopped cucumbers, tomatoes, tahini sauce, and fresh parsley inside the wrap. This option provides bold flavors and satisfying textures.
Pairing Ideas Table
| Wrap Type | Complementary Side | Beverage Pairing |
|---|---|---|
| Savory Veggie Delight | Mixed greens salad | Iced herbal tea |
| Protein-Packed Wrap | Quinoa salad | Sparkling water with lemon |
| Sweet & Fruity Breakfast | Fresh fruit bowl | Freshly brewed coffee |
| Mediterranean-Inspired Wrap | Roasted chickpeas | Mint lemonade |
“Tip: Serve the wraps warm for extra softness and optimal flavor release. To keep leftover wraps pliable, wrap them tightly in foil and reheat briefly in a skillet or microwave.”
With these serving suggestions, we can customize our oatmeal wraps for any meal or occasion ensuring each bite is packed with wholesome goodness and deliciousness.
Make-Ahead Tips
Preparing oatmeal wraps in advance saves us time and ensures we always have a nutritious base ready to build delicious meals. Here’s how we can best plan ahead while preserving freshness and flavor:
- Cook and Cool Completely
After cooking each wrap on the skillet, let them cool fully on a wire rack. Cooling prevents moisture buildup which can make wraps soggy when stored.
- Stack with Parchment Paper
To keep the wraps from sticking together, we place a piece of parchment or wax paper between each wrap before stacking. This simple step helps maintain their texture.
- Wrap and Seal Airtight
Place the stacked wraps in an airtight container or resealable plastic bag. Removing excess air preserves freshness and prevents them from drying out.
- Refrigeration Time Frame
We store the wraps in the fridge for up to 4 days. Keeping them chilled slows any deterioration and keeps taste optimal.
- Freezing for Longer Storage
For extended storage, we freeze the wraps. Wrap the stack tightly with plastic wrap then place in a freezer bag. They can last up to 3 months frozen without losing quality.
- Thawing and Reheating
To use frozen wraps, thaw them overnight in the fridge or at room temperature for 15-20 minutes. Reheat on a hot skillet for 30-60 seconds per side to regain that soft, pliable texture.
| Storage Method | Duration | Storage Tips |
|---|---|---|
| Refrigeration | Up to 4 days | Use airtight container, cool wraps |
| Freezing | Up to 3 months | Wrap tightly, thaw before reheating |
“Pro tip: Pre-rolling our wrap dough into discs before cooking and freezing them raw offers another quick option for fresh wraps on demand. Just cook them straight from the freezer over medium heat for 1-2 minutes per side.”
By mastering these make-ahead tips we maximize convenience and make wholesome, tasty oatmeal wraps a regular part of our meal routines.
Storage Instructions
Proper storage is essential to maintain the freshness and flexibility of our oatmeal wraps, ensuring they stay soft and ready for any meal. Follow these steps for optimal results:
Refrigeration
- Let the wraps cool completely on a wire rack before storing to prevent moisture buildup.
- Place parchment paper between each wrap to stop them from sticking together.
- Stack the wraps and store them in an airtight container or a resealable plastic bag.
- Keep them in the refrigerator for up to 4 days.
Freezing
For longer storage, freezing is an excellent option:
- Cool the wraps completely and separate them with parchment paper.
- Place the stacked wraps into a heavy-duty freezer bag or airtight container.
- Label and date the package.
- Freeze for up to 3 months.
Thawing & Reheating
To enjoy the wraps at their best:
- Thaw frozen wraps overnight in the refrigerator or on the counter for about 30 minutes.
- Reheat gently on a non-stick skillet over medium heat for 30 seconds per side.
- Alternatively, microwave wrapped in a damp paper towel for 20-30 seconds to restore softness.
Storage Summary Table
| Storage Method | Preparation | Storage Container | Duration | Reheating Tip |
|---|---|---|---|---|
| Refrigerator | Cool completely, parchment paper | Airtight container or bag | Up to 4 days | Skillet or microwave with damp towel |
| Freezer | Cool, parchment paper separator | Heavy-duty freezer bag | Up to 3 months | Thaw overnight, reheat gently |
Conclusion
Oatmeal wraps bring a fresh twist to meal prep that’s both nutritious and delicious. Their versatility means we can customize every bite to suit our tastes and dietary needs without sacrificing flavor or texture.
With simple ingredients and easy steps, these wraps fit seamlessly into busy lifestyles, offering a wholesome alternative to traditional options. By mastering storage and reheating techniques, we ensure they stay fresh and ready whenever hunger strikes.
Let’s make oatmeal wraps a go-to for healthy meals that never compromise on convenience or taste.
Frequently Asked Questions
What are oatmeal wraps?
Oatmeal wraps are nutritious, soft flatbreads made primarily from oats. They offer a nutty flavor and are a healthy alternative to traditional wraps, suitable for any meal.
Are oatmeal wraps gluten-free?
Yes, when made with certified gluten-free oats, oatmeal wraps are naturally gluten-free, making them a great option for those with gluten sensitivities.
How do I make oatmeal wraps at home?
You blend oats into flour, then mix with whole wheat flour, baking powder, salt, water, and olive oil to form dough. Roll into discs and cook on a non-stick skillet until lightly browned.
What fillings can I use for oatmeal wraps?
Fillings can be savory like grilled vegetables and hummus, protein-rich such as chicken and avocado, or sweet options like Greek yogurt and berries.
Can I prepare oatmeal wraps in advance?
Yes, you can make wraps ahead of time, store them in the fridge for up to 4 days, or freeze for up to 3 months. Use parchment paper between wraps to prevent sticking.
How should I store oatmeal wraps?
Store cooled wraps in airtight containers. Refrigerate for up to 4 days or freeze for up to 3 months. Reheat gently in a skillet or microwave to maintain softness.
What equipment do I need to make oatmeal wraps?
A food processor or blender, mixing bowl, measuring cups, rolling pin, non-stick skillet or griddle, spatula, and a clean towel or plate for keeping wraps warm.
How do I reheat oatmeal wraps without drying them out?
Reheat on a skillet over low heat or briefly in the microwave covered with a damp paper towel to keep them soft and pliable.
Are oatmeal wraps healthy?
Yes, they are rich in fiber and made from wholesome ingredients, making them a nutritious choice for increasing your daily fiber intake.
Can oatmeal wraps be used for all meals?
Absolutely! Oatmeal wraps are versatile and can be filled with ingredients suitable for breakfast, lunch, dinner, or snacks.