
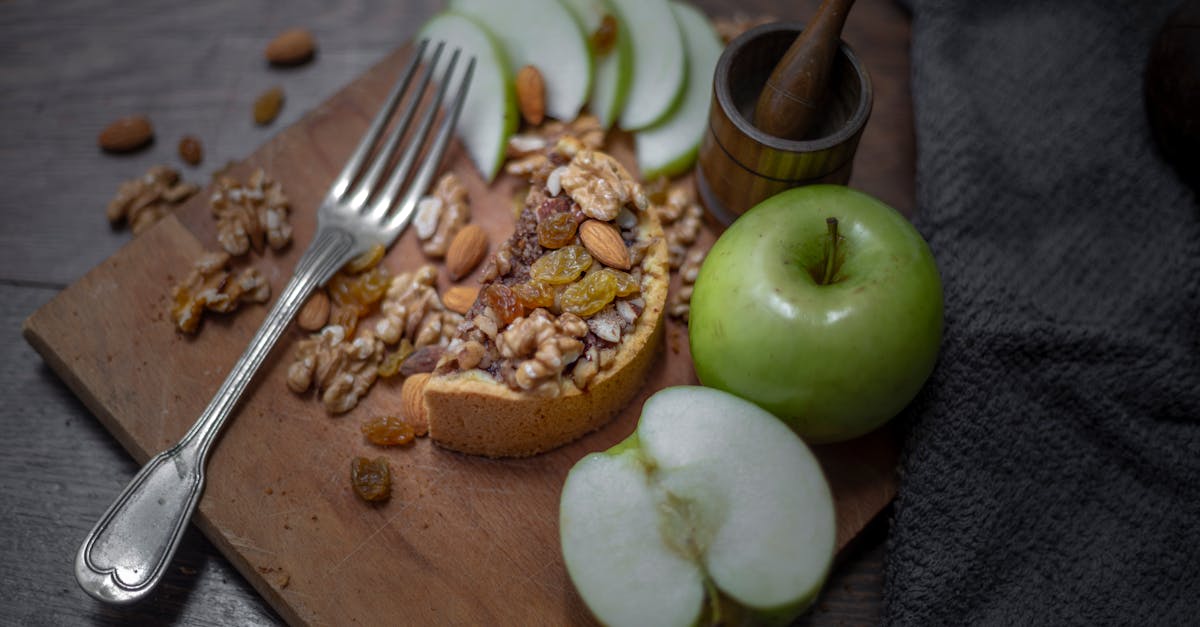
Sloppy Joes have long been a favorite comfort food, but sometimes they can get a little too messy for our liking. That’s why we created this Not So Sloppy Joe recipe — it captures all the rich, savory flavors we love without the saucy chaos. Perfect for family dinners or casual gatherings, this version keeps things tidy while still packing a punch.
Ingredients
To craft the perfect Not So Sloppy Joe, we carefully select ingredients that balance rich flavor with easy handling. Below are the essentials divided by component for an organized cooking experience.
For the Meat Mixture
- 1 lb ground beef, preferably 80/20 for juiciness
- 1 small yellow onion, finely diced
- 2 cloves garlic, minced
- 1/2 cup green bell pepper, finely chopped (optional for texture)
- 1/4 tsp smoked paprika
- Salt and freshly ground black pepper, to taste
For the Sauce
- 3/4 cup tomato sauce
- 2 tbsp ketchup (adds sweetness and thickness)
- 1 tbsp Worcestershire sauce (for depth)
- 1 tbsp apple cider vinegar (balances sweetness with acidity)
- 1 tsp brown sugar (optional, to enhance caramelization)
- 1/2 tsp dry mustard powder
- Pinch of red pepper flakes (optional for a slight kick)
For Serving
| Ingredient | Quantity | Notes |
|---|---|---|
| Hamburger buns | 4 sturdy, preferably brioche or potato rolls | Toasted for best texture |
| Cheddar cheese slices | 4 slices | Sharp cheddar intensifies flavor |
| Pickle chips | As desired | Adds a crisp tang |
| Lettuce leaves | Optional | For added crunch and freshness |
By using these measured ingredients, we ensure our Not So Sloppy Joe stays flavorful without the mess, perfect for enjoying by hand at any casual meal.
Equipment Needed
To create the perfect Not So Sloppy Joe, having the right equipment ensures a smooth cooking process and consistent results. Here is a list of essential tools we use to bring this delicious recipe to life:
- Large Skillet or Sauté Pan
We prefer a wide, heavy-bottomed skillet for evenly browning the ground beef and sautéing onions and peppers. This helps prevent overcrowding and promotes better caramelization.
- Wooden Spoon or Silicone Spatula
Stirring the meat mixture constantly requires a sturdy spoon or spatula. We choose non-reactive tools to avoid scratching the pan and ensure easy mixing.
- Measuring Cups and Spoons
Accurate measurement of ingredients like tomato sauce, ketchup, Worcestershire sauce, and seasonings is crucial for the balanced, savory flavor we want in our Not So Sloppy Joe sauce.
- Cutting Board and Chef’s Knife
For chopping onions, garlic, and optional green bell peppers, a sharp chef’s knife and a stable cutting board are indispensable to maintain safety and precision.
- Strainer or Colander (Optional)
If desired, we drain excess grease from the cooked ground beef using a fine mesh strainer or colander to keep the dish less oily and tidier.
- Baking Sheet or Toaster Oven (Optional)
Toasting hamburger buns lightly enhances their texture and flavor. We use a baking sheet or toaster oven for this purpose.
| Equipment | Purpose |
|---|---|
| Large Skillet or Sauté Pan | Brown meat and sauté vegetables |
| Wooden Spoon or Silicone Spatula | Stir and mix ingredients |
| Measuring Cups and Spoons | Measure sauces and seasonings with precision |
| Cutting Board and Chef’s Knife | Chop vegetables accurately |
| Strainer or Colander (Optional) | Drain excess grease from cooked meat |
| Baking Sheet or Toaster Oven (Optional) | Toast hamburger buns |
Having these tools at hand lets us efficiently prepare this Not So Sloppy Joe Recipe with minimal mess and maximum flavor.
Prep Work
Before we start cooking our Not So Sloppy Joe, we need to prepare the key ingredients carefully. This step ensures a smooth cooking process and enhances the dish’s flavor and texture.
Preparing the Vegetables
We begin by finely dicing the onion and green bell pepper (if using). Aim for uniform small pieces to ensure even cooking and a consistent texture in the meat mixture. Next, mince the garlic cloves to release their aromatic oils, which will deepen the sauce’s flavor. Use a sharp chef’s knife and a sturdy cutting board for safety and precision. Set the chopped vegetables aside, ready for sautéing.
Measuring Ingredients
Accurate measurement is essential for balancing the rich, savory flavors in our Not So Sloppy Joe. We measure the following:
| Ingredient | Measurement | Notes |
|---|---|---|
| Ground beef | 1 pound | Preferably 80/20 lean to fat ratio |
| Diced onion | 1 cup | About 1 medium onion |
| Diced green bell pepper | ½ cup | Optional for added sweetness and crunch |
| Minced garlic | 2 cloves | Freshly minced for best flavor |
| Tomato sauce | ¾ cup | Enhances savory base |
| Ketchup | ¼ cup | Adds sweetness and tang |
| Worcestershire sauce | 1 tablespoon | Provides depth and umami |
| Seasonings (salt, pepper, paprika) | To taste | Adjust to preference |
Using measuring cups, spoons, and a digital scale when possible allows us to achieve consistent results every time. Keep all measured ingredients within reach to streamline the cooking process.
Cooking Instructions
Follow these step-by-step instructions to prepare our Not So Sloppy Joe filling that is flavorful, thick, and easy to handle—perfect for a mess-free family meal.
Cooking the Meat
- Heat a large skillet over medium-high heat until hot.
- Add 1 pound of ground beef to the skillet. Use a wooden spoon or silicone spatula to break the meat into small crumbles.
- Stir occasionally to ensure even browning.
- When the beef starts to brown but is still pink in places, add ½ cup diced onion and ¼ cup diced green bell pepper (optional) to the skillet.
- Cook together for 4–5 minutes until the vegetables soften and the beef browns fully.
- Add 2 cloves minced garlic and cook for 30 seconds, stirring constantly to prevent burning.
- If there is excess grease, drain carefully or use a strainer to remove it for a leaner mix.
“Browning the meat thoroughly with the vegetables builds a rich, savory base for our Not So Sloppy Joe’s sauce.“
Making the Sauce
- Stir in the following measured sauce ingredients directly into the skillet:
| Ingredient | Amount |
|---|---|
| Tomato sauce | ¾ cup |
| Ketchup | ¼ cup |
| Worcestershire sauce | 1 tbsp |
| Brown sugar (optional) | 1 tbsp |
| Yellow mustard | 1 tsp |
| Salt | ½ tsp |
| Black pepper | ¼ tsp |
- Whisk gently to combine all ingredients with the meat mixture.
- Reduce heat to medium-low and allow the sauce to simmer.
- Let it cook uncovered for 10-12 minutes, stirring often to prevent sticking.
- The sauce will thicken and coat the meat evenly, creating that perfect balance of tangy and sweet flavors.
Combining Meat and Sauce
- Once the sauce thickens and the meat is fully cooked, taste and adjust seasoning of salt and pepper as needed.
- For a tidier presentation, avoid excess liquid by simmering until a slightly thickened consistency forms.
- Remove the skillet from heat and allow the filling to rest for a couple of minutes to set.
- Serve immediately on toasted hamburger buns with your choice of toppings like cheddar cheese, pickles, or lettuce for added crunch and flavor.
Assembly
Let’s bring together all the flavors and textures to create our Not So Sloppy Joe sandwiches. This final step ensures a perfect balance of hearty filling and crisp buns for a satisfying, mess-free meal.
Toasting the Buns
To elevate flavor and add a slight crunch, we start by toasting the hamburger buns. This step helps prevent sogginess and enhances the overall texture.
Instructions:
- Preheat a skillet or griddle over medium heat.
- Lightly butter the cut sides of the buns.
- Place buns cut-side down on the skillet.
- Toast for about 2 to 3 minutes until golden brown.
- Remove buns and keep warm.
Tip: For extra flavor, lightly sprinkle garlic powder or herbs on the butter before toasting.
Assembling the Not So Sloppy Joe
Assembling our Not So Sloppy Joe is simple but crucial to maintain its tidy character and rich taste.
| Step | Action | Detail |
|---|---|---|
| 1 | Place bottom bun on plate | Use a sturdy plate to catch any drips |
| 2 | Add a generous scoop of meat mixture | Approximately ½ cup for a balanced portion |
| 3 | Layer with optional cheddar cheese slice | Place immediately for gentle melting |
| 4 | Add pickle chips and/or lettuce | Adds crunch and freshness |
| 5 | Top with the other half of the bun | Press lightly to secure filling |
We recommend serving the Not So Sloppy Joe hot to enjoy the full melding of flavors. Remember, the toasty buns and well-spiced filling create a sandwich that is flavorful yet neat—perfect for family dinners or casual gatherings.
Serving Suggestions
To enjoy our Not So Sloppy Joe to the fullest, we recommend pairing it with sides and accompaniments that complement its rich and savory profile without overwhelming the dish. Below are some Serving Suggestions that elevate the experience while keeping the meal tidy and satisfying.
Ideal Side Dishes
We suggest classic American sides that bring texture and balance:
- Crispy French Fries or sweet potato fries provide a crunchy contrast.
- A fresh coleslaw adds a cool, creamy element that brightens the palate.
- Pickle spears or chips bring a sharp, tangy bite that cuts through the richness.
- Baked beans offer a smoky sweetness that pairs perfectly with the savory beef.
Beverage Pairings
For drinks that complement the flavors of Not So Sloppy Joe, consider:
| Beverage Type | Flavor Profile | Why It Works |
|---|---|---|
| Iced Tea | Light, slightly sweet | Refreshes and balances flavors |
| Craft Beer | Malty or hoppy depending on preference | Enhances savory meat notes |
| Lemonade | Tart and sweet | Adds a bright and zesty contrast |
Topping Enhancements
To enhance our classic sandwich, try these toppings:
- Sharp cheddar cheese melted on top for a rich, creamy layer.
- Crisp lettuce leaves to add freshness and crunch.
- Extra pickle chips for added tanginess and texture.
- A drizzle of yellow mustard or a light swipe of mayonnaise for moisture without overpowering.
Presentation Tips
We recommend toasting the buns lightly to reinforce their structure and avoid sogginess. Present sandwiches on a sturdy plate lined with parchment for easy clean-up. Garnishing the plate with pickle slices or a small side salad enhances visual appeal.
Make-Ahead Tips
To ensure our Not So Sloppy Joe recipe fits seamlessly into busy schedules, we recommend some practical make-ahead tips that keep the flavors intact and the preparation stress-free.
Prepare the Meat Mixture in Advance
Cook the ground beef with onion, garlic, and green bell pepper exactly as described. Let it cool completely. Transfer the meat and sauce mixture to an airtight container. This base can be refrigerated for up to 3 days or frozen for up to 3 months.
Reheating Instructions
When ready to serve, gently reheat the meat mixture over medium-low heat. Stir occasionally until heated through and slightly thickened again, about 5-7 minutes. Avoid high heat to prevent drying out.
Toast Buns Later for Freshness
To maintain the perfect texture, toast the hamburger buns just before serving. This prevents sogginess and ensures crisp edges, which complement the hearty beef filling.
Assemble Right Before Serving
Keep toppings such as cheddar cheese slices, pickle chips, and lettuce separate until assembly. This helps keep the sandwich components fresh and maintains the tidy presentation our Not So Sloppy Joe promises.
| Storage Option | Duration | Notes |
|---|---|---|
| Refrigerate (meat) | Up to 3 days | Cool completely before sealing container |
| Freeze (meat) | Up to 3 months | Use freezer-safe containers |
| Refrigerate (buns) | Up to 2 days | Store in a sealed bag to prevent drying |
| Toppings (fresh) | Up to 2 days | Keep in separate airtight containers |
“Prepping our Not So Sloppy Joe meat mixture ahead not only saves time but also deepens the flavors, allowing the seasonings to meld beautifully.”
By following these make-ahead tips, we ensure every bite of our Not So Sloppy Joe remains flavorful, moist, and mess-free, ready to delight at any mealtime.
Storage and Reheating Instructions
Proper storage and reheating are essential to maintain the flavor and texture of our Not So Sloppy Joe filling. Here are our step-by-step guidelines:
Storing the Meat Mixture
- Allow the meat mixture to cool to room temperature after cooking.
- Transfer it to an airtight container.
- Label the container with the date to keep track of freshness.
- Store in the refrigerator for up to 3 to 4 days.
- For longer storage, freeze the meat mixture in a freezer-safe container or heavy-duty freezer bag for up to 3 months.
| Storage Method | Duration | Storage Tip |
|---|---|---|
| Refrigerator | 3 to 4 days | Use airtight containers |
| Freezer | Up to 3 months | Remove excess air from freezer bag |
Storing the Buns and Toppings
- Keep hamburger buns in their original packaging or in a resealable plastic bag, stored at room temperature for up to 2 days.
- For longer storage, freeze buns wrapped in foil or placed in freezer bags for up to 1 month.
- Store cheddar cheese slices and pickle chips separately in the refrigerator to maintain freshness.
- Keep lettuce leaves wrapped in a damp paper towel inside a sealed container to prevent wilting.
Reheating the Meat Mixture
To gently reheat without drying out the filling, follow these options:
-
Stovetop:
- Place the meat mixture in a skillet over medium-low heat.
- Add 1 to 2 tablespoons of water or beef broth to loosen the sauce.
- Stir occasionally until heated through, about 5 to 7 minutes.
-
Microwave:
- Transfer the meat to a microwave-safe dish.
- Cover with a microwave-safe lid or wrap to retain moisture.
- Heat on medium power in 1-minute intervals.
- Stir between intervals until evenly heated.
Tips to Preserve Flavor and Texture
- Toast buns fresh just before serving to prevent sogginess.
- Assemble sandwiches right before eating to keep toppings crisp and fillings moist.
- Avoid reheating the buns to maintain their softness and structure.
Conclusion
Not So Sloppy Joes offer a perfect balance of flavor and convenience without the usual mess. With thoughtful preparation and the right techniques, this recipe fits seamlessly into busy lifestyles while still delivering a satisfying meal. Whether for a family dinner or casual get-together, these sandwiches bring comfort and ease to the table.
By keeping things tidy and tasty, we’ve created a dish that everyone can enjoy without the fuss. Give it a try and experience how simple adjustments can elevate a classic favorite into something truly special.
Frequently Asked Questions
What makes Not So Sloppy Joes different from classic Sloppy Joes?
Not So Sloppy Joes have a thicker, less messy meat mixture and are served on toasted buns with layered toppings, reducing spills while keeping rich flavor.
What are the key ingredients for Not So Sloppy Joes?
Ground beef, onion, garlic, optional green bell pepper, tomato sauce, ketchup, Worcestershire sauce, seasoning, sturdy hamburger buns, cheddar cheese, pickle chips, and lettuce.
What equipment is needed to prepare this recipe?
A large skillet, wooden spoon, measuring cups, and a cutting board are essential for efficient cooking and preparation.
How should I prepare the vegetables for this recipe?
Finely dice the onion and green bell pepper, and mince the garlic to ensure even cooking and balanced flavor.
Why is toasting the buns important?
Toasting enhances flavor, adds texture, and prevents the buns from becoming soggy when filled with the meat mixture.
Can I make the meat mixture ahead of time?
Yes, you can prepare it in advance, store it in the refrigerator for up to 3-4 days or freeze for up to 3 months, then reheat gently.
How do I store and reheat leftovers?
Store the meat mixture in an airtight container. Reheat gently on the stove or microwave to maintain moisture; toast buns just before serving.
What are good side dishes to serve with Not So Sloppy Joes?
Classic American sides like fries, coleslaw, or baked beans, and beverages like soda or iced tea complement this dish well.
How should I assemble the sandwiches?
Layer the toasted bun with the warm meat mixture, cheddar cheese, pickle chips, and optional lettuce just before serving for best texture.
Are green bell peppers necessary in the recipe?
Green bell peppers are optional; they add flavor and texture but can be omitted if preferred or unavailable.