
There’s something magical about making ice cream at home and the Nostalgia Electrics Ice Cream Maker Recipe Book makes it easier than ever. This handy guide is packed with delicious recipes that bring the joy of classic homemade ice cream right to our kitchen. Whether we’re craving rich chocolate, fresh fruit flavors, or unique creations, this book has us covered.
Using the Nostalgia Electrics Ice Cream Maker means we get creamy, smooth results every time without any hassle. The recipe book not only inspires us with a variety of flavors but also helps us master the art of ice cream making step by step. It’s perfect for anyone looking to create sweet treats that impress family and friends.
Overview of Nostalgia Electrics Ice Cream Maker
The Nostalgia Electrics Ice Cream Maker offers a perfect blend of vintage charm and modern convenience, making homemade ice cream both fun and accessible. Designed for ease of use, it ensures delicious frozen treats with minimal effort.
Features of the Ice Cream Maker
Our Nostalgia Electrics Ice Cream Maker includes several standout features that make it a must-have appliance:
- Retro Design: Classic styling that adds a nostalgic touch to any kitchen.
- Built-in Freezer Bowl: Eliminates the need for ice and salt, simplifying the ice cream making process.
- Simple Controls: One-button operation for easy churning.
- Compact Size: Fits conveniently on countertops and in storage.
- Mixing Paddle: Ensures consistent churning for creamy, smooth texture.
- Transparent Lid: Allows us to watch the freezing process without interrupting.
| Feature | Benefit |
|---|---|
| Retro Design | Enhances kitchen aesthetics |
| Built-in Freezer Bowl | No need for messy ice and salt |
| Simple Controls | User-friendly, perfect for beginners |
| Compact Size | Saves kitchen space |
| Mixing Paddle | Delivers smooth consistent ice cream |
| Transparent Lid | Monitor progress without stopping churning |
Benefits of Using Nostalgia Electrics Model
When we use the Nostalgia Electrics Ice Cream Maker, we enjoy several distinct advantages that elevate the homemade ice cream experience:
- Quick Preparation: The built-in freezer bowl chills quickly, cutting down preparation time.
- Consistent Results: The paddle churns continuously, preventing ice crystals and yielding a velvety texture.
- Versatility: From classic flavors like vanilla and chocolate to creative recipes from the recipe book, it supports all.
- Easy Cleanup: Detachable parts and smooth surfaces make cleaning effortless.
- Family-Friendly Operation: Safe and simple enough for everyone in our family to join in the fun.
By combining intuitive features with tangible benefits, the Nostalgia Electrics Ice Cream Maker proves to be an ideal tool for us to create delightful homemade ice cream anytime.
Essential Tools and Equipment
To master recipes from the Nostalgia Electrics Ice Cream Maker Recipe Book, having the right tools and equipment is essential. These allow us to achieve the perfect texture and flavor promised in every scoop. Below we outline the key specifications of the ice cream maker and highlight additional kitchen tools that will make our ice cream-making experience smooth and enjoyable.
Nostalgia Electrics Ice Cream Maker Specifications
Our Nostalgia Electrics Ice Cream Maker is designed with user-friendly features tailored for creamy homemade ice cream. Here are its essential specifications:
| Feature | Description |
|---|---|
| Design Style | Retro vintage aesthetic |
| Freezer Bowl Capacity | 4 quarts (enough for family servings) |
| Operation | One-button control for simple use |
| Mixing Paddle | Consistent churning for smooth texture |
| Lid | Transparent for monitoring |
| Size | Compact, easy to store |
| Power | 50-watt motor for efficient mixing |
| Weight | Approximately 8 lbs for stability |
This combination of features means we can quickly prepare a variety of ice cream flavors with consistent results every time. The built-in freezer bowl removes the hassle of ice and salt, making operation cleaner and more convenient.
Additional Kitchen Tools Needed
Beyond the Nostalgia Electrics Ice Cream Maker, several additional tools will help us execute recipes with precision and ease:
- Measuring Cups and Spoons – Accurate ingredient measurement is crucial for the perfect balance of flavors and texture.
- Mixing Bowls – Use medium to large bowls for mixing base ingredients before pouring into the ice cream maker.
- Whisk or Hand Mixer – For blending custard or cream mixtures thoroughly, ensuring smooth consistency.
- Spatula – A flexible spatula helps scrape the sides of mixing bowls cleanly.
- Thermometer – Essential for recipes involving custards, to monitor cooking temperature closely.
- Freezer-safe Containers – To store finished ice cream securely for further hardening.
- Ice Cream Scoop – For serving the final product elegantly and uniformly.
By combining the Nostalgia Electrics Ice Cream Maker with these essential kitchen tools, we set ourselves up for a foolproof ice cream making process infused with creativity and precision.
Ingredients
To create perfect homemade ice cream using the Nostalgia Electrics Ice Cream Maker and its recipe book, having precise and quality Ingredients is essential. Below we outline the Basic Ice Cream Ingredients and Optional Mix-ins and Flavorings that bring those rich recipes to life.
Basic Ice Cream Ingredients
These core ingredients form the foundation for smooth, creamy ice cream. You will use them in nearly every recipe from the Nostalgia Electrics Ice Cream Maker Recipe Book:
- Whole milk – 2 cups, preferably cold for better churning
- Heavy cream – 1 cup, to add richness and creaminess
- Granulated sugar – ¾ cup, measured accurately for balanced sweetness
- Egg yolks – 4 large, for a custard base that results in a silky texture
- Pure vanilla extract – 1 tablespoon, or as specified for classic vanilla flavor
| Ingredient | Quantity | Purpose |
|---|---|---|
| Whole milk | 2 cups | Provides liquid base |
| Heavy cream | 1 cup | Adds fat for creaminess |
| Granulated sugar | ¾ cup | Sweetens and stabilizes texture |
| Egg yolks | 4 large | Thickens and smoothes custard base |
| Pure vanilla extract | 1 tablespoon | Flavor enhancer |
Optional Mix-ins and Flavorings
To customize and elevate our ice cream with the nostalgic twist this recipe book offers, here are popular mix-ins and flavorings you can incorporate after churning or during the final stages:
- Chocolate chips – ½ cup, small or mini size for even distribution
- Crushed cookies – ⅓ cup, like Oreos or graham crackers for added crunch
- Fresh fruit – ½ cup, chopped strawberries, blueberries, or mango for natural sweetness
- Nuts – ¼ cup, toasted almonds, pecans, or walnuts for texture and flavor
- Caramel or fudge swirls – ¼ cup, to swirl in for decadent ribbons
- Extracts and spices – peppermint, almond, cinnamon (1-2 teaspoons), tailored to recipe preference
These additions let us transform a simple base into endless delicious variations inspired by the Nostalgia Electrics Ice Cream Maker Recipe Book.
“Using the right mixture of basic ingredients with thoughtful mix-ins unlocks the full potential of your ice cream maker, delivering creamy, dreamy results every time.”
This breakdown sets us up to confidently follow any recipe from the book, ensuring we gather and use the correct ingredients for authentic homemade ice cream.
Instructions
To achieve the perfect homemade ice cream with the Nostalgia Electrics Ice Cream Maker, we follow a straightforward process that guarantees creamy results every time. Below, we outline each step clearly to help us master the art of ice cream making from the recipe book.
Prep Work Before Starting
Before we begin churning, preparation is key. Here’s what we need to do:
- Freeze the bowl: Place the 4-quart freezer bowl in the freezer for at least 12-24 hours to ensure it is fully frozen.
- Gather ingredients and tools: Measure all ingredients precisely. Use measuring cups, a whisk or hand mixer, a spatula, and a thermometer to monitor temperature.
- Prep mix-ins: Chop or prepare add-ins like nuts, fruits, or cookies beforehand so they are ready to fold in.
Making Classic Vanilla Ice Cream
The classic vanilla sets a perfect base and demonstrates the thoroughness of the Nostalgia Electrics Ice Cream Maker Recipe Book.
- In a saucepan, combine:
- 2 cups whole milk
- 2 cups heavy cream
- ¾ cup granulated sugar
- Heat gently until sugar dissolves, stirring constantly.
- In a separate bowl, whisk 5 large egg yolks until pale.
- Slowly pour half the warm milk mixture into the yolks, whisking continuously to temper.
- Return egg mixture to the saucepan, cook on low until the custard thickens (do not boil), targeting 170°F (77°C).
- Remove from heat, stir in 1 tablespoon pure vanilla extract.
- Chill custard in the fridge for at least 4 hours or overnight.
- Pour chilled custard into the frozen bowl and turn on the ice cream maker. Churn for 20-30 minutes until thick.
- Transfer ice cream to freezer-safe containers for firming or immediate serving.
Creating Chocolate Ice Cream
Chocolate lovers will enjoy this rich, velvety treat.
| Ingredient | Quantity | Notes |
|---|---|---|
| Whole milk | 2 cups | |
| Heavy cream | 2 cups | |
| Granulated sugar | ¾ cup | |
| Egg yolks | 5 | |
| Semi-sweet cocoa powder | ⅔ cup | Sifted |
| Pure vanilla extract | 1 tbsp | |
| Bittersweet chocolate | 4 oz | Melted and cooled |
Steps:
- Whisk cocoa powder with sugar to combine.
- Heat milk and cream in a saucepan until warm.
- Gradually add cocoa-sugar mix to milk mixture, stir until smooth.
- Temper egg yolks with half hot cocoa mixture.
- Return to saucepan, cook until custard coats a spoon.
- Stir in melted chocolate and vanilla extract.
- Chill custard thoroughly.
- Churn in frozen bowl for 25-30 minutes until creamy.
- Store in freezer-safe containers.
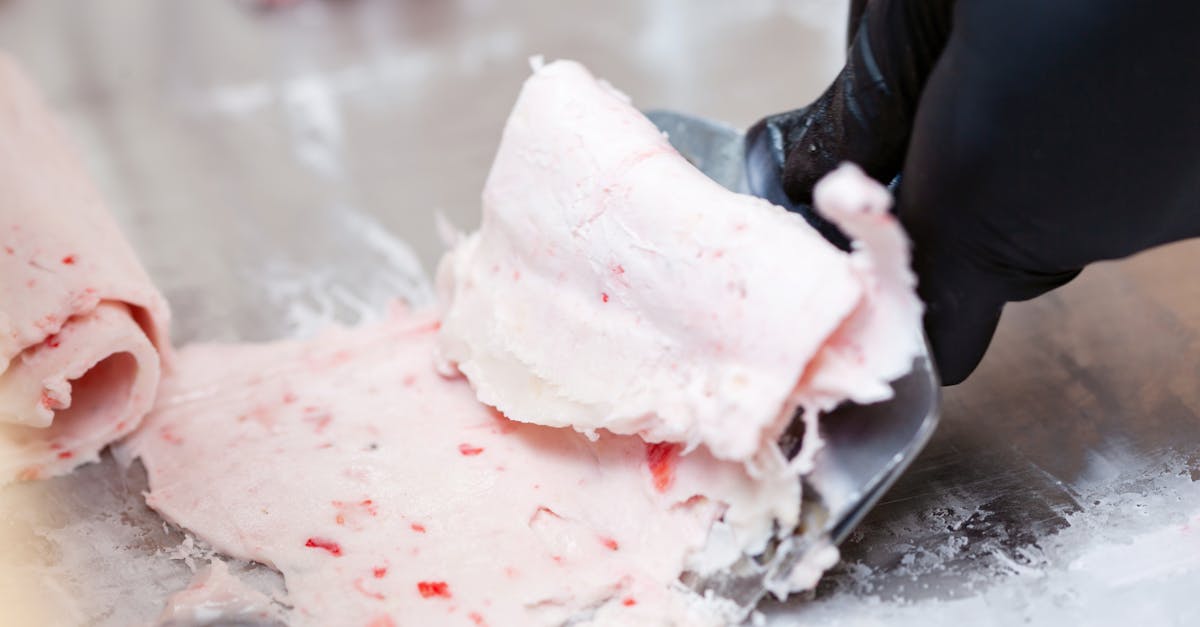
Preparing Fruit-Based Ice Creams
We love fresh fruit flavors. Here is how to integrate them perfectly.
- Puree fruit: Use about 1 ½ cups of fresh or frozen fruit. Blend until smooth.
- Cook fruit ideal for flavors like strawberry, mango, or blueberry with ¼ cup sugar on low for 5 minutes, cool completely.
- Prepare custard base as with vanilla ice cream.
- Stir the fruit puree gently into the custard after chilling.
- Churn the combined mixture for 20-25 minutes.
- Optionally, fold in fruit chunks just before finishing.
- Freeze for at least 2 hours before serving.
Specialty Recipes from the Recipe Book
The Nostalgia Electrics Ice Cream Maker Recipe Book includes exciting recipes that elevate our ice cream game beyond basics:
| Recipe Name | Key Ingredients | Churn Time | Notes |
|---|---|---|---|
| Salted Caramel Swirl | Caramel sauce, sea salt | 25 minutes | Fold caramel in last 5 minutes |
| Mint Chocolate Chip | Fresh mint extract, chocolate chips | 20 minutes | Add chips during last 5 minutes of churning |
| Coffee Espresso | Strong brewed espresso, coffee beans | 25 minutes | Use cold brewed espresso to mix |
| Cookies & Cream | Crushed Oreos or cookies | 25 minutes | Mix in crushed cookies before transfer |
Each specialty recipe follows the same freezing principles but allows for creative mix-ins and flavor enhancements. We always monitor the consistency via the transparent lid, ensuring perfect texture before storing.
By carefully adhering to these instructions and using the Nostalgia Electrics Ice Cream Maker features, we create delectable homemade ice cream with ease and confidence.
Directions for Operating the Nostalgia Electrics Ice Cream Maker
Operating the Nostalgia Electrics Ice Cream Maker is straightforward and designed to deliver creamy, smooth ice cream with minimal effort. Let’s walk through the essential steps to ensure you get the best results every time.
Setting Up the Ice Cream Maker
Before starting, it’s crucial to prepare the ice cream maker correctly:
- Freeze the bowl: Place the freezer bowl in your freezer for at least 24 hours until it is completely frozen solid. This step is key to achieving the perfect texture.
- Assemble the unit: Insert the frozen bowl into the base. Attach the mixing paddle firmly inside the bowl.
- Add ingredients: Pour your ice cream mixture evenly into the freezer bowl, making sure not to exceed the maximum fill line.
- Secure the lid: Place the transparent lid on top, locking it in place to prevent spills and allow monitoring.
| Setup Step | Details | Time Required |
|---|---|---|
| Freezing the bowl | Freeze until solid | 24 hours (minimum) |
| Assembling unit | Insert bowl and mixing paddle | 2-3 minutes |
| Adding ingredients | Pour mixture carefully | 1-2 minutes |
| Securing lid | Lock for safe churning | Immediate |
Churning Process Explained
Once your ice cream maker is set up, the churning process begins to transform the ingredients into fluffy, creamy ice cream:
- Power on: Turn the machine on using the single control button.
- Continuous churning: The paddle rotates to mix your ingredients thoroughly while incorporating air. This prevents ice crystals and creates a smooth consistency.
- Monitor progress: Use the clear lid to watch as the mixture thickens. Usually, churning takes 20-30 minutes depending on the recipe and room temperature.
- End churning: Once the ice cream reaches a soft-serve texture, switch off the machine.
- Freeze to firm: For firmer texture, transfer the ice cream to a freezer-safe container and freeze for 2-4 hours.
“The key to the perfect scoop is patient churning and proper freezing,” as experienced home chefs will tell you.
Tips for Perfect Ice Cream Texture
Achieving the ideal ice cream texture requires more than just following the recipe. Here are our top tips to make your ice cream delightfully creamy every time:
- Ensure bowl is fully frozen: The colder the bowl, the faster the freeze, leading to smaller ice crystals.
- Use fresh, high-quality ingredients: Rich creams and fresh eggs produce better flavor and texture.
- Don’t overfill the bowl: Leave space for ingredients to expand during churning.
- Churn continuously at a steady pace: Avoid interruptions to maintain even freezing.
- Add mix-ins during the last 5 minutes: This ensures they are evenly distributed without breaking down.
- Store ice cream properly: Use airtight, freezer-safe containers to prevent freezer burn.
| Tip | Reason |
|---|---|
| Fully freeze bowl | Promotes faster freezing and better texture |
| Use fresh ingredients | Enhances flavor and creaminess |
| Avoid overfilling bowl | Allows proper freezing and expansion |
| Continuous steady churning | Prevents icy texture |
| Add mix-ins late | Even distribution without melting |
| Proper storage | Preserves freshness and prevents freezer burn |
By mastering these steps and utilizing the features of the Nostalgia Electrics Ice Cream Maker, we ensure a smooth, enjoyable process and consistently delicious homemade ice cream results.
Make-Ahead and Storage Tips
Proper make-ahead planning and smart storage are essential to preserve the creamy texture and vibrant flavors from our Nostalgia Electrics Ice Cream Maker Recipe Book. Following these tips ensures our homemade ice cream tastes fresh and maintains its ideal consistency every time.
Freezing and Storing Homemade Ice Cream
To keep homemade ice cream at its best, we must focus on freezing and storage methods that prevent ice crystals and flavor loss.
- Freeze completely before storing: Once churning stops and the texture is soft-serve, transfer the ice cream immediately to an airtight, freezer-safe container.
- Press plastic wrap directly on the surface of the ice cream to minimize air exposure and ice crystal formation.
- Store the container in the coldest part of the freezer, not the door, to avoid temperature fluctuations.
- Allow at least 4 hours of freezing to firm up before serving.
| Storage Tip | Purpose | Ideal Condition |
|---|---|---|
| Airtight container | Prevents freezer burn and moisture loss | Glass or BPA-free plastic |
| Press plastic wrap | Minimizes air exposure | Direct contact with ice cream surface |
| Store in coldest freezer zone | Maintains consistent freezing temperature | Rear or bottom shelf |
| Freeze fully before serving | Achieves creamy and scoopable texture | Minimum 4 hours |
“Proper storage lets us savor our homemade ice cream’s rich texture and full flavor days after making it.”
Best Practices for Reusing the Ice Cream Maker
To enjoy consistent results every time with our Nostalgia Electrics Ice Cream Maker, maintaining and preparing the machine correctly is crucial.
- Refreeze the freezer bowl promptly after each use for at least 24 hours. This ensures the bowl is fully frozen and ready for the next batch.
- Clean the mixing paddle, lid, and bowl thoroughly immediately after use. Use warm soapy water and dry completely before reassembly.
- Avoid overfilling the bowl, never exceed the 4-quart capacity. Overloading affects the churning consistency and freezing speed.
- Allow the machine to come to room temperature before storing to prevent moisture buildup inside components.
- Store the unit assembled with the lid slightly ajar to avoid stale odors.
| Maintenance Step | Reason | Recommended Frequency |
|---|---|---|
| Refreeze freezer bowl | Maintains ice cream maker’s freezing ability | 24 hours minimum post-use |
| Clean all parts immediately | Prevents residue buildup and odors | After every use |
| Avoid overfilling | Ensures consistent churning and freezing | Every batch |
| Air dry and store with lid ajar | Prevents moisture and stale odors | Every storage |
“We keep our Nostalgia Electrics Ice Cream Maker performing at its finest by following these simple reuse practices for creamy, dreamy ice cream every time.”
By incorporating these Make-Ahead and Storage Tips into our ice cream routine, we maximize the delicious outcomes from the Nostalgia Electrics Ice Cream Maker Recipe Book, ensuring every scoop tastes as delightful as the first.
Troubleshooting Common Issues
When using the Nostalgia Electrics Ice Cream Maker, occasional issues can arise that affect your ice cream’s texture or the machine’s operation. We’ve outlined practical solutions to help you overcome these common challenges efficiently and confidently.
Fixing Texture Problems
Achieving the perfect creamy texture is essential. If the ice cream turns out grainy, icy, or too soft, consider the following fixes:
- Grainy or Icy Texture
This often occurs when the mixture isn’t properly chilled before churning or if the bowl was not fully frozen. Always refrigerate your ice cream base for at least 2 hours before pouring it into the frozen bowl. Also, ensure the freezer bowl has been in the freezer for at least 24 hours for optimal cold retention.
Tip: Use fresh, high-quality ingredients and avoid substituting low-fat dairy products as they can reduce creaminess.
- Too Soft or Unset Ice Cream
If your ice cream remains too soft after churning, it may need more time in the freezer to harden. Transfer it to a freezer-safe container, cover it tightly with plastic wrap, and freeze for an additional 2-4 hours. Avoid overfilling the bowl initially because too much mixture can prevent proper freezing.
Tip: Balance sugar and fat content in your recipe as excess sugar or low fat lowers freezing point, impacting firmness.
| Texture Issue | Possible Cause | Solution |
|---|---|---|
| Grainy or Icy | Base not chilled, bowl not fully frozen | Chill base 2+ hours, freeze bowl 24 hours |
| Too Soft or Runny | Insufficient freezing time, overfilled bowl | Freeze longer after churning, reduce batch size |
| Hard or Frozen Solid | Over-freezing or too much water content | Shorten freezing time, adjust liquid ratio |
Solving Machine Malfunctions
If the Nostalgia Electrics Ice Cream Maker isn’t operating as expected, here’s how we fix common machine issues:
- Machine Won’t Start or Paddle Doesn’t Turn
First, confirm the freezer bowl is completely frozen. The motor won’t engage if the bowl lacks sufficient cold to trigger the sensor. Also, check that all parts are correctly assembled and the lid is securely locked.
Tip: Use only the power source recommended in the manual to avoid electrical issues.
- Loud or Unusual Noises
Noise can indicate the paddle is misaligned or the machine is on an uneven surface. Shut off the machine immediately, disassemble, then reassemble carefully ensuring the paddle fits snugly on its spindle. Place the unit on a flat, stable surface for operation to prevent motor strain.
- Slow or Inconsistent Churning
This sometimes happens if the mixture is too thick or if the bowl begins warming up during operation. Keep the bowl frozen until use and avoid opening the lid mid-churn, which slows freezing. If slow churning persists, inspect the paddle for damage or obstructions.
| Malfunction Type | Potential Cause | Recommended Action |
|---|---|---|
| Won’t Start | Bowl not frozen, incorrect assembly | Freeze bowl fully, check assembly and lid |
| Unusual Noises | Misaligned paddle, unstable surface | Realign paddle, place machine on flat surface |
| Slow/Inconsistent Churning | Thick mixture, warm bowl, paddle issues | Freeze bowl thoroughly, avoid lid opening, inspect paddle |
By following these troubleshooting tips, we maintain the efficiency of our Nostalgia Electrics Ice Cream Maker and guarantee consistent, delicious results with every batch.
Conclusion
The Nostalgia Electrics Ice Cream Maker Recipe Book opens up a world of homemade ice cream possibilities for us all. With the right tools, quality ingredients, and easy-to-follow recipes, creating delicious, creamy treats becomes a fun and rewarding experience.
By combining vintage-inspired design with modern convenience, this ice cream maker and recipe book duo lets us enjoy endless flavor creativity right in our own kitchens. Whether we’re making classic favorites or experimenting with new combinations, every batch promises to impress and delight.
Frequently Asked Questions
What is the Nostalgia Electrics Ice Cream Maker Recipe Book?
The recipe book is a guide filled with easy-to-follow recipes for making homemade ice cream, offering a variety of flavors from classic to unique. It provides step-by-step instructions to help users create creamy, smooth ice cream.
What are the key features of the Nostalgia Electrics Ice Cream Maker?
This ice cream maker has a retro design, a built-in freezer bowl (no ice or salt needed), one-button controls, a 4-quart capacity, a mixing paddle, and a transparent lid for monitoring.
What tools do I need besides the ice cream maker?
You’ll need measuring cups, mixing bowls, a whisk or hand mixer, a spatula, a thermometer, freezer-safe containers, and an ice cream scoop for best results.
What ingredients are essential for making homemade ice cream?
Basic ingredients include whole milk, heavy cream, sugar, egg yolks, and vanilla extract. Optional add-ins like chocolate chips, fruit, and nuts can enhance flavor.
How do I operate the Nostalgia Electrics Ice Cream Maker?
Freeze the bowl for at least 24 hours, assemble the machine, add ingredients, secure the lid, and turn on the motor. Monitor the churning until you reach the desired texture.
How should I store homemade ice cream for the best quality?
Use airtight containers, press plastic wrap on the surface, and store in the coldest part of your freezer to prevent ice crystals and flavor loss.
What are some tips for perfect ice cream texture?
Use fresh, high-quality ingredients, avoid overfilling the bowl, and churn properly. Store ice cream correctly after making to maintain creaminess.
How can I troubleshoot grainy or icy ice cream?
Try using fresher ingredients, reduce air exposure, or churn longer. Ensure the freezer bowl is fully frozen before use.
What if my ice cream is too soft or doesn’t set properly?
Make sure the bowl is thoroughly frozen and avoid overfilling. Adding stabilizers like egg yolks or gelatin can also help set the texture.
What to do if the ice cream maker doesn’t start or has unusual noises?
Check the power connection, ensure the bowl is fully frozen, and that the paddle is properly attached. Clean and dry all parts to avoid mechanical issues.
Can I make multiple batches in a row?
Yes, but you must refreeze the bowl for at least 24 hours between batches and clean the machine thoroughly.
Is the Nostalgia Electrics Ice Cream Maker suitable for families?
Yes, it’s easy to use, safe, and compact, making it great for family fun and creating custom flavors together.