
We love how the Ninja Foodi transforms simple casseroles into satisfying meals with minimal fuss. Its clever design combines pressure cooking with air frying so we get tender fillings and crispy toppings in one go. It’s perfect for busy days when we crave comfort without spending hours in the kitchen.
We rely on these easy Ninja Foodi casserole recipes to feed our family or wow guests at potlucks. They let us layer wholesome ingredients then let the Foodi handle the rest. We’ll focus on flavors that satisfy every craving from classic chicken and veggies to decadent pasta bakes. Let’s dig in and discover how the Ninja Foodi sets a new standard for delicious casseroles we can whip up anytime.
What Are Ninja Foodi Casserole Recipes?
These recipes make use of the multifunctional capabilities of the Ninja Foodi to deliver hearty meals that feature tender fillings and crisp toppings in a single pot. We layer our main ingredients then activate the pressure cooker function to lock in juices. Next we switch to the crisping lid for that golden finish. This two-step process lets us create meals that taste rich and look appealing.
We typically begin by placing proteins vegetables and seasonings directly into the cooker. We add stock or sauce in measured amounts to ensure the right balance of moisture. Once the pressure cycle ends we use the air-crisp lid to form a lightly browned surface. That final touch adds depth of flavor and transforms a simple casserole into something special.
Here is a quick reference table that highlights some common pressure and crisping times:
| Ingredient | Pressure Cook Time (minutes) | Crisping Time (minutes) |
|---|---|---|
| Chicken Breasts | 10 to 15 | 5 to 7 |
| Ground Beef | 5 to 8 | 3 to 5 |
| Mixed Vegetables | 2 to 4 | 2 to 3 |
| Pasta | 0 to 3 | 2 to 4 |
By following these guidelines we can craft casseroles that are flavorful and satisfying. We lean on the versatility of the Ninja Foodi to simplify our routine and ensure consistent results.
Equipment and Tools
We rely on our Ninja Foodi Multi-Cooker for the unique combination of pressure cooking and air frying. We keep a few essentials within reach to make our casserole recipes effortless. We find that these items help us transition smoothly from sautéing to pressure cooking to crisping:
- Measuring Cups and Spoons for precise ingredient portions
- Silicone Spatula to gently stir and prevent scratches
- Wooden Spoon for breaking up meats and mixing heavier fillings
- Trivet or rack to elevate certain ingredients when needed
- Oven Mitts or heat-resistant gloves for safe handling
| Equipment | Purpose | Recommended Size |
|---|---|---|
| Ninja Foodi | Combines pressure cooking and air frying | 6.5-quart or 8-quart |
| Measuring Cups and Spoons | Ensures accuracy for liquids and dry goods | Standard US sets |
| Silicone Spatula | Protects nonstick surface when stirring | 10-inch or 12-inch |
| Oven Mitts | Shields hands from high heat | Thick quilted or silicone |
| Trivet | Raises ingredients above liquid or sauce | Compatible with Foodi basket |
Ingredients
In order to build on the pressure cooking advantage of the Ninja Foodi we prepare a well-balanced set of ingredients that yield a flavorful base. This includes a mix of protein vegetables pasta and seasonings that come together under the crisping lid for a delightful finish.
- 1 lb boneless skinless chicken breasts cut into 1-inch cubes
- 1 tablespoon olive oil
- 1 small onion diced
- 1 cup diced bell peppers
- 2 cups fresh spinach
- 2 cups uncooked penne pasta
- 1 teaspoon salt
- 1 teaspoon black pepper
- 1 teaspoon garlic powder
- 1 cup shredded cheddar cheese
- 2 cups chicken broth
| Ingredient | Alternative |
|---|---|
| Chicken breasts | Ground turkey or ground beef |
| Cheddar cheese | Mozzarella or Monterey Jack |
| Spinach | Kale or Swiss chard |
| Bell peppers | Zucchini or mushrooms |
Directions
Now we bring our flavorful Ninja Foodi casserole to life. Each step helps us achieve a savory filling and a perfectly crisp top.
Prep
- Rinse the fresh spinach and pat dry
- Dice the onion and bell peppers into small pieces
- Cut the boneless skinless chicken breasts into bite-size chunks
- Measure the uncooked penne pasta and set aside
- Gather the olive oil and seasonings (garlic powder onion powder salt pepper)
Cook
- Select the Sauté function on our Ninja Foodi and add olive oil
- Stir in diced onion and bell peppers until they soften
- Add chicken chunks and cook until light golden on all sides
- Turn off the Sauté function and pour in uncooked pasta and 1 cup of water or broth
- Secure the pressure lid and set the Pressure Cook function on High for 8 minutes
| Step | Function | Time |
|---|---|---|
| 1 | Sauté | 3 to 4 min |
| 2 | Pressure Cook | 8 min |
| 3 | Air Crisp | 5 min |
Assemble
- Unlock the lid and stir in fresh spinach until it wilts
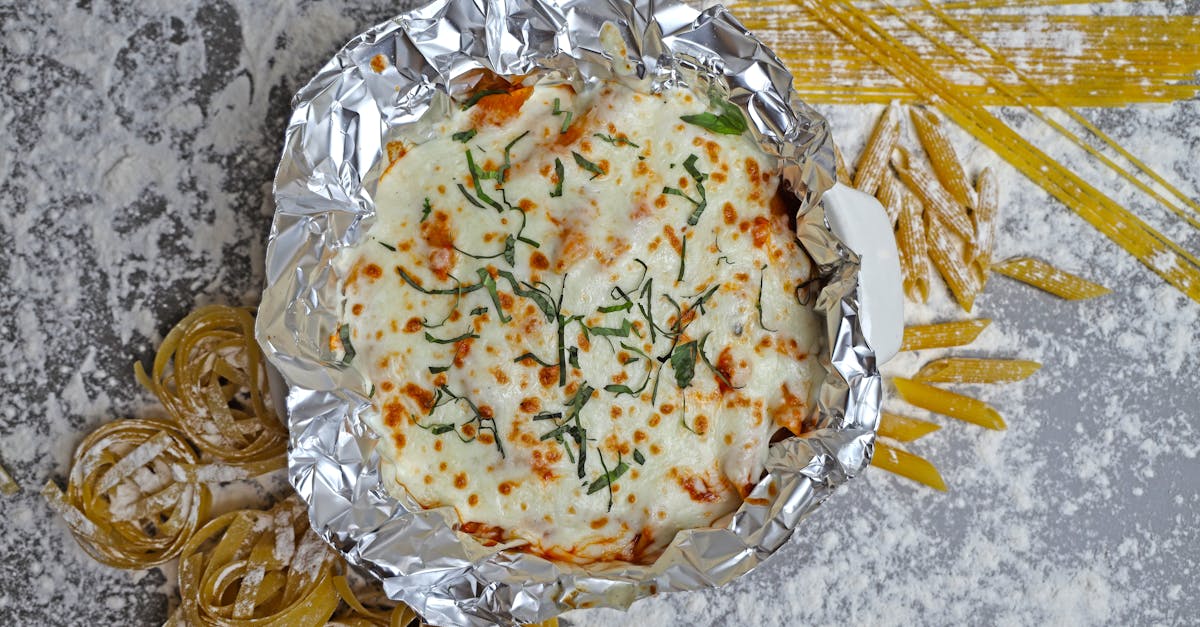
- Top with shredded cheddar cheese and close the crisping lid
- Select the Air Crisp function for 5 minutes or until the cheese bubbles
- Allow the casserole to rest for 1 minute before scooping into bowls
Make-Ahead and Storage Tips
We prepare our casserole ahead of time by assembling ingredients and refrigerating the unbaked dish when we want a convenient meal plan for busy days. We place the casserole in a shallow container to help it chill quickly. We cover it tightly with aluminum foil or plastic wrap. We label it with the date. Once we are ready to cook we place the dish in our Ninja Foodi and follow the pressure-cooking steps before crisping the top.
When we have leftovers we follow these steps:
- Scoop the remaining casserole into an airtight container
- Let it cool at room temperature for about 30 minutes
- Refrigerate or freeze it soon after to maintain food safety
We reheat the casserole in the Ninja Foodi using the Air Crisp function. If we want a creamier texture we add a few tablespoons of broth or milk before reheating. We stir once or twice to prevent uneven heating.
Below is a quick reference for best storage durations:
| Storage Method | Recommended Time | Notes |
|---|---|---|
| Refrigerator | Up to 3 days | Cover tightly for freshness |
| Freezer | Up to 2 months | Thaw overnight if possible |
We use these guidelines to enjoy our make-ahead casseroles without loss of flavor or texture.
Conclusion
We love how this versatile tool keeps our casserole routine exciting. We layer ingredients then let the Ninja Foodi do the rest. It’s a quick solution for hearty meals that don’t require extra fuss or cleanup. We’re thrilled to keep discovering new flavor combinations that transform simple pantry staples into something extraordinary. Whether whipping up dinner for the family or entertaining guests we’re confident these recipes will continue to delight our taste buds. There’s a reason we reach for this appliance time after time.