
Making homemade ice cream has never been easier or more fun than with our pint ice cream maker. This handy little gadget lets us whip up delicious, creamy treats right in our own kitchen without the hassle of large batches. Whether we’re craving classic vanilla or adventurous flavors, our pint ice cream maker recipes deliver perfect results every time.
We’ve gathered a collection of tried-and-true recipes that are simple, quick, and customizable. From rich chocolate to fruity sorbets, these recipes show how versatile and convenient ice cream making can be. Let’s dive into the world of small-batch frozen delights that are sure to satisfy any sweet tooth.
My Pint Ice Cream Maker Recipes
Making delicious ice cream with our My Pint Ice Cream Maker is straightforward and rewarding. Below we share our favorite recipes and step-by-step methods to create luscious small-batch ice cream, perfect for any craving.
Classic Vanilla Ice Cream
Ingredients:
- 1 cup heavy cream, chilled
- 1/2 cup whole milk, chilled
- 1/3 cup granulated sugar
- 1 teaspoon pure vanilla extract
Instructions:
- In a mixing bowl, whisk together the sugar and whole milk until the sugar dissolves completely.
- Stir in the heavy cream and vanilla extract.
- Pour the mixture into the My Pint Ice Cream Maker container.
- Secure the lid and freeze the container for at least 24 hours.
- After freezing, assemble the maker and churn for 20-30 minutes, or until the ice cream reaches a soft-serve consistency.
- Transfer to a small airtight container, freeze another 1-2 hours to firm up, and enjoy!
Decadent Chocolate Ice Cream
Ingredients:
- 1 cup heavy cream, chilled
- 1/2 cup whole milk, chilled
- 1/3 cup granulated sugar
- 2 tablespoons unsweetened cocoa powder
- 1/4 cup semi-sweet chocolate chips (optional)
Instructions:
- Combine sugar and cocoa powder in a bowl; whisk to blend evenly.
- Add whole milk slowly, whisking until smooth with no lumps.
- Stir in chilled heavy cream.
- For extra chocolate flavor, fold in chocolate chips after the initial 15 minutes of churning.
- Pour into the ice cream maker container, freeze 24 hours before churning.
- Churn for 25-30 minutes until creamy and thick.
- Place in a sealed container to firm for 1 hour before serving.
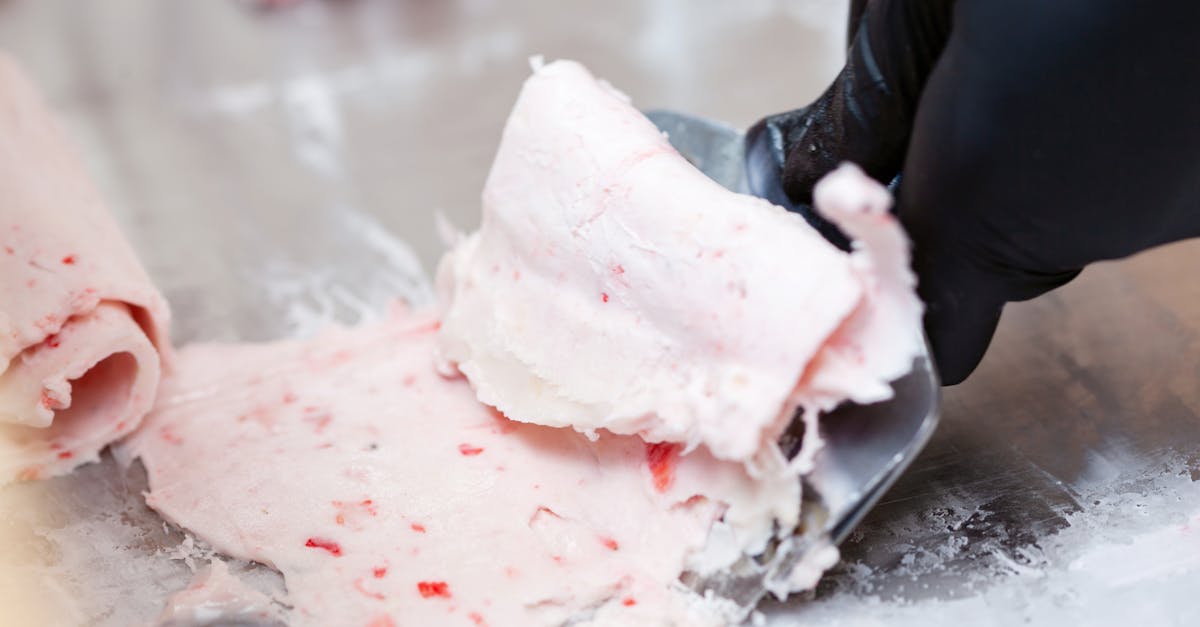
Fresh Strawberry Ice Cream
Ingredients:
- 1 cup fresh strawberries, hulled and sliced
- 1 tablespoon sugar
- 1 cup heavy cream, chilled
- 1/2 cup whole milk, chilled
- 1/3 cup granulated sugar
- 1 teaspoon lemon juice
Instructions:
- Mash strawberries with 1 tablespoon sugar and lemon juice; let sit 10 minutes.
- In a bowl, whisk together the remaining sugar, whole milk, and heavy cream.
- Stir in strawberry mixture.
- Freeze the container for 24 hours.
- Churn in the My Pint Ice Cream Maker for 20-30 minutes.
- Transfer to a container, freeze for 1-2 hours to set.
Recipe Summary Table
| Recipe | Heavy Cream (cups) | Whole Milk (cups) | Sugar (cups) | Additional Ingredients | Churn Time (minutes) | Freeze Time (hours) |
|---|---|---|---|---|---|---|
| Classic Vanilla | 1 | 0.5 | 0.33 | 1 tsp vanilla extract | 20-30 | 24 |
| Decadent Chocolate | 1 | 0.5 | 0.33 | 2 tbsp cocoa powder, chocolate chips | 25-30 | 24 |
| Fresh Strawberry | 1 | 0.5 | 0.33 | 1 cup strawberries, 1 tsp lemon juice | 20-30 | 24 |
Tips for Perfect Pint Ice Cream
- Always freeze the container at least 24 hours before churning — this is key for smooth texture.
- Use chilled ingredients to speed up the churning process.
- For mix-ins like nuts or chocolate chips, add them during the last 5-10 minutes of churning to distribute evenly.
- Store leftover ice cream in airtight containers to keep ice crystals at bay.
Ingredients
To make the perfect pint ice cream at home, having the right Ingredients is essential. Below we list the precise components for each classic and creative flavor to help us craft rich, creamy delights every time.
Classic Vanilla Ice Cream Ingredients
Our Classic Vanilla recipe calls for simple, high-quality essentials that bring out that timeless flavor:
- 1 cup heavy cream, chilled
- 1 cup whole milk, chilled
- ¾ cup granulated sugar
- 1 large egg yolk
- 1 tablespoon pure vanilla extract
Chocolate Fudge Ice Cream Ingredients
For the Decadent Chocolate Fudge blend, we combine deep cocoa notes with luscious texture:
| Ingredient | Quantity | Prep Notes |
|---|---|---|
| Heavy cream | 1 cup | Chilled |
| Whole milk | 1 cup | Chilled |
| Granulated sugar | ¾ cup | |
| Unsweetened cocoa powder | ½ cup | Sifted for smoothness |
| Large egg yolk | 1 | |
| Semi-sweet chocolate | 4 oz | Melted and slightly cooled |
Strawberry Swirl Ice Cream Ingredients
Our Fresh Strawberry ice cream combines creaminess with fruity brightness for a refreshing treat:
- 1 cup heavy cream, chilled
- 1 cup whole milk, chilled
- ¾ cup granulated sugar
- 1 large egg yolk
- 1 teaspoon pure vanilla extract
- 1 cup fresh strawberries, hulled and mashed
- 2 tablespoons strawberry syrup or puree for swirl
Unique Flavor Variations Ingredients
We love experimenting with unique flavors to keep our pint ice cream maker recipes exciting. Here are key ingredient ideas to customize:
- Mint Chocolate Chip: 1 teaspoon peppermint extract, ½ cup mini chocolate chips
- Salted Caramel: ½ cup caramel sauce, ¼ teaspoon sea salt
- Coffee Espresso: 2 tablespoons instant espresso powder dissolved in milk
- Pistachio: ½ cup roasted pistachios finely chopped, a few drops of almond extract
Using fresh, chilled, and accurately measured ingredients allows us to craft perfect one-pint batches each time, maximizing flavor and texture within our compact ice cream maker.
Equipment Needed
To make the best use of our My Pint Ice Cream Maker Recipes, having the right equipment is essential. Below we break down the necessary tools to ensure smooth preparation and perfect results every time.
My Pint Ice Cream Maker Overview
The My Pint Ice Cream Maker is a compact, user-friendly appliance designed for small-batch ice cream. Its key features include:
- Freezable bowl that requires at least 24 hours in the freezer before use.
- Simple on/off motorized base that spins the mixture to achieve creamy consistency.
- Transparent lid for monitoring the churning process.
- Capacity limited to 1 pint for tailor-made portions.
| Feature | Details |
|---|---|
| Bowl Capacity | 1 pint (16 ounces) |
| Freezing Time for Bowl | Minimum 24 hours |
| Motor | Electric, low-speed churning |
| Dimensions | Compact for easy countertop storage |
| Material | BPA-free plastic and stainless steel |
Understanding these components makes it easier for us to handle My Pint Ice Cream Maker Recipes with confidence for consistent and delightful results.
Additional Tools and Supplies
Apart from the ice cream maker itself, a few additional tools help streamline the process and optimize texture and flavor:
- Measuring cups and spoons: Accurate measurements keep ingredient ratios perfect.
- Mixing bowls: For blending base ingredients thoroughly before churning.
- Whisk or hand mixer: To emulsify cream and sugar evenly.
- Spatula: For scraping every drop from the bowl after churning.
- Freezer-safe container: To store leftover ice cream if needed.
- Chilled bowls or serving dishes: Enhance the ice cream experience by keeping servings cold.
- Ingredient prep tools: Like a potato masher for fresh strawberries or coffee grinder for espresso beans.
Having these essentials at hand complements the My Pint Ice Cream Maker and empowers us to experiment confidently with diverse flavors and textures.
Preparing Your Ingredients
Properly Preparing Your Ingredients is the foundation for crafting delicious pints of homemade ice cream with the My Pint Ice Cream Maker. Let’s focus on precision and freshness to ensure smooth texture and rich flavor in every batch.
Measuring and Mixing Base Ingredients
Accurate measurement of base ingredients guarantees consistent results for our small-batch ice creams. Use liquid measuring cups for cream and milk, and dry measuring cups for sugar and powders. Here’s what we keep in mind:
| Ingredient | Typical Measurement | Preparation Tip |
|---|---|---|
| Heavy Cream | 1 cup (240 mL) | Keep chilled for better whipping and texture |
| Whole Milk | 1 cup (240 mL) | Use cold, preferably fresh from fridge |
| Granulated Sugar | ⅔ cup (130 grams) | Dissolve completely into the mixture |
| Vanilla Extract | 1 tsp | Add last to preserve aroma |
| Cocoa Powder | ¼ to ⅓ cup | Sift before mixing to avoid clumps |
Start by whisking together sugar and liquid ingredients until sugar fully dissolves. This ensures an evenly sweetened, silky base ready for churning.
Preparing Fruits and Mix-Ins
Freshness and texture of fruits and mix-ins make a dramatic difference in each pint. Follow these steps for optimal flavor infusion:
- Wash and dry fruits thoroughly to avoid excess water in the mix.
- Cut fruits into small uniform pieces or puree depending on recipe style.
- For berries or soft fruits, lightly mash or puree for smoother texture.
- For nuts, chocolate chips, or candy pieces, chop coarsely to retain crunch.
Add mix-ins during the last 2 minutes of churning to evenly distribute without altering the freezing process. This technique keeps textures distinct and flavors vibrant.
Chilling the Mixture
Cooling the ice cream base before churning is critical for optimal freezing and creamy texture:
- Transfer mixed base to a clean bowl.
- Cover tightly with plastic wrap, pressing it directly onto the surface to prevent skin formation.
- Refrigerate for at least 2 hours or preferably overnight. This deep chill improves texture and accelerates the churning process.
“Cold ingredients make creamy ice cream”—this mantra helps us achieve perfectly chilled mixtures that yield smooth, rich pint-sized servings every time.
Instructions for Using My Pint Ice Cream Maker
Follow these simple steps to make the most of My Pint Ice Cream Maker. With proper setup and technique, we can create creamy, delicious pints every time.
Setting Up the Ice Cream Maker
- Freeze the bowl at least 24 hours before use. This ensures the bowl is cold enough to freeze the ice cream base efficiently.
- Place the frozen bowl securely into the motorized base.
- Attach the transparent lid firmly to monitor the churning process.
- Make sure the paddle is properly inserted into the bowl and connected to the motor.
“Starting with a fully frozen bowl is key to achieving the perfect creamy texture.”
Pouring the Mixture
- Before pouring, ensure your ice cream base is well-chilled (preferably refrigerate for at least 2 hours).
- Remove the lid and slowly pour the chilled mixture into the frozen bowl.
- Avoid filling the bowl above the max fill line to prevent overflow when the ice cream expands during churning.
| Step | Details |
|---|---|
| Mixture Temperature | Chill mixture in fridge 2 hours min |
| Fill Level | Do not exceed max fill line |
| Pour Method | Pour slowly to avoid air bubbles |
Ice Cream Churning Process
- Secure the lid back onto the bowl.
- Turn on the machine and allow it to churn for about 25 to 30 minutes.
- During the last 5 minutes, add any mix-ins like chocolate chips, nuts, or fruit bits through the lid opening.
- Watch through the transparent lid to check the consistency—it should thicken to a soft-serve texture.
Tip: “Mix-ins go in last for even distribution without disrupting the churn.”
Freezing Tips for Perfect Texture
- Once churning is complete, transfer the ice cream to an airtight container immediately.
- For firm set ice cream, freeze for an additional 2 to 4 hours.
- If you prefer soft-serve style, serve immediately.
- Always store leftover ice cream in the coldest part of your freezer to maintain texture.
| Freezing Stage | Time | Result |
|---|---|---|
| Churning | 25-30 minutes | Soft-serve texture |
| Post-churn freezing | 2-4 hours | Firm scoopable ice cream |
| Storage | Ongoing | Maintain fresh creamy texture |
Following these instructions enhances the performance of My Pint Ice Cream Maker and guarantees smooth, flavorful results every batch.
Recipe Variations and Customizations
Exploring Recipe Variations and Customizations allows us to tailor our pint ice cream creations to every preference and occasion. By adjusting mix-ins, ingredient choices, and sweetness levels, we unlock a world of delightful possibilities with our My Pint Ice Cream Maker.
Adding Mix-Ins and Toppings
To enhance texture and flavor, adding mix-ins and toppings is one of the easiest ways to customize our pint ice cream. Incorporate ingredients during the last 2-3 minutes of churning to ensure even distribution without clumping.
Popular Mix-Ins:
- Chopped nuts (walnuts, pecans, almonds)
- Mini chocolate chips or chunks
- Fresh or freeze-dried fruits (blueberries, raspberries)
- Cookie pieces or brownie bits
- Swirls of caramel, fudge, or fruit preserves
- Toasted coconut flakes
Recommended Topping Ideas:
- Whipped cream and a sprinkle of cinnamon
- Drizzled hot fudge or caramel sauce
- Crushed candy bars or sprinkles
- Sea salt flakes for a salted caramel touch
“Adding mix-ins at the correct time during churning ensures an even blend without affecting the ice cream’s smoothness.”
Dairy-Free and Vegan Alternatives
For those seeking dairy-free or vegan options, our My Pint Ice Cream Maker works beautifully with plant-based bases. We can replace traditional dairy ingredients while maintaining creamy texture and rich taste.
Common Dairy-Free Substitutes:
| Dairy Ingredient | Dairy-Free Alternative | Notes |
|---|---|---|
| Heavy Cream | Coconut cream or cashew cream | Provides richness and smoothness |
| Whole Milk | Almond milk, oat milk, or soy milk | Use unsweetened varieties for control |
| Sugar | Organic cane sugar or agave syrup | Keep quantities consistent |
Tips for Vegan Ice Cream:
- Chill all plant-based ingredients thoroughly before use.
- Use a stabilizer like a tablespoon of cornstarch or arrowroot powder dissolved in base liquid for creamier results.
- Add natural flavor extracts (vanilla, almond) to boost flavor depth.
Low-Sugar and Healthy Options
Our pint ice cream can be customized for low-sugar or healthier preferences without sacrificing taste or texture. Using alternative sweeteners and nutrient-rich ingredients helps create guilt-free indulgences.
Sugar Substitutes and Adjustments:
| Substitute | Sweetness Level (Compared to Sugar) | Usage Tips |
|---|---|---|
| Stevia | ~200-300x sweeter | Use sparingly, may affect aftertaste |
| Erythritol | ~70% as sweet | Granulated form works well |
| Monk fruit sweetener | Comparable | Often blended with erythritol |
Additional Healthy Modifications:
- Use Greek yogurt or avocado to add creaminess with protein and healthy fats.
- Incorporate fresh fruits for natural sweetness and fiber.
- Reduce portion sizes to one pint servings for controlled indulgence.
Serving Suggestions
Enjoying My Pint Ice Cream Maker Recipes is just the beginning. Here are some creative and practical ways to serve your homemade pints, along with essential storage tips to keep your ice cream fresh and delicious.
Creative Serving Ideas
We love to elevate our small-batch ice cream with these tasteful and visually appealing serving ideas:
- Classic Sundaes: Scoop your favorite flavor into a chilled bowl. Top with hot fudge, whipped cream, and a cherry for a timeless treat.
- Ice Cream Sandwiches: Sandwich a scoop of your homemade ice cream between two freshly baked cookies or brownies. Wrap for a portable delight.
- Fruit Parfaits: Layer scoops with fresh berries, granola, and a drizzle of honey or chocolate sauce for a refreshing dessert parfait.
- Affogato Style: Pour a shot of hot espresso over a scoop of vanilla or coffee-flavored pint ice cream for a rich Italian-inspired delight.
- Waffle Bowls: Serve scoops on warm, crispy waffles topped with nuts or fruit for texture and flavor contrast.
For an extra indulgence, sprinkle chopped nuts, crushed candy, or toasted coconut over the ice cream just before serving. To keep mix-ins well distributed and texturally enjoyable, add them during the last two minutes of churning.
Storage Guidelines and Shelf Life
Proper storage ensures your My Pint Ice Cream Maker creations remain creamy and flavorful. Follow these guidelines:
| Storage Aspect | Recommendation |
|---|---|
| Container | Use airtight, freezer-safe containers to prevent ice crystals. |
| Freezer Temperature | Keep your freezer at 0°F (-18°C) for optimal texture preservation. |
| Cooling Before Freezing | Let freshly churned ice cream firm up in the freezer for 2-4 hours. |
| Shelf Life | Consume within 1-2 weeks for best flavor and texture. |
Tip: Place a piece of parchment or plastic wrap directly on the ice cream surface before sealing the container. This minimizes freezer burn and keeps the ice cream fresh.
“For the creamiest, most luscious ice cream, enjoy within two weeks and keep the pints stored at consistent freezer temperatures.”
By following these serving and storage suggestions, our homemade pints will taste as vibrant and fresh as the moment they were churned.
Troubleshooting Common Issues
When making homemade ice cream with the My Pint Ice Cream Maker, sometimes things don’t turn out perfectly. Below we address the most frequent problems and share actionable solutions to help us achieve the creamy, flavorful pint every time.
Ice Cream Too Soft or Runny
If our ice cream lacks firmness or appears more like a milkshake, the likely causes include:
- Insufficient freezing of the bowl: Ensure the freezable bowl is kept in the freezer for at least 24 hours before use. A partially frozen bowl cannot properly chill the mixture.
- Warm ingredients: Use ingredients straight from the refrigerator. Warmer mixtures take longer to freeze and can cause runny texture.
- Short churning time: The mixture might need additional churning. The My Pint Ice Cream Maker typically requires 20 to 25 minutes to reach the optimal consistency. Avoid stopping too soon.
- High liquid content: If we add too much fruit puree or liquid mix-ins, the base can get too wet.
Tips to fix runny ice cream:
| Issue Cause | Solution |
|---|---|
| Bowl not fully frozen | Freeze bowl minimum 24 hours; check for hard freeze before use |
| Ingredients not chilled | Refrigerate mixture for 2-4 hours before churning |
| Churning stopped early | Continue churning until mixture thickens to soft-serve texture |
| Excess liquid in recipe | Reduce added juice or purées; adjust recipe balance |
“Cold ingredients make creamy ice cream” remains our best mantra to avoid softness.
Ice Cream Too Hard or Icy
Overly hard or icy ice cream usually comes from:
- Freezer temperature too low: Storing ice cream below -10°F (-23°C) can make it difficult to scoop and icy once out of the freezer.
- Overfreezing in the bowl: Leaving the mixture churning beyond recommended time may lead to excess ice crystal formation.
- Lack of fat or sugar in base: Fat and sugar lower freezing points; insufficient amounts cause icy texture.
- Not storing properly after churning: Exposure to air leads to ice crystals and hardness.
Solutions to soften ice cream without losing quality:
| Problem | Solution |
|---|---|
| Freezer too cold | Set freezer between 0°F to 5°F (-18°C to -15°C) |
| Over-churned ice cream | Stop churn at soft-serve stage; freeze for 2-3 hours |
| Low fat or sugar content | Use recipe with minimum 10% fat and 12% sugar by weight |
| Air exposure causing iciness | Store in airtight container; press plastic wrap on surface |
To improve scoopability, let ice cream rest at room temperature 5-10 minutes before serving.
By carefully monitoring our bowl freeze times, ingredient temperatures, churning duration, and storage techniques, we can troubleshoot and prevent the common pitfalls in our My Pint Ice Cream Maker recipes. This ensures our homemade pints are consistently delicious and perfectly textured.
Conclusion
Making ice cream with the My Pint Ice Cream Maker turns dessert into a fun and rewarding experience. With just a few simple ingredients and some creativity, we can whip up endless flavors tailored to our tastes. The compact size means less waste and more opportunities to experiment with new recipes.
By following the tips and techniques shared, we’re set up for success every time. Whether it’s a classic favorite or a bold new creation, homemade ice cream is always a treat worth savoring. Let’s keep exploring and enjoying every creamy, delicious pint we make together.
Frequently Asked Questions
What size ice cream maker is best for homemade pints?
A pint-sized ice cream maker, like the My Pint Ice Cream Maker, is ideal for small, convenient batches. It allows easy experimentation with flavors and minimizes waste.
How long should I freeze the bowl before making ice cream?
Freeze the ice cream maker’s bowl for at least 24 hours before use to ensure proper churning and a creamy texture.
Can I use dairy-free ingredients in these recipes?
Yes, plant-based milks and creams can substitute dairy. Choose options like coconut or almond milk and adjust sweetness for best results.
When should I add mix-ins like nuts or fruit?
Add mix-ins during the last few minutes of churning to evenly distribute them without breaking down their texture.
How do I prevent my ice cream from being too soft?
Ensure the bowl is fully frozen, use well-chilled ingredients, and freeze the finished ice cream for a few hours before serving.
What equipment do I need besides the ice cream maker?
Basic tools include measuring cups, mixing bowls, and spatulas for preparing and handling the ice cream mixture.
Can I customize flavors easily with a pint ice cream maker?
Yes, small batch sizes allow you to try a wide range of flavors and mix-ins to suit your taste.
How should I store homemade ice cream?
Store in airtight containers in the coldest part of your freezer, and let it soften slightly before serving for best texture.
Is it necessary to chill the ice cream base before churning?
Yes, chilling the base mixture improves freezing performance and results in creamier ice cream.
What are some popular homemade ice cream flavors?
Classic Vanilla, Decadent Chocolate, and Fresh Strawberry are favorites; you can also try Mint Chocolate Chip, Salted Caramel, Coffee Espresso, or Pistachio.