
Mushroom gummies are a fun and tasty way to enjoy the benefits of medicinal mushrooms. These chewy treats combine natural mushroom extracts with fruity flavors to create a snack that’s both delicious and nourishing. Whether you’re looking to boost your immune system or add a unique twist to your wellness routine, mushroom gummies offer a convenient option.
We love how easy these gummies are to make at home, allowing us to customize the flavors and ingredients to suit our tastes. Plus, they’re a great alternative to traditional capsules or teas, especially for those who prefer a sweeter way to consume mushrooms. Let’s dive into a simple recipe that brings together health and flavor in every bite.
Ingredients
To craft our delicious and nourishing mushroom gummies, gathering the right ingredients is essential. Each component plays a crucial role in creating gummies that are both flavorful and beneficial.
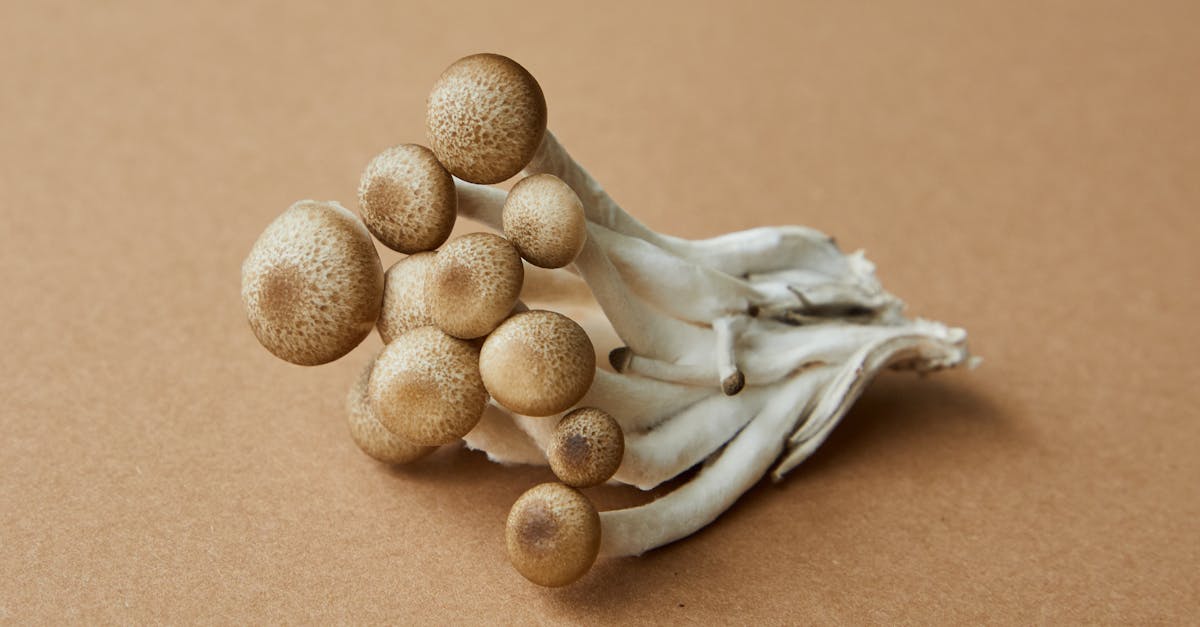
Mushroom Extract or Powder
The star ingredient is medicinal mushroom extract or powder. We recommend:
- Lion’s Mane for cognitive support
- Reishi for immune boosting and relaxation
- Chaga for antioxidant properties
Choose organic, high-quality extracts or powders to ensure potency and purity.
| Mushroom Type | Benefits | Form |
|---|---|---|
| Lion’s Mane | Enhances focus and memory | Extract or powder |
| Reishi | Supports immune system, relaxation | Extract or powder |
| Chaga | Rich in antioxidants | Extract or powder |
Gelatin or Agar-Agar
This ingredient provides the gummy texture:
- Use unflavored gelatin for the classic chewy texture.
- For a vegan option, substitute gelatin with agar-agar powder.
We use approximately 2 tablespoons gelatin or 1 tablespoon agar-agar powder for a standard batch.
Sweeteners
Sweetness balances the earthiness of mushrooms. Choose from:
- Honey for a natural floral flavor
- Maple syrup for a subtle caramel note
- Agave nectar as a neutral, vegan-friendly option
- Stevia or monk fruit for low-calorie sweetness
Our preferred quantity is 1/4 to 1/3 cup, adjusted for taste.
Flavorings and Additives
To enhance flavor and boost health benefits, add:
- Lemon juice for brightness and a vitamin C kick
- Vanilla extract for warmth and depth
- Turmeric for anti-inflammatory properties
- Cinnamon for a hint of spice
Use about 1 teaspoon of each, or to taste.
Optional Ingredients
Customize your gummies further with:
- Vitamin C powder or zinc for added immune support
- Collagen peptides for skin health
- Fruit juice (like pomegranate or cranberry) instead of water for fruity undertones
Adjust additives to your personal health goals and flavor preference.
By selecting these ingredients carefully, our mushroom gummies recipe is set to deliver both taste and wellness benefits seamlessly.
Equipment Needed
To craft delicious and nutritious mushroom gummies at home, having the right equipment ensures a smooth and efficient process. Below we outline the essential tools for preparing these wellness-boosting treats with precision and ease.
Essential Tools for Making Mushroom Gummies
- Saucepan
We use a medium-sized saucepan to gently heat the mushroom extract and other ingredients. This prevents scorching and allows better control over the temperature, which is crucial for achieving the perfect gummy texture.
- Mixing Bowl
A heatproof mixing bowl is necessary when combining gelatin or agar-agar with liquid. Using a bowl that withstands heat helps us avoid common mistakes like clumping or uneven dissolving.
- Whisk or Spoon
We rely on a whisk or a sturdy spoon to thoroughly mix ingredients, ensuring the gelatin or agar-agar dissolves completely and flavors blend evenly.
- Measuring Cups and Spoons
Precise measurements guarantee consistent gummy quality. We use measuring tools to accurately portion powders, extracts, sweeteners, and liquids.
- Gummy Molds
Silicone gummy molds shape the mixture into easy-to-eat bite-sized pieces. Their flexibility makes it easy to pop out the gummies once set, preserving their shape perfectly.
- Dropper or Small Ladle
For filling molds without spills or mess, a dropper or a small ladle helps us transfer the mixture delicately into the cavities, keeping the workspace neat.
Optional Equipment for Enhanced Results
| Equipment | Purpose | Benefits |
|---|---|---|
| Digital Thermometer | Monitors precise temperature during heating | Prevents overheating, preserves nutrients |
| Blender or Food Processor | Blends mushroom powders smoothly | Ensures fine texture and uniform distribution |
| Airtight Storage Container | Stores finished gummies | Maintains freshness and extends shelf life |
“Precision in equipment use directly impacts the texture and flavor of our mushroom gummies — investing in these tools guarantees a superior homemade product.”
Having these key tools ready helps us confidently navigate each step in the recipe, ensuring our mushroom gummies come out chewy, flavorful, and packed with wellness benefits every time.
Prep Work
Before diving into the cooking process, preparing our ingredients and molds precisely ensures our mushroom gummies turn out perfectly textured and flavorful. Let’s get ready step-by-step.
Measuring and Preparing Ingredients
Accurate measurement is crucial for achieving the right consistency and taste in our mushroom gummies. We recommend using digital or precise measuring tools.
| Ingredient | Measurement | Preparation |
|---|---|---|
| Medicinal mushroom powder or extract | 1–2 teaspoons | Use organic, high-quality powder or liquid extracts |
| Gelatin or agar-agar | 2 tablespoons | Bloom gelatin in cold water for 5 minutes; agar-agar needs to be finely ground |
| Sweetener (honey, maple syrup, or sugar) | 2-3 tablespoons | Choose natural sweeteners for flavor and health benefits |
| Liquid (water, juice, or tea) | ½ cup (120 ml) | Warm the liquid slightly for easier mixing |
| Flavorings (e.g., vanilla extract, lemon zest) | ½ teaspoon or as desired | Fresh or pure extracts amplify flavor |
- Bloom gelatin properly to avoid lumps and achieve a smooth gummy texture.
- If using agar-agar, heat it fully to activate gelling properties.
- Always pre-warm the liquid base to help dissolve powders and sweeteners more effectively.
Preparing the Mold
The mold preparation is fundamental for clean, easy-to-release gummies.
- Use silicone gummy molds for their flexibility and non-stick properties.
- Lightly grease the molds with a neutral oil to prevent sticking if desired, especially when using agar-agar.
- Place the molds on a flat tray or surface for stability when pouring.
- Keep molds at room temperature ready for immediate use after the mixture preparation.
Tip: For creative presentation, choose molds in fun shapes that align with your theme or preference—this adds an element of joy while maintaining the nutritional benefits of our mushroom gummies.
Ensuring each step in our prep work is done with care sets the foundation for delicious and visually appealing mushroom gummies.
Making the Mushroom Mixture
Crafting the perfect mushroom gummy mixture requires careful attention to ingredient integration and temperature control. This step ensures our gummies deliver both potent health benefits and delightful taste.
Combining Liquid Ingredients
We begin by gently heating the liquid base to dissolve ingredients smoothly. Use 1 cup of your chosen liquid—water, fruit juice, or herbal tea—for natural flavor and nourishment. Warm the liquid in a medium saucepan over medium heat, stirring constantly to avoid scorching.
Tip: Keep the temperature between 140°F and 160°F (60°C to 71°C) to optimize ingredient blending without damaging delicate compounds.
| Liquid Base Options | Recommended Temperature | Key Notes |
|---|---|---|
| Water | 140°F – 160°F | Neutral flavor, lets mushrooms shine |
| Fruit Juice | 140°F – 155°F | Adds natural sweetness |
| Herbal Tea | 140°F – 160°F | Complements mushroom flavors |
Adding Mushroom Extract
Next, we incorporate the medicinal mushroom extract or powder. Measure precisely 2 teaspoons of your preferred extract such as Lion’s Mane, Reishi, or Chaga. Whisk the extract into the warm liquid until fully dissolved, ensuring an even distribution.
Pro Tip: Stir steadily in one direction to prevent clumping and to maintain the integrity of bioactive compounds.
Incorporating Gelatin or Agar-Agar
For the gummy texture, we now add 1 tablespoon of gelatin or agar-agar. Before adding, make sure your gelatin is bloomed by sprinkling it into ¼ cup of cold water and allowing it to sit for 5 minutes.
Slowly pour the bloomed gelatin or agar-agar into the warm mushroom-laden liquid. Stir consistently until fully dissolved and the mixture thickens slightly—about 3 to 5 minutes.
| Ingredient | Amount | Preparation Method | Notes |
|---|---|---|---|
| Gelatin | 1 tablespoon | Bloom in ¼ cup cold water | Creates chewy gummy texture |
| Agar-Agar | 1 tablespoon | Dissolve directly in warm liquid | Vegan alternative with firmer set |
Reminder: Maintain heat until gelatin or agar-agar dissolves fully but avoid boiling, which can degrade texture and nutrients. Once smooth, remove from heat and proceed to pouring into molds immediately for best results.
Cooking Process
Let’s dive into the step-by-step cooking process to transform our carefully prepared ingredients into delicious mushroom gummies. Proper technique here ensures optimal texture, flavor, and retention of the powerful benefits medicinal mushrooms offer.
Heating the Mixture
Start by pouring the pre-measured liquid base—whether it’s water, fruit juice, or herbal tea—into a medium-sized saucepan. Gently heat the liquid over low to medium heat until it reaches a temperature between 140°F and 160°F. This temperature range is crucial because it allows the medicinal mushroom extracts and gelatin or agar-agar to dissolve fully without degrading their active compounds.
“Avoid boiling the mixture, as excessive heat can destroy the delicate bioactive compounds in the mushroom extracts and affect the gummy texture.”
Use a digital thermometer if available to maintain precise heat control. Once you reach the target temperature:
| Step | Temperature | Purpose |
|---|---|---|
| Heat liquid base | 140°F–160°F | Optimizes ingredient blending, preserves benefits |
| Avoid boiling | Above 212°F | Prevents nutrient degradation and texture loss |
Stirring and Monitoring Consistency
As the liquid reaches the desired warmth, slowly whisk in 2 teaspoons of medicinal mushroom extract and 1 tablespoon of bloomed gelatin or agar-agar. Stir continuously to ensure even distribution and prevent clumps from forming. Keep stirring gently for around 3 to 5 minutes until the mixture looks smooth and begins to thicken slightly.
“Consistency is key for gummies that are chewy yet tender. The mixture should coat the back of a spoon lightly.”
If you notice the mixture is too thin, add a little more gelatin or agar-agar gradually, always stirring vigorously. Conversely, if it’s too thick before pouring, briefly reduce the heat and add a teaspoon of your liquid base to loosen it up.
Regular stirring maintains the perfect blend of texture and flavor while keeping the medicinal components well incorporated throughout the gummy matrix.
| Task | Time | Indicator |
|---|---|---|
| Stir mushroom and gelatin | 3–5 minutes | Smooth mixture, no clumps |
| Monitor thickness | Throughout stirring | Mixture coats spoon lightly |
By carefully heating and stirring, we create a luscious mushroom gummy mixture that balances chewiness with nutrient preservation, laying the groundwork for the final set of gummies that will boost our wellness effectively and deliciously.
Pouring and Setting the Gummies
Now that our mushroom gummy mixture is perfectly blended and smooth, it’s time for the crucial step of pouring and setting the gummies. This phase ensures our gummies develop their signature chewiness and hold the rich medicinal benefits of the mushrooms.
Pouring Into Molds
We begin by carefully transferring the warm mushroom mixture into silicone gummy molds. Using a dropper or a small ladle helps us control the flow and avoid spills. Pour slowly to fill each cavity evenly, leaving a small gap at the top for expansion.
A few tips for optimal pouring:
- Ensure the mixture remains warm but not boiling, as rapid cooling can cause clumping.
- Work quickly yet steadily to avoid premature setting in the pot.
- Avoid overfilling the molds to prevent irregular shape and stickiness between gummies.
| Equipment | Purpose |
|---|---|
| Silicone molds | Shape and size consistency |
| Dropper/Ladle | Controlled, spill-free pouring |
Cooling and Setting Time
Once filled, we place the molds on a flat surface at room temperature for 10 to 15 minutes to start firming up. Then transfer the molds to the refrigerator to set completely.
- Refrigerate for a minimum of 2 hours or until the gummies are firm and springy to the touch.
- Avoid freezing, as this can affect gummy texture and degrade mushroom potency.
- After setting, gently pop the gummies from the molds to maintain their shape and texture.
| Step | Time Required | Recommended Temperature |
|---|---|---|
| Initial room temperature | 10-15 minutes | 68-72°F (20-22°C) |
| Complete setting | 2 hours minimum | 38-42°F (3-5°C) in refrigerator |
Removing and Storing Gummies
Proper removal and storage are essential to preserve the texture and potency of our mushroom gummies. Let’s dive into the best practices to enjoy these healthy treats at their freshest.
Removing Gummies from Mold
To ensure our mushroom gummies keep their perfect shape and chewy texture, we follow these careful steps:
- Chill Fully: Confirm the gummies have set in the refrigerator for at least 2 hours.
- Loosen Edges: Gently pull the edges of the silicone molds away from the gummies to loosen them.
- Invert Slowly: Turn the mold upside down and press lightly on the back of each cavity.
- Avoid Tearing: Use your fingers gently—avoid sharp tools to prevent tearing or deformation.
- Room Temperature: If gummies stick, let the mold sit at room temperature for 5 minutes before retrying.
Tip: Applying a thin layer of coconut oil on the mold before pouring the mixture can help with easier removal without residue.
Storage Tips and Shelf Life
To maintain freshness, flavor, and medicinal benefits of our mushroom gummies, proper storage is vital. Here’s how we keep them at their best:
| Storage Method | Conditions | Shelf Life | Notes |
|---|---|---|---|
| Airtight Container | Refrigerated at 35°F – 40°F | Up to 2 weeks | Prevents moisture and airborne exposure |
| Freezer | Wrapped and sealed airtight | Up to 3 months | Thaw at room temperature before serving |
| Room Temperature | Cool, dry place, airtight jar | 3-5 days | Best for immediate consumption |
- Avoid humidity: Moisture can cause gummies to become sticky or spoil faster.
- Separate layers with parchment paper if stacking gummies in containers.
- Always label your containers with the date for easy tracking.
Variations and Tips
Exploring variations and applying helpful tips allow us to tailor our mushroom gummies recipe to fit diverse dietary needs, flavor preferences, and wellness goals. Let’s dive into options that will elevate our homemade gummies.
Vegan Alternatives
For those seeking vegan mushroom gummies, we swap traditional gelatin with plant-based gelling agents for a cruelty-free chewy texture. Consider:
- Agar-agar powder: Derived from seaweed, agar-agar sets firmly at room temperature. Use about 1 tablespoon to replace 1 tablespoon of gelatin.
- Pectin: A fruit-based gelling agent that creates a softer, more jelly-like consistency. Adjust pectin levels based on desired firmness.
- Carrageenan: Another seaweed extract offering a smooth, firm set but test small batches because it varies in texture.
| Gelatin Substitute | Quantity (to replace 1 tbsp gelatin) | Notes |
|---|---|---|
| Agar-agar | 1 tablespoon | Sets firm, best heated to boil |
| Pectin | 1.5 tablespoons | Soft texture, ensure pH balance |
| Carrageenan | 1 tablespoon | Smooth texture, test batch |
When using vegan alternatives, gently heat the mixture longer and stir consistently for full dissolution. Cooling time may extend, so be patient for full gel set.
Flavor Variations
We can easily customize mushroom gummies to heighten both taste and health benefits by experimenting with natural additives. Some creative flavor and ingredient combinations include:
- Citrus twist: Add 1 tablespoon of fresh lemon or orange zest plus 1-2 tablespoons of juice for a bright tang that complements earthiness.
- Berry blend: Incorporate 1/4 cup pureed mixed berries or 1 tablespoon freeze-dried berry powder for vibrant color and antioxidants.
- Herbal infusion: Use brewed chamomile or hibiscus tea as the liquid base to add floral or tart notes alongside mushroom benefits.
- Spiced warmth: Stir in 1/2 teaspoon cinnamon or ginger powder for a cozy flavor boost and anti-inflammatory effects.
- Sweetener swaps: Adjust sweetness by using honey, maple syrup, or agave to taste, maintaining natural, wholesome profiles.
We suggest testing small batches with different variations to balance flavor intensity and gummy texture.
Dosage and Serving Suggestions
Balancing potency with palatability is key when incorporating medicinal mushroom extracts into gummies. Typical dosage guidelines include:
| Ingredient | Suggested Amount per Serving | Notes |
|---|---|---|
| Mushroom extract (powder or tincture) | 200 to 500 mg | Depends on mushroom type and goals |
| Gelatin or alternative | 1 tablespoon | Ensures firm chewiness |
| Sweetener (optional) | 1 to 2 teaspoons | Adjust per flavor preference |
We recommend starting with smaller dosages (around 200 mg extract per gummy) and gradually increasing based on how your body responds. Taking 1 to 2 gummies daily empowers a gentle wellness boost.
Serving tips:
- Store gummies in an airtight container in the refrigerator for freshness up to two weeks.
- Consume gummies as a mid-morning or evening snack for sustained immune support and cognitive benefits.
- Avoid combining with caffeine or alcohol for maximum medicinal mushroom absorption.
Conclusion
Making mushroom gummies at home gives us full control over the ingredients, flavors, and potency. It’s a simple yet effective way to incorporate the powerful benefits of medicinal mushrooms into our daily routine without compromising on taste or convenience.
With the right tools and techniques, we can craft gummies that are both delicious and nourishing. Whether we’re aiming for immune support, cognitive boost, or antioxidant protection, these homemade treats offer a customizable and enjoyable wellness boost.
By experimenting with different mushroom varieties and flavor profiles, we keep our health journey exciting and personalized. Let’s embrace this fun, tasty approach to wellness and make mushroom gummies a staple in our self-care routine.
Frequently Asked Questions
What are mushroom gummies?
Mushroom gummies are edible supplements made by combining medicinal mushroom extracts or powders with gelatin or vegan alternatives, sweeteners, and flavorings. They offer a tasty, convenient way to enjoy the health benefits of mushrooms like Lion’s Mane, Reishi, and Chaga.
What are the benefits of mushroom gummies?
Mushroom gummies support immune health, cognitive function, relaxation, and provide antioxidants. They’re an easy, enjoyable alternative to capsules or teas, making it simple to incorporate medicinal mushrooms into your wellness routine.
Can I make mushroom gummies at home?
Yes, you can easily make mushroom gummies at home using basic kitchen equipment like a saucepan, silicone molds, and a whisk. Homemade gummies allow you to customize flavors and ingredients to suit your health needs.
Which mushrooms are best for making gummies?
Popular choices include Lion’s Mane for brain health, Reishi for immune support and relaxation, and Chaga for antioxidants. Using high-quality, organic mushroom extracts or powders ensures the best results.
What ingredients do I need besides mushrooms?
You’ll need gelatin or a vegan alternative like agar-agar for texture, sweeteners (like honey or maple syrup), flavorings (fruit juice or herbs), and a liquid base such as water, fruit juice, or herbal tea.
How do I ensure the gummies have a chewy texture?
Proper blooming of gelatin or agar-agar and gently heating the mixture between 140°F and 160°F while stirring helps achieve the ideal gummy texture without damaging the mushrooms’ bioactive compounds.
How long do mushroom gummies take to set?
After pouring the mixture into molds, let the gummies sit at room temperature for 10-15 minutes. Then refrigerate for at least 2 hours until they fully set and become chewy.
What is the best way to store mushroom gummies?
Store gummies in airtight containers in the refrigerator for up to two weeks, freeze for three months, or keep at room temperature for immediate use. Avoid humidity and label containers with dates.
Are there vegan alternatives to gelatin?
Yes, agar-agar, pectin, and carrageenan are popular vegan gelling agents. Each requires specific measurements to achieve the right texture similar to traditional gelatin.
How can I customize the flavor of mushroom gummies?
You can add natural flavorings like citrus zest, berry juice, herbs, or spices. Experiment with sweeteners and liquid bases to create gummies tailored to your taste preferences and dietary needs.