
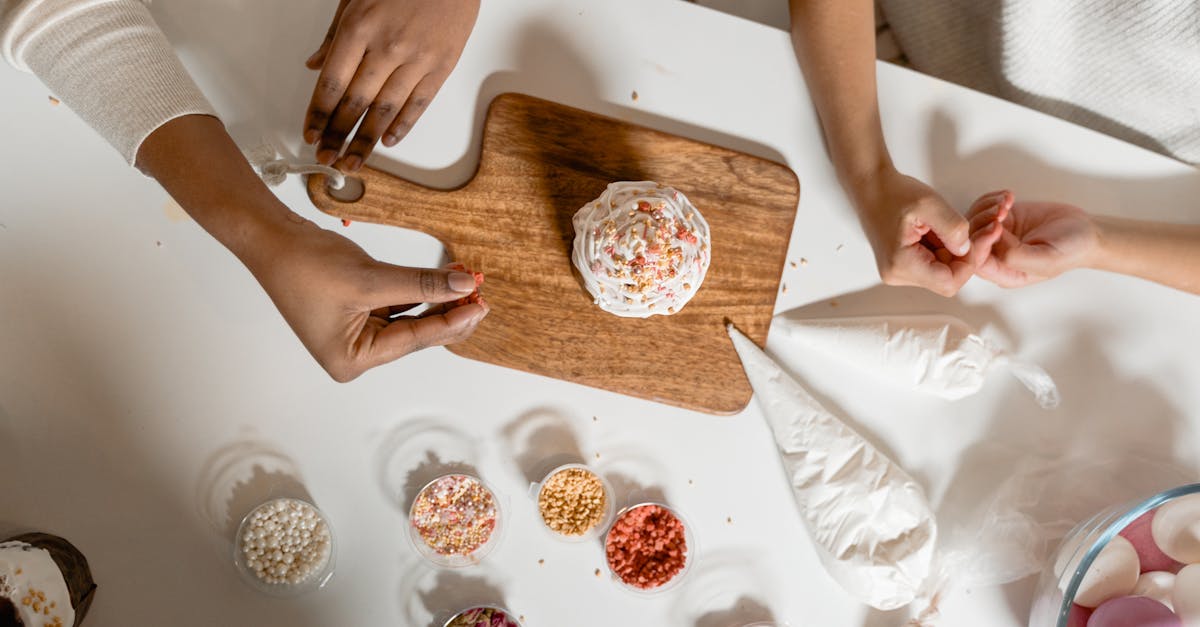
There’s something magical about the way molasses transforms a simple treat into a rich, nostalgic delight. Molasses puff candy, with its airy, honeycomb-like texture and deep caramel flavor, is a timeless favorite that brings back memories of old-fashioned candy shops and homemade confections. It’s the kind of treat that feels like a little piece of history wrapped in sweetness.
Molasses Puff Candy Recipe
Let’s dive into making this delicious treat. This molasses puff candy recipe will yield an airy, crunchy, and delightfully sweet dessert.
Ingredients
Here’s everything we need to craft the perfect molasses puff candy:
- 1 cup granulated sugar
- 1/2 cup light molasses
- 2 tablespoons water
- 1 1/2 teaspoons baking soda (sifted)
Instructions
Follow these step-by-step instructions carefully to achieve the ideal texture and flavor:
- Prepare the workspace:
- Line an 8-inch square baking dish with parchment paper, leaving overhangs for easy removal.
- Lightly grease the parchment with non-stick spray.
- Cook the sugar mixture:
- Combine the sugar, molasses, and water in a heavy-bottomed saucepan.
- Place the saucepan over medium heat and stir until the sugar dissolves.
- Attach a candy thermometer to the side of the pan, ensuring the bulb is submerged but not touching the bottom.
- Heat to the perfect stage:
- Stop stirring once the sugar dissolves, allowing the mixture to reach 300°F (hard crack stage).
- The mixture should bubble vigorously during this stage.
- Add baking soda for the puff effect:
- Immediately remove the saucepan from heat.
- Quickly whisk in the sifted baking soda.
- The mixture will foam and expand rapidly—this reaction is what creates the candy’s signature airy texture.
- Pour and cool:
- Without delay, pour the foaming mixture into the prepared pan. Avoid spreading it out as this can deflate the candy.
- Let the candy cool completely at room temperature for about 1–2 hours, until it hardens.
- Break into pieces:
- Once hardened, lift the parchment from the pan and gently break the candy into bite-sized pieces using your hands or a mallet.
Key Tips for Success
| Tip | Why It Matters |
|---|---|
| Use a candy thermometer | Ensures accurate temperature, vital for achieving the right texture. |
| Work quickly after foaming | The mixture sets rapidly; delaying can ruin the airy structure. |
| Do not stir during boiling | Prevents crystals from forming, ensuring smooth, glassy candy. |
This Molasses Puff Candy Recipe takes us back to an era of simpler sweets while offering a satisfying crunch and caramelized perfection.
Ingredients
Here’s what we need to create the perfectly light and crunchy molasses puff candy. Make sure to have everything measured and prepared beforehand as timing is crucial in this recipe.
- 1 cup granulated sugar
- 1/4 cup molasses (unsulphured preferred for a mild, caramelized taste)
- 1/4 cup honey (for a golden color and soft sweetness)
- 1/4 cup water (to dissolve the sugar)
- 1 1/2 teaspoons baking soda (sifted for lump-free incorporation)
- Optional: A pinch of salt for balance
Key Notes
- Always use a candy thermometer to monitor the temperature. The mixture should reach the “hard crack” stage at 300°F for optimal results.
- Avoid stirring the mixture once it begins boiling, as unwanted crystallization may occur.
Here’s a quick snapshot of our primary ingredients for reference:
| Ingredient | Measurement | Purpose |
|---|---|---|
| Granulated Sugar | 1 cup | Creates the base structure and sweetness |
| Molasses | 1/4 cup | Provides depth with its rich, smoky flavor |
| Honey | 1/4 cup | Adds a warm, smooth sweetness |
| Water | 1/4 cup | Dissolves sugar and evens heating |
| Baking Soda | 1 1/2 teaspoons | Reacts to create puffed, airy texture |
| Salt | Pinch (optional) | Balances richness and enhances overall flavor |
Tools And Equipment
To successfully create the molasses puff candy, having the right tools and equipment is indispensable. Here’s a precise list of items we’ll need, along with their intended use, to ensure smooth cooking and perfect results.
Essential Tools
- Medium-sized heavy-bottom saucepan
A heavy-bottom pan ensures even heat distribution and reduces the risk of burning the sugar and molasses mixture.
- Candy thermometer
Achieving the exact temperature is critical for this recipe. We’ll use a candy thermometer to monitor the mixture, ensuring it reaches the “hard crack” stage at 300°F.
- Measuring cups and spoons
Accurate measurement is key to maintaining the right ingredient ratios. Keep a full set of these ready.
- Wooden spoon or silicone spatula
These resist high heat and are perfect for blending the ingredients before the mixture starts boiling.
- 9×13-inch baking pan lined with parchment paper
Lining with parchment paper prevents sticking, making it easier to remove the candy once set.
- Whisk
We’ll use a whisk to rapidly mix in the baking soda for that signature puff texture.
Safety and Prep Accessories
- Heat-resistant gloves or oven mitts
Handling hot pans safely is crucial. Always have gloves or mitts for protection.
- Cooling rack
Ensures proper airflow while the candy sets, preventing condensation underneath.
- Sharp knife or kitchen scissors
Once the candy sets, these will help us cut it into clean, crisp pieces for serving.
Clean-Up Tools
- Large mixing bowl filled with hot water
Soaking the utensils and saucepan immediately after use makes clean-up significantly easier since sugar solidifies quickly.
Tools at a Glance
| Tool | Purpose |
|---|---|
| Heavy-bottom saucepan | Even heat distribution for sugar and molasses mixture |
| Candy thermometer | Precise temperature tracking to reach the “hard crack” stage |
| Measuring cups and spoons | Exact ingredient measurement for consistency |
| Silicone spatula/wooden spoon | Stirring and mixing to avoid heat damage |
| Baking pan with parchment | Non-stick surface for setting the candy |
| Whisk | Rapidly incorporating baking soda for aeration |
| Oven mitts or gloves | Safe handling of hot tools |
| Cooling rack | Ensures even airflow for candy setting |
| Sharp knife/scissors | Cutting candy into serving portions |
Directions
Let’s dive into creating molasses puff candy, a treat with a perfect balance of airy texture and caramelized sweetness. Follow these simple steps for success.
Prep
- Measure and Prepare Ingredients:
Have all ingredients measured and ready. We need:
- 1 cup of granulated sugar
- 1/3 cup of molasses
- 2 tablespoons of honey
- 1/4 cup of water
- 2 teaspoons of baking soda, sifted to remove lumps
- Prepare Equipment:
Lay out a medium saucepan, a candy thermometer, a whisk, and a prepared baking sheet lined with parchment paper. Use a heat-resistant spatula for transferring the candy mixture.
- Safety Check:
Place heat-resistant gloves nearby and set a cooling rack for the finished candy. Candy-making gets hot, so these tools ensure safety!
Cook
- Combine Ingredients:
In the medium saucepan, add sugar, molasses, honey, and water. Stir gently to combine.
- Heat The Mixture:
Set the saucepan over medium heat. Attach the candy thermometer to the pan without letting it touch the bottom. Avoid stirring as the mixture heats.
- Monitor Temperature:
Watch closely as the mixture boils. It should reach 300°F (“hard crack” stage). This is critical for the candy to set properly, so trust the thermometer!
- Incorporate Baking Soda:
Remove the saucepan from heat immediately upon reaching 300°F. Quickly whisk in the sifted baking soda. Watch the mixture foam and puff up beautifully—this is the magic of molasses puff candy at work!
- Transfer to Pan:
Work fast! Pour the frothy candy mixture onto the prepared lining. Avoid spreading it out, as this can deflate the candy’s airy texture.
Cooling And Cutting
- Allow To Cool:
Let the candy cool completely on the parchment-lined baking sheet. This can take around 30 minutes. The candy will harden as it sets.
- Cut Into Pieces:
Once cooled, use a sharp knife to break the candy into uneven chunks or snap it apart with your hands. For a cleaner cut, we suggest scoring lightly with the knife before snapping.
- Storage Tip:
Store the candy in an airtight container to prevent humidity from melting its crunch. Add wax paper between layers if stacking pieces.
| Timing Steps | Approximate Duration |
|---|---|
| Measuring and Prep | 10 minutes |
| Cooking the Mixture | 10-15 minutes |
| Cooling | 30 minutes |
| Cutting and Storing | 10 minutes |
Tips For Success
When making molasses puff candy, precision and timing are everything. Follow these essential tips to ensure your candy turns out perfectly every time:
1. Use A Candy Thermometer
Achieving the proper temperature is critical. We need to heat the mixture to the “hard crack” stage, which is 300°F (150°C). A candy thermometer ensures this exactness. Clip it to the side of the saucepan and monitor the temperature closely to avoid overcooking.
Pro Tip: If you don’t have a candy thermometer, test by dropping a small amount of the mixture into a bowl of cold water. It should form brittle threads when ready.
2. Avoid Stirring While Boiling
Once the sugar, molasses, and liquids start boiling, resist the urge to stir. Stirring can cause crystallization and lead to a grainy texture instead of the signature airy crunch. Let the mixture bubble undisturbed for a smooth and glossy finish.
3. Prep Ingredients And Tools In Advance
Timing is critical, especially after adding baking soda, as the foaming reaction happens quickly. Prepare all ingredients, measuring them accurately beforehand. Ensure tools like your whisk, candy thermometer, and baking tray lined with parchment paper are ready to go.
4. Work Quickly After Adding Baking Soda
Incorporate the baking soda swiftly but evenly with a whisk. The reaction creates the iconic puffiness through carbon dioxide bubbles. Work with purpose here to pour the foamed candy onto the prepared tray while it’s still pliable.
5. Safety First
Molasses puff candy involves extremely hot sugar syrup that can cause burns. Wear heat-resistant gloves when handling the saucepan. Use a long-handled whisk to mix thoroughly and maintain distance from the rising foamy bubbles.
6. Mind The Weather
Humidity can affect the candy’s texture and crunch. If possible, make the candy on a dry, cool day to avoid the sugars drawing in moisture and softening.
| Key Equipment | Purpose |
|---|---|
| Candy thermometer | Ensures mixture reaches the exact temperature of 300°F |
| Heavy-bottom saucepan | Allows even heat distribution to avoid burning |
| Heat-resistant gloves | Protects hands when dealing with hot syrup |
| Parchment paper-lined tray | Provides a non-stick surface for cooling the candy |
| Whisk | Incorporates baking soda for puffiness evenly |
Remember: The success of your molasses puff candy relies on attention to detail and timing. These tips will help ensure that your finished candies are flawlessly airy and flavorful with that nostalgic crunch we all love.
Storage Instructions
Proper storage is essential to maintain the crunchy texture and caramelized flavor of our molasses puff candy. If stored incorrectly, the candy can absorb moisture, losing its airy structure and becoming sticky. Follow these simple guidelines to keep your puff candy in its best condition:
1. Cool Completely Before Storing
Ensure the candy has cooled completely before attempting to store it. Any residual heat can produce condensation, leading to a sticky and undesirable texture. We recommend allowing the pieces to rest at room temperature on a cooling rack or parchment paper for at least an hour after cutting.
2. Use an Airtight Container
Store the candy pieces in an airtight container to shield them from humidity. Moisture is your puff candy’s worst enemy and can ruin the crispiness. If desired, layer the candy with parchment paper to prevent the pieces from sticking together.
3. Avoid Humidity and Heat
Keep the container in a cool, dry place, away from direct sunlight or heat sources. Excess heat can cause the candy to melt or lose its structure. Avoid storing the candy in locations like the refrigerator, which can introduce moisture.
4. Shelf Life
Molasses puff candy will stay fresh and crisp for up to 2 weeks, provided it is stored correctly. Here’s a quick look at the recommended storage conditions:
| Storage Method | Environment | Estimated Shelf Life |
|---|---|---|
| Airtight container (room temp) | Cool, dry area (60-70°F) | Up to 2 weeks |
| Uncovered or improper storage | Exposed to air or humidity | 1-2 days |
5. Freezing Option
For longer storage, puff candy can be frozen. Seal the candy in a freezer-safe bag or airtight container, ensuring no air can enter. When ready to enjoy, allow the candy to thaw at room temperature inside the container to avoid exposure to humidity. However, note that freezing and thawing may slightly alter its perfect texture.
Conclusion
Molasses puff candy is more than just a sweet treat; it’s a beautiful blend of nostalgia and craftsmanship. With the right preparation and attention to detail, we can recreate this timeless candy in our own kitchens, filling our homes with the rich aroma of caramelized perfection.
By following the steps and tips outlined, we can enjoy the satisfying crunch and airy texture that make this candy so special. It’s a rewarding experience that brings a touch of tradition to our modern lives, perfect for sharing or savoring on our own.
Frequently Asked Questions
What is molasses puff candy?
Molasses puff candy is a light, airy confection with a crunchy texture and rich caramel flavor. It’s made using simple ingredients like molasses, sugar, honey, water, and baking soda, creating a nostalgic treat reminiscent of traditional candy shops.
How do I make molasses puff candy successfully?
To make molasses puff candy successfully, prepare all ingredients and tools in advance, use a candy thermometer to reach the “hard crack” stage (300°F), avoid stirring during boiling, and work quickly after adding baking soda to achieve the desired puffiness.
Why is a candy thermometer essential for this recipe?
A candy thermometer ensures the mixture reaches the precise “hard crack” stage at 300°F, which is critical for achieving the correct texture and crunch in the molasses puff candy.
Can I substitute molasses in the recipe?
While molasses is key for the distinct flavor, you can use dark corn syrup or golden syrup as substitutes, though the taste and color may differ slightly.
How should I store molasses puff candy?
Store molasses puff candy in an airtight container in a cool, dry place to maintain its crunch. Avoid heat and humidity, which can soften the candy. Properly stored, it lasts up to two weeks.
Can I freeze molasses puff candy?
Yes, you can freeze molasses puff candy to extend its shelf life, but freezing may affect its texture slightly. Make sure to use an airtight container and avoid condensation during thawing.
Why shouldn’t I stir the mixture while boiling?
Stirring while boiling can cause sugar crystallization, resulting in a gritty texture instead of the smooth, airy finish typical of molasses puff candy.
What tools do I need to make molasses puff candy?
You’ll need a heavy-bottom saucepan, candy thermometer, measuring cups and spoons, a whisk, heat-resistant gloves, a cooling rack, and clean-up tools like a bowl of hot water to soak sticky utensils.
How do I know if the mixture is ready to add baking soda?
The mixture is ready when it reaches the “hard crack” stage (300°F), as monitored by a candy thermometer. At this stage, you quickly whisk in the baking soda for the candy to puff.
What is the shelf life of molasses puff candy?
When stored in an airtight container at room temperature, molasses puff candy stays fresh for up to two weeks. Improper storage or high humidity can reduce its shelf life.