
Who can resist the charm of mini desserts? Our Mini Blackberry Cheesecakes are the perfect blend of creamy indulgence and fruity sweetness, all in a bite-sized treat. These little delights are ideal for parties, family gatherings, or when we just want a personal-sized dessert to satisfy our sweet tooth.
Blackberries bring a tangy, vibrant twist to the classic cheesecake, making each bite a burst of flavor. Plus, their deep purple hue adds a touch of elegance to these tiny treats. Whether we’re seasoned bakers or beginners, this recipe is simple to follow and delivers stunning results every time.
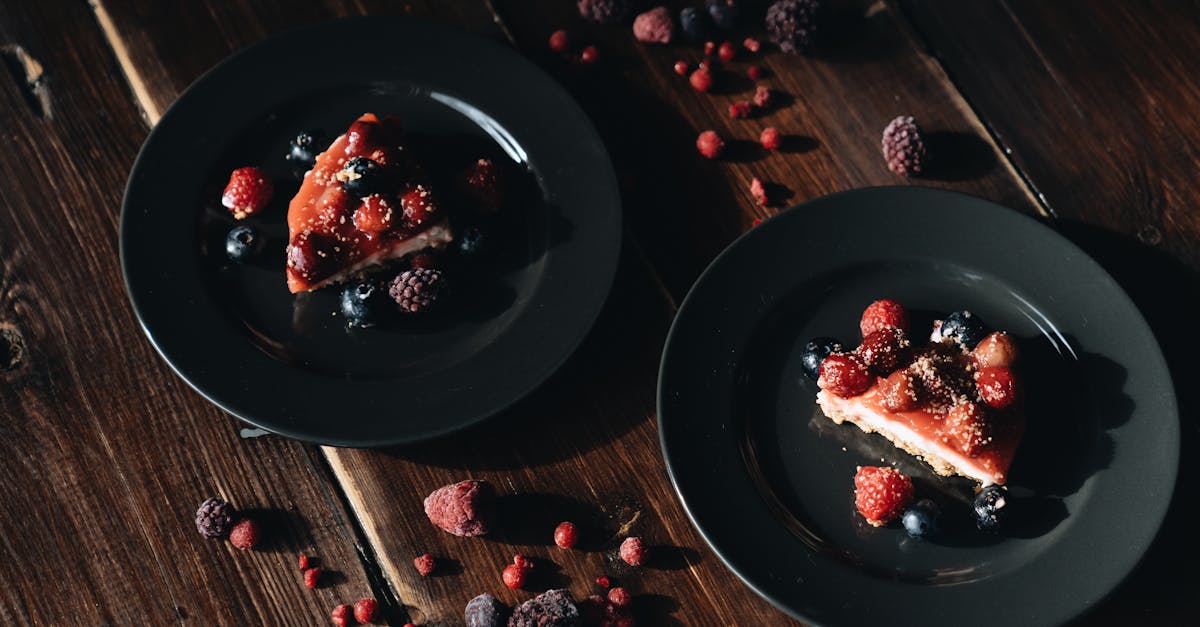
Let’s celebrate the beauty of small desserts that pack big flavors. These mini cheesecakes are not only delicious but also visually stunning, making them a delightful addition to any dessert table.
Mini Blackberry Cheesecake Recipe
These Mini Blackberry Cheesecakes are an indulgent treat that are as stunning as they are delicious. Bite-sized and bursting with flavor, they are a perfect blend of creamy cheesecake, sweet tangy blackberry topping, and a buttery crust. Let’s walk step-by-step through how to make these impressive yet simple desserts.
Ingredients
For the crust:
- 1 cup graham cracker crumbs (about 8 crackers, finely crushed)
- 2 tablespoons granulated sugar
- 4 tablespoons unsalted butter, melted
For the cheesecake filling:
- 8 ounces cream cheese (softened)
- 1/3 cup granulated sugar
- 1 teaspoon vanilla extract
- 1 large egg (room temperature)
- 1 tablespoon sour cream
For the blackberry topping:
- 1 cup fresh blackberries (plus extras for garnish)
- 2 tablespoons granulated sugar
- 1 teaspoon lemon juice
- 1 teaspoon cornstarch (mixed with 1 tablespoon water to create a slurry)
Tools Needed
Create a more seamless baking experience by having all tools ready:
- Muffin tin with 12 cups
- Paper cupcake liners
- Electric hand or stand mixer
- Mixing bowls (at least 2)
- Saucepan for blackberry topping
- Food processor (for crushing graham crackers)
Steps To Prepare
Step 1: Prepare the crust
- Preheat the oven to 325°F and line the muffin tin with paper cupcake liners.
- In a medium bowl, combine graham cracker crumbs, 2 tablespoons of sugar, and melted butter. Mix until the texture resembles wet sand.
- Press about 1 tablespoon of the mixture firmly into the bottom of each cupcake liner to form an even crust. Use the back of a spoon or the bottom of a small glass for this step.
- Bake the crusts for 5 minutes at 325°F. Remove from the oven and let cool while you prepare the filling.
Step 2: Make the cheesecake filling
- Using an electric mixer, beat cream cheese on medium speed until smooth and creamy.
- Add sugar and continue to beat, scraping down the sides of the bowl to ensure no lumps.
- Mix in the vanilla extract and sour cream.
- Incorporate the egg last, beating just until combined. Overmixing can cause cracks in the cheesecake.
- Spoon the filling evenly over the cooled crusts, filling each liner about three-quarters full.
Step 3: Bake the cheesecakes
- Bake in the preheated oven for 18-20 minutes, or until the centers are just set. They should have a slight jiggle but no wet batter visible.
- Once done, let the cheesecakes cool in the tin for about 15 minutes. Then, transfer them to the refrigerator. Chill for at least 2 hours or overnight for flavors to develop fully.
Step 4: Prepare the blackberry topping
- In a small saucepan, combine blackberries, sugar, and lemon juice. Cook over medium heat until the berries break down, releasing their juices (about 5 minutes).
- Add the cornstarch slurry, stirring until the mixture thickens to a sauce-like consistency. Remove from heat and allow to cool.
- Spoon a dollop of the blackberry topping over the cooled cheesecakes. Garnish with fresh blackberries for an extra touch.
Tips for Success
- Room temperature ingredients: Ensure cream cheese and egg are at room temperature to achieve a smooth, lump-free batter.
- Don’t overfill: Leave space at the top of liners to prevent spilling and allow room for topping.
- Chill time: Chilling the cheesecakes for at least 2 hours sets the texture, making them easier to handle and enhancing the flavors.
Baking Times Summary Table
| Component | Temperature | Time |
|---|---|---|
| Crust | 325°F | 5 minutes |
| Cheesecake filling | 325°F | 18-20 minutes |
| Cooling (refrigerator) | N/A | At least 2 hours |
With these steps, anyone can master the art of Mini Blackberry Cheesecakes, creating desserts that look stunning and taste irresistible.
Ingredients
Let’s gather everything we need to create these Mini Blackberry Cheesecakes. We’ll break it down into three parts—crust, cheesecake filling, and blackberry topping.
For The Crust
- 1 cup (100g) graham cracker crumbs (about 8 full crackers, finely crushed)
- 2 tbsp granulated sugar
- 5 tbsp unsalted butter, melted
For The Cheesecake Filling
- 12 ounces (340g) cream cheese, softened (use full-fat for best results)
- 1/4 cup (50g) sour cream (room temperature)
- 1/2 cup (100g) granulated sugar
- 1 large egg, room temperature
- 1 tsp pure vanilla extract
- 1 tbsp all-purpose flour (adds structure to the cheesecake)
For The Blackberry Topping
- 1 1/2 cups (200g) fresh blackberries
- 1/4 cup (50g) granulated sugar
- 1 tsp lemon juice (freshly squeezed for brightness)
- 1 tbsp cornstarch
- 2 tbsp water (helps dissolve the cornstarch)
We recommend using fresh blackberries for the topping to retain that vivid purple hue, but frozen berries work in a pinch. Keep all ingredients at room temperature before mixing for a smooth texture.
Equipment Needed
Having the right equipment is essential for creating perfect Mini Blackberry Cheesecakes. These tools will ensure our desserts come out flawless every time. Let’s go over the items we’ll need:
Baking Equipment
- 12-cup muffin pan: Helps us bake the mini cheesecakes in perfect portions. Use one with non-stick coating or prepare with liners.
- Paper cupcake liners: Prevents sticking and makes removing the cheesecakes easy.
- Mixing bowls: At least two—you’ll need one large and one medium for mixing different components like the crust and filling.
- Electric hand mixer or stand mixer: For achieving a consistently smooth cream cheese filling.
- Silicone spatula: To scrape down the edges of the bowl while mixing, ensuring nothing is wasted.
Measuring Tools
Accuracy is key in baking, so proper measuring tools are vital:
- Dry measuring cups: For precise amounts of flour, sugar, and graham cracker crumbs.
- Liquid measuring cup: For lemon juice and water.
- Measuring spoons: For smaller quantities like vanilla extract and cornstarch.
Cooking Tools for Blackberry Topping
- Small saucepan: To cook the blackberry topping to the perfect syrupy consistency.
- Fine mesh strainer: Optional, but helpful if you prefer a smooth blackberry topping by removing seeds.
- Whisk: To dissolve the cornstarch seamlessly into the sauce.
Assembly and Serving Tools
- Spoon or cookie scoop: Ideal for evenly portioning the crust and filling into the muffin cups.
- Cooling rack: Essential for cooling the mini cheesecakes evenly after baking.
- Serving platter: For a beautiful presentation of your finished mini cheesecakes.
Using these tools ensures a straightforward and enjoyable baking process. Investing in quality equipment dramatically improves the final result of our Mini Blackberry Cheesecakes, making them look and taste stunning.
Directions
Let’s walk through how to make these irresistible Mini Blackberry Cheesecakes step-by-step. Follow these directions to achieve a perfect balance of creamy, tangy, and sweet in every bite.
Prep The Crust
- Preheat the oven to 325°F (163°C) and line a 12-cup muffin pan with paper liners.
- In a medium bowl, combine:
- 1 cup graham cracker crumbs
- 2 tablespoons granulated sugar
- 4 tablespoons melted butter
- Mix until the texture resembles wet sand. Scoop about 1 tablespoon of the mixture into each muffin liner and press it down firmly using the back of a spoon or a small glass bottom.
- Bake the crusts for 5 minutes. Remove them from the oven and let them cool while you move on to the filling.
Prepare The Cheesecake Filling
- In a large mixing bowl, add:
- 12 oz cream cheese (softened, room temperature)
- 1/3 cup granulated sugar
- 2 tablespoons sour cream
- Blend on medium speed using an electric mixer until smooth and creamy.
- Add in:
- 1 large egg
- 1 teaspoon vanilla extract
- 1 teaspoon all-purpose flour
- Mix again on low speed until all ingredients are fully combined. Do not overmix to avoid air bubbles.
Make The Blackberry Topping
- In a small saucepan, combine:
- 1 1/2 cups fresh blackberries (or frozen, if needed)
- 1/4 cup granulated sugar
- 1 tablespoon lemon juice
- 1 teaspoon cornstarch
- 1 tablespoon water
- Heat the mixture over medium heat, stirring frequently, until the blackberries break down and the mixture thickens. This will take about 5–7 minutes.
- If desired, press the mixture through a mesh strainer for a smoother topping. Allow it to cool to room temperature.
Assemble The Mini Cheesecakes
- Spoon the cheesecake filling evenly over the cooled crusts, filling each liner almost to the top. Smooth the tops with the back of the spoon.
- Bake the cheesecakes at 325°F for 15–18 minutes, or until the centers are set but still slightly jiggly.
- Remove the cheesecakes from the oven and let them cool in the pan for 30 minutes. Then, transfer the pan to the refrigerator to chill for at least 2 hours.
- Once fully chilled, top each cheesecake with a dollop of the blackberry topping.
- Optionally, garnish with a fresh blackberry or a sprig of mint for presentation.
These mini cheesecakes are best served cold and can be stored in the refrigerator for up to 5 days when kept in an airtight container.
Instructions
Let’s bring our Mini Blackberry Cheesecakes to life with these simple steps. Follow carefully to ensure perfectly creamy, tangy, and visually stunning results every time.
Bake The Cheesecakes
- Preheat the oven: Set the oven to 325°F (162°C). Line a 12-cup muffin pan with paper liners for easy removal.
- Prepare the crust: Combine 1 cup of graham cracker crumbs with 2 tablespoons of granulated sugar and 3 tablespoons of melted butter. Stir until the mixture resembles wet sand.
- Press the crust into liners: Divide the mixture evenly among the 12 muffin cups, pressing firmly to form a compact layer. Use a spoon or the bottom of a small glass for evenness.
- Bake the crust: Place the pan in the oven and bake for 5 minutes. Remove and let it cool while preparing the filling.
- Make the cheesecake filling: In a large mixing bowl, beat 8 ounces of softened cream cheese and 1/3 cup of granulated sugar until smooth and creamy. Add 1/4 cup sour cream, 1 egg, 1/2 teaspoon vanilla extract, and 1 tablespoon all-purpose flour. Mix until fully combined and no lumps remain.
- Pour filling over crusts: Divide the creamy filling among the cooled crusts, filling each liner about 3/4 full.
- Bake to perfection: Return the pan to the oven and bake for 20-22 minutes, or until the edges are set but the centers are slightly jiggly.
Chill And Set
- Cool the cheesecakes: Remove the cheesecakes from the oven and allow them to cool in the pan for 10 minutes. Then transfer them onto a wire rack to cool completely to room temperature.
- Refrigerate to set: Place the cheesecakes on a tray, cover, and refrigerate for at least 2 hours or overnight for the best texture. During this time, the filling will firm up and develop a rich flavor.
- Prepare the blackberry topping: As the cheesecakes chill, cook 1 cup of fresh blackberries, 2 tablespoons of granulated sugar, 1 teaspoon of lemon juice, 1 teaspoon of cornstarch, and 2 tablespoons of water in a small saucepan over medium heat. Stir continuously until the mixture thickens and turns glossy. Set aside to cool completely.
- Top and serve: Spoon the cooled blackberry topping onto the set mini cheesecakes. Optionally, garnish with fresh mint leaves or a few extra blackberries for an elegant finish.
Tip: These mini cheesecakes are best served cold. Store leftovers in an airtight container in the refrigerator for up to 5 days.
Make-Ahead Instructions
When preparing these Mini Blackberry Cheesecakes, making them ahead of time is not only possible but also enhances their flavor—giving the cheesecake base enough time to set and fully absorb the blackberry topping. Here’s how we can plan ahead without compromising texture, freshness, or taste:
Step 1: Prepare the Crust and Cheesecake Filling in Advance
- Mix and press the graham cracker crust into the muffin pan as instructed in the recipe.
- Prepare the cheesecake filling, then pour it over the crust in each muffin cup.
- Instead of baking right away, cover the muffin pan tightly with plastic wrap or aluminum foil to prevent air from drying the mixture.
- Store the prepared pan in the refrigerator for up to 24 hours before baking.
Step 2: Blackberry Topping Storage Tips
- Cook the blackberry topping as directed until thickened.
- Allow it to cool completely to room temperature.
- Transfer the topping to an airtight container and refrigerate it for up to 3 days prior to assembling the cheesecakes.
Step 3: Bake, Chill, and Serve Later
- Bake the cheesecakes as instructed and let them cool to room temperature.
- Once cooled, transfer them to an airtight container or wrap them individually in plastic wrap to prevent drying out.
- Refrigerate the baked mini cheesecakes for up to 5 days. Assemble by spooning the prepared blackberry topping over the cheesecakes just before serving for the freshest presentation.
Freezing Instructions for Long-Term Storage
For those who truly want to get ahead, we can freeze the baked and cooled Mini Blackberry Cheesecakes without the topping. Follow these steps:
- Place the mini cheesecakes on a baking sheet and freeze them uncovered for 2 hours until firm.
- Wrap each cheesecake individually in plastic wrap and then place them in a freezer-safe bag or container.
- Label with the freezing date. These can be stored in the freezer for up to 2 months.
Note: To serve, thaw the cheesecakes in the refrigerator overnight. Add the blackberry topping just before serving for the best result.
Tips For Perfect Mini Blackberry Cheesecakes
Creating the perfect Mini Blackberry Cheesecakes requires attention to detail and a few clever techniques. Here are our top tips to ensure your cheesecakes turn out creamy, flavorful, and visually stunning.
1. Use Room Temperature Ingredients
To achieve a smooth and creamy cheesecake filling, always use room temperature cream cheese, sour cream, and egg. Cold ingredients can form lumps during mixing, resulting in a less-than-silky texture. We recommend letting these ingredients sit out for about 30 to 60 minutes before starting.
2. Do Not Overmix
When preparing the cheesecake filling, mix until the ingredients are just combined. Overmixing can incorporate too much air into the batter, causing the cheesecakes to crack during baking. Use a low mixing speed for a velvety texture.
3. Perfectly Press the Crust
For the crust, ensure that the graham cracker mixture is evenly distributed and tightly packed into each muffin cup. A tablespoon or the bottom of a small glass works well to press the crumbs firmly, so they bake into a sturdy base.
4. Don’t Overbake
Keep a close eye on the cheesecakes in the oven. To test for doneness, gently jiggle the muffin pan; the centers should have a slight wobble but appear set around the edges. Overbaking can result in dry or cracked cheesecakes. Here’s an estimated baking guide:
| Oven Temperature | Baking Time |
|---|---|
| 325°F (163°C) | 16–18 minutes |
5. Chill Thoroughly
Proper chilling is essential for setting the mini cheesecakes. After removing them from the oven, let them cool completely at room temperature before transferring to the refrigerator. For the best results, chill for at least 4 hours or overnight.
6. Use Fresh Blackberries
For vibrant color and natural sweetness, fresh blackberries work best for the topping. However, if fresh berries aren’t in season, frozen blackberries can be substituted. Be sure to thaw and drain them to prevent excess liquid from diluting the topping.
7. Thicken the Blackberry Topping Correctly
When preparing the blackberry topping, stir it constantly as it cooks to ensure the cornstarch activates and thickens evenly. Avoid rushing this step since undercooked cornstarch can leave the topping runny.
8. Invest in Non-stick Muffin Liners
Non-stick or silicone muffin liners ensure the mini cheesecakes release effortlessly, preserving their smooth edges. If you don’t have liners, grease the muffin pan thoroughly.
9. Garnish Like a Pro
A garnish elevates the appearance of your cheesecakes. We suggest decorating with a dollop of whipped cream, a single blackberry, or a sprig of fresh mint just before serving.
10. Store Properly for Freshness
Mini Blackberry Cheesecakes taste their best when stored correctly. Place them in an airtight container and refrigerate for up to 5 days. For longer storage, they can be frozen without the topping for up to 2 months. Always thaw overnight in the refrigerator before serving.
These tips will help your Mini Blackberry Cheesecakes stand out, delivering a perfect balance of flavor, texture, and presentation every single time.
Storing And Serving Suggestions
When it comes to storing and serving Mini Blackberry Cheesecakes, proper steps ensure freshness and enhance their presentation for any occasion.
Refrigeration Storage
- Once the cheesecakes have been baked and fully chilled, place them in an airtight container to maintain their flavor and texture.
- Store in the refrigerator for up to 5 days. This keeps the cheesecake filling creamy and the crust crisp.
Freezing Tips
For extended storage, these mini delights can be frozen. Follow these steps:
- Do not add the blackberry topping before freezing. Prepare and freeze only the plain, baked cheesecakes.
- Once completely cooled, wrap each individual cheesecake tightly in plastic wrap.
- Place the wrapped cheesecakes in a freezer-safe airtight container or a resealable freezer bag.
- They can be frozen for up to 2 months.
When ready to serve, thaw the cheesecakes in the refrigerator overnight. Add the blackberry topping just before serving for the freshest flavor.
| Step | Time Recommended |
|---|---|
| Refrigeration Storage | Up to 5 days |
| Freezer Storage | Up to 2 months (without topping) |
Serving Suggestions
To serve these mini cheesecakes impressively, consider these ideas:
- Sprinkle a dusting of powdered sugar over the blackberry topping for a sophisticated finish.
- Add a dollop of whipped cream or a small mint leaf on top for a fresh pop of color.
- Serve on individual dessert plates or tiered serving trays for gatherings, allowing the vibrant purple topping and golden crust to shine.
For the best flavor and texture, serve these mini cheesecakes cold. Their creamy filling, buttery crust, and tangy blackberry topping are perfectly balanced at chilled temperatures.
Conclusion
Mini Blackberry Cheesecakes bring together the perfect mix of flavor, texture, and presentation. They’re a versatile dessert that’s as enjoyable to make as they are to eat. Whether you’re hosting a gathering or simply treating yourself, these mini delights never fail to impress.
By following the recipe and tips provided, you’ll create stunning cheesecakes that are sure to be a hit. With their creamy filling, tangy blackberry topping, and elegant appearance, they’re a dessert worth savoring and sharing. Let’s get baking and enjoy every bite!
Frequently Asked Questions
What makes Mini Blackberry Cheesecakes a great dessert option?
Mini Blackberry Cheesecakes are a perfect dessert choice due to their creamy texture, tangy blackberry flavor, and eye-catching presentation. They are easy to make, versatile for various occasions, and ideal for individual servings.
Can I use frozen blackberries instead of fresh ones?
Yes, you can use frozen blackberries if fresh ones are unavailable. However, fresh blackberries are recommended for their vibrant color and flavor.
What baking tools are essential for making Mini Blackberry Cheesecakes?
Essential tools include a 12-cup muffin pan, mixing bowls, an electric mixer, measuring tools, and non-stick muffin liners. They ensure an efficient and mess-free baking process.
How long should I chill Mini Blackberry Cheesecakes before serving?
Chill the cheesecakes for at least 2-4 hours, or overnight, to allow them to set fully and enhance their flavor.
Can I make Mini Blackberry Cheesecakes ahead of time?
Yes! You can prepare the crust and filling up to 24 hours before baking. The baked cheesecakes can also be stored without the topping for up to 2 months in the freezer.
How do I store Mini Blackberry Cheesecakes?
Store the cheesecakes in an airtight container in the refrigerator for up to 5 days. For freezing, wrap them tightly and freeze for up to 2 months without the topping.
What are some tips for perfect Mini Blackberry Cheesecakes?
Use room temperature ingredients, avoid overmixing, press the crust firmly, and chill thoroughly. Additionally, garnish with fresh berries for enhanced presentation.
Can I freeze Mini Blackberry Cheesecakes?
Yes, you can freeze the cheesecakes without the topping for up to 2 months. Thaw in the refrigerator overnight before serving.
How should I serve Mini Blackberry Cheesecakes for an elevated presentation?
Serve them cold on individual plates or tiered trays. Garnish with powdered sugar, whipped cream, fresh blackberries, or mint leaves for a polished look.
What should I use to thicken the blackberry topping?
Use cornstarch mixed with water to thicken the blackberry topping for a smooth and glossy finish.