
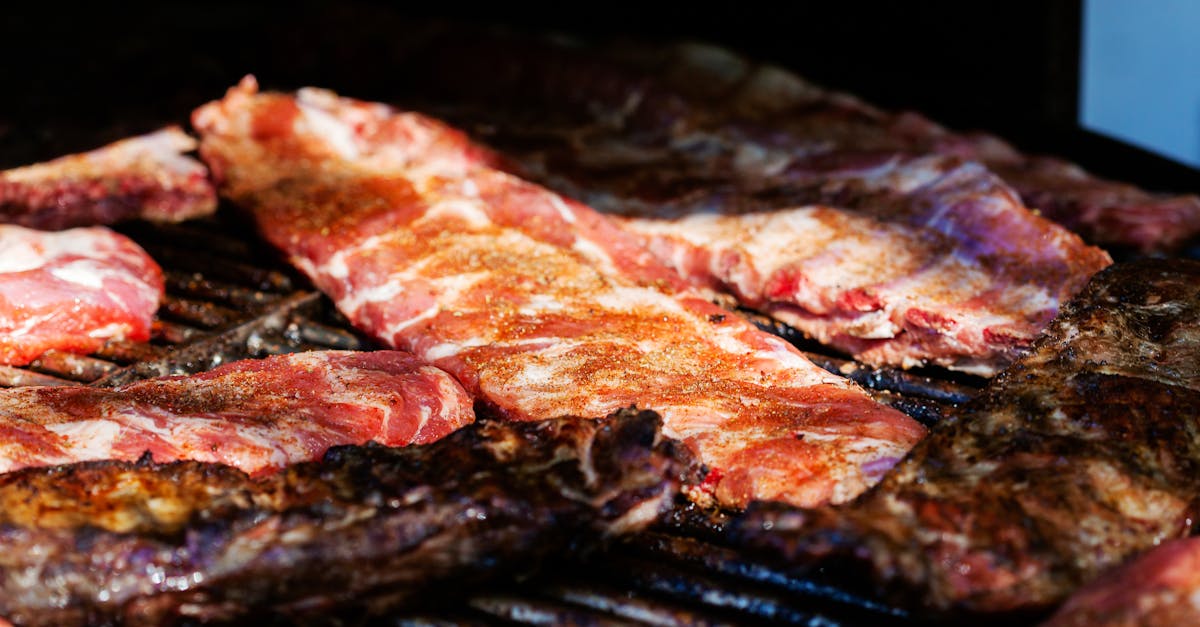
Miami ribs bring a vibrant twist to classic barbecue with bold flavors inspired by the city’s rich cultural blend. These ribs combine tangy citrus, spicy seasonings, and a hint of sweetness that captures Miami’s lively spirit in every bite.
We love how this recipe balances smoky, savory, and zesty notes to create ribs that are juicy and packed with flavor. Whether you’re grilling for a weekend cookout or looking to impress guests, Miami ribs offer a delicious way to elevate your barbecue game.
Get ready to dive into a recipe that’s easy to follow and delivers mouthwatering results. Let’s bring a taste of Miami to your table with ribs that are sure to become a new favorite.
Ingredients
To craft the perfect Miami Ribs, we need a combination of fresh ribs, a vibrant Miami-style marinade, bold dry rub spices, and thoughtful serving suggestions that amplify every bite.
Ribs
- 2 racks of baby back pork ribs (about 3 to 4 pounds total)
- Remove the silver skin membrane from the back of ribs for better flavor absorption and tenderness
Miami-Style Marinade
| Ingredient | Quantity | Notes |
|---|---|---|
| Fresh lime juice | ½ cup | Provides tangy citrus brightness |
| Orange juice | ½ cup | Adds natural sweetness |
| Olive oil | ⅓ cup | Helps infuse flavors |
| Garlic cloves, minced | 4 | Enhances aroma and depth |
| Fresh cilantro, chopped | ¼ cup | Brings fresh herbal note |
| Scotch bonnet pepper, minced | 1 (optional) | Adds signature Miami heat |
| Ground cumin | 1 teaspoon | Earthy undertone |
| Salt | 1 teaspoon | Balances all flavors |
| Black pepper | ½ teaspoon | Adds mild heat |
Dry Rub Spices
- 2 tablespoons brown sugar (for caramelized sweetness)
- 1 tablespoon smoked paprika (smoky depth)
- 1 teaspoon chili powder (bold spice)
- 1 teaspoon garlic powder (rich savor)
- 1 teaspoon onion powder (subtle sweetness)
- ½ teaspoon cayenne pepper (adjust for heat tolerance)
- 1 teaspoon salt (enhances overall flavor)
- ½ teaspoon black pepper (ground fresh for best taste)
Serving Suggestions
- Fresh lime wedges for squeezing over finished ribs
- Chopped fresh cilantro for garnish
- Pineapple salsa or mango salsa for a tropical contrast
- Side of coconut rice or grilled corn on the cob to complement the flavors
Equipment Needed
To master the Miami Ribs Recipe, having the right equipment is essential for achieving tender, flavorful results. Below is a list of the key tools we recommend for an efficient and enjoyable cooking process.
Essential Tools for Preparing Miami Ribs
- Large Baking Sheet: For roasting the ribs evenly in the oven.
- Aluminum Foil: To tightly wrap the ribs during the slow-cooking phase, locking in moisture and flavor.
- Mixing Bowls: Separate bowls for the vibrant Miami-style marinade and the dry rub spice mix.
- Measuring Spoons and Cups: Accuracy is key for the balance of flavors in the marinade and rub.
- Sharp Knife: For trimming excess fat and removing the membrane from the ribs.
- Cutting Board: To prep ribs and chop fresh ingredients like cilantro and garlic.
- Tongs: For flipping the ribs on the grill or handling them safely.
- Grill or Oven: A charcoal or gas grill enhances the smoky character, but a reliable oven works perfectly.
- Basting Brush: To evenly coat ribs with marinade or glaze during cooking.
- Thermometer (optional): Ensures ribs reach the perfect internal temperature for juicy tenderness.
Recommended Equipment Specifications
| Equipment | Recommended Size/Type | Purpose |
|---|---|---|
| Large Baking Sheet | Half-sheet (18×13 inches) | Even oven roasting |
| Aluminum Foil | Heavy-duty | Seal in moisture |
| Mixing Bowls | Medium (2-3 quarts) | Marinade and rub prep |
| Measuring Spoons & Cups | Standard set | Precise ingredient measurement |
| Sharp Knife | Chef’s knife (8-inch) | Trimming and trimming ribs |
| Cutting Board | Plastic or wooden | Safe surface for prep |
| Tongs | Metal with silicone grips | Safe flipping and handling |
| Grill or Oven | Gas/charcoal grill or conventional oven | Cooking ribs to perfection |
| Basting Brush | Silicone or natural bristle | Even application of sauces and marinades |
| Thermometer | Instant-read digital | Checking internal temperature (optional) |
By assembling all these items before starting, we set ourselves up for a seamless cooking experience that will bring the rich, vibrant taste of Miami ribs to life. Having the right tools ensures each step from trimming to glazing is done smoothly, helping us highlight every note of the marinade and spice rub.
Prep Work
Before we dive into cooking, prepping the ribs and blending our Miami-style flavors are key steps to locking in that vibrant taste. Let’s get everything ready to create the perfect balance of tang, spice, and sweetness.
Preparing the Ribs
- Remove the membrane: Flip each rack to the bone side. Slide a sharp knife under the thin membrane and gently peel it off. This step ensures tenderness and better absorption of flavors.
- Trim excess fat: Use a sharp knife to trim any excess fat or loose bits for even cooking.
- Rinse and pat dry: Rinse the ribs under cold water and pat them thoroughly dry with paper towels. Dry ribs allow the marinade and rub to adhere better.
- Score the surface lightly: Lightly score the meat side with a knife in a crisscross pattern. This helps the marinade penetrate deeply.
Making the Miami-Style Marinade
Our signature marinade captures Miami’s citrusy zest and spicy kick. We combine fresh ingredients that brighten the pork and invite complex layers of flavor.
| Ingredient | Quantity | Prep Details |
|---|---|---|
| Fresh lime juice | ½ cup | Squeezed from fresh limes |
| Fresh orange juice | ½ cup | Freshly squeezed |
| Olive oil | ¼ cup | Extra virgin preferred |
| Minced garlic | 3 cloves | Finely minced |
| Chopped cilantro | ¼ cup | Fresh, chopped |
| Scotch bonnet pepper | 1 small (optional) | Deseeded and finely chopped |
- Combine all ingredients in a mixing bowl.
- Whisk vigorously until the mixture is emulsified and smooth.
- Taste and adjust the heat with more Scotch bonnet if desired.
“The key to authentic Miami ribs is this marinade. It brings a vibrant, fresh brightness that will make every bite unforgettable.”
Applying the Dry Rub
The dry rub adds depth and smoky sweetness that perfectly complements the citrus marinade.
| Ingredient | Quantity |
|---|---|
| Brown sugar | 3 tbsp |
| Smoked paprika | 2 tbsp |
| Chili powder | 1 tbsp |
| Garlic powder | 1 tbsp |
| Onion powder | 1 tbsp |
| Cayenne pepper | ½ tsp |
| Salt | 1 tsp |
| Black pepper | 1 tsp |
- Mix all dry rub ingredients uniformly in a small bowl.
- Pat the marinated ribs dry lightly with a paper towel to balance moisture.
- Generously coat both sides of the ribs with the dry rub, pressing it gently into the meat.
- Let the ribs rest for at least 30 minutes to absorb the flavors before cooking.
By meticulously preparing the ribs, remixing the Miami-style marinade and applying the bold dry rub, we set the foundation to achieve juicy, flavor-packed Miami ribs every time.
Cooking Instructions
Cooking Miami Ribs perfectly demands careful attention to temperature and timing. Whether you choose the oven, grill, or slow cooker, follow these step-by-step methods to unlock the rich, vibrant flavors and tender texture this recipe promises.
Oven Cooking Method
Oven cooking is ideal for consistent heat and juicy ribs indoors.
- Preheat your oven to 300°F (150°C) for low and slow cooking.
- Prepare the ribs by placing them on a large baking sheet lined with foil, bone side down.
- Cover the ribs tightly with another sheet of foil to create a sealed packet retaining moisture.
- Bake for 2.5 to 3 hours until the ribs are tender and the meat starts pulling away from the bones.
- Remove the top foil, brush the ribs generously with the Miami-style marinade and remaining dry rub.
- Increase oven temperature to 425°F (220°C) and bake uncovered for an additional 15 minutes to caramelize the exterior.
- Rest the ribs for 10 minutes before slicing to lock in juices.
| Step | Temperature | Time | Notes |
|---|---|---|---|
| Initial bake | 300°F | 2.5 – 3 hours | Covered with foil to keep moisture |
| Final caramelize | 425°F | 15 minutes | Uncovered, basted with marinade and dry rub |
Grill Cooking Method
Grilling infuses the Miami Ribs with smoky char and irresistible crispness.
- Prepare your grill for indirect medium heat, approximately 275°F to 300°F (135°C to 150°C).
- Place the ribs bone side down away from direct flame on the grill grates.
- Close the lid and cook for 2 to 2.5 hours maintaining steady temperature.
- Brush ribs with marinade and dry rub every 30 minutes to build layers of flavor.
- For the last 15 minutes, move ribs directly over heat to sear and caramelize. Watch closely to prevent burning.
- Remove ribs, let rest 10 minutes, garnish with fresh lime wedges and cilantro before serving.
Slow Cooker Method
Using a slow cooker guarantees tender ribs infused with Miami-style zest without much hands-on time.
- Cut ribs into smaller sections to fit into your slow cooker.
- Rub dry spices evenly over rib pieces.
- Place ribs in the slow cooker, bone side down, layering if necessary.
- Pour the Miami-style marinade over the ribs evenly.
- Cover and cook on low for 6 to 7 hours or on high for 3 to 4 hours until ribs are tender and flavorful.
- For a crispy finish, transfer ribs to a baking sheet, brush with extra marinade, and broil for 3–5 minutes until edges caramelize.
- Rest before serving.
| Method | Temperature | Cook Time | Special Tips |
|---|---|---|---|
| Oven | 300°F then 425°F | 2.5–3 hrs + 15 min | Covered then uncovered for caramelization |
| Grill | 275°–300°F | 2–2.5 hrs | Indirect heat, finish over direct heat |
| Slow Cooker | Low or High | 6–7 hrs (low), 3–4 hrs (high) | Broil after for crispiness |
Let’s make these Miami Ribs the centerpiece of our next meal by mastering one of these three versatile cooking techniques.
Finishing Touches
To elevate our Miami Ribs Recipe to perfection, the final steps are vital. These finishing touches maximize flavor and texture, ensuring a mouthwatering experience that stays true to Miami’s vibrant spirit.
Glazing the Ribs
Glazing is the secret to achieving that irresistible glossy finish and intensified flavor in our Miami ribs. Here’s how we do it:
- Prepare the glaze using reserved Miami-style marinade mixed with a little honey or brown sugar for added caramelization.
- Brush the glaze generously over the ribs during the last 10-15 minutes of cooking.
- Apply multiple coats every 5 minutes for a sticky, layered finish.
- Use a basting brush and be mindful not to over-saturate, preventing sogginess.
- For a final caramelized crust, broil the ribs for 2-3 minutes while watching carefully to avoid burning.
This technique locks in juices and creates that perfect dance of tangy, sweet, and spicy flavor typical of our Miami Ribs.
| Step | Action | Duration |
|---|---|---|
| Initial glaze | Brush reserved marinade + honey | Last 15 mins |
| Additional coats | Reapply every 5 minutes | 2-3 coats total |
| Final broil | Broil on high to caramelize | 2-3 minutes |
“Glazing brings our Miami ribs to life with that unmistakable vibrant sheen and flavor punch.”
Resting Time
After removing the ribs from heat, resting plays a crucial role in preserving tenderness and flavor:
- Let the ribs rest uncovered on a cutting board for 10-15 minutes.
- This allows the juices to redistribute evenly throughout the meat.
- Resting prevents the ribs from drying out when cut and enhances the juicy tenderness that defines our Miami staple.
- During this time, we can prepare our garnishes like fresh lime wedges and chopped cilantro to complement the dish.
Serving Suggestions
To fully enjoy the Miami Ribs Recipe, pairing the ribs with complementary sides and drinks enhances the overall dining experience. Let’s explore the perfect accompaniments to bring out the vibrant flavors of these ribs.
Side Dishes That Pair Well
To balance the bold and zesty notes of our Miami ribs, consider these side dishes that add texture, flavor, and a tropical flair:
- Coconut Rice: Creamy and subtly sweet, coconut rice perfectly complements the spicy and citrusy ribs.
- Grilled Corn on the Cob: Charred and buttery corn adds a smoky crunch to each bite.
- Tropical Mango Salsa: A fresh blend of diced mango, red onion, cilantro, and jalapeño offers a refreshing contrast.
- Black Beans and Rice: Hearty and savory, this classic side adds depth and balances the ribs’ flavor.
- Plantain Chips: Crisp and lightly salted, plantain chips add a fun crunch and tropical essence.
- Cucumber and Jicama Salad: Crisp and hydrating, this salad cuts through the richness of the ribs with a zesty lime vinaigrette.
| Side Dish | Flavor Profile | Why It Works |
|---|---|---|
| Coconut Rice | Creamy, sweet | Balances spicy and tangy ribs |
| Grilled Corn on the Cob | Smoky, buttery | Adds crunch and complements char |
| Tropical Mango Salsa | Fresh, sweet, spicy | Provides refreshing contrast |
| Black Beans and Rice | Savory, hearty | Adds depth and keeps meal filling |
| Plantain Chips | Crisp, slightly salty | Offers a crunchy tropical bite |
| Cucumber & Jicama Salad | Crisp, tangy, refreshing | Cuts through rich flavors |
Recommended Drinks
Pairing drinks with our Miami ribs is key to enhancing the meal’s flavor profile and keeping the palate refreshed. Here are some drink options that work wonderfully:
- Classic Mojito: Lime, mint, and rum create a refreshing tropical cocktail that complements citrus and spice.
- Hibiscus Iced Tea: Vibrant and slightly tart, hibiscus tea matches well with the marinade’s tang.
- Tropical Fruit Punch: A blend of passion fruit, pineapple, and orange juices with a splash of soda water offers a sweet and fizzy contrast.
- Mexican Lager: Light and crisp beer balances the ribs without overpowering the flavors.
- Sparkling Water with Lime: Simple and hydrating, it refreshes the palate between bites.
| Drink | Flavor Notes | Pairing Benefit |
|---|---|---|
| Classic Mojito | Minty, citrus, sweet | Enhances citrus and spice |
| Hibiscus Iced Tea | Tart, floral | Balances tangy marinade |
| Tropical Fruit Punch | Sweet, fruity, fizzy | Refreshes palate |
| Mexican Lager | Light, crisp | Complements smoky, bold ribs |
| Sparkling Water with Lime | Clean, zesty | Cleanses palate, keeps fresh |
We encourage trying these tailored sides and drinks to complement our Miami ribs, ensuring each serving bursts with the vibrant spirit of Miami.
Make-Ahead Tips
Preparing our Miami Ribs recipe in advance elevates both the flavor and convenience. Here’s how to maximize taste and save time for your cookout or dinner party:
Marinate Overnight for Maximum Flavor
We recommend marinating the ribs in the vibrant Miami-style marinade (lime juice, orange juice, olive oil, garlic, cilantro, and Scotch bonnet pepper if desired) at least 4 hours, ideally overnight (8-12 hours). This slow infusion allows the citrus acids and spices to deeply penetrate the meat, resulting in ribs bursting with balanced tangy, sweet, and spicy notes.
Apply Dry Rub Ahead of Time
After marinating, pat the ribs dry lightly and apply the spice rub liberally. Wrapping the ribs in plastic wrap or placing them in an airtight container and refrigerating for up to 24 hours helps the dry rub spices meld into the meat, boosting the smoky, sweet, and savory layers.
| Make-Ahead Step | Recommended Duration | Purpose |
|---|---|---|
| Marinate Ribs | 8-12 hours (overnight) | Deeply infuse citrus and spices |
| Apply Dry Rub | Up to 24 hours | Enhance smoky sweet flavor profile |
Pre-Cook for Stress-Free Serving
For gatherings, we can pre-cook ribs using the oven or slow cooker method up to 24 hours ahead. After cooking, let them cool completely, then wrap tightly in foil and refrigerate. On serving day, reheat gently on grill or oven at 300°F for 20-30 minutes and finish with a fresh glaze to revive the caramelized shine.
Prepare Glaze Ahead
Reserve some marinade before adding raw meat and combine it with honey or brown sugar to create the finishing glaze. Store the glaze in a small jar in the fridge for up to 3 days. Brushing this glaze during the last minutes of cooking seals in moisture and adds that signature glossy finish.
“Marinating overnight and applying the dry rub ahead of time are the keys to unlocking the full spectrum of Miami Rib flavors.”
Quick Checklist for Make-Ahead Miami Ribs
- Marinate ribs overnight (8-12 hours)
- Apply dry rub and refrigerate up to 24 hours
- Prepare and refrigerate glaze in advance
- Pre-cook ribs 1 day before for easy reheating
By following these Make-Ahead Tips we set ourselves up for a flavorful, stress-free feast that captures the essence of Miami in every tender bite.
Storage and Reheating
Storing and reheating Miami ribs properly ensures we maintain their bold flavors and juicy tenderness. Follow these steps to keep the ribs fresh and delicious for your next meal.
Storing Miami Ribs
- Allow the ribs to cool to room temperature before storing.
- Wrap the ribs tightly with aluminum foil or place them in an airtight container to preserve moisture.
- Label the container with the date for easy tracking.
- Store the ribs in the refrigerator for up to 3 to 4 days.
- For longer storage, freeze the ribs by wrapping them in plastic wrap then aluminum foil to prevent freezer burn. They will keep for up to 2 months in the freezer.
| Storage Method | Container Type | Duration | Temperature |
|---|---|---|---|
| Refrigerator | Airtight container | 3 to 4 days | 34°F to 40°F (1°C-4°C) |
| Freezer | Wrapped in foil/plastic | Up to 2 months | 0°F (-18°C) or below |
Reheating Miami Ribs
To reheat the ribs and lock in their signature Miami flavor, use these methods:
Oven Method (Recommended)
- Preheat oven to 275°F (135°C).
- Place ribs on a baking sheet. Cover loosely with foil to retain moisture.
- Heat for 20-25 minutes or until warmed through.
- For a crispier finish, uncover during the last 5 minutes.
- Optionally, brush with reserved Miami-style glaze before serving.
Grill Method
- Preheat grill to medium heat.
- Place ribs over indirect heat.
- Cover and heat for 10-15 minutes, turning occasionally.
- Brush with glaze to revive the tangy-sweet shine and cook 2-3 minutes per side over direct heat for slight charring.
Microwave Method (Quickest)
- Place ribs in a microwave-safe dish.
- Cover with a damp paper towel to maintain moisture.
- Heat on medium power for 2-3 minutes.
- Check temperature. If needed, continue heating in 30-second intervals.
- Best for small portions to avoid drying out.
Pro Tips for Optimal Flavor
- Always rest reheated ribs for 3-5 minutes to let juices redistribute.
- Reapply a light layer of glaze or marinade before reheating for enhanced zest.
- Avoid reheating ribs multiple times to preserve texture and taste.
“Proper storage and reheating protect the vibrant Miami-style marinade and dry rub flavors, keeping every bite as memorable as the first.“
By following these storage and reheating tips, we enjoy our Miami ribs at peak flavor whenever we crave their juicy, zesty satisfaction.
Conclusion
Bringing the bold, vibrant flavors of Miami ribs to your table is easier than you might think. With the right ingredients, techniques, and a little patience, you’ll create a dish that’s bursting with tangy, spicy, and sweet notes. Whether you’re grilling for a crowd or cooking a cozy meal at home, these ribs deliver a memorable taste experience every time.
We encourage you to experiment with the marinade and spice rub to make this recipe your own. And don’t forget the sides and drinks that complement the dish perfectly, turning any meal into a celebration of Miami’s rich culinary spirit. Enjoy the process and savor every juicy, flavorful bite!
Frequently Asked Questions
What makes Miami ribs unique compared to other barbecue ribs?
Miami ribs are unique due to their vibrant marinade combining tangy citrus, spicy seasonings, and sweetness that reflects Miami’s diverse culture, resulting in juicy, flavorful ribs with a bold, tropical twist.
What ingredients are essential for the Miami-style marinade?
Key ingredients include fresh lime juice, orange juice, olive oil, minced garlic, chopped cilantro, and optional Scotch bonnet pepper for heat, creating a bright, zesty flavor.
What spices are used in the dry rub for Miami ribs?
The dry rub features brown sugar, smoked paprika, chili powder, garlic powder, onion powder, cayenne pepper, salt, and black pepper for a smoky, sweet, and spicy flavor profile.
What equipment do I need to cook Miami ribs effectively?
You’ll need a baking sheet, aluminum foil, mixing bowls, measuring tools, sharp knife, cutting board, tongs, grill or oven, basting brush, and optionally a meat thermometer for precise cooking.
How should I prepare the ribs before cooking?
Remove the membrane, trim excess fat, rinse and pat dry, then lightly score the surface to help the marinade and dry rub penetrate for maximum flavor.
What cooking methods can I use for Miami ribs?
You can cook them in the oven, on the grill, or with a slow cooker—each method ensuring tender, juicy ribs packed with Miami-inspired flavors.
How do I finish and serve Miami ribs for best flavor?
Glaze the ribs toward the end of cooking for a glossy finish and let them rest before serving. Pair with lime wedges, cilantro, tropical salsas, and sides like coconut rice or grilled corn.
Can I make Miami ribs ahead of time?
Yes, marinate the ribs overnight and consider pre-cooking them for easier, stress-free serving later without compromising flavor.
How should I store and reheat leftover Miami ribs?
Store ribs in an airtight container in the fridge for up to 3 days or freeze for longer. Reheat gently in the oven, on the grill, or microwave to maintain juiciness and flavor.
What sides and drinks complement Miami ribs well?
Tropical mango salsa, coconut rice, grilled corn, and refreshing mojitos are excellent choices that enhance the vibrant, tropical spirit of the dish.