
Mayonnaise rolls are a delightful twist on traditional bread rolls that bring extra moisture and tenderness to every bite. Using mayonnaise in the dough might sound unusual, but it creates a soft, fluffy texture that’s hard to resist. These rolls are perfect for sandwiches, dinner sides, or just enjoying warm with a bit of butter.
Ingredients
To make mouthwatering Mayonnaise Rolls with a soft, tender crumb, we carefully select ingredients that enhance flavor and texture. Below are the essential ingredients for the dough, filling, and optional toppings or glaze.
Dough Ingredients
The dough is the heart of our mayonnaise rolls recipe. Using mayonnaise in the dough adds richness and moisture, creating a soft and fluffy roll every time.
| Ingredient | Quantity | Notes |
|---|---|---|
| All-purpose flour | 3 ½ cups (420 g) | Sifted |
| Instant yeast | 2 ¼ tsp (1 packet) | Active and fresh |
| Granulated sugar | 2 tbsp | Balances yeast fermentation |
| Salt | 1 tsp | Enhances flavor |
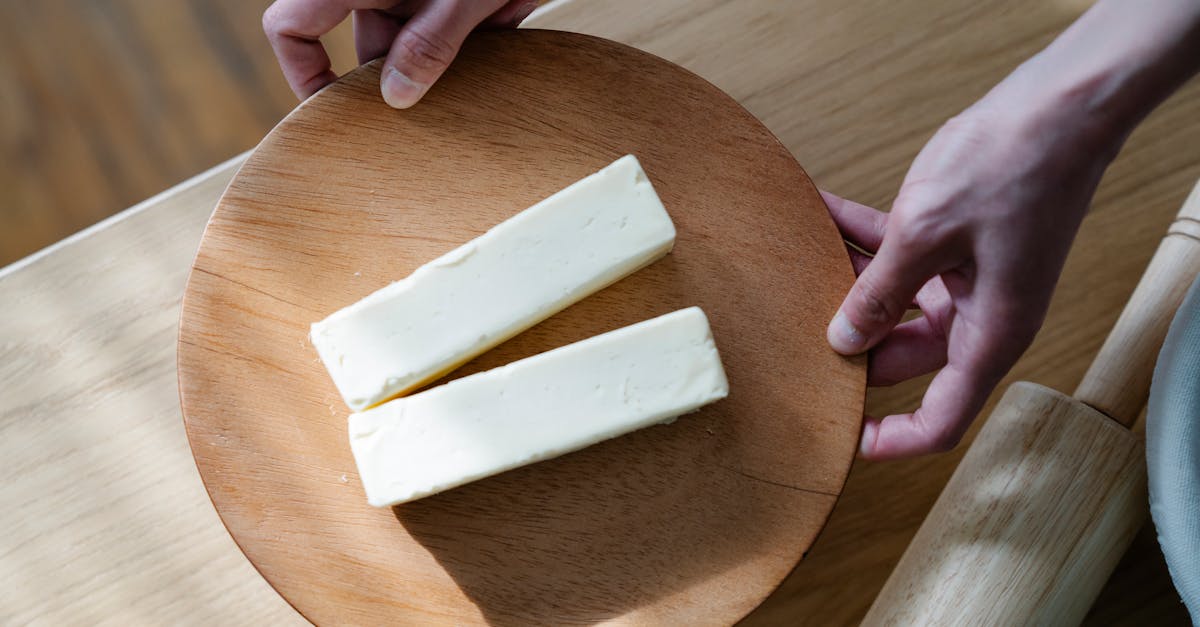
| Mayonnaise | ½ cup (120 g) | Adds moisture and tenderness |
| Whole milk | 1 cup (240 ml) | Warm (about 110°F) for yeast |
| Unsalted butter | 2 tbsp | Melted, for richness |
| Large egg | 1 | Room temperature, helps bind dough |
Filling Ingredients (If Applicable)
Our basic mayonnaise rolls recipe can be enjoyed plain or with delicious fillings to customize flavor. Here are some common fillings if preferred.
- Shredded cheddar cheese (1 cup) – For cheesy rolls
- Cooked bacon bits (½ cup) – Adds smoky savor
- Chopped herbs (2 tbsp) – Such as parsley or chives for freshness
Additional Toppings or Glaze Ingredients
Toppings and glazes elevate the appearance and taste of our mayonnaise rolls. We recommend a simple egg wash or butter glaze to finish the rolls with irresistible shine and softness.
| Ingredient | Quantity | Purpose |
|---|---|---|
| Large egg | 1 | Beaten, for egg wash glaze |
| Water or milk | 1 tbsp | Mixed with egg for shine |
| Unsalted butter | 2 tbsp | Melted, brushed after baking |
Brushing the rolls with melted butter immediately after baking keeps them soft and imparts a rich flavor that makes these rolls truly unforgettable.
Equipment Needed
To create the perfect Mayonnaise Rolls, having the right equipment is essential for a smooth baking process and ideal results. Here is a detailed list of the tools we recommend using to ensure the dough develops properly and the rolls bake evenly with a golden crust.
| Equipment | Purpose |
|---|---|
| Large Mixing Bowl | To combine and knead the dough ingredients |
| Measuring Cups and Spoons | For precise measurement of dry and wet ingredients |
| Stand Mixer with Dough Hook (optional) | To knead dough thoroughly and save time |
| Kitchen Scale (optional) | For accuracy in measuring flour and other ingredients |
| Plastic Wrap or Clean Kitchen Towel | To cover the dough during rising |
| Baking Sheet or Pan | To shape and bake the rolls |
| Parchment Paper or Silicone Baking Mat | Prevents sticking and promotes even baking |
| Pastry Brush | To apply egg wash or melted butter |
| Cooling Rack | To cool rolls evenly after baking |
Note: If you do not have a stand mixer, kneading by hand on a clean surface works just as well. The key is to develop a smooth dough that springs back when pressed.
We suggest preparing all equipment before starting the recipe. This helps us keep organized and maintain a steady flow from mixing to baking.
Prep Work
Before diving into making our Mayonnaise Rolls, we need to take a few important steps to ensure the dough and any fillings or toppings come together perfectly.
Preparing the Dough
To achieve that signature soft and tender texture unique to our Mayonnaise Rolls, careful dough preparation is essential. Here’s what we focus on:
- Measure precisely: Use a kitchen scale or measuring cups for accuracy, especially for flour and mayonnaise.
- Activate the yeast: Warm whole milk to about 110°F (43°C) to wake the instant yeast without killing it.
- Mix wet ingredients: Combine mayonnaise, warm milk, and the large egg thoroughly to create a smooth, creamy base.
- Incorporate dry ingredients: Gradually add all-purpose flour, granulated sugar, and salt. Use a stand mixer with a dough hook or mix by hand until the dough forms.
- Knead well: Knead for 8-10 minutes until the dough is smooth and slightly tacky but not sticky.
- First rise: Shape the dough into a ball, place it in a greased bowl, and cover it with plastic wrap or a clean kitchen towel. Let it rise in a warm, draft-free spot for about 1 to 1.5 hours or until doubled in size.
| Step | Details | Time/Temp |
|---|---|---|
| Warm milk | To activate yeast | 110°F (43°C) |
| Kneading | Smooth and elastic dough | 8-10 minutes |
| First rise | Dough doubles in size | 1 to 1.5 hours |
“Proper dough preparation forms the foundation for perfectly soft, fluffy mayonnaise rolls.”
Preparing the Filling or Toppings
Although these rolls shine on their own, adding personalized fillings or glazes elevates the flavor and presentation:
- Optional fillings:
- Shredded cheddar cheese for a sharp twist.
- Cooked bacon bits for smoky richness.
- Chopped herbs such as rosemary or chives to add freshness.
- Toppings and glazes:
- Brush the rolls with an egg wash before baking for a golden, shiny crust.
- Immediately after baking, slather melted unsalted butter over the rolls to lock in moisture and impart extra richness.
Before rolling or shaping, evenly distribute your chosen fillings inside the dough. For toppings, prepare your brush and melted butter nearby to apply while rolls are still warm.
Tip: Prepare your fillings and toppings in advance so that when the dough is ready, the assembly process is smooth and efficient.
Instructions
Follow these detailed steps to create soft and flavorful mayonnaise rolls that will impress every time. Precise technique and timing are key to perfect results.
Making the Dough
- In a large mixing bowl, combine 2 ½ cups all-purpose flour, 1 tablespoon granulated sugar, and 1 teaspoon salt.
- In a separate small bowl, dissolve 2 ¼ teaspoons instant yeast in 1 cup warm whole milk (about 110°F). Let sit for 5 minutes until frothy.
- Add ½ cup mayonnaise, 3 tablespoons unsalted butter (melted), and 1 large egg to the yeast mixture. Whisk until smooth.
- Pour wet ingredients into the dry ingredients. Stir with a wooden spoon or dough hook attachment until the dough starts to form.
- Knead the dough on a lightly floured surface or with a stand mixer for 8-10 minutes until smooth and elastic.
- Lightly grease a large bowl with oil, place the dough inside, and cover with plastic wrap or a damp towel.
First Rise
- Let the dough rise in a warm, draft-free area for 1 to 1.5 hours or until it doubles in size.
- The dough should look puffy and bounce back slowly when pressed lightly with your finger.
Shaping the Rolls
- Gently punch down the dough to release air.
- Turn the dough out onto a floured surface. Divide the dough into 12 equal pieces using a bench scraper or knife.
- Shape each piece into a smooth ball by pulling the edges under and pinching at the base.
- Place rolls on a parchment-lined baking sheet, spacing them about 2 inches apart.
| Step | Action | Goal |
|---|---|---|
| Divide Dough | Into 12 equal pieces | Even roll size |
| Shape Rolls | Form smooth balls by tucking edges | Uniform texture and shape |
| Arrange Rolls | Place on baking sheet with space | Room for expansion |
Second Rise
- Cover the shaped rolls loosely with a clean kitchen towel.
- Let rise again for 30 to 45 minutes until nearly doubled in size.
- The rolls should feel soft and springy to the touch.
Baking the Rolls
- Preheat your oven to 375°F (190°C) during the second rise.
- Optionally, brush the rolls gently with an egg wash made from 1 beaten egg mixed with 1 tablespoon water for a golden crust.
- Bake for 18 to 20 minutes or until the rolls are a deep golden brown and sound hollow when tapped on the bottom.
- Remove rolls from oven and place on a cooling rack immediately.
Optional Glazing or Topping
- Brush hot rolls with 2 tablespoons melted unsalted butter to keep the crust soft and add richness.
- For added flavor, sprinkle the tops with garlic powder, herbs, or shredded cheese before baking.
- To create a shiny finish, apply a second egg wash midway through baking.
“Brushing the rolls with melted butter right after baking locks in moisture for irresistibly soft mayonnaise rolls.”
These instructions guide us to perfectly tender rolls with the signature richness that mayonnaise provides.
Serving Suggestions
Our Mayonnaise Rolls shine not only for their tender crumb and rich flavor but also for their incredible versatility. Here are our top serving ideas to elevate these soft and fluffy rolls.
Perfect for Sandwiches
- Slice the rolls horizontally to create a cozy pocket.
- Layer with deli meats like turkey, ham, or roast beef.
- Add your favorite cheeses such as Swiss or cheddar.
- Finish with fresh lettuce, tomato, and a smear of mustard or mayo for added moisture.
These rolls hold fillings well without becoming soggy thanks to their sturdy yet tender structure.
Ideal Dinner Side
Pair warm, buttery Mayonnaise Rolls with:
| Main Dish | Serving Tip |
|---|---|
| Hearty stews | Use rolls to soak up rich, savory broth |
| Roasted chicken | Serve rolls brushed with garlic butter |
| BBQ ribs | Complement rolls with a smoky glaze |
The buttery softness enhances any comfort food by balancing hearty flavors.
Simply Enjoyed Warm with Butter
- After baking, brush the rolls generously with melted unsalted butter.
- Serve immediately while still warm for an irresistible aroma and melt-in-your-mouth texture.
“There is nothing quite like biting into a warm roll fresh from the oven, its soft crumb enhanced by a silky layer of butter.”
Creative Serving Ideas
- Stuff with cheese and herbs before baking for a savory surprise.
- Use as slider buns for mini sandwiches at parties.
- Dip into creamy soups or chowders for a luscious bite.
By capitalizing on the rich moisture imparted by mayonnaise in the dough, these rolls complement various dishes and occasions with ease.
Our Mayonnaise Rolls truly serve as an adaptable base for a wide array of meals from casual snacks to elegant dinners. We encourage you to experiment with these suggestions and find your perfect match.
Storage Tips
To keep our Mayonnaise Rolls fresh and soft, proper storage is essential. Follow these steps to maximize their shelf life and maintain their delicious texture.
Short-Term Storage
- Allow the rolls to cool completely on a cooling rack to prevent condensation and sogginess.
- Place the cooled rolls in an airtight container or resealable plastic bag.
- Store at room temperature for up to 2 days.
Long-Term Storage (Freezing)
- Cool the rolls completely before freezing.
- Wrap each roll individually in plastic wrap to lock in moisture.
- Place the wrapped rolls in a freezer-safe bag or airtight container.
- Freeze for up to 3 months without losing flavor or texture.
Reheating Instructions
- For frozen rolls, thaw at room temperature inside the wrapping for 1-2 hours.
- Preheat the oven to 350°F (175°C).
- Place rolls on a baking sheet and warm for 8-10 minutes to refresh softness and warmth.
- Optionally, brush with melted butter after reheating for extra richness.
| Storage Method | Container Type | Duration | Temperature | Notes |
|---|---|---|---|---|
| Room Temperature | Airtight container/plastic bag | Up to 2 days | 68-72°F (20-22°C) | Keep rolls fully cooled |
| Refrigeration* | Airtight container | Up to 5 days | 35-40°F (2-4°C) | May dry out rolls |
| Freezing | Plastic wrap + freezer bag | Up to 3 months | 0°F (-18°C) | Wrap individually to retain moisture |
*Refrigeration is generally not recommended as it can dry out the rolls. Freeze for longer storage instead.
Pro Tip: Always let the rolls fully cool before sealing to avoid moisture buildup that causes sogginess. Wrapping tightly preserves the moist, tender crumb that mayonnaise rolls are known for.
By following these Storage Tips we preserve the hallmark softness and flavorful freshness of our Mayonnaise Rolls for any occasion.
Conclusion
Mayonnaise rolls bring a delightful twist to classic bread, offering a tender texture and rich flavor that elevate any meal. With just a few simple ingredients and some careful preparation, we can create rolls that are perfect for sandwiches, sides, or snacks. Their versatility means they fit seamlessly into both casual and special occasions.
By following the right techniques and storage tips, these rolls stay fresh and soft longer, making them a reliable choice for our baking repertoire. Whether enjoyed warm with butter or filled with our favorite ingredients, mayonnaise rolls are sure to become a favorite in our kitchen.
Frequently Asked Questions
What makes mayonnaise rolls different from regular bread rolls?
Mayonnaise rolls are softer and more tender than regular rolls due to mayonnaise in the dough, which adds moisture and richness, resulting in a fluffy texture.
What ingredients are essential for making mayonnaise rolls?
You need all-purpose flour, instant yeast, sugar, salt, mayonnaise, whole milk, unsalted butter, and a large egg to make mayonnaise rolls.
Can I add fillings or toppings to mayonnaise rolls?
Yes, optional fillings like shredded cheddar, bacon bits, and herbs can be added, along with toppings such as egg wash or melted butter for extra flavor and shine.
What equipment do I need to bake mayonnaise rolls?
Essential tools include a mixing bowl, measuring cups, a stand mixer (optional), baking sheet, parchment paper, pastry brush, and a cooling rack.
Why is proper dough preparation important for mayonnaise rolls?
Proper preparation, including activating yeast and kneading, ensures the right texture, softness, and rise for perfect mayonnaise rolls.
How should I store mayonnaise rolls to keep them fresh?
Store cooled rolls in an airtight container at room temperature for up to 2 days or freeze wrapped rolls for up to 3 months to maintain softness.
What are the best ways to serve mayonnaise rolls?
They’re great for sandwiches, as sides with stews or roasted chicken, sliders, or simply warmed with butter for a delicious snack.