
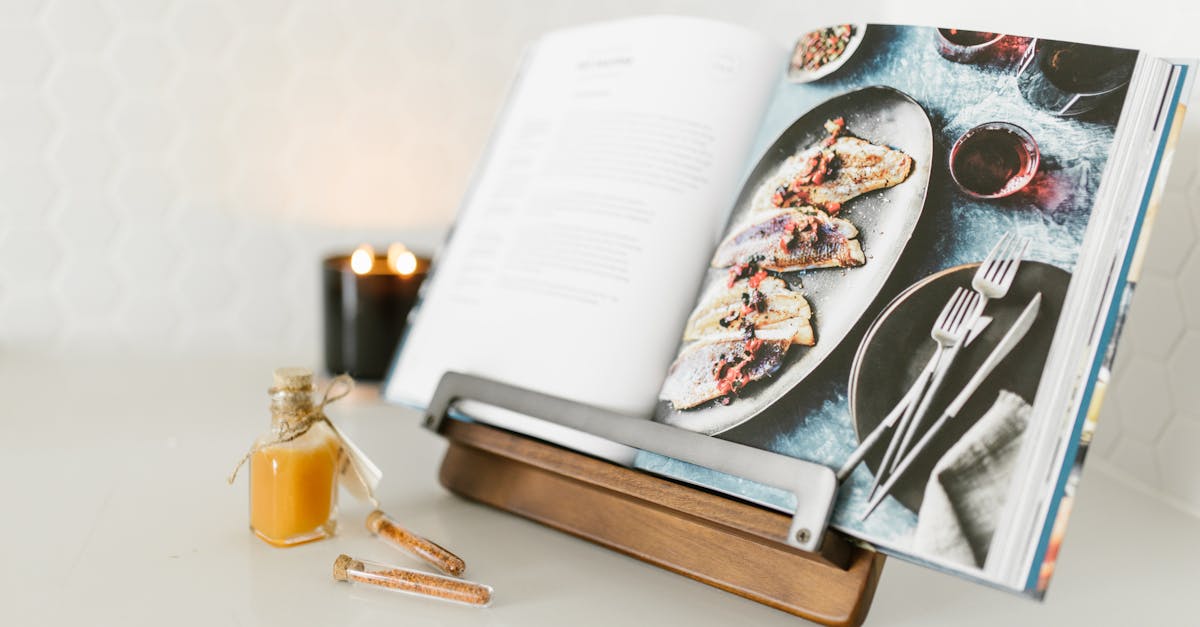
There’s something timeless about cooking with a recipe book open right in front of us. A marble recipe book stand not only keeps our favorite recipes at eye level but also adds a touch of elegance to our kitchen. Its sturdy design ensures our cookbooks stay put while we whip up delicious meals.
Marble stands are more than just functional—they’re a stylish kitchen accessory that blends durability with beauty. Whether we’re trying out a new dish or revisiting a family favorite, having a reliable stand makes the cooking process smoother and more enjoyable. Let’s explore how a marble recipe book stand can elevate our culinary space and keep our recipes within easy reach.
Materials Needed for Marble Recipe Book Stand
To create a durable and elegant Marble Recipe Book Stand, gathering the right materials ensures functionality and style. Below we break down the essential components needed for this project.
Marble Slab or Tile
The cornerstone of our stand is a high-quality Marble Slab or Tile. We recommend selecting a piece with these features:
| Feature | Description |
|---|---|
| Thickness | At least 1/2 inch for stability |
| Size | Minimum 10 x 12 inches for support |
| Finish | Polished for elegance and easy cleaning |
| Color/Pattern | Choose natural veining that complements kitchen decor |
This marble piece provides the sturdy base and sophisticated look essential for the stand. We suggest sourcing from reputable suppliers to ensure durability and authentic natural stone.
Non-Slip Pads or Rubber Feet
To maintain the stand’s stability and protect surfaces, adding Non-Slip Pads or Rubber Feet is critical. These prevent movement during cooking and safeguard countertops from scratches.
- Use four pads sized about 1 inch in diameter for balanced grip.
- Opt for heat-resistant and waterproof materials for kitchen safety.
- Attach to each bottom corner of the marble with strong adhesive.
This simple addition transforms the marble slab into a secure, non-slip platform for your recipe books.
Adhesive or Mounting Supplies
To assemble or secure additional components such as a wooden ledge or decorative accents, we need reliable adhesives or mounting supplies:
- Use epoxy glue or construction adhesive rated for stone.
- Select waterproof and heat-resistant formulas for kitchen conditions.
- Prepare surfaces by cleaning and drying thoroughly before application.
- Consider clamps or weights for pressuring parts during curing.
Proper bonding ensures the stand remains solid and functional during repeated use.
Optional Decorative Elements
To customize and enhance our Marble Recipe Book Stand, adding Optional Decorative Elements can elevate its aesthetic appeal:
- Brass or copper accents for a vintage touch.
- A wooden ledge attached to hold pages open.
- Engraving or inlays on the marble surface for personalization.
These elements blend form and function, turning a practical kitchen tool into an artful centerpiece.
By carefully selecting these materials, we build a Marble Recipe Book Stand that is both functional and visually stunning, perfectly complementing our kitchen space while easing our cooking process.
Tools Required
To craft our marble recipe book stand with precision and durability, we need the right tools to ensure every step is executed flawlessly. These essential tools help us measure accurately, assemble securely, and finish with a polished look.
Measuring Tape or Ruler
Accurate measurements are critical for cutting and positioning the marble slab. We use a Measuring Tape or Ruler to mark exact dimensions, ensuring the stand fits perfectly in our kitchen space and holds the cookbook securely.
| Tool | Purpose | Tip |
|---|---|---|
| Measuring Tape | Measure marble slab and base size | Use a metal tape for precise reading |
| Ruler | Mark straight lines and edges | Choose one with clear, visible marks |
Marker or Pencil
To transfer measurements onto the marble surface, a Marker or Pencil is essential. We prefer a fine-tip marker or a soft pencil that marks clearly without scratching the marble. These markings guide us during cutting and assembly.
- Use a pencil for erasable marks during layout adjustments
- Use a permanent marker for final cutting lines
Drill or Adhesive Applicator
Depending on the assembly method, we require either a drill or an adhesive applicator. For attaching rubber feet or decorative accents, a drill with the correct drill bits ensures secure fastenings. Alternatively, a strong industrial adhesive applicator allows us to bond marble pieces without drilling.
| Tool | Function | Recommended Use |
|---|---|---|
| Drill with masonry bit | Create holes safely in marble | For installing screws or anchors |
| Adhesive applicator | Dispense strong marble-safe glue | For seamless bonding without holes |
Sandpaper or Polishing Cloth
Finishing touches are just as important as cuts and assembly. Using sandpaper with a fine grit or a polishing cloth gently smooths rough edges or blemishes on the marble surface. This enhances safety and gives our stand a sleek, glossy finish that complements any kitchen decor.
- Start with 400-grit sandpaper for smoothing
- Use a polishing cloth with marble-safe polish for shine
Equipped with these tools, we confidently create a functional and elegant marble recipe book stand that withstands daily kitchen use while adding a luxurious touch.
Preparing the Marble Base
To build a sturdy and elegant Marble Recipe Book Stand, preparing the marble base correctly is crucial. This foundation supports the entire structure and ensures stability and style in our kitchen.
Selecting the Right Marble Size and Shape
Choosing the perfect marble size and shape is the first step. For recipe books, a base measuring about 12 inches by 10 inches works well, providing enough surface area without overwhelming counter space. The shape can be rectangular or slightly square, depending on your design preference.
| Aspect | Recommended Dimension | Notes |
|---|---|---|
| Length | 12 inches | Adequate support for most books |
| Width | 10 inches | Stable footprint |
| Thickness | 0.5 to 1 inch | Durable and heavy enough |
| Shape | Rectangular or square | Based on design aesthetic |
We suggest selecting a slab with smooth edges or pre-polished corners to reduce the finishing work later.
Cleaning and Polishing the Marble
A clean and polished marble base not only looks stunning but also prevents stains and damage. Start by wiping the marble down with a soft cloth and a gentle, pH-neutral cleaner, avoiding any acidic or abrasive substances.
Next, we lightly sand any rough spots using fine-grit sandpaper to maintain the natural sheen. Finally, buff the surface with a polishing cloth or marble polish compound to restore its glossy finish. Remember, a smooth, shiny base adds both beauty and functionality to our recipe book stand.
Applying Non-Slip Pads or Feet
To ensure our marble base stays firmly in place while cooking, applying non-slip pads or rubber feet is essential. These pads protect countertops from scratches and provide the grip needed for stability.
Place four small pads, one on each corner of the marble base. Use strong, heat-resistant adhesive to secure the pads firmly. The non-slip feet should be about 0.25 inch thick to elevate the base slightly, preventing moisture buildup underneath while maintaining a stable platform for the cookbook.
This step guarantees our marble recipe book stand remains steady, safe, and elegant throughout every cooking session.
Assembling the Recipe Book Stand
Now that we have prepared our marble base and gathered all materials, it’s time to assemble the marble recipe book stand. This step requires precision to ensure functionality and elegance.
Attaching the Back Support or Holder
Begin by positioning the back support or holder at an angle that comfortably holds a recipe book upright. Typically, a backrest angle of 70 to 75 degrees works well for clear visibility and easy page turning.
- Use a strong adhesive or drill anchors to secure the support to the marble base.
- If drilling, pre-drill holes gently to avoid cracking the marble.
- Apply adhesive on the contact surfaces evenly and press firmly, holding in place until set.
- For wooden or metal back supports, ensure they are aligned centrally and flush with the marble base.
Securing Decorative Elements (If Any)
If you have chosen to add brass accents, personalized engravings, or other decorative touches, follow these steps:
- Attach brass accents using small brass screws or strong epoxy glue.
- Position personalized engravings or plaques centered on the marble or back support.
- Use a clean cloth to gently press adhesives and remove any excess glue immediately.
- Allow all decorative elements to cure fully as per the adhesive manufacturer’s instructions to ensure durability.
| Decorative Element | Attachment Method | Notes |
|---|---|---|
| Brass Accents | Small screws or epoxy glue | Align carefully before securing |
| Personalized Engravings | Epoxy glue | Clean surface before application |
| Rubber Feet / Non-Slip Pads | Peel and stick adhesive | Place on marble base corners for stability |
Testing Stability and Adjustments
Once all components are secured, test the stand’s stability:
- Place a heavy cookbook or tablet on the stand.
- Observe if the base slips or the back support wobbles.
- Adjust by reinforcing adhesive joints or repositioning non-slip pads if necessary.
- If the angle feels uncomfortable, carefully loosen joints (if screws were used) and re-angle the support.
- Ensure the entire structure feels solid and balanced before use.
Using Your Marble Recipe Book Stand
Using our marble recipe book stand effectively enhances both the functionality and aesthetics of our cooking space. Here’s how to optimize its use for the best culinary experience.
Placement in the Kitchen
Proper placement of the marble recipe book stand is essential for convenience and workspace efficiency. We recommend positioning it:
- On a stable, flat section of the countertop near the primary cooking area.
- Close to power outlets if using a tablet or digital cookbook.
- Away from direct heat sources like burners to prevent damage to the marble or the book.
- At eye level or slightly below for comfortable reading without straining our necks.
| Placement Tips | Benefits |
|---|---|
| Stable, flat surface | Prevents slips and book damage |
| Near cooking area | Easy access to recipes during preparation |
| Away from heat sources | Protects marble and cookbook integrity |
| Eye-level positioning | Enhances readability and comfort |
Maintaining and Cleaning Tips
To keep our marble recipe book stand looking pristine and lasting for years, maintenance is key. Follow these cleaning and maintenance tips:
- Clean regularly with a soft damp cloth to remove dust and kitchen residues.
- Avoid harsh chemical cleaners; instead, use a mild soap diluted in water for stains.
- Dry the surface immediately to prevent water spots or cracks.
- Apply a marble polish or sealant every 6 to 12 months to protect the surface and enhance its natural shine.
- Check non-slip pads frequently and replace when worn to maintain stability.
Tip: Use coasters or mats under the stand if working with wet hands or ingredients to avoid water damage.
Safety Considerations
- Ensure the stand is securely placed on a non-slip surface to prevent accidental slips.
- Avoid placing the stand at the kitchen edge to prevent falls.
- Handle the marble stand gently to avoid chips or cracks that could create sharp edges.
- Keep the stand and surrounding area clear of clutter to maintain friction and room for safe maneuvering.
- When cleaning, avoid dropping or banging it against hard surfaces to maintain structural integrity.
| Safety Precautions | Reason |
|---|---|
| Secure on non-slip surface | Prevents accidental movement |
| Avoid kitchen edges | Reduces risk of falling |
| Handle with care | Prevents chips and dangerous edges |
| Clear surrounding area | Ensures safe positioning |
| Gentle cleaning | Maintains longevity and condition |
Make-Ahead Tips and Storage
Proper care and smart storage help preserve the elegance and durability of our Marble Recipe Book Stand. Let’s explore how to keep it pristine when not in use and add seasonal charm to our kitchen space.
Storing When Not in Use
To maintain the integrity of the marble recipe book stand, always store it in a cool, dry place away from direct sunlight and extreme temperatures. Here are some key tips:
- Place the stand on a soft cloth or padded surface to prevent scratches or chips.
- Avoid stacking heavy items on top to preserve its shape and adhesive bonds.
- Cover the stand with a breathable fabric or dust cover to keep dust and kitchen grease off.
- If possible, store upright to avoid pressure on the back support or angled holder.
| Storage Tips | Description |
|---|---|
| Location | Cool and dry, away from heat and sunlight |
| Surface | Soft cloth or padded area |
| Protection | Breathable cover or dust cloth |
| Position | Upright to maintain the angle and structure |
By following these steps, we ensure our marble recipe book stand remains robust and visually stunning for everyday use or special cooking sessions.
Seasonal Decoration Ideas
Adding seasonal decorations to our Marble Recipe Book Stand transforms it into a stylish focal point while blending with holiday or seasonal kitchen themes. Here’s how we can do it tastefully:
- Spring: Drape a small garland of fresh or faux greenery around the base. Add pastel-colored ceramic figurines or miniature flowers.
- Summer: Place seashell accents or bright citrus-scented candles nearby to evoke a fresh, vibrant vibe.
- Fall: Incorporate small pumpkins, acorns, or a rustic burlap ribbon tied around the stand for a warm autumn feel.
- Winter: Use evergreen sprigs, pine cones, or miniature string lights to create a cozy, festive atmosphere.
“Seasonal touches not only enhance aesthetics but also make the stand a conversation piece during gatherings.”
By customizing the decor according to seasons or occasions, we keep the marble recipe book stand both functional and beautifully integrated into our kitchen’s current style.
Conclusion
A marble recipe book stand combines practicality with timeless elegance, making it a valuable addition to any kitchen. Its sturdy design not only supports cookbooks securely but also elevates the overall cooking environment.
By investing a little time in crafting and maintaining the stand, we ensure it remains both functional and visually appealing for years to come. With thoughtful placement and seasonal touches, the marble stand becomes more than just a kitchen tool—it turns into a stylish centerpiece that inspires our culinary creativity.
Frequently Asked Questions
What are the benefits of using a marble recipe book stand in the kitchen?
A marble recipe book stand keeps recipes at eye level for easy access while cooking. Its sturdy design securely holds cookbooks and adds an elegant, stylish touch to the kitchen space.
What materials do I need to make a marble recipe book stand?
You need a high-quality marble slab or tile, non-slip pads or rubber feet for stability, and strong adhesives. Optional decorative elements like brass accents or personalized engravings can enhance its look.
What tools are necessary for crafting a marble recipe book stand?
Essential tools include a measuring tape, marker, drill or adhesive applicator, and sandpaper for smoothing edges. These help ensure precise assembly and a polished finish.
How do I prepare the marble base for the stand?
Choose a marble piece about 12 by 10 inches for good support. Clean and polish it to prevent damage, then attach non-slip pads underneath to protect surfaces and keep it stable.
At what angle should the back support be attached?
The back support should be fixed at a 70 to 75-degree angle. This position offers optimal visibility and ease of use while holding the recipe book securely.
How can I ensure my marble stand is stable and secure?
Use strong adhesives or drill anchors for assembly and test stability with a heavy cookbook or tablet. Adjust as needed to achieve a balanced, sturdy structure.
Where should I place my marble recipe book stand in the kitchen?
Place it on a stable, flat surface near the cooking area but away from heat sources. Position it at eye level for comfortable and safe reading while cooking.
How should I clean and maintain the marble recipe book stand?
Clean regularly with a soft cloth, avoid harsh chemicals, and apply marble polish every 6 to 12 months to maintain its shine and durability.
What safety tips should I follow when using the stand?
Ensure it’s on a non-slip surface, avoid placing it near edges, handle it gently to prevent chips, and keep the surrounding area clutter-free.
How do I store the marble recipe book stand when not in use?
Store it in a cool, dry place away from direct sunlight and extreme temperatures. Use a soft cloth or padded surface to protect it from scratches and cover it to keep dust off.
Can I decorate the marble stand for different seasons?
Yes, adding tasteful seasonal decor like greenery in spring or pumpkins in fall can personalize the stand and keep it a stylish focal point all year round.