
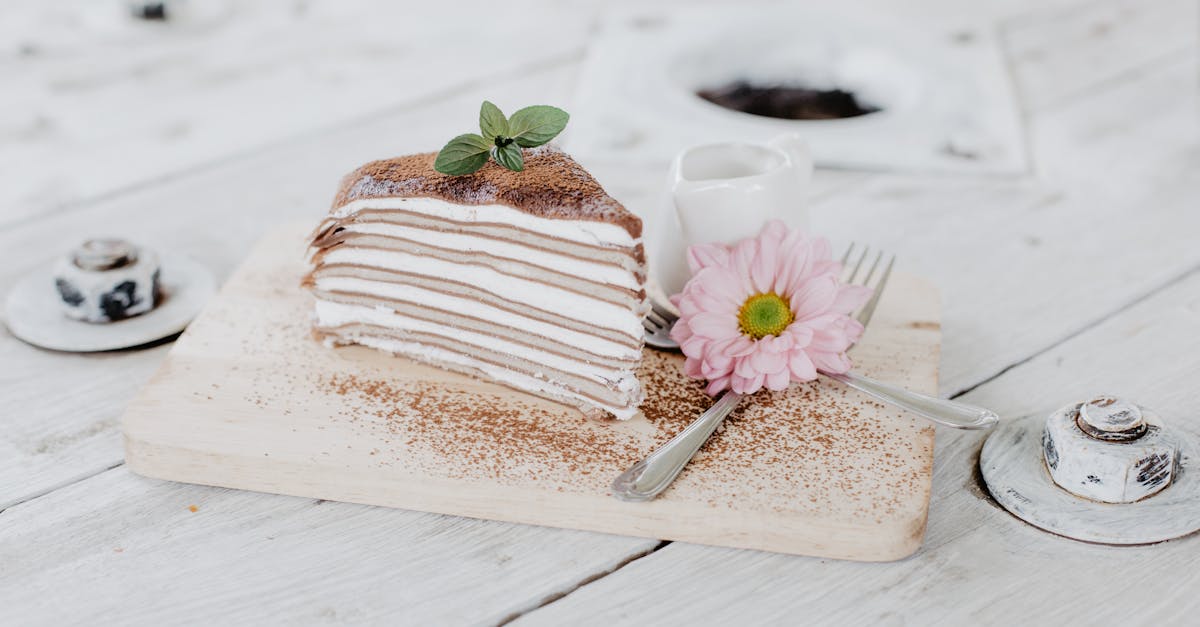
Craving something sweet but watching your sodium intake? We’ve got you covered with delicious low sodium dessert recipes that satisfy your sweet tooth without compromising your health. These treats prove that you don’t need excess salt to enjoy rich flavors and delightful textures.
Whether you’re managing blood pressure or simply aiming for a heart-healthy lifestyle, these desserts are perfect for anyone looking to reduce sodium without missing out on indulgence. From fruity delights to creamy favorites, our recipes use natural ingredients to keep sodium levels in check while delivering mouthwatering results.
Join us as we explore easy and tasty low sodium desserts that everyone can enjoy. These recipes are not only good for you but also simple to make, so you can treat yourself and your loved ones guilt-free anytime.
Ingredients for Low Sodium Dessert Recipes
To craft delicious low sodium dessert recipes, we focus on ingredients that naturally contain minimal or no sodium. Choosing the right components not only keeps our treats heart-healthy but also maximizes flavor without compromising on taste or texture.
Common Low Sodium Sweeteners
Sweetness is essential in desserts, and we rely on natural sweeteners that have little to no sodium content. These alternatives avoid the hidden sodium found in many processed sugars or syrups.
- Honey: Adds moisture and rich sweetness with zero sodium.
- Pure Maple Syrup: Offers a complex flavor profile and no sodium.
- Agave Nectar: Smooth and mild with no added salt.
- Stevia or Monk Fruit Extract: Zero-calorie, zero-sodium sweeteners ideal for low-sodium diets.
- Brown Rice Syrup: A neutral, low-sodium option for binding and sweetening.
| Sweetener | Sodium Content (mg per tbsp) | Notes |
|---|---|---|
| Honey | 0 | Adds floral sweetness |
| Maple Syrup | 0 | Complex caramel-like flavor |
| Agave Nectar | 0 | Mild, neutral taste |
| Stevia Extract | 0 | Highly concentrated sweetener |
| Brown Rice Syrup | 0 | Mild sweetness, good texture |
Fresh Fruits and Natural Flavorings
Using fresh fruits and natural extracts enhances desserts with vibrant flavors and nutrients while keeping sodium at bay. They are our go-to for adding color, sweetness, and aroma naturally.
- Berries (strawberries, blueberries, raspberries): Rich in antioxidants, sweet, and naturally sodium-free.
- Bananas: Great natural sweetener and creamy texture addition with zero sodium.
- Citrus Zest (lemon, orange, lime): Provides bright, tangy notes without salt.
- Vanilla Extract: Pure vanilla adds warmth and depth; opt for sodium-free varieties.
- Cinnamon and Nutmeg: Spice blends that deliver rich flavor without any sodium content.
- Unsweetened Cocoa Powder: Adds chocolate flavor with negligible sodium levels.
Sodium-Free Baking Alternatives
Traditional baking ingredients can sometimes carry hidden sodium. We select alternatives that maintain our desserts’ integrity and ensure low sodium safety.
- Baking Soda Alternatives: Use pure baking powder labeled sodium-free or cream of tartar with baking soda combinations.
- All-Purpose Flour and Whole Wheat Flour: Naturally sodium-free; choose unbleached versions for best results.
- Unsalted Butter or Plant-Based Oils: Use unsalted butter or neutral oils like coconut or avocado oil to control sodium.
- Non-Dairy Milks (almond, oat, coconut): Check labels for sodium-free or low sodium options.
- Eggs: A natural binding agent with zero sodium.
| Baking Ingredient | Sodium Content (mg per serving) | Notes |
|---|---|---|
| Baking Powder (sodium-free) | 0 | Substitute for baking soda |
| All-Purpose Flour | 0 | Basic baking staple |
| Unsalted Butter | 0.5 | Butter choice to reduce sodium |
| Plant-Based Oils | 0 | Coconut, avocado oils preferred |
| Non-Dairy Milks | 0-10 | Choose unsweetened, sodium-free |
| Eggs | 70 (per large egg) | Moderate, but natural ingredient |
By carefully selecting these Ingredients for Low Sodium Dessert Recipes, we ensure every bite is flavorful and safe for sodium-conscious lifestyles.
Tools and Equipment Needed
To create delectable low sodium dessert recipes that shine with natural flavors and care, having the right tools and equipment is essential. Our goal is to prepare each dessert with precision and ease while maintaining the integrity of the sodium-conscious ingredients. Here’s a comprehensive list of what we need:
Basic Mixing and Measuring Tools
- Measuring cups and spoons: Accurate measurements of low sodium sweeteners like honey and pure maple syrup are crucial to balance sweetness.
- Mixing bowls: Multiple sizes, preferably glass or stainless steel, to mix wet and dry ingredients separately.
- Whisk and spatula: Whisks help incorporate air into batters while spatulas allow gentle folding to preserve texture.
Baking and Cooking Equipment
- Non-stick baking pans: Use unsalted butter or plant-based oils to grease pans lightly, preventing adhesion without added sodium.
- Silicone baking mats or parchment paper: For easy release and cleanup, keeping the sodium level controlled by avoiding salted spray alternatives.
- Oven thermometer: Accuracy in baking temperature is key for optimal rise and texture without overbaking.
Specialty Tools for Flavor and Texture
- Microplane or zester: To grate citrus zest like lemon or orange, enhancing flavor without salt.
- Food processor or blender: Perfect for pureeing fresh fruits and nuts, or combining ingredients smoothly.
- Cooling rack: Essential for letting desserts cool evenly, preserving flavors and preventing sogginess.
Tools Summary Table
| Tool Type | Purpose | Importance in Low Sodium Desserts |
|---|---|---|
| Measuring cups & spoons | Accurate ingredient quantity | Ensures balanced sweetness without excess sodium |
| Mixing bowls | Separate and combine ingredients | Helps maintain texture and proper ingredient blending |
| Whisk & spatula | Incorporate air and gently fold | Preserves lightness and airiness in low sodium batters |
| Non-stick baking pans | Baking foundation without added salt | Prevents sticking without sodium-based sprays or salts |
| Silicone mats/parchment | Non-stick surface substitute | Supports clean removal and sodium-free cooking surfaces |
| Oven thermometer | Verify oven temperature | Keeps baking consistent for moisture and flavor |
| Microplane/zester | Grate zest and flavor extracts | Adds natural flavors without sodium |
| Food processor/blender | Puree and mix ingredients | Simplifies creation of smooth, consistent low sodium mixes |
| Cooling rack | Even cooling and moisture control | Prevents sogginess and flavor loss |
With these tools in hand, we equip ourselves to explore the full potential of low sodium dessert recipes by emphasizing freshness, flavor, and health. Next, let’s use these essentials to craft desserts that delight the senses while protecting our well-being.
Preparation Steps for Low Sodium Desserts
To achieve delightful low sodium desserts that are both flavorful and heart-healthy, precise preparation is essential. Below we guide you through key steps to ensure your treats maintain their sweetness and freshness without added sodium.
Measuring Ingredients Accurately
Accurate measuring ensures the low sodium status of our desserts and preserves the intended taste and texture. Here’s how we approach ingredient measurement for the best results:
- Use standard measuring cups and spoons for dry and liquid ingredients respectively.
- Level off dry ingredients with a straight edge to avoid excess amounts.
- For liquid sweeteners like honey or pure maple syrup, use a liquid measuring cup at eye level.
- Measure flours and baking powders gently by spooning into the cup to prevent compacting which can alter the balance.
- Always verify that baking powder is sodium-free to prevent unwanted salt intake.
| Ingredient Type | Recommended Measuring Tool | Measurement Tip |
|---|---|---|
| Dry (flour, sugar) | Standard dry measuring cups | Spoon into cup and level with a knife |
| Liquids (syrups) | Liquid measuring cup | View measurement at eye level |
| Baking agents | Measuring spoons | Use a leveled spoon, ensure sodium-free |
Prepping Fruits and Flavorings
Fresh fruits and natural flavorings are the backbone of our low sodium dessert recipes. Preparing these ingredients properly maximizes their flavor impact while keeping sodium levels at a minimum:
- Wash fruits thoroughly to remove any residues.
- Dice or slice fruits uniformly to ensure even cooking and consistent texture.
- Use a microplane zester to extract vibrant citrus zest (lemon, orange) without the bitter pith.
- When incorporating vanilla or almond extracts, ensure brands are free from added sodium.
- For dried fruits, soak briefly in warm water to rehydrate, enhancing softness and natural sweetness.
By focusing on precise measuring and thoughtful prepping of ingredients, we bring out the full potential of our low sodium desserts, ensuring they remain indulgent yet healthy.
Directions for Making Low Sodium Desserts
Mastering the art of low sodium dessert preparation requires precise steps to ensure both flavor and health benefits shine through. Let’s walk through each stage from mixing to cooling, emphasizing techniques that keep sodium levels minimal without sacrificing taste.
Mixing and Combining Ingredients
- Measure ingredients accurately. Use digital scales for dry items and liquid measuring cups for wet ingredients to maintain the correct proportions. This precision prevents accidental sodium increases and ensures consistent results.
- Combine dry ingredients separately first. Sifting together unbleached flour, baking soda, sodium-free baking powder, and natural sweeteners distributes leavening agents evenly, promoting uniform texture.
- Incorporate wet ingredients gradually. Blend unsweetened applesauce, unsalted butter or plant-based oils, and non-dairy milk slowly into the dry mixture. Stir gently to avoid overmixing, which can cause toughness.
- Add natural flavor enhancers last. Fold in fresh fruits like mashed bananas or blueberries, citrus zest, and pure vanilla extract carefully to preserve their vibrant aroma and freshness.
- Avoid salt replacements or sodium-containing additives. Focus entirely on naturally low sodium components for purity.
“Proper mixing is the foundation of a light, fluffy, and flavorful low sodium dessert.”
Baking or Cooking Instructions
- Preheat the oven to the specified temperature before assembling the batter to ensure even cooking.
- Use the recommended bakeware. Non-stick pans or silicone molds work best to prevent extra oil use.
- Place the dish on the center rack for balanced heat distribution.
- Bake within the suggested time frame. Check doneness by inserting a toothpick in the middle; it should come out clean or with a few moist crumbs.
- Avoid overbaking, which can dry out desserts and diminish sweetness perception without sodium’s balancing effect.
- For stovetop desserts, maintain low to medium heat. Stir consistently to prevent burning while retaining moisture.
| Step | Detail | Purpose |
|---|---|---|
| Preheat oven | Set to specified temperature | Even consistent cooking |
| Choose proper bakeware | Non-stick or silicone molds | Reduce oil, easy release |
| Positioning | Center rack | Balanced heat distribution |
| Monitor baking time | Follow recipe, check with toothpick | Prevent over/under baking |
| Heat control (stovetop) | Low to medium temperature | Avoid burning, maintain moisture |
Cooling and Setting Procedures
- Allow desserts to cool gradually at room temperature. Rapid temperature changes can alter texture and moisture balance.
- Transfer baked desserts to wire racks after initial cooling. This promotes air circulation and prevents sogginess.
- Refrigerate when applicable. Custards, puddings, and gelatin-based desserts benefit from chilling to set properly without adding sodium.
- Cover desserts loosely with parchment paper or clean cloth to protect from drying while cooling.
- Serve at recommended temperatures to enhance natural flavors and maintain a pleasing mouthfeel.
“Cooling with care lets the full spectrum of low sodium dessert flavors and textures emerge.”
By following each step attentively, we ensure our low sodium desserts remain both tantalizing and healthful, perfect for savoring guilt-free sweetness every time.
Tips for Enhancing Flavor Without Sodium
Enhancing flavor in low sodium dessert recipes requires creativity and the right ingredients. We can boost taste without adding sodium by focusing on natural and aromatic elements that excite our taste buds while keeping health priorities intact.
Using Herbs and Spices
Herbs and spices are powerful tools in intensifying dessert flavor without sodium. They add depth, warmth, and complexity that enrich our creations naturally.
- Cinnamon adds a sweet, woody aroma perfect for cakes, muffins, and fruit-based desserts.
- Nutmeg provides a subtle nutty warmth that complements custards, puddings, and spice cakes.
- Ginger brings a zesty, slightly spicy kick ideal for cookies, pies, and tropical desserts.
- Cardamom introduces a floral and citrusy note that’s wonderful in teas, custards, and rice puddings.
- Mint and basil freshen up fruit salads, sorbets, and chocolate treats with a bright herbal twist.
- Vanilla extract or vanilla bean powder enhances sweetness perception and rounds out flavors without sodium.
We recommend lightly toasting whole spices before grinding to unlock their maximum aromatic potential. Fresh herbs can be finely chopped or infused into syrups and creams for layered flavor impact.
Sweetness Balancing Techniques
Balancing sweetness naturally improves flavor depth and allows us to reduce reliance on salt or sodium-based enhancers. Here are key techniques:
| Technique | Description | Application |
|---|---|---|
| Acidic Contrast | Adding lemon juice or a splash of apple cider vinegar brightens flavors and balances sweetness | Drizzle over fruit compotes, glazes |
| Natural Sweeteners | Use honey, maple syrup, agave nectar, or brown rice syrup to create nuanced sweetness profiles | Sweetening batters, syrups, frostings |
| Bitterness Modulation | Incorporate unsweetened cocoa powder or dark chocolate to add complexity and counteract excess sweetness | Cakes, brownies, mousse |
| Roasting Ingredients | Roasting fruits or nuts caramelizes natural sugars, intensifying flavor without added sugar | Toppings, mix-ins, fillings |
| Salt-Free Extracts & Oils | Use almond, coconut, or orange extracts to enhance sweetness perception | Flavor enhancers in batters and creams |
Quotes to Inspire Flavor Creativity:
“Flavors are like music notes; when balanced right they create a beautiful harmony in every bite.”
“Salt is just one player in the orchestra of flavor. Herbs, spices, and acids conduct the symphony.”
By experimenting within these guidance areas we can masterfully uplift low sodium dessert recipes with full-bodied flavor without compromising health goals.
Make-Ahead Instructions and Storage Tips
Proper make-ahead and storage strategies ensure our low sodium desserts maintain their fresh taste and perfect texture. Let’s explore the best ways to freeze and refrigerate these treats so we can enjoy them anytime.
Freezing Low Sodium Desserts
Freezing is ideal for extending the shelf life of many low sodium desserts. It preserves flavors and texture without adding any sodium. Here are key tips for successful freezing:
- Cool completely before freezing to prevent ice crystals that can damage texture.
- Use airtight containers or freezer-safe bags to avoid freezer burn.
- For individual portions, wrap desserts tightly in plastic wrap before placing in containers.
- Label with dessert name and date to keep track; use within 3 months for best quality.
- Thaw desserts slowly overnight in the refrigerator to maintain consistency.
| Dessert Type | Freezing Tips | Storage Duration |
|---|---|---|
| Cakes & Brownies | Wrap in foil and seal in freezer bag | Up to 3 months |
| Fruit-based desserts | Use airtight containers, freeze flat | Up to 2 months |
| Custards & Puddings | Freeze in portion-sized containers | 1-2 months |
| Cookies | Freeze in a single layer, then stack | Up to 3 months |
“Freezing low sodium desserts not only saves time but locks in natural flavors without compromising health goals.“
Refrigeration Guidelines
Refrigeration is essential for some low sodium dessert recipes that rely on fresh ingredients or need to be set properly. Follow these guidelines:
- Store desserts in covered containers to prevent absorption of odors and moisture loss.
- Consume refrigerated desserts within 3-4 days to ensure freshness and safety.
- For creamy or custard-based desserts, refrigerate immediately after cooling.
- Let refrigerated desserts sit at room temperature for 10-15 minutes before serving to enhance flavors and texture.
| Dessert Type | Refrigeration Storage Tips | Storage Duration |
|---|---|---|
| Pies & Tarts | Cover with plastic wrap or lids | 3-4 days |
| Creamy desserts | Store in airtight containers | 2-3 days |
| Fresh fruit desserts | Use vented containers | 2-3 days |
| Cheesecakes | Wrap edges with foil, refrigerate | Up to 5 days |
Serving Suggestions for Low Sodium Desserts
To fully enjoy our low sodium dessert recipes, thoughtful serving suggestions can elevate the experience while keeping sodium intake minimal. Here are several ideas that balance presentation, flavor, and health-conscious choices.
Pair with Fresh or Stewed Fruits
Adding vibrant fresh fruits or lightly stewed fruit compotes creates natural sweetness and moisture without sodium. Consider:
- Berries such as strawberries or blueberries for a tart contrast
- Stone fruits like peaches or plums gently warmed with a splash of lemon juice and cinnamon
- Citrus segments for bright acidity
These accompaniments brighten flavors and add texture variety, enhancing the dessert without sodium.
Incorporate Dairy-Free or Unsweetened Yogurt
Serve desserts alongside unsweetened yogurt or plant-based yogurt alternatives such as coconut or almond yogurt. They provide creamy richness, balancing sweetness while aligning with heart-healthy and low sodium goals.
Use Sodium-Free Garnishes
Elevate visual appeal and flavor with these sodium-free garnishes:
- Toasted unsalted nuts or seeds for crunch
- Fresh mint or edible flowers for aroma and color
- A dusting of cinnamon or cocoa powder
Serve on Light, Neutral Bases
For items like puddings, mousses, or fruit-based desserts, presenting them on light bases such as rice cakes or unsalted crackers can add a sophisticated texture contrast without increasing sodium.
Temperature and Presentation Tips
- Serve chilled desserts straight from the refrigerator for a refreshing finish.
- Warm fruit toppings before serving for a cozy feel alongside cold desserts.
- Use colorful plates or glassware to enhance the dessert’s vibrant natural hues.
| Serving Suggestion | Benefits | Sodium Impact |
|---|---|---|
| Fresh or stewed fruits | Adds natural sweetness & moisture | Minimal/None |
| Unsweetened yogurt | Creamy texture & tang | Minimal |
| Unsalted nuts or seeds | Crunch & richness | None |
| Cocoa powder or cinnamon | Aroma and flavor depth | None |
| Light neutral bases | Texture contrast | None |
Inspiring Quote
“Good food is all the sweeter when shared with others…and inspired by mindful choices that nourish body and soul.”
By embracing these serving suggestions for low sodium desserts, we craft delightful, healthful experiences that satisfy both palate and wellness goals.
Conclusion
Exploring low sodium dessert recipes opens up a world of flavorful and health-conscious treats that anyone can enjoy. By focusing on natural ingredients and thoughtful preparation, we prove that managing sodium intake doesn’t mean sacrificing taste or indulgence.
With the right techniques and creative flavor boosters, these desserts become a satisfying option for our hearts and palates alike. Let’s continue to embrace these recipes and share them with loved ones, making every sweet moment both delicious and mindful.
Frequently Asked Questions
What are low sodium dessert recipes?
Low sodium dessert recipes are sweet treats made with ingredients naturally low in sodium. They avoid added salt or high-sodium components to help maintain healthy blood pressure and support heart health while still tasting great.
Which sweeteners are best for low sodium desserts?
Common low sodium sweeteners include honey, pure maple syrup, agave nectar, stevia, and brown rice syrup. These natural options enhance sweetness without adding sodium.
Can I use regular baking powder in low sodium desserts?
Regular baking powder often contains sodium. It’s best to use sodium-free baking powder alternatives to keep your desserts truly low sodium.
What tools do I need for making low sodium desserts?
Essential tools include accurate measuring cups and spoons, mixing bowls, baking pans, a microplane for zesting, and a food processor for blending ingredients evenly.
How can I enhance flavor without adding sodium?
Use natural herbs and spices like cinnamon, nutmeg, ginger, and cardamom. Adding acidic ingredients, roasting fruits or nuts, and balancing sweetness also boost flavor without sodium.
How should I store low sodium desserts?
Store low sodium desserts in airtight containers. Refrigerate those with fresh ingredients and freeze desserts after cooling completely. Label containers and consume refrigerated desserts within a few days.
Are low sodium desserts suitable for people with high blood pressure?
Yes, they are designed to be heart-healthy by limiting sodium intake, making them a great option for those managing high blood pressure or following a low sodium diet.
Can I prepare low sodium desserts ahead of time?
Absolutely. Many low sodium desserts can be made ahead, frozen, or refrigerated to preserve freshness and flavor for later enjoyment.
What are some serving suggestions for low sodium desserts?
Pair desserts with fresh or stewed fruit, unsweetened yogurt, or sodium-free garnishes such as toasted nuts and fresh herbs. Use light-colored serving dishes for an appealing presentation.