
Dill pickles have long been a favorite snack and condiment but traditional recipes often pack in more salt than we’d like. That’s why we’re excited to share a low salt dill pickle recipe that lets you enjoy all the tangy crunch without the excess sodium.
This simple recipe uses fresh cucumbers and aromatic dill with just the right balance of vinegar and spices. It’s perfect for anyone watching their salt intake or just looking for a lighter, healthier pickle option. Plus, making pickles at home means you control every ingredient and flavor.
Whether you’re a pickle lover or new to homemade pickling, this low salt dill pickle recipe will quickly become a staple in our kitchen. Let’s dive in and create crisp, flavorful pickles that satisfy our cravings while keeping things heart-healthy.
Ingredients
To craft the perfect Low Salt Dill Pickle, we rely on fresh, high-quality ingredients that highlight flavor while keeping sodium levels low. Below are the essential components we use to achieve a crisp, tangy, and aromatic pickle.
Fresh Cucumbers
We start with vibrant and firm cucumbers to ensure crunchiness in every bite. Choose small to medium-sized pickling cucumbers with no soft spots or blemishes. These cucumbers hold up well during the pickling process and absorb flavors effectively.
- 2 pounds of fresh pickling cucumbers, washed and trimmed
- Optional: slice into spears or rounds depending on your preference
Dill and Spices
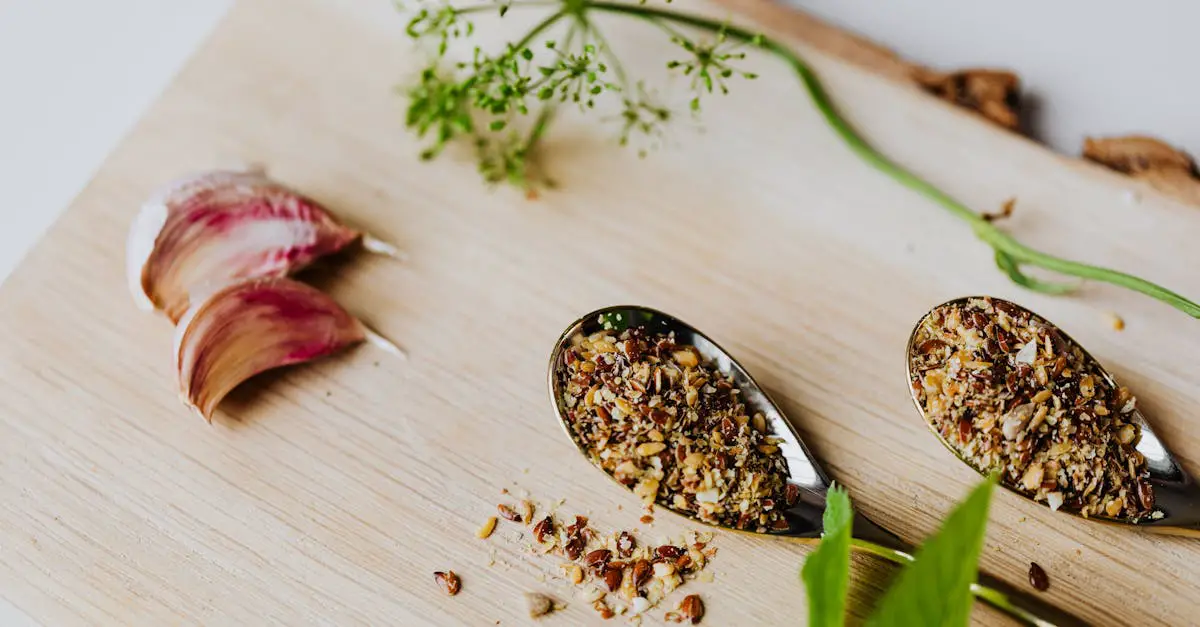
A key to authentic dill pickles is fragrant dill paired with carefully balanced spices. We use fresh dill heads or sprigs with seeds for the best aroma and taste, complemented by classic pickle spices that bring depth without overwhelming saltiness.
- 4-5 sprigs of fresh dill or 2 tablespoons dried dill seeds
- 1 tablespoon whole black peppercorns
- 1 tablespoon mustard seeds
- 2 cloves garlic peeled and smashed
- 1 teaspoon coriander seeds (optional)
Brine Components
Our brine keeps salt content intentionally low while maintaining safety and flavor. The right balance of vinegar and water ensures crispness and tang without excessive sodium.
| Ingredient | Quantity | Role in Recipe |
|---|---|---|
| Distilled white vinegar | 2 cups | Provides acidity and tang |
| Water | 2 cups | Dilutes vinegar for balanced brine |
| Kosher salt | 1 tablespoon | Low salt choice for seasoning |
| Sugar | 1 teaspoon | Balances acidity gently |
Optional Flavor Additions
To customize your pickles with layers of flavor, consider these additions. They add unique aroma and enhance the pickle’s complexity while keeping it low in salt.
- 1 dried chili pepper for subtle heat
- 1 small slice of fresh ginger for zing
- 1 bay leaf for herbal notes
- A few slices of onion for sweetness
Each ingredient here plays a critical role in creating our low salt dill pickles — crisp, flavorful, and heart-healthy. We carefully balance these elements to deliver a delicious pickle without compromising on taste or nutrition.
Equipment Needed
To make our Low Salt Dill Pickle Recipe perfectly crisp and flavorful, having the right equipment is essential. Here is what we recommend for a smooth and efficient pickling process.
- Quart-sized Mason jars with airtight lids
These jars provide the ideal size for homemade pickles and ensure they stay fresh during the fermentation and storage period.
- Large non-reactive pot (stainless steel or enamel)
We use this for boiling the brine mixture without any metallic taste transferring to our pickles.
- Measuring spoons and cups
Precise measurement is key to balancing flavors in a low salt recipe, so we rely on accurate measuring tools.
- Mixing bowl
Useful for combining spices and soaking cucumbers before packing them into the jars.
- Tongs or jar lifter
These help us safely move hot jars in and out of boiling water, avoiding burns.
- Vegetable scrub brush
We use this to thoroughly clean cucumbers before pickling for a crisp texture.
- Weight or small clean glass
To keep cucumbers submerged in the brine so they pickle evenly without exposure to air.
- Funnel (optional, but recommended)
A wide-mouth funnel helps pour brine smoothly into jars without spillage.
| Equipment | Purpose | Notes |
|---|---|---|
| Mason jars (quart) | Storage and fermentation | Airtight lids prevent contamination |
| Non-reactive pot | Boiling brine | Stainless steel or enamel preferred |
| Measuring spoons/cups | Accurate measurement | Essential for salt control |
| Mixing bowl | Preparing cucumbers and spices | |
| Tongs or jar lifter | Handling hot jars | Ensures safety |
| Vegetable scrub brush | Cleaning cucumbers | Promotes crisp texture |
| Weight or small glass | Submerging cucumbers in brine | Prevents mold growth |
| Funnel (optional) | Pouring brine into jars | Reduces mess and spills |
Having this equipment ready before starting helps us maintain efficiency and reinforces our goal of making a healthy, low salt dill pickle with the right crunch and flavor every time.
Prep Work
To ensure our Low Salt Dill Pickles turn out crisp and flavorful, the prep work is crucial. Let’s get everything ready step-by-step for the best results.
Washing and Cutting Cucumbers
First, we thoroughly wash the cucumbers under cold running water using a vegetable scrub brush to remove any dirt and debris. This step guarantees clean and crunchy pickles. After washing:
- Trim off the blossom ends, as they can cause softening.
- Cut the cucumbers as desired: into spears, chips, or whole small cucumbers for fermenting.
Pro Tip: Use firm, fresh pickling cucumbers to achieve the signature crunch in our Low Salt Dill Pickle recipe.
Preparing the Jars
Next, we prepare our quart-sized Mason jars to ensure a safe and airtight sealing:
- Wash jars, lids, and bands in hot soapy water.
- Rinse well and sterilize by boiling jars and lids in hot water for 10 minutes.
- Remove and let air dry on a clean towel.
- Keep jars warm until ready to fill to avoid cracking.
“Proper jar sterilization is essential for safety and extends shelf life in canning.”
Measuring Spices and Brine Ingredients
Precise measurements keep our brine flavorful yet low in salt. Here’s a quick reference:
| Ingredient | Measurement | Notes |
|---|---|---|
| Distilled white vinegar | 3 cups | 5% acidity recommended |
| Water | 3 cups | Adjust for diluting brine |
| Kosher salt | 1 tablespoon | Low compared to traditional recipes |
| Sugar | 1 teaspoon | Balances acidity |
| Black peppercorns | 1 teaspoon | Whole, for spice |
| Mustard seeds | 1 teaspoon | Adds subtle heat |
| Garlic cloves | 2-3, peeled and crushed | For aroma and flavor |
| Fresh dill sprigs | 3-4 per jar | Key for dill flavor |
We measure all brine ingredients with precise tools for consistency. Combine vinegar, water, salt, and sugar in a large pot, then heat to dissolve salt and sugar completely before packing the jars.
Reminder: Keeping salt content low is vital for our Low Salt Dill Pickle recipe’s heart-healthy promise without sacrificing taste.
By following these prep steps carefully, we set the foundation for crisp, delicious Low Salt Dill Pickles every time.
Making the Brine
Creating the perfect low salt dill pickle brine is essential for preserving flavor while maintaining a heart-healthy sodium level. Let’s carefully mix and prepare a balanced brine to ensure our pickles stay crisp and delicious.
Mixing the Low Salt Solution
We begin by combining the key ingredients for our low salt dill pickle brine. Precise measurements maintain the delicate balance of flavor and sodium content. Here is the ideal ratio for one quart of pickles:
| Ingredient | Quantity | Notes |
|---|---|---|
| Distilled white vinegar | 2 cups | Provides acidity and tang |
| Water | 2 cups | Dilutes vinegar for balance |
| Kosher salt | 1 tablespoon | Use less to keep sodium low |
| Sugar | 1 teaspoon | Enhances flavor without excess sweetness |
| Garlic cloves | 2, crushed | Adds aroma and depth |
| Black peppercorns | 1 teaspoon | Subtle spice note |
| Mustard seeds | 1 teaspoon | Mild pungency |
We recommend using kosher salt because it dissolves easily and has no added iodine or anti-caking agents that can cloud the brine. Crushing the garlic releases essential oils that enhance the briny aroma.
“The right balance in our brine is what makes this recipe stand out — flavorful yet heart-healthy.”
Heating the Brine (If Applicable)
Heating the brine is a crucial step to fully dissolve the salt and sugar and extract flavors from our spices. It also helps to slightly sterilize the brine before it touches the cucumbers.
- Pour the vinegar and water into a large non-reactive pot.
- Add kosher salt, sugar, garlic, black peppercorns, and mustard seeds.
- Heat the mixture over medium heat until the salt and sugar completely dissolve.
- Bring just to a simmer, do not boil, to preserve the brightness of the vinegar.
- Remove from heat and let the brine cool slightly before pouring over cucumbers in jars.
This step ensures every jar receives an evenly seasoned, clear brine that won’t cloud or weaken our pickles.
Tip: Use a funnel to pour the hot brine carefully into jars to avoid spills, keeping the workspace tidy and safe.
By mixing and heating our low salt dill pickle brine with precision, we guarantee that our pickles will be crisp, flavorful, and perfect for anyone seeking a healthier option.
Packing the Jars
Packing the jars correctly is crucial to ensure our Low Salt Dill Pickles come out crunchy, flavorful, and perfectly preserved. Let’s focus on how to layer cucumbers and dill alongside adding the right spices and extra flavors for that signature taste.
Layering Cucumbers and Dill
Start by arranging the cucumbers tightly but without crushing them. We want them snug enough to prevent floating but still allow the brine to circulate.
- Place a few sprigs of fresh dill at the bottom of each sterilized quart jar. This forms the flavor base.
- Stack cucumbers vertically or horizontally depending on their size and jar shape.
- For each jar, include 2–3 additional dill sprigs evenly spaced between layers of cucumbers to ensure uniform dill flavor in every bite.
- Leave about ½ inch headspace at the top to allow the brine to cover the cucumbers completely.
“The key is to pack the cucumbers tightly but gently — this keeps them crisp and lets the brine work its magic evenly.”
Adding Spices and Additional Flavors
Adding the right spices elevates the flavor without increasing the salt content. Here’s how to distribute them optimally:
| Spice / Flavor | Quantity per Quart Jar | Purpose |
|---|---|---|
| Black peppercorns | 6–8 whole peppercorns | Adds mild heat and complexity |
| Mustard seeds | 1 tsp | Adds subtle tang and brightness |
| Garlic cloves | 1–2 peeled cloves, sliced or whole | Provides savory aroma |
| Optional: Dried chili | ½ small dried chili (optional for spice) | Adds a touch of heat |
| Optional: Bay leaf | 1 leaf per jar | Adds an earthy depth |
| Optional: Fresh ginger | 1-inch thin slice | Adds warmth and spice nuances |
| Optional: Onion slices | 3-4 thin slices | Adds sweetness and aroma |
- Evenly distribute these spices throughout the jar.
- Insert garlic and optional add-ins nestled between cucumbers for balanced flavor infusion.
Pro Tip: Use a small funnel to add the brine after spices and cucumbers are packed. This prevents spills and ensures all ingredients stay submerged.
With careful layering of cucumbers, dill, and the thoughtfully measured spices, our Low Salt Dill Pickles will deliver crispness and a flavor profile that exceeds expectations all while keeping sodium in check.
Pickling Process
The pickling process is where all our careful preparation and mixing come together to create the perfect Low Salt Dill Pickles. Let’s focus on the essential steps to ensure our pickles achieve optimal flavor and crunch.
Pouring the Brine Over Cucumbers
We begin by carefully pouring the warm, flavorful low salt brine over the packed cucumbers and dill in each jar. It is crucial to:
- Fill jars fully ensuring brine covers the cucumbers completely—this prevents spoilage and promotes even pickling.
- Leave about ½ inch of headspace at the top of each jar for expansion during processing.
- Use a funnel to avoid spills and to keep the jar rims clean for proper sealing.
- Press down gently on cucumbers with a clean utensil to remove air bubbles and allow the brine to circulate fully.
The table below summarizes the key points for brine pouring:
| Step | Details |
|---|---|
| Brine Temperature | Warm, not boiling (approx. 120°F/49°C) |
| Headspace to Leave | ½ inch (1.25 cm) |
| Coverage | Brine must fully cover all cucumbers |
| Air Bubble Removal | Press cucumbers gently to release bubbles |
| Tools | Use funnel and tongs for safe handling |
“Proper immersion in brine is the foundation of crispy and flavorful pickles.”
Sealing the Jars
Sealing our jars correctly is the final critical step to preserve freshness and ensure safe fermentation. We:
- Wipe jar rims clean with a damp paper towel to remove any brine residue.
- Place the sterilized airtight lids and screw bands on each jar finger-tight.
- Avoid over-tightening to allow air to escape during processing but secure enough to seal fully.
- Process jars in a boiling water bath or store refrigerated depending on your preferred method.
- Allow jars to cool undisturbed for 12 to 24 hours to complete vacuum sealing.
Here is a quick checklist for sealing:
| Action | Description |
|---|---|
| Clean Jar Rims | Wipe clean before sealing |
| Lid and Band Placement | Apply lids and screw bands finger-tight |
| Over-tightening | Avoid, to allow air escape |
| Processing Method | Boiling water bath or refrigeration |
| Cooling Time | 12–24 hours undisturbed |
“Sealing jars properly ensures extended shelf life and keeps our Low Salt Dill Pickles at their best.”
By following these precise steps in the pickling process, we guarantee pickles that are delightfully crisp, perfectly seasoned, and heart-healthy with low sodium content.
Storage and Fermentation
Proper storage and fermentation are key to preserving our flavorful, crisp Low Salt Dill Pickles. Let’s explore the best ways to keep them fresh and develop their signature tang.
Refrigerator Method
For the safest and simplest storage, we recommend the Refrigerator Method. After sealing the jars, place them in the fridge immediately. This keeps the pickles cold and slows any unwanted microbial activity, ensuring a consistent crunch and flavor.
- Store jars in the back of the refrigerator where temperature is most stable.
- Keep pickles submerged under brine to prevent spoilage.
- Use airtight lids to maintain freshness over time.
Refrigerated pickles typically last up to 2 months with excellent flavor and texture.
Room Temperature Fermentation (If Applicable)
If you prefer a more traditional tang, the Room Temperature Fermentation allows natural bacteria to develop complex flavors faster. Use this method only if you are confident in your kitchen hygiene and monitoring.
Follow these steps carefully:
| Step | Details |
|---|---|
| Temperature | Store jars at 65°F to 75°F in a dark, dry spot |
| Jar Preparation | Use clean jars with loose lids or fermentation airlocks to release gas |
| Brine/Submersion | Keep cucumbers fully submerged using a weight or glass to prevent mold |
| Monitoring | Check daily for bubbles or white film (kahm yeast) that is harmless but should be skimmed off |
Fermentation can take 3 to 7 days, depending on room conditions and flavor preference.
Timing for Optimal Flavor
Timing plays a crucial role in achieving our perfect Low Salt Dill Pickle taste profile.
| Method | Time Frame | Flavor Notes |
|---|---|---|
| Refrigerator Storage | 24 to 48 hours before eating | Mildly tangy, crisp, and fresh |
| Room Temperature Fermentation | 3 to 7 days | Stronger tanginess with deeper flavor |
| Longer Fermentation | 2 weeks or more | More sour, softer texture |
“We find that allowing at least 48 hours in the refrigerator brings out the balanced dill and subtle garlicky notes without overpowering salt.”
By controlling storage conditions and fermentation time, we ensure our Low Salt Dill Pickles deliver the perfect crunch and taste every time.
Serving Suggestions
Our Low Salt Dill Pickle offers versatile ways to enjoy its crisp texture and balanced flavor. Here are some of our favorite serving ideas to maximize the pickles’ appeal:
1. Classic Snack or Side
- Serve the pickles chilled straight from the jar for a refreshing, low-sodium snack.
- Cut into spears or slices and pair with cheese or charcuterie boards.
- Use as a crunchy side alongside sandwiches and burgers for added zest.
2. Salad Enhancer
- Chop the pickles finely to toss into potato, tuna, or egg salads.
- Add to green salads for a bright herbal note and crunchy contrast.
- Sprinkle with a little fresh dill or pepper to enhance flavor without extra salt.
3. Sandwich and Wrap Upgrade
- Layer slices of Low Salt Dill Pickles in deli sandwiches or wraps.
- Their tangy crunch balances creamy spreads like mayonnaise or mustard.
- Ideal for turkey, chicken, or veggie sandwiches seeking a fresh kick.
4. Flavorful Relish Base
- Dice the pickles to create a quick homemade relish by mixing with chopped onions and a touch of honey.
- Use as a topping for hot dogs, grilled sausages, or roasted meats.
- Keeps sodium low while adding complexity and brightness.
5. Cocktail Companion
- Serve whole or speared pickles alongside savory cocktails like Bloody Marys.
- Their vinegar bite and fresh dill aroma complement tomato juice and spices perfectly.
Quick Reference Table of Serving Ideas
| Serving Style | Preparation Tips | Ideal Pairings |
|---|---|---|
| Snack or Side | Serve chilled, whole or sliced | Cheese, charcuterie, sandwiches |
| Salad Enhancer | Chop finely for salads | Potato, tuna, egg, green salads |
| Sandwich Upgrade | Slice thickly or thinly for layering | Turkey, chicken, veggie wraps |
| Relish Base | Dice small, mix with onions/honey | Hot dogs, sausages, roasted meat |
| Cocktail Companion | Serve whole or skewered | Bloody Mary, savory cocktails |
“Our low salt dill pickles add flavor without the sodium overload, making them a perfect addition to both everyday meals and special occasions.”
Feel free to explore these low salt dill pickle serving options and discover how they can transform your dishes with heart-healthy zest and crunch.
Tips for Perfect Low Salt Dill Pickles
Crafting the perfect Low Salt Dill Pickles requires attention to detail at every step. Here are essential tips that ensure crisp, flavorful, and heart-healthy pickles every time.
1. Choose the Right Cucumbers
Start with fresh, firm pickling cucumbers. Look for cucumbers that are bright green with no soft spots or yellowing. Smaller cucumbers tend to be crisper and better suited for pickling.
2. Prepare Cucumbers Properly
- Wash cucumbers thoroughly with a vegetable scrub brush under cold running water to remove dirt and wax.
- Trim the blossom ends because they contain enzymes that can soften pickles.
- Choose your preferred cut: spears, slices, or whole for uniform pickling.
3. Use Accurate Brine Measurements
Balance is key when making our low salt brine. Too little salt compromises flavor and preservation; too much defeats the low sodium goal.
| Brine Ingredient | Quantity |
|---|---|
| Distilled White Vinegar | 4 cups |
| Water | 4 cups |
| Kosher Salt | 1 tablespoon |
| Sugar | 1 teaspoon |
| Garlic (peeled cloves) | 4 cloves |
| Black Peppercorns | 1 tablespoon |
| Mustard Seeds | 1 tablespoon |
4. Heat Brine to Extract Flavor
Bring the brine mixture to a simmer until the salt and sugar dissolve completely. Heating helps infuse the spices and creates a clear, flavorful brine that penetrates the cucumbers evenly.
5. Pack Jars Tightly but Gently
- Layer cucumbers and fresh dill compactly to prevent floating.
- Distribute spices evenly throughout the jar for balanced flavor.
- Use a small glass or weight to keep cucumbers submerged under brine—this prevents spoilage and maintains crunch.
6. Eliminate Air Bubbles
After pouring hot brine over the cucumbers, run a clean utensil (like a chopstick) around the inside of jars to release trapped air. Removing air pockets promotes even pickling and preserves flavor.
7. Seal Correctly for Storage Method
- Wipe jar rims clean of brine or residues to ensure a proper seal.
- Apply lids finger-tight only to avoid over-tightening.
- Choose refrigeration for crisp, fresh pickles or process jars in a boiling water bath for longer shelf life.
8. Control Fermentation Time for Desired Tang
| Fermentation Method | Duration | Flavor Profile |
|---|---|---|
| Refrigerator (cold) Storage | 24–48 hours | Mildly tangy & crisp |
| Room Temperature Fermentation | 3–7 days | Stronger tang & aroma |
9. Customize Flavor without Extra Salt
Add optional seasonings such as dried chili, fresh ginger, bay leaves or thinly sliced onion. These ingredients enhance complexity while keeping sodium levels low.
10. Keep Pickles Submerged
Always ensure cucumbers remain fully submerged under the brine during storage. Use weights or clean glass pieces to prevent spoilage and retain optimal texture.
“Consistent attention to measuring, packing, and fermenting makes all the difference in producing low salt dill pickles that are perfectly balanced in crunch and flavor.”
By following these tips with care and precision, we guarantee Low Salt Dill Pickles that delight with every bite—full of vibrant dill aroma, crisp texture, and heart-healthy benefits.
Conclusion
Making low salt dill pickles at home lets us enjoy that classic tangy crunch without worrying about excess sodium. With fresh ingredients and careful preparation, we can create pickles that are both flavorful and heart-healthy.
By mastering the process and customizing flavors, these pickles become a versatile addition to any meal or snack. Let’s embrace this simple recipe to bring bold taste and better nutrition to our tables every time.
Frequently Asked Questions
What makes this Low Salt Dill Pickle recipe healthier than traditional ones?
This recipe uses less salt and substitutes ingredients like kosher salt and spices to maintain flavor without excess sodium, making it a heart-healthy choice.
What type of cucumbers should I use for these pickles?
Use fresh, firm pickling cucumbers, as they provide the ideal crunch and texture for low salt dill pickles.
Can I customize the flavor of the pickles?
Yes, you can add optional ingredients like dried chili pepper, fresh ginger, bay leaf, or onion to tailor the flavor without increasing salt content.
What equipment do I need to make these pickles at home?
Essential tools include quart-sized Mason jars with airtight lids, a non-reactive pot, measuring cups and spoons, a mixing bowl, a vegetable scrub brush, tongs or jar lifter, and optionally, a funnel and weight.
How do I keep my pickles crisp during the pickling process?
Proper prep like trimming cucumber ends, sterilizing jars, tightly packing cucumbers, and using the correct brine help ensure your pickles stay crunchy.
What is the best way to store Low Salt Dill Pickles?
Store pickles in the refrigerator, keeping them submerged in brine and sealed in airtight jars. You can also ferment them at room temperature for a tangier taste.
How long should I ferment or refrigerate these pickles for ideal flavor?
Refrigerate for 24 to 48 hours for mild tang, or ferment at room temperature for 3 to 7 days for a stronger flavor.
Can I use regular table salt instead of kosher salt?
Kosher salt is preferred for its purity and better dissolving properties, but if needed, you can substitute table salt while adjusting the quantity to reduce additives.
Is it safe to process the jars in a boiling water bath?
Yes, boiling water bath processing can be used for sealing, but refrigeration is recommended for best texture and flavor with low salt pickles.
How do these pickles enhance meals without adding too much sodium?
They add crunchy, flavorful zest to snacks, salads, sandwiches, and cocktails by using spices and vinegar instead of excess salt.