
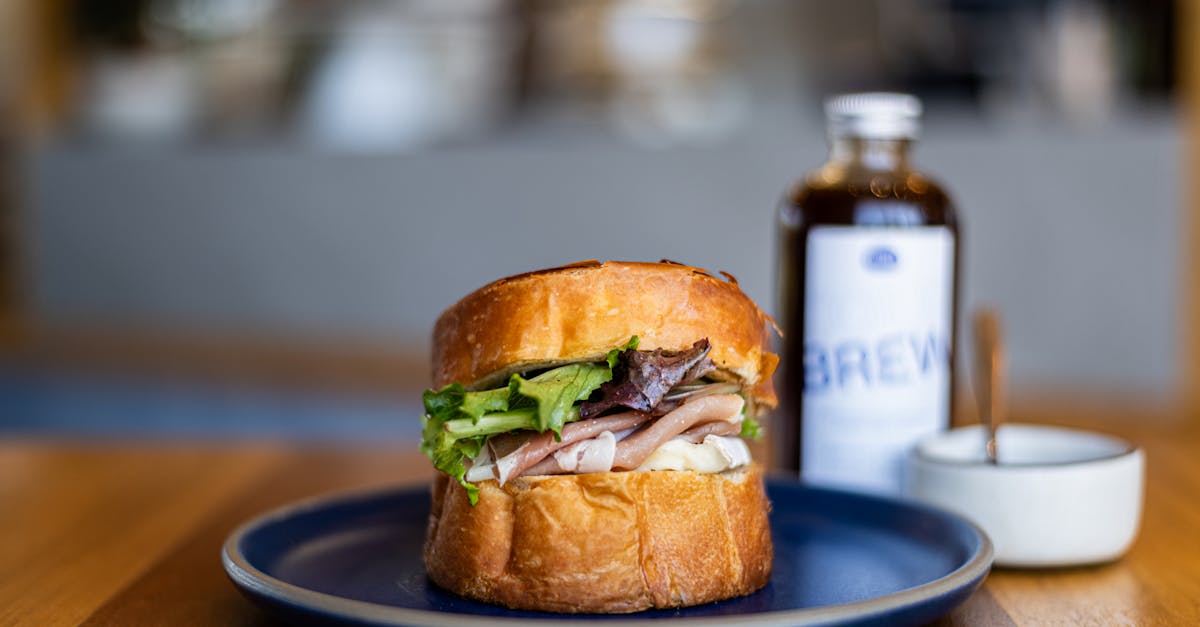
Baking bread while following a low iodine diet can feel challenging, but it doesn’t have to be. We’ve crafted a simple low iodine bread recipe that’s both delicious and safe for those needing to limit their iodine intake. This bread offers a comforting, homemade option without compromising on taste or texture.
Low iodine diets are often recommended before certain medical treatments or for thyroid health, making it essential to find recipes that fit these guidelines. Our recipe uses carefully selected ingredients to keep iodine levels low while still delivering that satisfying fresh-baked bread experience we all love. Whether you’re new to this diet or looking for reliable recipes, this bread is a perfect addition to your kitchen.
Ingredients
To create the perfect Low Iodine Bread, we carefully select ingredients that align with the diet’s restrictions while ensuring delicious flavor and texture. Below are the essential components divided into dry and wet ingredients for clarity and ease.
Dry Ingredients
- 3 cups all-purpose flour (ensure no added iodates)
- 2 teaspoons baking powder (gluten-free if preferred, no iodized salt)
- 1 teaspoon sugar (white granulated)
- ½ teaspoon salt (non-iodized)
- 1 tablespoon ground flaxseeds (optional for fiber and texture)
Wet Ingredients
- 1 cup water (room temperature)
- ¼ cup vegetable oil (neutral flavor, such as canola or sunflower)
- 1 tablespoon apple cider vinegar (helps with leavening and crumb softness)
- 1 teaspoon vanilla extract (optional, for subtle flavor boost)
| Ingredient | Quantity | Note |
|---|---|---|
| All-purpose flour | 3 cups | No added iodates |
| Baking powder | 2 teaspoons | Gluten-free & no iodized salt |
| Sugar | 1 teaspoon | White granulated |
| Salt | ½ teaspoon | Non-iodized |
| Ground flaxseeds | 1 tablespoon | Optional |
| Water | 1 cup | Room temperature |
| Vegetable oil | ¼ cup | Neutral flavor |
| Apple cider vinegar | 1 tablespoon | Enhances crumb softness |
| Vanilla extract | 1 teaspoon | Optional |
By selecting these ingredients, we guarantee a bread that respects low iodine dietary needs without sacrificing taste or freshness.
Equipment Needed
To bake our Low Iodine Bread successfully, having the right equipment on hand ensures smooth preparation and optimal results. Here is a detailed list of necessary tools and why each is important:
- Mixing Bowls: At least one large bowl for combining dry ingredients and another for wet ingredients. Preferably glass or stainless steel to avoid any metallic reaction.
- Measuring Cups and Spoons: Accurate measurement is crucial, especially with ingredients like salt and baking powder; use standard measuring sets.
- Whisk or Fork: For mixing wet ingredients thoroughly and ensuring even distribution of apple cider vinegar and oil.
- Wooden Spoon or Silicone Spatula: Ideal for combining dry and wet ingredients gently without overmixing.
- Loaf Pan (8×4 inch): A non-stick or lightly greased pan shapes the bread perfectly and makes removal effortless.
- Oven Thermometer: To verify the exact baking temperature, which is essential for proper rise and texture.
- Cooling Rack: Allows the bread to cool evenly preventing sogginess on the bottom crust.
- Kitchen Towel or Plastic Wrap: For covering the dough during the rising phase to maintain moisture.
Equipment Summary Table
| Equipment | Purpose | Recommended Size/Type |
|---|---|---|
| Mixing Bowls | Combine ingredients | Large glass or stainless steel |
| Measuring Cups/Spoons | Precision in measuring | Standard measuring sets |
| Whisk/Fork | Blend wet ingredients | Medium size |
| Wooden Spoon/Spatula | Mix ingredients gently | Silicone or wooden |
| Loaf Pan | Shape and bake bread | 8×4 inch non-stick or greased |
| Oven Thermometer | Confirm oven temperature accuracy | Digital or analog |
| Cooling Rack | Cool bread evenly | Medium size |
| Kitchen Towel/Plastic Wrap | Cover dough during rising | Clean towel or plastic wrap |
By organizing our workstation with this essential equipment, we ensure every step of our low iodine bread recipe goes smoothly—resulting in fresh, delicious bread that fits perfectly within dietary restrictions.
Directions
Follow these precise steps to bake our Low Iodine Bread perfectly while maintaining all dietary safeguards and achieving a delicious, fresh loaf.
Prep Work
- Preheat the oven to 350°F (175°C). Use an oven thermometer to verify accuracy.
- Lightly grease your 8×4 inch loaf pan with a small amount of non-iodized vegetable oil.
- Line mixing bowls, measuring tools, and utensils for quick access.
- Ensure water is at room temperature for optimal yeast activity.
Mixing the Dough
- In a large mixing bowl, combine 3 cups of all-purpose flour, 2 teaspoons of gluten-free baking powder, 1 teaspoon of white granulated sugar, ½ teaspoon of non-iodized salt, and optional 1 tablespoon ground flaxseeds.
- Whisk dry ingredients to ensure even distribution.
- In a separate bowl, mix 1 cup room temperature water, ¼ cup neutral vegetable oil, 1 tablespoon apple cider vinegar, and optional 1 teaspoon vanilla extract.
- Gradually pour the wet mixture into the dry ingredients.
- Stir gently with a wooden spoon or silicone spatula until a soft, cohesive dough forms.
First Rise
- Cover the bowl with a clean kitchen towel or plastic wrap.
- Place it in a warm, draft-free spot.
- Let the dough rise for 45 to 60 minutes, or until it roughly doubles in size.
Shaping the Bread
- Lightly flour a clean surface with a small amount of all-purpose flour.
- Turn the dough out onto the surface.
- Gently press the dough into a rectangle.
- Roll it lengthwise into a loaf shape.
- Transfer the shaped dough into the prepared loaf pan.
Second Rise
- Cover the loaf pan loosely with the kitchen towel or plastic wrap.
- Allow the dough to rise again for 30 to 40 minutes, or until it raises just above the pan’s edge.
Baking Instructions
- Place the loaf pan in the center of the preheated oven.
- Bake at 350°F (175°C) for 35 to 40 minutes.
- The bread is done when the crust turns golden brown and a toothpick inserted in the center comes out clean.
- Optionally tap the loaf bottom—it should sound hollow.
Cooling and Storing
- Remove the bread from the oven immediately.
- Let it cool in the pan for 10 minutes.
- Carefully transfer the bread to a cooling rack to cool completely before slicing.
- Store in an airtight container at room temperature for up to 3 days or slice and freeze for longer freshness.
| Step | Temperature | Time | Notes |
|---|---|---|---|
| Oven Preheat | 350°F (175°C) | — | Verify with oven thermometer |
| First Rise | Room temp | 45–60 minutes | Dough doubles in size |
| Second Rise | Room temp | 30–40 minutes | Dough rises above pan rim |
| Bake | 350°F (175°C) | 35–40 minutes | Golden crust, toothpick test |
| Cooling | Room temp | 10+ minutes | Remove from pan then cool on rack |
Tips for Making Low Iodine Bread
To master the art of baking low iodine bread, attention to detail is key. Below, we share practical tips to help you maintain strict iodine limits while achieving great flavor and texture.
Ingredient Substitutions
Choosing the right ingredients is vital for keeping the iodine content low. Here are safe alternatives and notes to guide your substitutions:
| Ingredient | Recommended Substitute | Notes |
|---|---|---|
| All-purpose flour | Unbleached all-purpose flour | Ensure no iodates or conditioners added |
| Baking powder | Gluten-free baking powder | Confirm it’s free from iodized salt |
| Salt | Non-iodized salt | Avoid sea salt or iodized table salt |
| Vegetable oil | Light olive oil or sunflower oil | Use neutral flavors to keep bread mild |
| Milk | Water or almond milk (unsweetened) | Avoid dairy with high iodine like cow’s milk |
| Sweeteners | White granulated sugar or honey | Avoid molasses or brown sugar with additives |
“Always verify labels carefully to avoid hidden iodine sources in commonly used ingredients.”
Avoiding Iodine Contamination
Maintaining a clean, controlled environment prevents accidental iodine introduction:
- Use dedicated utensils and mixing bowls for low iodine baking only.
- Rinse all equipment thoroughly before use to remove any residual iodine residues.
- Avoid metal pans or containers previously used with iodine-rich products.
- Handle ingredients with clean, dry hands to prevent cross-contamination.
- Store low iodine bread separately from other high iodine baked goods.
Tip: Preheat your oven early and use an oven thermometer to maintain accurate baking temperatures which affect bread texture without altering iodine content.
By following these tips we ensure every loaf of low iodine bread meets dietary restrictions and tastes delightful.
Make-Ahead Instructions
Preparing our Low Iodine Bread ahead of time can save us valuable effort and ensure fresh bread whenever we need it. Here’s how to handle the make-ahead process for the best results.
Step 1: Prepare and Shape the Dough
After the first rise (45 to 60 minutes until doubled in size), punch down the dough gently and shape it for the loaf pan. At this point, instead of proceeding with the second rise, cover the shaped dough tightly with plastic wrap or place it in an airtight container.
Step 2: Refrigerate Overnight
Place the covered dough in the refrigerator for up to 12 hours. This slow, cold fermentation helps develop flavor without increasing iodine levels and allows flexibility in our baking schedule.
Step 3: Second Rise and Baking
Remove the dough from the fridge, uncover it, and allow it to come to room temperature for 30 to 40 minutes. This completes the second rise, letting the dough expand and relax before baking. Preheat the oven to 350°F (175°C) and bake as usual for 35 to 40 minutes until the crust is golden brown.
Step 4: Cooling and Storing
Cool the bread in the pan for 10 minutes, then transfer it to a cooling rack. Once completely cooled, store it in an airtight container at room temperature for up to 3 days or slice and freeze it for longer freshness.
| Make-Ahead Step | Action | Time/Temperature | Notes |
|---|---|---|---|
| After first rise | Shape dough, cover tightly | N/A | Use plastic wrap or airtight container |
| Refrigerate dough | Slow fermentation | Up to 12 hours, 35-40°F | Enhances flavor, fits schedule flexibility |
| Second rise | Bring dough to room temperature | 30-40 minutes | Dough will expand and become airy |
| Bake bread | Oven baking | 350°F / 175°C, 35-40min | Bake until golden brown |
“The key to successful make-ahead low iodine bread is gently managing the fermentation and temperature to maintain both flavor and diet compatibility.”
By following these make-ahead instructions, we can enjoy fresh, flavorful Low Iodine Bread without stress, fitting perfectly into our schedules and dietary needs.
Conclusion
Baking low iodine bread doesn’t have to be complicated or flavorless. With the right ingredients and techniques, we can enjoy fresh, soft bread that fits perfectly within our dietary needs. This recipe offers a reliable way to maintain variety and satisfaction in our meals without compromising health.
By staying mindful of ingredient choices and preparation methods, we ensure every loaf supports our well-being. Whether for medical reasons or thyroid health, this low iodine bread recipe empowers us to bake confidently and deliciously at home.
Frequently Asked Questions
What is a low iodine diet and who needs it?
A low iodine diet limits iodine intake to support thyroid health or prepare for certain medical treatments, like radioactive iodine therapy. It’s essential for those with thyroid conditions or before thyroid scans.
Can I bake bread on a low iodine diet?
Yes, you can bake bread with specific low iodine ingredients and by avoiding iodized salt or enriched flours, ensuring the bread fits dietary restrictions and tastes great.
What ingredients are safe for low iodine bread?
Use all-purpose flour without iodates, gluten-free baking powder without iodized salt, non-iodized salt, neutral vegetable oils like sunflower oil, and avoid dairy or seaweed ingredients.
Why avoid iodized salt in low iodine recipes?
Iodized salt contains added iodine, which can exceed diet limits. Using non-iodized salt ensures the iodine level stays low and within dietary requirements.
How long should I let the dough rise for low iodine bread?
Let the dough rise twice: first for 45-60 minutes until it doubles, then after shaping, rise again for 30-40 minutes before baking.
Can I prepare the dough in advance?
Yes, you can refrigerate the shaped dough overnight after the first rise, then let it come to room temperature before the second rise and baking to enhance flavor.
How should I store low iodine bread?
Store it in an airtight container at room temperature for up to 3 days or freeze sliced portions for longer freshness.
What kitchen tools do I need to bake low iodine bread?
Essential tools include mixing bowls, measuring spoons and cups, a whisk or fork, spatulas, an 8×4 inch loaf pan, oven thermometer, cooling rack, and plastic wrap or kitchen towels.
How can I avoid iodine contamination when baking?
Use dedicated utensils, rinse all equipment thoroughly, and handle ingredients with clean hands to prevent iodine cross-contamination.
Can I add flavorings like vanilla to low iodine bread?
Yes, adding safe flavorings like vanilla extract is optional and allowed, as it does not add iodine and can enhance the bread’s taste.