
If you’re looking to enjoy bread without the usual blood sugar spikes, our Low GI Bread Recipe is just what you need. This bread is crafted to release energy slowly, keeping you fuller longer and helping maintain steady blood sugar levels. Perfect for anyone mindful of their glycemic index or simply wanting a healthier bread option.
We’ve combined wholesome ingredients to create a loaf that’s not only nutritious but also deliciously satisfying. Whether you’re making sandwiches or enjoying a warm slice with your favorite spread, this bread fits seamlessly into a balanced lifestyle. Let’s dive into how you can bake this easy, low GI bread right in your own kitchen.
Ingredients
To bake our Low GI Bread successfully, we rely on carefully selected ingredients that keep the glycemic index low while enhancing flavor and texture. Below, we break down the essential components you will need.
Dry Ingredients
We start with dry ingredients that form the structure and contribute to the low glycemic response:
- 1 ½ cups whole wheat flour (preferably stone-ground for extra fiber)
- 1 cup oat bran (rich in soluble fiber to reduce glycemic impact)
- ½ cup almond flour (adds moisture and healthy fats)
- 2 tablespoons ground flaxseed (boosts fiber and omega-3)
- 1 tablespoon baking powder (gluten-free, helps the bread rise)
- 1 teaspoon baking soda
- 1 teaspoon sea salt
Wet Ingredients
Our wet ingredients provide moisture and natural sweetness without spiking blood sugar levels:
- 1 ¼ cups unsweetened almond milk (or any low-GI plant milk)
- 2 large organic eggs (room temperature)
- 3 tablespoons extra virgin olive oil (heart-healthy fat)
- 2 tablespoons pure raw honey (optional, for subtle sweetness)
Optional Add-Ins
Enhance the nutritional profile and flavor of our Low GI Bread with these optional ingredients:
| Add-Ins | Quantity | Benefits |
|---|---|---|
| Chopped walnuts | ¼ cup | Adds crunch and healthy fats |
| Sunflower seeds | 2 tablespoons | Boosts fiber and vitamin E |
| Chia seeds | 1 tablespoon | Provides extra omega-3 and improves texture |
| Cinnamon powder | ½ teaspoon | Adds warmth and may help regulate blood sugar |
We encourage experimenting with these add-ins for texture and taste variations while maintaining the bread’s low glycemic load.
Equipment Needed
To bake our Low GI Bread effectively, having the right equipment ensures precision and a perfect texture. Here is the essential equipment list that we recommend for this recipe:
- Mixing Bowls: Use at least two medium-sized bowls for combining dry and wet ingredients separately.
- Measuring Cups and Spoons: Accurate measurement of ingredients maintains the low glycemic quality.
- Whisk and Spatula: A whisk to blend wet ingredients smoothly and a rubber spatula to fold ingredients gently.
- Loaf Pan (9×5 inches): This standard size pan shapes the loaf ideally and allows even baking.
- Oven: Preheated to the exact temperature to develop that perfect crust and tender crumb.
- Cooling Rack: Essential for allowing the bread to cool evenly without condensation which keeps the crust crisp.
- Sieve (optional): To sift dry ingredients like flours and baking powder for a lighter texture.
- Kitchen Scale (optional): For precise ingredient weighting, enhancing consistency in our Low Gi Bread results.
Equipment Table for Low Gi Bread Baking
| Equipment | Purpose | Notes |
|---|---|---|
| Mixing Bowls | Separate dry and wet mixes | At least two needed |
| Measuring Cups/Spoons | Accurate ingredient measurement | Essential for recipe success |
| Whisk & Spatula | Mixing and folding ingredients | Use both for best results |
| Loaf Pan (9×5 in) | Bread shaping and baking | Non-stick preferred |
| Oven | Controlled baking environment | Preheat to recipe temperature |
| Cooling Rack | Cooling bread after baking | Prevents soggy crust |
| Sieve (optional) | Sifting dry ingredients | For lighter, fluffier bread |
| Kitchen Scale (optional) | Precise measurements | Improves consistency |
By assembling these tools before starting, we ensure a smooth baking process that results in our signature low glycemic bread—nutritious and delicious with a consistently excellent texture.
Prep Work
Before we begin baking our Low GI Bread, it is crucial to prepare all ingredients and equipment precisely. Proper prep work ensures a smooth baking process and consistent results every time.
Measuring Ingredients
Accurate measurement of each ingredient is essential to maintain the low glycemic index and texture of our bread. We recommend using a digital kitchen scale for dry ingredients like whole wheat flour and almond flour, as even small deviations can alter the bake.
| Ingredient | Measurement Tool | Tip |
|---|---|---|
| Whole wheat flour | Kitchen scale or measuring cup | Spoon into cup lightly then level off |
| Oat bran | Measuring cup | Pack gently for accuracy |
| Almond flour | Kitchen scale | Use fresh for best flavor |
| Ground flaxseed | Measuring spoon | Level firmly |
| Baking powder | Measuring spoon | Use fresh for proper rise |
| Baking soda | Measuring spoon | Measure precisely for balance |
| Sea salt | Measuring spoon | Use fine grain for even mixing |
| Unsweetened almond milk | Measuring cup | Use room temperature for better mix |
| Organic eggs | Count | Use large eggs for consistency |
| Extra virgin olive oil | Measuring cup | Use liquid measuring cup |
| Optional raw honey | Measuring spoon | Adjust to taste but keep minimal |
Pro tip: For even mixing, we like to sift the dry ingredients using a sieve before combining them. This avoids clumps and improves texture.
Preparing the Baking Pan
To set our Low GI Bread up for success, proper preparation of the baking pan is key.
- Use a 9×5 inch loaf pan, ideal for our recipe size.
- Lightly grease the pan’s interior with olive oil or line it with parchment paper. This prevents sticking and ensures an easy release.
- If using parchment paper, allow some overhang on the sides. This makes lifting the bread out after baking effortless.
- Place the prepared pan on a baking sheet to catch any spills and make handling easier.
“A well-prepped pan helps maintain the bread’s shape and supports even crust development, essential for that perfect low GI loaf.”
By measuring accurately and prepping the pan thoughtfully, we lay the foundation for a successful Low GI Bread bake that’s nutritious and delicious.
Instructions
Follow these clear, detailed steps to bake our Low GI Bread perfectly. Each stage ensures optimal texture, flavor, and a stable glycemic response.
Mixing the Dough
- In a large mixing bowl, combine the dry ingredients: whole wheat flour, oat bran, almond flour, ground flaxseed, baking powder, baking soda, and sea salt.
- Use a whisk to blend the dry ingredients thoroughly. This promotes even distribution of leavening agents.
- In a separate bowl, whisk together the wet ingredients: unsweetened almond milk, organic eggs, extra virgin olive oil, and optional raw honey.
- Gradually pour the wet mixture into the dry ingredients.
- Fold gently with a spatula until the dough forms a consistent, slightly sticky batter. Avoid over-mixing to maintain bread softness.
- If desired, add optional nuts or seeds like chopped walnuts, sunflower seeds, or chia seeds, folding them in evenly.
| Step | Action | Purpose |
|---|---|---|
| 1-2 | Mix dry ingredients thoroughly | Even leavening distribution |
| 3-4 | Whisk wet ingredients & combine | Proper hydration and binding |
| 5 | Fold to combine | Maintain texture, avoid toughness |
| 6 | Add optional seeds/nuts | Enhance flavor and nutrition |
Tip: Use a spatula instead of a mixer to keep the dough light and airy.
First Proofing
- Cover the dough bowl loosely with a clean kitchen towel or plastic wrap.
- Let the dough rest at room temperature for 45 to 60 minutes.
- During this time, the dough will rise slightly as the baking soda and powder activate.
- A gentle rise means the dough is ready for shaping without becoming overproofed.
“Proper proofing supports the bread’s crumb structure, promoting our Low GI Bread’s soft and dense texture.”
Shaping the Dough
- Lightly grease or line a 9×5 inch loaf pan with parchment paper.
- Transfer the rested dough into the prepared pan.
- With wet or oiled hands, smooth the dough surface gently to create an even top.
- Avoid pressing down forcefully to preserve air pockets essential for bread rise.
| Item | Preparation |
|---|---|
| Loaf pan | Lightly greased or parchment lined |
| Dough surface | Smoothed gently to an even top |
Second Proofing
- Cover the loaf pan loosely with plastic wrap or a damp towel.
- Allow the dough to proof a second time for 30 minutes at room temperature.
- During this stage, the dough will rise further, preparing for optimal oven spring.
- Check the dough by gently pressing it with a finger; if it springs back slowly, it is ready to bake.
Note: Overproofing can cause a dense crumb, so monitor the dough carefully.
Baking the Bread
- Preheat the oven to 350°F (175°C).
- Place the loaf pan on the center rack of the oven.
- Bake for 40 to 45 minutes, until the crust turns golden brown and a toothpick inserted in the center comes out clean.
- For a crisp crust, remove the bread from the pan immediately after baking and place it on a cooling rack.
- Allow the bread to cool completely before slicing to maintain structure and flavor integrity.
| Baking Step | Temperature | Time |
|---|---|---|
| Oven | 350°F (175°C) | – |
| Bake Bread | – | 40 to 45 mins |
Tips for Baking Low GI Bread
To achieve the perfect Low GI Bread loaf, here are essential tips that focus on ingredient handling, baking techniques, and troubleshooting to ensure a consistent, delicious, and blood sugar-friendly result every time.
1. Measure Ingredients Accurately
Using precise measurements is critical for maintaining the bread’s low glycemic index. We recommend weighing dry ingredients with a digital kitchen scale for consistency. Avoid packing flour or bran to prevent dense bread.
| Ingredient | Measurement Tip |
|---|---|
| Whole wheat flour | Scoop lightly, then level off |
| Oat bran | Use a kitchen scale if possible |
| Ground flaxseed | Measure loosely packed |
| Wet ingredients | Use liquid measuring cups |
“Accurate measurements directly influence the texture and glycemic load of your bread, helping to keep it truly low GI.“
2. Mix Gently but Thoroughly
When combining together the dry and wet ingredients, stir gently yet evenly until just combined. Overmixing can lead to tough Low GI Bread due to gluten development, reducing softness.
3. Proofing Is Key
Allow the dough to rise in a warm draft-free area. For our recipe, a rise of 45 to 60 minutes usually suffices. This controlled fermentation helps develop flavor and texture without spiking the glycemic response.
- Use a damp cloth to cover the dough and prevent drying
- Avoid over-proofing as it may cause a fall in the loaf structure
4. Handle Dough with Care
When shaping the dough, avoid excessive kneading which can affect the final crumb. Smooth the dough gently and place it evenly into the prepared loaf pan for an even bake.
5. Oven Temperature and Baking Time
Preheat the oven to the specified temperature (usually 350°F / 175°C). Bake the bread for 40 to 50 minutes until a golden crust forms. Insert a skewer to test doneness: it should come out clean without wet batter.
| Baking Aspect | Recommended Range |
|---|---|
| Oven Temperature | 350°F (175°C) |
| Baking Time | 40-50 minutes |
| Test for Doneness | Skewer clean |
6. Cooling to Maintain Texture
Cool the bread on a rack for at least 30 minutes to let moisture redistribute evenly inside the loaf. Cutting too soon causes crumbling and affects the bread’s low GI texture.
7. Optional Add-ins for Flavor and Nutrition
Incorporate nuts, seeds, or spices like cinnamon that fit your taste but ensure to keep below amounts that could alter the glycemic load:
- Chopped walnuts (1/4 cup)
- Sunflower seeds (2 tbsp)
- Chia seeds (1 tbsp)
- Cinnamon powder (1 tsp)
These additions add richness without compromising the slow-release energy benefit.
By following these expert tips we can bake Low GI Bread that offers a perfect balance of nutrition, texture, and flavor — ideal for managing blood sugar while satisfying your taste buds.
Storage and Shelf Life
Proper storage is essential to maintain the fresh taste and texture of our Low GI Bread while preserving its nutritional integrity. Here’s how we can best store this healthy loaf to maximize its shelf life.
Room Temperature Storage
- Wrap the bread tightly in plastic wrap or place it inside an airtight container to prevent moisture loss and avoid stale bread.
- Store in a cool, dry place away from direct sunlight and heat sources.
- The bread will stay fresh for up to 3 days at room temperature.
Refrigeration
- Refrigeration is an option to extend shelf life but it may cause the bread to dry out faster.
- Wrap the bread in plastic wrap and then place it in a zip-top bag to reduce air exposure.
- The bread keeps well in the fridge for up to 7 days.
- Allow the bread to come to room temperature before slicing and serving to restore softness.
Freezing for Long-Term Storage
- For longer storage, freezing is ideal: slice the bread first to allow easy use of portions.
- Wrap each slice or the entire loaf tightly in plastic wrap, then wrap again in aluminum foil or place it inside a freezer-safe bag to prevent freezer burn.
- The bread can be frozen for up to 3 months without losing quality.
- To thaw, leave slices at room temperature or toast directly from frozen.
Summary of Storage Methods and Shelf Life
| Storage Method | Wrapping Recommendation | Shelf Life | Notes |
|---|---|---|---|
| Room Temperature | Plastic wrap or airtight container | Up to 3 days | Keep in cool, dry place away from sunlight |
| Refrigeration | Plastic wrap + zip-top bag | Up to 7 days | May dry out; bring to room temp before use |
| Freezing | Plastic wrap + aluminum foil/freezer bag | Up to 3 months | Slice before freezing; thaw at room temp or toast |
“By storing our Low GI Bread properly, we preserve its low glycemic benefits and delicious flavor, ensuring we enjoy every slice at its best.”
Following these storage guidelines helps us maintain the bread’s texture and nutritional value while supporting our goal of stable blood sugar levels through low glycemic eating.
Serving Suggestions
Our Low GI Bread shines brightest when served thoughtfully to enhance its health benefits and flavor. Here are expert tips and ideas to enjoy this delicious loaf at its full potential.
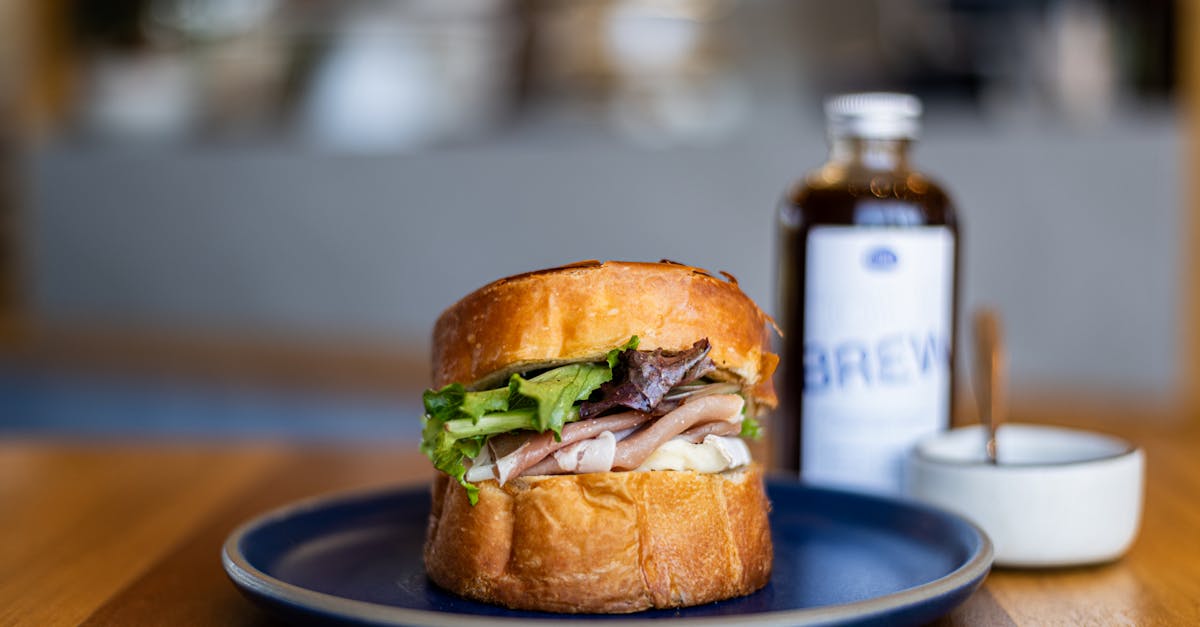
1. Savory Sandwiches with Nutrient-Dense Fillings
Create satisfying sandwiches using our bread as the perfect base. Try fillings like:
- Avocado slices for healthy fats
- Grilled chicken or turkey breast for lean protein
- Fresh leafy greens such as spinach or arugula
- Sliced tomatoes and cucumbers for crunch and hydration
- A spread of hummus or mustard to keep glycemic impact low
2. Hearty Toast Toppings
Turn toasted Low GI Bread into a nourishing snack or breakfast by topping it with:
- Natural almond or peanut butter paired with chia seeds for omega-3s
- Mashed avocado sprinkled with chili flakes and lemon juice
- Cottage cheese with sliced strawberries or apple pieces for a subtle sweetness
- Smoked salmon with capers and dill for an elegant touch
3. Accompanying Soups and Salads
Use slices of this bread alongside warm low GI soups like lentil or vegetable soup. It pairs especially well with:
- Mixed green or kale salads dressed with olive oil and lemon vinaigrette
- Roasted vegetable bowls for a fiber-rich, balanced meal
4. Snack or Standalone Bite
Enjoy a slice simply on its own or lightly toasted with a dollop of Greek yogurt and a drizzle of raw honey for a delicate sweetness. This honors the bread’s slow-release energy without extra spikes.
Practical Serving Tips
| Tip | Explanation |
|---|---|
| Slice thickness | Cut medium-thick slices to maintain texture and avoid dryness. |
| Toasting Temperature | Toast at medium heat for 2-3 minutes to enhance flavor gently. |
| Storage before serving | Keep bread at room temperature wrapped in linen for fresh taste. |
| Pairing liquids | Serve with herbal teas or water to keep glycemic levels stable. |
“Serving Low GI Bread with balanced proteins and fats maximizes satiety and sustained energy.”
By embracing these serving suggestions, we optimize the taste, texture, and health impacts of our Low GI Bread. Let’s explore these ideas and create meals that support our well-being without sacrificing flavor.
Conclusion
Baking Low GI Bread at home opens up a world of delicious and nutritious possibilities. With the right ingredients and techniques, we can enjoy bread that supports stable blood sugar and keeps us feeling satisfied longer.
This recipe not only fits well into a balanced lifestyle but also invites creativity with add-ins and serving options. By mastering this loaf, we take a meaningful step toward healthier eating without compromising on taste or texture.
Let’s keep experimenting and savoring every slice of this wholesome bread.
Frequently Asked Questions
What is low GI bread?
Low GI bread is bread made with ingredients that cause a slower, steadier rise in blood sugar levels, helping to maintain stable energy and support overall health.
Why is low GI bread beneficial?
It promotes stable blood sugar, prolongs satiety, and provides a steady energy release, making it ideal for people looking to manage their blood sugar or maintain healthy eating habits.
What are the key ingredients in low GI bread?
Key ingredients include whole wheat flour, oat bran, almond flour, ground flaxseed, baking powder, baking soda, sea salt, unsweetened almond milk, organic eggs, olive oil, and optional raw honey.
Can I add nuts or seeds to the bread?
Yes, add-ins like walnuts, sunflower seeds, chia seeds, and cinnamon are encouraged for flavor and extra nutrition without raising the glycemic load.
What equipment do I need to bake this bread?
You’ll need mixing bowls, measuring cups and spoons, a whisk, spatula, a 9×5 inch loaf pan, an oven, and a cooling rack. A sieve and kitchen scale are optional but helpful.
How do I prepare the baking pan?
Lightly grease the loaf pan or line it with parchment paper to prevent the bread from sticking and ensure easy removal after baking.
How should I mix the dough?
Combine dry ingredients fully, whisk wet ingredients separately, then fold them together gently to form a slightly sticky batter. Avoid overmixing.
How many proofing stages are needed?
Two proofing stages are recommended: the first to let the dough rise slightly, and the second after shaping to ensure optimal texture and rise before baking.
What’s the best way to store low GI bread?
Store at room temperature for up to 3 days, refrigerate up to 7 days (may dry out), or freeze for up to 3 months. Wrap well to prevent moisture loss.
How can I serve low GI bread?
Use it for sandwiches, as toast with healthy toppings, or alongside soups and salads. Slice thickness and toasting temperature can be adjusted for optimal taste and texture.