
There’s something timeless about a leather recipe book. It combines durability with a classic look that makes it more than just a place to jot down recipes—it becomes a cherished kitchen companion. Whether we’re passing down family favorites or experimenting with new dishes leather-bound books keep our culinary memories safe and stylish.
We love how these books add a touch of elegance to any kitchen counter or bookshelf. Beyond their beauty leather recipe books are practical too. Their sturdy covers protect our treasured recipes from spills and wear making them perfect for everyday use. Let’s explore how to choose or even create the perfect leather recipe book that fits our cooking style and keeps our recipes organized for years to come.
Materials Needed for Leather Recipe Book
To craft a durable and elegant leather recipe book that stands the test of time, selecting the right materials is essential. Here, we outline the key components to ensure your recipe book is both functional and beautiful.
Types of Leather Suitable for Recipe Books
Choosing the appropriate leather type directly impacts the texture, durability, and appearance of your recipe book. Below is a summary of common leather types ideal for this project:
| Leather Type | Characteristics | Best For |
|---|---|---|
| Full-Grain Leather | Thick, natural surface with visible grain and durability | Premium, long-lasting classic recipe books |
| Top-Grain Leather | Slightly sanded for smoothness, still strong and flexible | Elegant look with balance of durability and softness |
| Genuine Leather | Lower grade, thinner, more affordable | Budget-friendly options with leather look |
| Suede | Soft, napped surface, delicate but adds rustic charm | Rustic or vintage-style recipe books |
| Vegetable-Tanned | Natural tanning process, develops rich patina over time | Eco-conscious and beautifully aged leather |
Pro Tip: We recommend starting with Full-Grain or Top-Grain leather to combine durability with timeless aesthetics that protect your recipes through years of kitchen use.
Additional Supplies and Tools
Beyond leather, several essential supplies and tools will bring your leather recipe book to life. We’ve organized these into categories for clarity:
| Category | Item | Purpose |
|---|---|---|
| Binding Materials | Heavy-duty thread or waxed linen | Securely stitching pages to leather cover |
| Bookbinding glue | Reinforce binding and ensure durability | |
| Endpapers | Attach inside covers and add structural support | |
| Hardware | Metal rings or binder clips | Easily add or remove recipe pages |
| Decorative brass corners or clasps | Enhance look and protect edges | |
| Tools | Rotary cutter or craft knife | Precisely cut leather and paper |
| Cutting mat | Protect surfaces during cuts | |
| Leather hole punch | Create holes for stitching or hardware installation | |
| Ruler and bone folder | Measure and crease for clean folds | |
| Needle suitable for leather | Facilitate hand stitching | |
| Sandpaper or leather conditioner | Smooth edges and maintain leather quality |
Combining these materials and tools makes the process manageable and rewarding. Each element plays a role in crafting a recipe book that is both functional and a joy to use, reflecting our passion for preserving culinary memories in style.
Preparing the Leather
Preparing the leather correctly is crucial for crafting a durable and beautiful leather recipe book. This process ensures the leather is cut precisely and conditioned to protect it from everyday kitchen wear.
Cutting the Leather to Size
To start, we measure and mark the leather according to our recipe book’s dimensions. Accurate cutting is essential to achieve clean edges and a professional finish.
- Measure twice to ensure precision.
- Use a sharp rotary cutter or a leather knife for smooth cuts.
- Place the leather on a self-healing cutting mat to avoid damage to your work surface.
- Cut slowly along the marked lines for control and accuracy.
| Step | Tool Needed | Tip |
|---|---|---|
| Mark dimensions | Ruler, pencil | Use a fine pencil for clear marks |
| Cut leather | Rotary cutter, knife | Keep blade sharp for smooth edges |
| Secure leather | Clamps (optional) | Prevent shifting during cutting |
Conditioning and Treating the Leather
After cutting, conditioning the leather is vital to maintain softness and increase its lifespan. This step protects the leather from drying out and guards against stains common in kitchen environments.
- Select a high-quality leather conditioner or natural oils like mink oil or beeswax.
- Apply conditioner evenly using a soft cloth.
- Allow leather to absorb the treatment fully over 24 hours.
- Buff with a clean cloth to restore natural shine.
“Conditioning your leather recipe book cover helps preserve its rich texture and provides a water-resistant layer, essential for kitchen use.“
| Conditioning Step | Purpose | Recommended Product |
|---|---|---|
| Apply conditioner evenly | Maintain suppleness | Leather conditioner, beeswax |
| Absorption time | Deeply hydrate leather | 24 hours |
| Buff to finish | Enhance leather texture and shine | Soft cotton cloth |
Properly preparing our leather ensures our leather recipe book will remain both functional and elegant through years of culinary adventures.
Designing Your Leather Recipe Book
Designing your leather recipe book is where function meets style. We focus on creating a personalized, practical, and visually appealing book that complements your cooking routine and kitchen decor.
Choosing the Layout and Size
Selecting the right layout and size is crucial for ease of use and long-term durability. Consider these factors to tailor your recipe book to your specific needs:
- Size Options:
- Standard (8.5″ x 11″) for easy printing of most recipes
- Compact (6″ x 9″) for portability and storage convenience
- Square (7″ x 7″) for a modern aesthetic
- Page Layouts:
- Single recipe per page for clarity and space to write notes
- Double recipe spread for quick reference when cooking
- Tabbed sections to organize recipes by type or meal course
| Layout Aspect | Description | Recommendation |
|---|---|---|
| Size | Impacts portability and usability | Choose based on kitchen space |
| Page Orientation | Portrait or landscape for readability | Portrait generally preferred |
| Organization Method | Tabs, color codes, or indexes | Tabs for quick sectioning |
We recommend a portrait orientation combined with tabbed sections to keep your recipes accessible and well-organized. Make sure the pages have enough margin for leather binding without compromising writing space.
Adding Decorative Elements
Incorporating decorative elements brings personality and charm to your leather recipe book. Let’s make it uniquely yours while maintaining functional elegance:
- Embossing or Debossing: Use heat-pressed initials, names, or kitchen-inspired icons to personalize the cover with raised or recessed designs.
- Stitching Accents: Choose contrasting thread colors or unique stitching patterns around the borders to highlight craftsmanship.
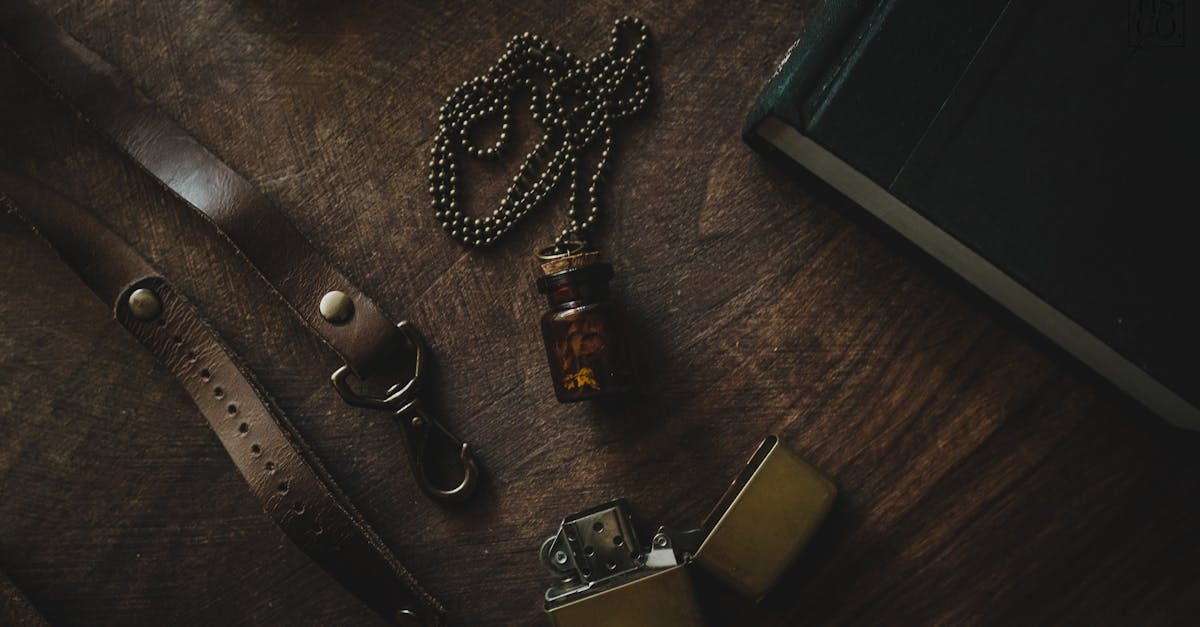
- Metal Hardware: Add brass or copper corner protectors, buckles, or clasps for vintage flair and extra durability.
- Inserts and Pockets: Include leather or fabric pockets inside the cover to hold recipe cards, notes, or culinary memorabilia.
- Ribbon Markers: Attach silk or leather ribbons to mark favorite sections or current recipe pages effortlessly.
“A leather recipe book is not just a keeper of recipes but a canvas for creativity.”
Balancing these embellishments enhances the tactile and visual experience of your recipe book while ensuring it remains practical for daily kitchen use. Choose subtle enrichments that reflect your style and honor the rustic beauty of genuine leather.
Assembling the Recipe Book
Assembling our leather recipe book brings together all prepared components into a functional and elegant kitchen essential. This step balances craftsmanship with practicality, ensuring durability and ease of use.
Binding Techniques for Leather Books
Choosing the right binding technique is crucial for both the longevity and the aesthetic appeal of our leather recipe book. We recommend the following binding options:
| Binding Method | Description | Benefits |
|---|---|---|
| Screw Post Binding | Uses metal screw posts to secure pages. | Allows easy page addition/removal. |
| Saddle Stitching | Thread sewn through folded sheets or signatures. | Creates a flat, flexible spine. |
| Case Binding | Traditional hardcover book binding with endpapers. | Offers robust and professional finish. |
| Ring Binding | Metal or plastic rings hold punched pages together. | Highly flexible with quick page access. |
For leather recipe books, screw post binding is particularly effective. It combines strength with the ability to update or reorganize recipes, adapting to changing collections.
We suggest these binding tips:
- Pre-punch holes evenly along the leather spine and pages with a rotary punch.
- Use acid-free washers between leather and pages to reduce wear.
- Tighten screws firmly but allow slight page movement to prevent stress.
Installing Pages or Recipe Inserts
Adding our recipes and notes is a key step. We prioritize both functionality and protection of treasured recipes:
- Prepare Pages and Inserts
- Use high-quality, acid-free paper to prevent yellowing.
- Print recipe pages with clear fonts for easy reading.
- Include dividers or tabbed inserts to separate categories.
- Align and Insert
- Stack pages neatly by section or menu.
- Align punched holes with binding holes exactly.
- Insert pages carefully to avoid tearing.
- Secure Pages
- For screw post binding, place washers on each side of the pages before tightening posts.
- For ring bindings, snap rings closed securely ensuring smooth page turning.
- Add Protective Elements
- Consider plastic sleeves for frequently used recipes to shield from spills.
- Add corner protectors on pages or covers for added durability.
Throughout assembly, we maintain our focus on creating a leather recipe book that is durable, accessible, and beautifully crafted to safeguard our culinary heritage for years.
Customizing Your Leather Recipe Book
To make our leather recipe book truly ours, customization adds character and functionality. Personal touches and practical additions elevate this kitchen essential into a reflection of our culinary journey.
Personalizing with Stamps or Engravings
Customization starts with stamping or engraving our leather recipe book. These techniques create a unique identity while preserving the leather’s natural beauty.
- Leather Stamping: We use metal or wooden stamps to imprint initials, family names, or meaningful symbols into the leather. This method adds texture and a handcrafted feel.
- Engraving: Laser engraving allows for detailed designs, such as recipes, quotes, or monograms, with precision. This technique creates a crisp and permanent mark enhanced by the leather’s rich tones.
Tips for effective personalization:
| Step | Description |
|---|---|
| Choose Design | Select meaningful text or imagery that reflects our style |
| Test on Scrap | Always stamp or engrave on a leather scrap to check depth |
| Positioning | Center names or motifs on the cover or spine for impact |
| Conditioning | Apply leather conditioner after stamping to restore glow |
“Personalizing with stamps or engravings transforms our leather recipe book into a treasured heirloom carrying our family’s culinary legacy.”
Adding Pockets or Bookmarks
Enhancing the leather recipe book’s practicality involves adding pockets for storage and bookmarks for easy navigation.
Pockets:
- Slim leather or fabric pockets sewn or glued into the cover hold loose recipes, grocery lists, or clippings.
- Clear plastic sleeves or zippered compartments add protection and organization.
- Position pockets on the inside front or back cover for quick access without bulk.
Bookmarks:
- Ribbon bookmarks or leather strips permanently attached to the spine help mark frequently used sections.
- Tassels or beads on bookmarks can add a decorative touch and improve grip for page-turning.
We recommend this pocket and bookmark setup for optimal usability:
| Feature | Material | Placement | Purpose |
|---|---|---|---|
| Leather/Fabric | Inside covers | Hold extra notes & recipes | |
| Sleeve | Clear Plastic | Inside covers | Protect fragile recipe pages |
| Bookmark | Ribbon/Leather | Spine | Mark favorite recipe sections |
Adding these functional details ensures our leather recipe book remains organized and effortless to use in busy kitchen moments.
Care and Maintenance of Your Leather Recipe Book
Proper care and maintenance are essential to preserve the elegance and durability of our leather recipe book. By following these straightforward steps, we can ensure it remains a trusted kitchen companion for years.
Cleaning Your Leather Recipe Book
- Use a soft, dry cloth to gently wipe away dust and dirt.
- For stubborn spots, dampen a cloth slightly with distilled water and wipe carefully. Avoid soaking the leather.
- Never use harsh chemicals or household cleaners as they can damage the leather’s natural finish.
“A gentle touch goes a long way in preserving the supple texture of leather.”
Conditioning the Leather
Leather requires periodic conditioning to maintain moisture and prevent cracking.
- Apply a small amount of high-quality leather conditioner with a soft cloth.
- Rub the conditioner evenly over the surface in circular motions.
- Let it absorb for 10 to 15 minutes, then buff with a clean, dry cloth.
| Recommended Conditioning Frequency |
|---|
| Every 3 to 6 months, depending on climate and usage |
Protecting Against Kitchen Hazards
Our leather recipe book should withstand kitchen life but benefit from proactive protection:
- Keep it away from direct heat sources like stovetops or ovens to avoid drying.
- If exposure to moisture occurs, blot gently and air dry naturally; never use heat.
- Use plastic sleeves for recipe pages to guard against spills and stains.
Storage Tips for Longevity
Proper storage helps prevent warping, discoloration, and wear.
- Store the book in a cool, dry place away from sunlight.
- Avoid placing heavy objects on top which can deform the cover.
- If unused for a long period, place it in a breathable fabric bag to protect from dust.
Repair and Handling Guidance
- Handle with clean hands to limit oils or food residue transfer.
- For minor scratches or scuffs, gently rub with a clean finger or apply a small amount of conditioner.
- Consult a professional leather repair specialist for significant damage to maintain the book’s integrity.
Embracing these care habits will keep our leather recipe book beautiful and strong, preserving the culinary memories it holds.
Conclusion
Crafting or choosing the perfect leather recipe book is more than just a practical decision—it’s about creating a lasting keepsake that honors our culinary adventures. With the right materials, thoughtful design, and proper care, these books become treasured kitchen companions that protect and showcase our favorite recipes.
By personalizing and maintaining our leather recipe books, we ensure they stay both beautiful and functional through years of use. This blend of durability and elegance makes them a meaningful way to preserve and celebrate our cooking heritage for generations to come.
Frequently Asked Questions
What makes leather recipe books durable and appealing?
Leather recipe books are durable because leather resists wear and spills, protecting recipes over time. Their classic look gives kitchens a timeless, elegant touch, making them cherished keepsakes.
Which types of leather are best for making recipe books?
Full-Grain, Top-Grain, Genuine, Suede, and Vegetable-Tanned leathers are popular options. Full-Grain offers the highest durability, while Vegetable-Tanned leather is great for personalization and aging beautifully.
What tools do I need to craft a leather recipe book?
Essential tools include a self-healing cutting mat, sharp knives, leather punches, needles, binding materials, and conditioning products. Hardware like screws or rings may also be needed depending on the binding style.
How should I prepare the leather before crafting?
Measure and cut leather precisely using sharp tools on a stable mat. Condition the leather with quality products to keep it supple and stain-resistant, ensuring the book lasts and looks good.
What is the ideal layout for a leather recipe book?
A portrait orientation with tabbed sections works well for organization. Common sizes include standard, compact, or square, with clear page layouts that make recipes easy to read and access.
Which binding method is best for recipe books?
Screw post binding is recommended for its strength and flexibility. It allows easy addition or removal of pages and helps the book withstand frequent kitchen use.
How can I protect recipe pages inside the leather book?
Use high-quality, acid-free paper and insert pages carefully. Plastic sleeves and corner protectors shield pages from spills and wear, extending the book’s lifespan.
What are some good ways to personalize a leather recipe book?
Add embossing, debossing, stitching accents, metal hardware, pockets, and bookmarks. Leather stamping or engraving with meaningful designs adds a unique and personal touch.
How do I maintain and clean my leather recipe book?
Dust regularly with a soft cloth and avoid harsh chemicals. Condition the leather periodically based on usage and climate. Keep the book away from heat and store it flat to prevent warping.
Can I repair minor damage on my leather recipe book?
Yes, small scratches and scuffs can be treated with leather conditioners or repair kits. For serious damage, consulting a professional is recommended to maintain its durability and appearance.