
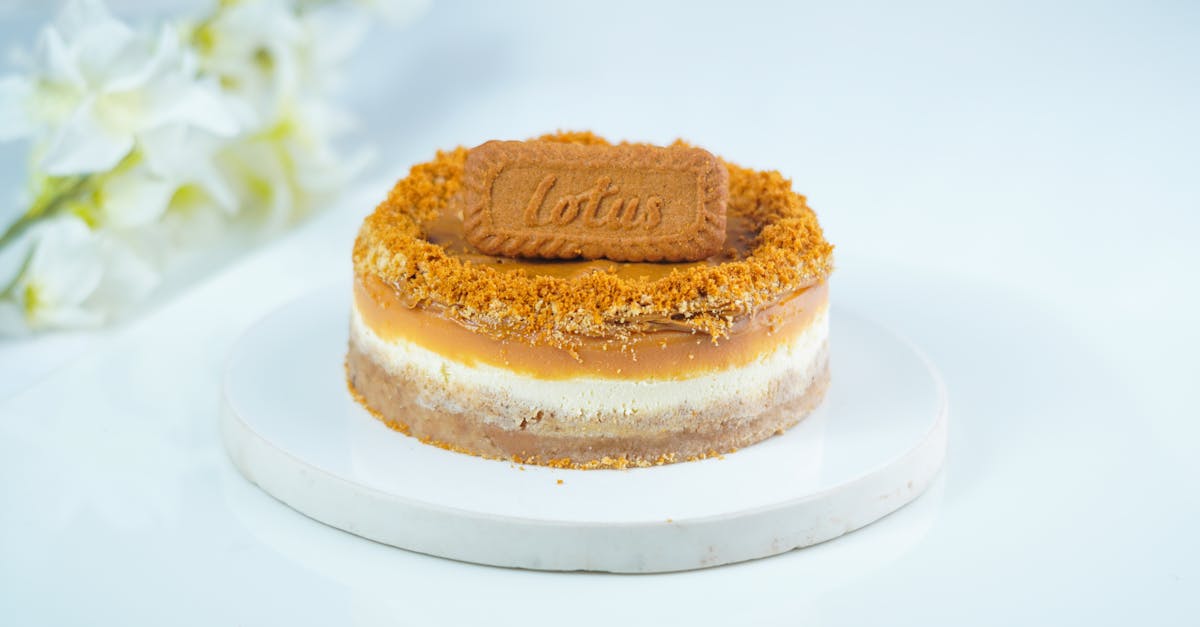
There’s something magical about combining two desserts we all love—cookies and cake. Our layered cookie cake is the ultimate treat for celebrations or when you simply want to indulge in something extraordinary. With its rich layers of soft cookies and creamy frosting, it’s a showstopper that’s as fun to make as it is to eat.
Layered Cookie Cake Recipe
Creating a Layered Cookie Cake is an enjoyable experience that combines baking and assembling for a visually stunning and mouthwatering dessert. Follow these step-by-step instructions for perfect results every time.
Ingredients
-
For the Cookie Layers:
- 2 ½ cups all-purpose flour, sifted
- 1 tsp baking soda
- ½ tsp salt
- 1 cup unsalted butter, room temperature
- 1 cup packed brown sugar
- ½ cup granulated sugar
- 2 large eggs
- 2 tsp pure vanilla extract
-
For the Frosting:
- 2 cups heavy whipping cream, chilled
- ¼ cup powdered sugar
- 1 tsp vanilla extract
-
Optional Decorations:
- ½ cup mini chocolate chips
- ¼ cup rainbow sprinkles
- Fresh fruit (e.g., berries or sliced strawberries)
Steps to Make the Layered Cookie Cake
Step 1: Prepare the Cookie Dough
In a mixing bowl, whisk together the flour, baking soda, and salt. In a separate bowl, cream the butter, brown sugar, and granulated sugar until light and fluffy. Add the eggs, one at a time, followed by the vanilla extract. Gradually mix the dry ingredients into the wet ingredients until fully combined.
Step 2: Shape and Bake the Cookie Layers
Divide the dough into two equal portions. Roll each portion into a circle, approximately 9 inches in diameter. Aim for even thickness to ensure the layers bake uniformly. Bake the cookie rounds at 350°F (175°C) on a parchment-lined baking sheet for 12–15 minutes, or until the edges are golden brown. Let the layers cool completely before assembling.
Step 3: Make the Whipped Cream Frosting
In a chilled mixing bowl, use an electric mixer to whip the heavy cream, powdered sugar, and vanilla extract until stiff peaks form. This will serve as the cake’s creamy, luscious filling.
Step 4: Assemble the Cake
- Place the first cookie layer on a serving plate or cake stand. Spread an even layer of whipped cream frosting on top, all the way to the edges.
- Gently add the second cookie layer on top, ensuring it is centered. Spread another layer of frosting over the top and along the sides if desired for a semi-naked cake appearance.
Step 5: Decorate the Cake
Sprinkle mini chocolate chips, rainbow sprinkles, or fresh fruit over the top for a decorative and flavorful finish. For an elevated appearance, pipe additional whipped cream on top using a star tip.
Table: Baking & Frosting Tips
| Tip | Details |
|---|---|
| Even Dough Thickness | Roll the cookie layers evenly to prevent uneven baking. |
| Cooling Time | Ensure cookie layers are fully cooled to avoid melting the frosting. |
| Whipping Cream Consistency | Use chilled tools to achieve stiff peaks with ease. |
The result is a towering Layered Cookie Cake with soft, chewy cookie layers and velvety whipped frosting—perfect for birthdays, anniversaries, or any sweet occasion.
Ingredients
To create our perfect Layered Cookie Cake, we will need separate sets of ingredients for the cookie layers, frosting, and optional toppings. Let’s gather everything we need for this dessert masterpiece!
Cookie Layers
For the soft and chewy cookie layers, ensure to measure accurately:
- 2 ¾ cups all-purpose flour
- 1 teaspoon baking soda
- ½ teaspoon baking powder
- ½ teaspoon salt
- 1 cup (2 sticks) unsalted butter (softened)
- 1 ½ cups granulated sugar
- 1 large egg
- 2 teaspoons vanilla extract
Frosting
This creamy frosting ties the layers together beautifully:
- 1 ½ cups heavy whipping cream (cold)
- ½ cup powdered sugar (sifted)
- 1 teaspoon vanilla extract
Optional Toppings
Give your cake a personal flair with these optional add-ons:
- 1 cup mini chocolate chips
- ½ cup rainbow sprinkles
- Fresh berries (e.g., strawberries or raspberries)
- ½ cup crushed cookies (for garnish)
Equipment Needed
Creating the perfect Layered Cookie Cake not only requires the best ingredients but also the right tools to ensure precision and ease during the process. Let’s gather everything we need to whip up this delightful treat effortlessly. Here’s a detailed list of equipment you’ll want on hand:
Baking Tools
- Mixing bowls: At least two; one for dry ingredients and another for wet ingredients.
- Hand mixer or stand mixer: Essential for creaming butter and sugar or whipping the cream frosting to perfect peaks.
- Rubber spatula: For scraping down the sides of the bowl and folding ingredients gently.
- Measuring cups and spoons: Accurate measurements are key for both the cookie layers and frosting.
- Digital kitchen scale: Ideal for weighing ingredients to maintain precision.
- Whisk: Great for combining dry ingredients evenly.
Cookie Layer Preparation
- Rolling pin: For rolling out even cookie dough layers.
- Parchment paper or silicone baking mat: Prevents the cookie dough from sticking, ensuring easy transfer to the baking sheets.
- Round cookie cutters or cake rings: To cut perfectly round cookie layers matching the desired cake size.
- Baking sheets: Sturdy, flat sheets for baking multiple cookies evenly.
- Cooling racks: To cool the cookie layers completely before assembly.
Frosting and Cake Assembly
- Offset spatula: For spreading frosting evenly between cookie layers and around the exterior.
- Cake turntable: Makes frosting and decorating smoother and faster.
- Piping bags and tips (optional): To add decorative frosting along the edges or in-between layers.
- Sharp serrated knife (optional): For trimming cookie edges if needed.
Optional Tools
- Decorating kit: Perfect for adding finishing touches like sprinkles or garnishes.
- Serving platter or cake board: For assembling and displaying the finished cake.
Quick Reference Table
| Equipment | Purpose |
|---|---|
| Mixing bowls | Mixing dry and wet ingredients separately. |
| Hand or stand mixer | Creaming, beating, and whipping. |
| Rolling pin | Rolling consistent cookie dough layers. |
| Baking sheets | Baking the cookie layers evenly. |
| Offset spatula | Precise frosting application during assembly. |
| Cake turntable | Simplifying frosting and decorating the cake. |
Directions
Creating this Layered Cookie Cake is straightforward and incredibly satisfying. Follow these step-by-step instructions to build your dessert masterpiece.
Prep The Cookie Dough
- Begin by creaming 1 cup of unsalted butter and 1 cup of granulated sugar in a large mixing bowl using an electric mixer on medium speed. Mix until the texture is light and fluffy, about 2-3 minutes.
- Add 1 large egg and 1 teaspoon of vanilla extract to the bowl. Beat until fully incorporated.
- In a separate bowl, whisk together 2 ½ cups of all-purpose flour, 1 teaspoon of baking soda, ½ teaspoon of baking powder, and ½ teaspoon of salt.
- Gradually add the dry ingredients to the butter mixture, mixing on low speed just until a dough forms. Avoid overmixing to keep the cookies tender.
- Cover the bowl with plastic wrap and chill the dough in the refrigerator for at least 1 hour to make it easier to handle.
Bake The Cookie Layers
- Preheat the oven to 350°F (175°C) and line 3-4 baking sheets with parchment paper.
- Roll out the chilled cookie dough on a lightly floured surface to an even thickness of about ¼ inch. Use a round cake ring or cookie cutter (6-8 inches) to cut out your cookie layers. Re-roll scraps as needed.
- Place the cut dough onto the prepared baking sheets, ensuring at least 1 inch of space between each layer.
- Bake the cookies for 8-10 minutes, or until the edges are lightly golden. Rotate the baking sheets halfway through for even baking.
- Let the cookie layers cool on the sheets for 5 minutes before transferring them to wire racks to cool completely.
Prepare The Frosting
- In a clean mixing bowl, combine 2 cups of cold heavy whipping cream, ¾ cup of powdered sugar, and 1 teaspoon of vanilla extract.
- Beat the mixture on low speed for 1 minute to combine the ingredients.
- Increase the speed to medium-high and whip until stiff peaks form, about 3-4 minutes. Do not overwhip, as it may cause the cream to curdle.
“For flavored frosting, try adding 1-2 tablespoons of cocoa powder or a drizzle of fruit puree for a creative twist.”
Assemble The Layered Cookie Cake
- Place one cookie layer onto a cake plate or turntable. Use an offset spatula to spread an even layer of frosting, about ¼ inch thick.
- Repeat the process with the remaining cookie layers and frosting, stacking them carefully. Be gentle to keep the layers aligned.
- Cover the top and sides of the assembled cake with a thin crumb coat of frosting. Chill the cake for 30 minutes to firm up.
- Apply a final layer of frosting for a smooth and seamless finish.
Add Toppings And Finishing Touches
- Decorate the cake with your choice of mini chocolate chips, rainbow sprinkles, fresh berries, or crushed cookies. Arrange toppings artistically for a stunning look.
- For extra flair, pipe decorative frosting swirls along the edges using a piping bag and star tip.
- Chill the cake for at least 1 hour before serving to set the frosting and layers. Use a sharp serrated knife to slice cleanly.
| Tools Needed | Purpose |
|---|---|
| Offset Spatula | Spreading frosting evenly |
| Cake Turntable | Rotating the cake for smooth assembly |
| Piping Bags & Tips | Decorating with frosting swirls |
| Serrated Knife | Slicing the cake cleanly |
Make-Ahead And Storage Tips
When making a Layered Cookie Cake, planning ahead can save time and ensure the freshest results. We’ve compiled practical tips to prepare components in advance and store the assembled cake to maintain its indulgent taste and texture.
Making Components Ahead
- Cookie Layers:
- Prepare, roll, and bake the cookie layers up to 3 days in advance.
- Once cooled completely, stack them with sheets of parchment paper in between to prevent sticking.
- Store them in an airtight container at room temperature.
- Whipped Cream Frosting:
- Whip the frosting on the same day of cake assembly for maximum creaminess. If you need to prepare ahead, store it in an airtight container in the refrigerator for up to 24 hours. Give it a gentle whisk before use for the best consistency.
Storing the Assembled Cake
- A fully assembled Layered Cookie Cake can be stored in the refrigerator. Cover it loosely with plastic wrap or a cake dome to keep the frosting intact. Consume within 2-3 days for peak freshness.
- For a firmer cake texture (and neater slices), refrigerate for at least 1 hour before serving. The frosting firms up slightly, making slicing easier.
Freezing Tips
- Cookie Layers: These freeze beautifully! Wrap each layer tightly in plastic wrap, followed by a layer of aluminum foil. Store in the freezer for up to 3 months. Thaw layers fully at room temperature before use.
- Assembled Cake: Freezing a fully assembled Layered Cookie Cake is not recommended as the whipped cream frosting loses its texture upon thawing.
Quick Reference Table
| Component | Storage Method | Max Storage Time | Notes |
|---|---|---|---|
| Cookie Layers | Airtight container | Up to 3 days | Keep at room temperature with parchment sheets. |
| Whipped Cream Frosting | Refrigerated | Up to 1 day | Whisk gently before use if made ahead. |
| Assembled Cake | Refrigerator | 2-3 days | Cover with plastic wrap or cake dome. |
| Cookie Layers (Frozen) | Freezer | Up to 3 months | Wrap tightly in plastic wrap and foil. |
Conclusion
Creating a Layered Cookie Cake is a rewarding experience that combines creativity with indulgence. The balance of soft, chewy cookie layers and luscious whipped cream frosting makes it a show-stopping dessert for any occasion.
With the right tools, thoughtful preparation, and a little patience, this cake transforms into a masterpiece that’s as fun to make as it is to eat. Whether you’re celebrating a special event or simply treating yourself, this cake is sure to impress.
We hope this recipe inspires you to get baking and share the joy of this delightful dessert with your loved ones.
Frequently Asked Questions
What is a Layered Cookie Cake?
A Layered Cookie Cake is a dessert that combines cookie layers with creamy frosting, stacked to create a visually appealing and delicious treat. It’s perfect for birthdays, anniversaries, or any celebration.
What ingredients are needed for the Layered Cookie Cake?
The cookie layers require flour, baking soda, baking powder, salt, butter, sugar, an egg, and vanilla extract. The frosting is made with heavy whipping cream, powdered sugar, and vanilla. Optional garnishes include chocolate chips, sprinkles, berries, or crushed cookies.
What tools do I need to make the Layered Cookie Cake?
Essential tools include mixing bowls, a hand/stand mixer, spatulas, measuring tools, a rolling pin, cookie cutters, baking sheets, and an offset spatula. A cake turntable and piping bags are helpful for assembly and decoration.
How do I ensure my cookie layers are even?
Roll the cookie dough to an even thickness using a rolling pin and guide rings. Chilling the dough before baking helps maintain consistency and reduces spreading.
Can I make the cookie layers or frosting ahead of time?
Yes! Prepare cookie layers up to three days in advance and store them in an airtight container at room temperature. Make the frosting the day of assembly or up to 24 hours earlier and refrigerate it.
How should I store the assembled cake?
Refrigerate the fully assembled Layered Cookie Cake and consume it within 2-3 days for optimal freshness.
Can I freeze the cookie layers?
Yes, freeze cookie layers for up to three months in an airtight container. Avoid freezing the fully assembled cake as the whipped frosting’s texture may change upon thawing.
How long does it take to assemble the cake?
Assembling the Layered Cookie Cake, including adding frosting and decorations, takes approximately 20-30 minutes, after cooling the cookie layers completely.
Can the recipe be customized?
Absolutely! Use different frosting flavors, substitute toppings, or add cocoa powder to the cookie dough for a chocolate variation. It’s easily adaptable to your preferences.
How do I prevent frosting from melting?
Ensure the frosting is whipped to stiff peaks and that the cake components are completely cooled before assembly. Keep the cake refrigerated to maintain its shape and freshness.