
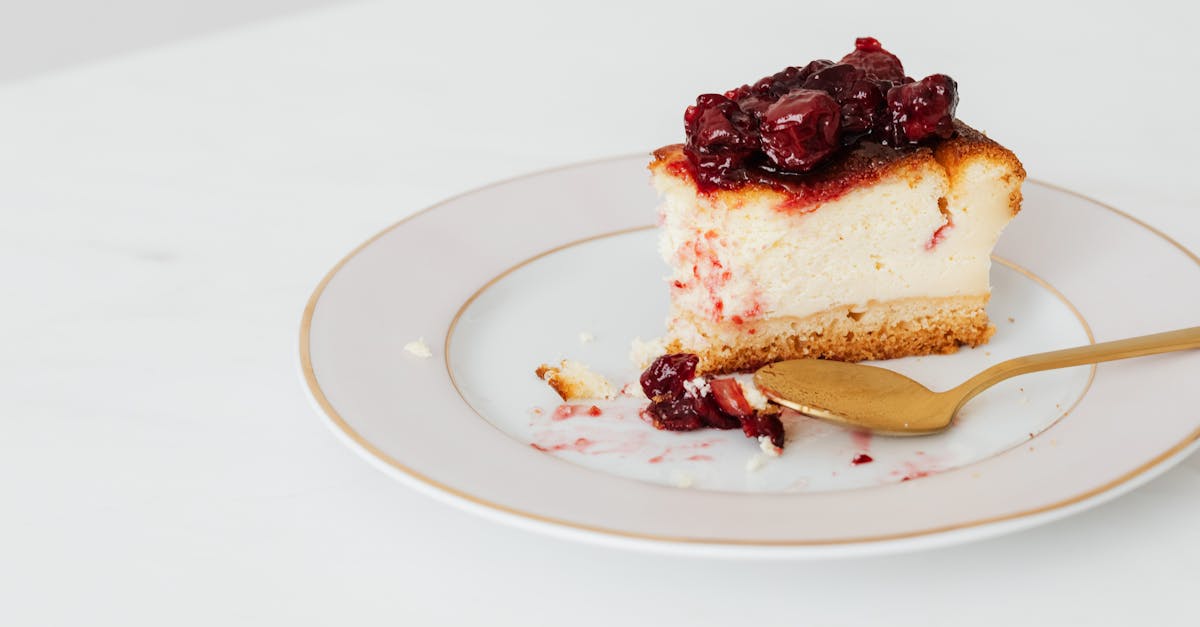
There’s nothing quite like homemade strawberry jam to brighten up your mornings. When strawberries are in season, making a large batch lets us capture that fresh, sweet flavor to enjoy all year long. Plus, it’s a fantastic way to save money and reduce waste by preserving plenty of ripe berries at once.
Our large batch strawberry jam recipe is straightforward and perfect for both beginners and experienced jam makers. With simple ingredients and easy steps, we’ll guide you through creating a delicious, spreadable treat that’s bursting with natural strawberry goodness. Whether you’re planning to gift jars or stock your pantry, this recipe delivers consistent results every time.
Ingredients
To achieve the perfect large batch strawberry jam, we carefully select each ingredient to ensure vibrant flavor, ideal texture, and lasting freshness. Below are the key components that bring this delicious jam to life.
Fresh Strawberries
For jam bursting with authentic strawberry goodness, we use ripe, fresh strawberries. Their natural sweetness and juiciness form the base of our recipe.
- Choose firm, bright red strawberries free from bruises or mold.
- We recommend about 8 cups of hulled and halved strawberries for a large batch, roughly 3 to 4 pounds of fresh fruit.
Sugar
Sugar not only sweetens but also acts as a preservative, ensuring the jam sets properly and stays fresh.
- Use granulated white sugar for a clean, classic taste.
- The key ratio is 2 cups of sugar for every 4 cups of prepared strawberries. Adjust slightly to taste if desired.
Pectin
Pectin is essential for achieving the perfect gel consistency in strawberry jam.
- We suggest using powdered fruit pectin designed for jam making.
- Typically, 1.75 ounces (about 50 grams) of powdered pectin complements the large batch size well.
- For natural thickening without commercial pectin, select perfectly ripe strawberries or add lemon juice to boost natural pectin levels.
Lemon Juice
Lemon juice adds brightness and balances sweetness while enhancing the jam’s natural acidity—crucial for safe preservation.
- Use freshly squeezed lemon juice rather than bottled for best flavor.
- Measure 1/4 cup (4 tablespoons) for the entire large batch.
- Lemon juice also helps activate the pectin for proper jam set.
| Ingredient | Quantity | Purpose |
|---|---|---|
| Fresh Strawberries | 8 cups (hulled and halved) | Flavor base and natural sweetness |
| Granulated Sugar | 4 cups | Sweetness and preservation |
| Powdered Pectin | 1.75 ounces (50 grams) | Thickening agent |
| Fresh Lemon Juice | 1/4 cup (4 tablespoons) | Acidity balance and pectin activation |
Equipment Needed
To create our large batch strawberry jam, having the right equipment sets us up for success. Below is a detailed list of essential tools that ensure smooth preparation, safe canning, and perfect results every time.
Large Stockpot
A Large Stockpot is crucial for cooking our jam in big quantities. We recommend:
- At least 8-quart capacity to hold all ingredients comfortably without spillage.
- Heavy-bottomed material to ensure even heat distribution and prevent scorching.
- High sides to reduce splatter during boiling.
Using this pot allows us to stir vigorously while maintaining consistent cooking temperature for the perfect gel.
Canning Jars and Lids
Proper Canning Jars and Lids preserve our jam safely and maintain freshness. We choose:
| Item | Recommended Size | Material | Notes |
|---|---|---|---|
| Mason Jars | 8 oz or 16 oz | Glass | Heat-resistant, reusable |
| Lids | Standard canning lids | Metal with rubber seal | Single-use for airtight seal |
We clean jars and lids thoroughly before use to prevent contamination.
Canning Funnel
A Canning Funnel simplifies transferring hot jam into jars without mess. It features:
- Wide opening to fit jar mouths easily.
- Heat-resistant food-grade plastic or stainless steel.
- Helps avoid sticky spills and ensures precise filling.
Ladle
We use a large Ladle to scoop and transfer jam efficiently. Look for:
- Heat-resistant material such as stainless steel or silicone.
- 1/2 to 1-cup capacity for quick filling.
- Long handle to keep hands safely away from hot jam.
Jar Lifter
For safety during hot water bath canning, a Jar Lifter is indispensable. Its features include:
- Sturdy grip with rubberized handles.
- Designed to securely lift hot jars out of boiling water.
- Prevents burns and accidents.
Food Thermometer
To monitor proper cooking temperature, a Food Thermometer is key. We use a digital or dial model that offers:
- Accuracy between 100°F and 220°F.
- Easy-to-read display.
- Durable and heat safe.
This precise temperature control helps us achieve the right consistency for our large batch strawberry jam.
Prep Work
Before diving into cooking, thorough prep work ensures our large batch strawberry jam turns out perfectly balanced and safe for storage. Let’s get our strawberries ready and sterilize the jars and equipment properly.
Preparing Strawberries
To start, we need 8 cups of hulled, fresh strawberries. Here’s how we prep them for the best flavor and texture:
- Wash the strawberries gently under cool running water to remove dirt and debris.
- Remove the stems and hulls using a paring knife or strawberry huller.
- Cut larger berries into halves or quarters for even cooking; smaller ones can remain whole.
- Place the prepared strawberries in a large bowl and set aside.
This step is crucial because properly prepared strawberries release their natural sweetness and blend evenly with the sugar and pectin.
Sterilizing Jars and Equipment
Sterilization guarantees our jam stays fresh and safe for months to come. We recommend the following method for sterilizing jars and other tools:
| Equipment | Sterilization Method | Duration |
|---|---|---|
| Canning jars | Boil jars in large pot with water | 10 minutes |
| Lids & bands | Boil in separate pot or soak in hot water | 5 minutes |
| Ladle, funnel | Wash thoroughly, then dip in boiling water | 2 minutes |
| Jar lifter | Wash and dry well (no boiling needed unless used for stirring jam) | N/A |
After boiling, keep jars hot in simmering water until ready to fill. This prevents glass cracking when we pour in hot jam.
“Proper sterilization is a cornerstone of safe jam-making and preserves the vibrant flavor of our large batch strawberry jam.“
Getting these prep steps right sets us up for a seamless and successful jam-cooking session.
Instructions
Follow these precise steps to create our large batch strawberry jam with consistent, delicious results. Each stage is designed for clarity and efficiency.
Making the Jam
- Prepare the Strawberries
Place 8 cups of hulled and quartered fresh strawberries into our large, clean stockpot. This amount ensures a robust fruit base for the jam’s signature texture and flavor.
- Add Sugar and Lemon Juice
Stir in 4 cups of granulated sugar and 1/4 cup of freshly squeezed lemon juice. The sugar sweetens and preserves while the lemon juice balances acidity and activates the pectin. Mix thoroughly to coat the fruit evenly.
- Incorporate Powdered Pectin
Sprinkle 1.75 ounces of powdered pectin over the fruit mixture. Stir continuously and evenly to prevent clumping and to ensure the pectin dissolves into the jam base.
- Boil the Mixture
Bring the mixture to a full rolling boil over medium-high heat. Stir constantly with a heat-resistant spoon to avoid burning or sticking. This vigorous boil should last exactly 1 minute to activate the pectin fully.
- Test Jam Consistency
Perform the gel test by placing a spoonful of hot jam on a chilled plate. After a minute, push with your finger; if it wrinkles and holds shape, it is ready. If not, continue boiling for 30 seconds and retest.
- Remove from Heat and Skim Foam
Once the desired consistency occurs, remove the pot from heat. Skim any foam from the surface with a metal spoon to improve the jam’s clarity and texture.
- Fill Sterilized Jars
Using a ladle and a canning funnel, carefully pour the hot jam into sterilized jars, leaving 1/4 inch headspace at the top. Wipe rims with a clean, damp cloth to remove residue.
- Seal and Process Jars
Place sterilized lids on jars and screw bands until fingertip-tight. Process jars in a boiling water bath for 10 minutes to ensure vacuum sealing and preservation.
| Ingredient | Quantity | Purpose |
|---|---|---|
| Fresh strawberries | 8 cups | Fruit base for flavor and texture |
| Granulated sugar | 4 cups | Sweetness and preservation |
| Powdered pectin | 1.75 ounces | Gel formation |
| Fresh lemon juice | 1/4 cup | Acidity balance and pectin activation |
“Boiling for 1 minute after adding pectin is crucial for the jam’s set and shelf life.”
By following these carefully crafted steps, we ensure our large batch strawberry jam holds vibrant fruit flavors, ideal gel texture, and lasts perfectly sealed throughout the year.
Testing Jam Consistency
To ensure our large batch strawberry jam has the perfect gel texture, we must test its consistency during the cooking process. This step is crucial because it confirms the jam will set properly and maintain its vibrant flavor and shelf life.
Step 1: Prepare the Cold Plate
Before we begin boiling the jam mixture, place a small plate or saucer in the freezer. The cold surface helps us assess the jam’s readiness quickly.
Step 2: Perform the Spoon or Cold Plate Test
After boiling the jam for exactly one minute with the added pectin, follow these steps:
- Remove the cold plate from the freezer.
- Drip a small amount of the hot jam onto the plate.
- Let it sit for 30 seconds to 1 minute, allowing the jam to cool.
- Gently push the edge of the jam with your finger.
If the jam wrinkles and holds its shape without running, it has reached the ideal consistency. If it’s still too runny or liquid, continue boiling and test again every few minutes.
Step 3: Additional Test — The Sheet Test
We can also use the sheet test to verify thickness:
- Dip a spoon into the boiling jam.
- Lift the spoon and allow the jam to flow off.
- If the jam flows off in a thick sheet rather than droplets, it’s ready.
Table of Consistency Indicators
| Test Method | Indicator of Perfect Jam Consistency | Action if Jam is Not Ready |
|---|---|---|
| Cold Plate Test | Jam wrinkles when pushed gently on cold plate | Boil additional 1-2 minutes, retest |
| Sheet Test | Jam flows off spoon in a thick sheet, not droplets | Continue boiling and test again |
By following these consistency tests, we ensure our large batch strawberry jam is perfectly set with a vibrant, luscious texture that enhances every bite.
Canning and Storing
Proper canning and storing techniques are essential to preserve the fresh taste and texture of our Large Batch Strawberry Jam. Following these steps ensures long-lasting quality and safety.
Filling Jars
We start by carefully filling our sterilized jars with hot jam. Using a canning funnel keeps the process clean and efficient. Leave a precise 1/4 inch headspace at the top of each jar to allow for expansion during processing. Wipe the rims of the jars with a clean, damp cloth to remove any jam residue. This step is crucial to create a tight seal later and prevent contamination.
- Use a ladle to transfer jam into jars while maintaining consistent spacing.
- Ensure no air bubbles remain by gently tapping the jars or running a non-metallic spatula around the inside edges.
- Place sterilized lids and screw bands on jars, tightening to fingertip tightness.
Processing Jars in Boiling Water Bath
Processing jars in a boiling water bath ensures safe preservation by destroying any remaining bacteria, molds, or yeasts. We follow these precise steps for consistent results:
| Step | Detail |
|---|---|
| Fill water bath | Fill canner with enough water to cover jars by at least 1–2 inches |
| Preheat water | Heat water to a gentle boil before placing jars in |
| Submerge jars | Use jar lifter to lower jars into water carefully |
| Boil time | Process jars for 10 minutes* |
| Remove and cool | Lift jars out and place on a towel or cooling rack |
*Processing time may vary based on altitude. Increase boiling time by 1 minute for every 1,000 feet above sea level.
Cooling and Sealing
After processing, cooling is a critical step for perfect sealing. We let jars sit undisturbed at room temperature for 12–24 hours. During this time, you may hear satisfying “popping” sounds—that’s the lids sealing properly.
- Check seals by pressing the center of each lid. If the lid does not flex up or down, the jar is sealed.
- For any jars that do not seal, refrigerate and consume within 3 weeks.
- Remove screw bands, wipe jars clean, label with date and contents before storing.
“Well-sealed jars can be stored in a cool, dark place for up to 1 year.” By mastering these steps, our Large Batch Strawberry Jam stays safe and delicious to enjoy well beyond strawberry season.
Tips for Success
Mastering our Large Batch Strawberry Jam Recipe means paying attention to a few key details. Here are essential tips to ensure our jam turns out perfectly every time.
Choosing the Best Strawberries
For the most vibrant and flavorful jam, selecting the right strawberries is crucial. We recommend:
- Choose ripe, red, and fragrant strawberries – Underripe or overly soft berries affect taste and texture.
- Buy fresh local strawberries if possible – They retain maximum natural sweetness and aroma.
- Avoid bruised or moldy fruit – These can spoil the batch and reduce shelf life.
- Hull and wash just before use – Minimizes water absorption which can thin the jam.
“The foundation of great jam begins with the freshest strawberries. The better the fruit the richer and more luscious the final jam.”
| Strawberry Quality | Jam Outcome |
|---|---|
| Ripe & fresh | Bright flavor & perfect gel |
| Underripe | Tart & thin texture |
| Overripe/bruised | Poor flavor & shelf life |
Adjusting Sweetness
Our recipe calls for 4 cups of granulated sugar for 8 cups of strawberries, balancing sweetness and preservation beautifully. To tailor sweetness:
- For a less sweet jam, reduce sugar by up to 20% – This can affect gel firmness slightly.
- Add natural sweeteners like honey or agave cautiously – Adjust pectin as these alter gel setting.
- Taste test before cooking – Mix a small raw sample with sugar to check sweetness preference.
| Sugar Amount | Sweetness Level | Texture Impact |
|---|---|---|
| 4 cups | Classic sweet | Firm gel |
| 3.2 cups (-20%) | Moderately sweet | Slightly softer |
| <3 cups | Low sweet | May not set well |
“Balancing sugar allows us to enjoy our jam exactly how we like it without sacrificing that ideal jam texture.”
Troubleshooting Common Issues
Sometimes despite best efforts, we may face hiccups when making a large batch strawberry jam. Here’s how to resolve common problems:
| Problem | Cause | Solution |
|---|---|---|
| Jam didn’t set properly | Insufficient pectin or cooking time | Add more pectin, boil for full 1 minute after adding pectin |
| Jam too runny | Too much water or undercooked | Cook longer or add a small amount of extra pectin |
| Jam too thick or stiff | Overcooked or too much pectin | Add a little hot water and stir until desired consistency |
| Mold growth after storage | Improper sterilization or sealing | Ensure jars sterilized; check for proper seal; refrigerate after opening |
“Successful jam-making is part science part timing and technique — patience and careful attention make all the difference.”
Following these tips will help us craft a luscious Large Batch Strawberry Jam that delights with every spoonful and preserves the sweet taste of summer all year round.
Serving Suggestions
Our Large Batch Strawberry Jam offers endless ways to elevate your meals and snacks. Here are some of our favorite Serving Suggestions to enjoy this vibrant, luscious jam:
Breakfast Delights
- Spread a generous layer of strawberry jam on warm toast, English muffins, or buttery croissants.
- Swirl into plain or vanilla yogurt for a naturally sweetened, fruity twist.
- Mix a spoonful into oatmeal or overnight oats to add a fresh strawberry flavor and natural sweetness.
Sweet Treats
- Use as a filling for homemade pastries, tarts, or thumbprint cookies.
- Dollop on pancakes, waffles, or French toast topped with whipped cream for a luxurious breakfast or dessert.
- Add a layer between cake tiers or on cupcakes for an irresistibly fruity surprise.
Savory Pairings
- Serve alongside cheese boards; pairs wonderfully with soft cheeses like brie or mascarpone and sharper varieties like aged cheddar.
- Spread on sandwiches with roasted turkey or ham for a sweet-savory flavor balance.
- Incorporate into salad dressings or marinades for a hint of fruitiness.
Storage & Serving Tips
| Tip | Details |
|---|---|
| Serve at room temperature | Enhances the jam’s natural aroma and fruity flavor. |
| Use clean utensils | Prevents contamination and preserves shelf life. |
| Refrigerate after opening | Keeps jam fresh for up to 3 weeks after opening. |
“Pro Tip: Warm the jam slightly before serving if it’s set too firm, helping it spread easily without losing texture.”
Our Large Batch Strawberry Jam is perfect for sharing and enhances a wide range of dishes from breakfast to dessert, assuring every spoonful bursts with the sweet essence of fresh summer strawberries.
Conclusion
Making a large batch of strawberry jam is a rewarding way to capture the essence of summer and enjoy it throughout the year. With the right ingredients, equipment, and techniques, we can create a delicious, versatile jam that enhances everything from breakfast to cheese boards.
By following a reliable process and paying attention to details like consistency and proper canning, we ensure our jam stays fresh and flavorful for months. Whether we’re preserving a bountiful harvest or simply craving homemade goodness, this recipe delivers satisfying results every time. Let’s keep spreading the joy of fresh strawberry jam in our kitchens and on our tables.
Frequently Asked Questions
What ingredients do I need to make large batch strawberry jam?
You need 8 cups of hulled fresh strawberries, 4 cups of granulated sugar, 1.75 ounces of powdered pectin, and 1/4 cup of freshly squeezed lemon juice for a perfect large batch.
What equipment is essential for making and canning strawberry jam?
A large stockpot (8-quart minimum), canning jars and lids, a canning funnel, ladle, jar lifter, and a food thermometer are essential for smooth cooking and safe preservation.
How do I prepare strawberries for jam-making?
Wash the strawberries thoroughly, hull them by removing stems, and cut them into even pieces to ensure consistent cooking and flavor.
Why is sterilizing jars important?
Sterilizing jars kills bacteria and ensures freshness, preventing spoilage and ensuring the jam is safe for long-term storage.
How long should I boil the jam mixture after adding pectin?
Boil the mixture for exactly one minute after adding pectin to activate it and ensure the jam sets properly.
How can I test if the jam has the perfect consistency?
Use the Cold Plate Test by dripping jam on a cold plate to see if it wrinkles, or the Sheet Test by observing if jam flows off a spoon in a thick sheet.
What is the proper method for canning and storing homemade jam?
Fill sterilized jars with hot jam, leaving 1/4 inch headspace, remove air bubbles, seal with lids, then process in a boiling water bath for 10 minutes (adjusted for altitude). Let jars cool undisturbed 12–24 hours before storing in a cool, dark place.
How long can homemade strawberry jam be stored?
Properly canned and sealed jam can be stored for up to one year in a cool, dark place.
How can I adjust the sweetness of my jam?
You can reduce or increase sugar slightly according to taste, but be cautious as sugar also helps with preservation and gel formation.
What are some serving suggestions for strawberry jam?
Use it on toast, yogurt, pastries, pancakes, with cheese boards, or as an ingredient in salad dressings. Warm slightly if too firm for easy spreading.
How should I store jam after opening?
Store open jam in the refrigerator and always use clean utensils to maintain freshness and prevent contamination.
What troubleshooting tips help if my jam doesn’t set properly?
Try boiling a little longer, retest consistency, or add a small amount of extra pectin. Make sure measurements and cooking times are accurate.