
Who doesn’t love biting into a rich, fudgy brownie? Our kosher brownie recipe brings all the indulgence you crave while adhering to dietary guidelines. Whether you’re preparing for Shabbat dessert, a holiday treat, or just satisfying a chocolate craving, these brownies are a crowd-pleaser every time.
What makes this recipe special is its simplicity and versatility. We use pantry staples and a few easy swaps to keep it kosher without compromising on that classic brownie texture—chewy edges and a gooey center. Perfect for sharing or keeping all to ourselves, this recipe is bound to become a favorite in your kitchen.
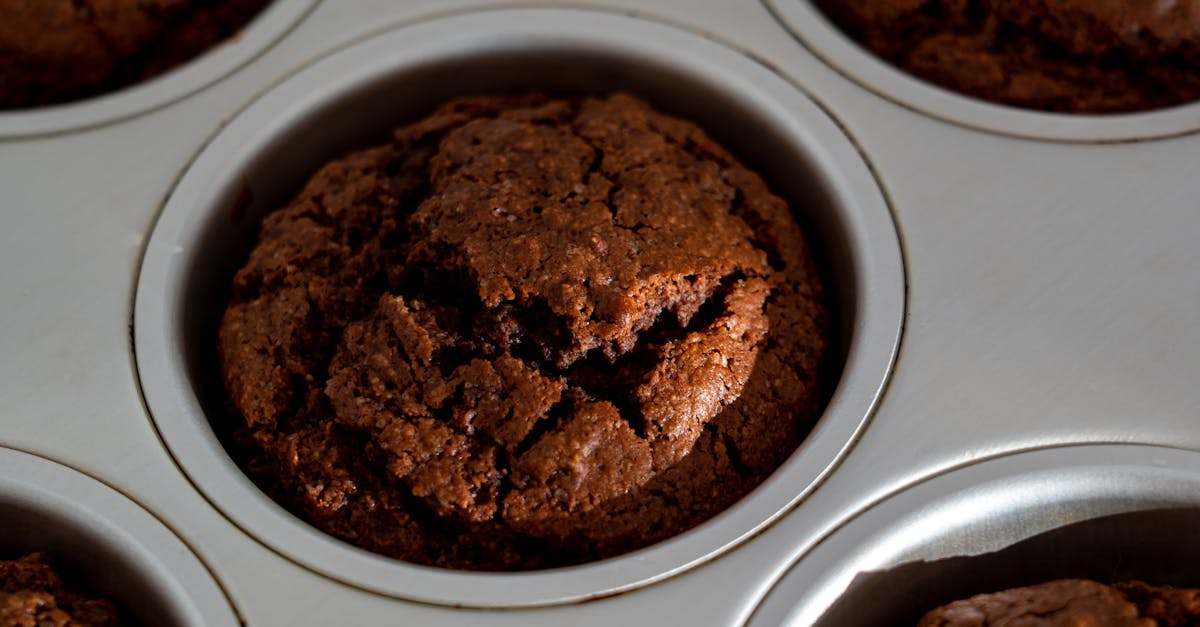
Kosher Brownie Recipe
Get ready to create the most indulgent kosher brownies with perfectly chewy edges, a soft, fudgy center, and a rich chocolate flavor. Let’s follow these simple steps to whip up this versatile treat.
Ingredients
- 1 cup granulated sugar
- 1/2 cup brown sugar, packed
- 1/2 cup unsalted margarine, melted
- 2 large eggs, at room temperature
- 1 teaspoon vanilla extract
- 1/3 cup unsweetened cocoa powder
- 1/2 cup all-purpose flour
- 1/4 teaspoon kosher salt
- 1/4 teaspoon baking powder
- 1/2 cup dairy-free chocolate chips (optional)
Tip: Look for kosher-certified products when choosing ingredients to ensure the recipe adheres to dietary guidelines.
Instructions
- Prepare the Oven and Pan
- Preheat your oven to 350°F (175°C).
- Line an 8×8-inch baking pan with parchment paper, leaving an overhang for easy removal. Lightly grease the parchment with nonstick spray.
- Mix the Wet Ingredients
- In a large bowl, combine the melted margarine, sugar, and brown sugar. Whisk until smooth and shiny.
- Add the eggs one at a time, whisking vigorously after each addition. Stir in the vanilla extract until everything is fully incorporated.
- Incorporate the Dry Ingredients
- In a separate bowl, sift together the cocoa powder, flour, kosher salt, and baking powder.
- Gradually fold the dry mixture into the wet ingredients using a silicone spatula. Mix until just combined, being careful not to overmix. If you’re adding chocolate chips, gently fold them in at this stage.
- Bake the Brownies
- Pour the batter into the prepared baking pan and spread it out evenly using the back of a spoon or a spatula.
- Bake in the preheated oven for 25-30 minutes or until the top is set and a toothpick inserted into the center comes out with a few moist crumbs.
| Baking Time | Oven Temperature | Pan Size |
|---|---|---|
| 25-30 minutes | 350°F (175°C) | 8×8-inch square |
- Cool and Serve
- Allow the brownies to cool in the pan for about 15 minutes, then use the parchment paper overhang to lift them out onto a wire rack.
- Let them cool completely before slicing into squares for clean cuts.
Pro Tip: For ultra-clean brownie edges, chill the brownies in the refrigerator for 20 minutes before cutting.
Ingredients
For our kosher brownie recipe, we’ll use a perfect blend of wet and dry ingredients, along with optional add-ins to create a deliciously fudgy treat. Ensure all components are kosher-certified for the best results.
Wet Ingredients
- ¾ cup (1½ sticks) unsalted margarine (softened; substitute with dairy-free butter if preferred)
- 1 cup granulated sugar
- ½ cup packed light brown sugar
- 2 large eggs (room temperature)
- 2 teaspoons pure vanilla extract
Dry Ingredients
- ½ cup unsweetened cocoa powder (use Dutch-process for a deeper flavor, if desired)
- ¾ cup all-purpose flour (sifted for a smoother batter)
- ½ teaspoon kosher salt (balances the sweetness)
- ½ teaspoon baking powder (optional, if you prefer a slightly cakier texture)
Optional Add-ins
- ½ cup dairy-free chocolate chips (choose a brand with a kosher symbol)
- ½ cup chopped nuts (e.g., walnuts or pecans, for added crunch)
- ¼ cup shredded coconut (if aiming for a tropical twist)
Pro Tip: Highlight your brownies with mix-ins like a sprinkle of flaky kosher salt or a drizzle of tahini over the batter before baking.
Tools And Equipment
To ensure that our kosher brownies turn out rich, fudgy, and picture-perfect, it’s essential to use the right tools and equipment. Using the correct items not only streamlines the baking process but also helps deliver consistent results. Here’s a list of the must-have tools and their purposes:
Essential Tools
- Mixing Bowls: At least two bowls—one for wet ingredients and one for dry ingredients. Opt for medium to large sizes for easy mixing.
- Whisk or Mixing Spoon: A whisk or sturdy spoon to combine ingredients smoothly. This helps incorporate air into the batter for a lighter texture.
- Rubber Spatula: Ideal for scraping down the sides of the bowl and ensuring no batter goes to waste.
- Measuring Cups and Spoons: Accurate measurements are critical in baking, especially for balancing kosher-friendly ingredients. Use separate cups for dry and liquid measurements.
Baking Equipment
| Tool | Purpose |
|---|---|
| 8×8-inch Baking Pan | Perfect for achieving thick, gooey brownies. Line it with parchment paper for easy removal. |
| Parchment Paper | Prevents sticking and ensures clean edges while lifting the brownies out of the pan. |
| Wire Cooling Rack | Allows the brownies to cool evenly, preventing them from becoming soggy on the bottom. |
Optional Add-On Tools
- Sifter: Useful for removing lumps from cocoa powder or flour for a smoother batter.
- Offset Spatula: Ensures the brownie batter is evenly spread in the baking pan, leading to uniform baking.
- Knife or Dough Cutter: Chill and cut your brownies with a sharp knife or dough cutter for those clean, café-style edges.
Directions
Let’s dive into the step-by-step process of creating these rich, chewy, and fudgy kosher brownies. Follow these simple instructions for perfect results every time.
Prep
- Preheat the oven to 350°F (175°C).
- Line an 8×8-inch baking pan with parchment paper, leaving some overhang on the sides for easy removal.
- Gather all kosher-certified ingredients and ensure the margarine is softened to room temperature for smoother mixing.
Mix The Wet Ingredients
- In a large mixing bowl, beat together ½ cup softened unsalted margarine, 1 cup granulated sugar, and ½ cup brown sugar using a whisk or an electric mixer until the mixture is fluffy and creamy.
- Crack in two large eggs, one at a time, mixing well after each addition.
- Stir in 2 teaspoons of vanilla extract until fully incorporated.
Combine Dry Ingredients
- In a separate bowl, sift together:
- ½ cup unsweetened cocoa powder
- ¾ cup all-purpose flour
- ½ teaspoon kosher salt
- Optional: ½ teaspoon baking powder for a slightly cakier texture.
- Use a whisk to ensure these ingredients are evenly distributed, breaking up any lumps.
Fold Everything Together
- Gradually add the dry ingredients to the wet mixture, folding gently with a rubber spatula. Be cautious not to overmix to avoid dense brownies.
- If desired, fold in ½ cup dairy-free chocolate chips, chopped nuts, or shredded coconut for added texture and flavor.
Bake The Brownies
- Pour the batter into the prepared baking pan, spreading it evenly with an offset spatula to ensure smooth edges.
- Bake in the preheated oven for 25-30 minutes, or until a toothpick inserted into the center comes out with moist crumbs (not wet batter).
- Remove from the oven and place the pan on a wire cooling rack for at least an hour to cool completely.
Pro Tip: For clean edges when slicing, chill the brownies in the fridge for 15-20 minutes before cutting with a sharp knife or dough cutter.
Tips For Perfect Kosher Brownies
Creating kosher brownies that are moist, fudgy, and delicious requires attention to detail and a few expert techniques. Follow these tips to elevate your baking game and achieve bakery-quality results every time:
1. Choose Quality Ingredients
- Always use kosher-certified products, such as margarine, cocoa powder, and chocolate chips, to maintain dietary compliance and ensure authenticity.
- Opt for high-quality cocoa powder for a rich chocolate flavor. For a more decadent texture, use Dutch-processed cocoa, if available.
- Fresh eggs and correctly measured sugars (both granulated and brown) ensure the proper structure and sweetness.
2. Measure Accurately
- Baking is a science. Use measuring cups and spoons for precise ingredient measurements, especially for flour and cocoa powder.
- Avoid packing flour into the measuring cup. Instead, spoon it in and level it off for accuracy. Too much flour can lead to dense, dry brownies.
3. Achieve the Ideal Batter
- Beat the eggs and sugars until just combined. Overmixing can incorporate too much air, resulting in cakey brownies rather than fudgy ones.
- When folding the dry ingredients into the wet mixture, mix until just combined to avoid overworking the batter.
4. Prepare the Pan Perfectly
- Line the baking pan with parchment paper, leaving overhangs on two sides for easy removal. This prevents sticking and ensures neat brownie edges.
- For thicker brownies, stick to an 8×8-inch pan as recommended. A larger pan will result in thinner brownies.
5. Custom Doneness Check
- To achieve that classic gooey center, check for doneness with a toothpick. It should come out with moist crumbs—not wet batter. If it’s clean, the brownies are overbaked.
- Each oven varies, so start checking at the 25-minute mark and adjust accordingly.
6. Enhance with Mix-Ins
- Add texture and flavor by incorporating dairy-free chocolate chips, chopped nuts, or shredded coconut into the batter. Sprinkle with flaky kosher salt for an exciting sweet-and-salty combination.
- If you want a unique twist, swirl a dollop of tahini or peanut butter on top before baking.
7. Cool Completely Before Cutting
- Allow the brownies to cool on a wire cooling rack to prevent sogginess. For the cleanest slices, chill the brownies in the fridge for at least 30 minutes.
- Use a sharp knife or dough cutter to cut the chilled brownies into perfect squares.
8. Store Brownies Properly
- Store brownies in an airtight container at room temperature for up to 3 days for freshness. For longer storage, freeze the brownies in a single layer and thaw before serving.
- If you have added any perishable toppings, refrigerate in a sealed container.
Table of Key Temperatures and Times:
| Step | Temperature/Time |
|---|---|
| Baking temperature | 350°F (175°C) |
| Baking time | 25–30 minutes |
| Cooling duration | At least 30 minutes (optional chilling) |
Make-Ahead Instructions
Preparing these kosher brownies in advance is a breeze, making them perfect for busy schedules, upcoming events, or last-minute cravings. We’ll walk you through every step to ensure your brownies maintain their rich, fudgy texture and irresistible flavor when you need them.
Baking in Advance
If you’re planning to bake the brownies ahead of time, follow these steps:
- Bake as Directed: Prepare and bake the brownies according to the recipe instructions, ensuring they are fully cooled before moving on.
- Wrap Properly: Use plastic wrap to tightly cover the pan or individual brownie slices to prevent air exposure. For added protection, add a layer of aluminum foil over the plastic wrap.
- Storage Tips:
- At Room Temperature: For short-term storage (up to 2 days), keep the covered brownies at room temperature in a cool, dry place.
- Refrigeration: For a slightly longer storage option (up to 5 days), place the wrapped brownies in an airtight container in the refrigerator.
| Storage Option | Recommended Time |
|---|---|
| Room Temperature | Up to 2 days |
| Refrigerated | Up to 5 days |
| Frozen | Up to 3 months |
Freezing Kosher Brownies
Freezing is a fantastic way to save time and always have indulgent kosher brownies on hand for any occasion. Here’s how to freeze them for the best results:
- Cool Completely: Ensure the brownies are cooled entirely to avoid condensation, which can lead to freezer burn.
- Slice or Keep Whole: Decide whether you’d prefer individual portions or to freeze the brownies as a whole slab.
- Double Wrap:
- For individual pieces, wrap each slice in plastic wrap and place them in a freezer-safe, airtight container or zip-top bag.
- For a whole batch, wrap the entire pan tightly in plastic wrap, followed by a layer of aluminum foil.
- Label & Freeze: Add a label with the date to track freshness. Store in the freezer for up to 3 months.
Pro Tip: Thaw brownies by removing them from the freezer and allowing them to sit at room temperature for 1-2 hours while still wrapped.
Reheating for Freshness
To restore the warm, gooey texture of freshly baked brownies, reheat them using these methods:
- Microwave: Heat a single brownie on medium power for 10-15 seconds for a quick fix.
- Oven: Preheat to 300°F and warm the entire pan or individual squares for 5-10 minutes, covering with foil to prevent drying.
Bonus Tip: Top reheated brownies with dairy-free ice cream or a drizzle of chocolate ganache for an extra indulgent dessert.
Conclusion
Crafting the perfect kosher brownie is simpler than it seems, and the results are absolutely worth it. With a few pantry staples, the right tools, and some thoughtful techniques, we can create a dessert that’s rich, chewy, and irresistibly fudgy. Whether we’re preparing for a special occasion or indulging in a quiet moment, these brownies are a reliable go-to treat.
By following the steps and tips outlined, we can ensure consistent, delicious results every time. Let’s not forget the joy of experimenting with mix-ins or serving ideas to make each batch uniquely ours. Now’s the time to grab our aprons and start baking!
Frequently Asked Questions
What makes this brownie recipe kosher?
This recipe is kosher because it adheres to dietary guidelines, using kosher-certified ingredients like margarine and dairy-free chocolate chips. It avoids mixing meat and dairy, ensuring it’s suitable for kosher kitchens.
Can I make these brownies ahead of time?
Yes, you can bake the brownies in advance. Wrap them tightly and store at room temperature for up to 3 days, in the refrigerator for 1 week, or freeze for up to 3 months.
How do I ensure clean edges when cutting the brownies?
For clean edges, chill the brownies in the refrigerator for 30 minutes before slicing with a sharp knife or dough cutter. This helps reduce crumbling.
What’s the best way to store leftover brownies?
Store brownies in an airtight container at room temperature for 2-3 days or in the refrigerator for up to a week. For longer storage, freeze them in a freezer-safe bag for up to 3 months.
Can I customize this recipe with mix-ins?
Absolutely! You can add dairy-free chocolate chips, chopped nuts, shredded coconut, or even drizzle tahini and sprinkle flaky kosher salt for extra flavor.
What size baking pan should I use for this recipe?
An 8×8-inch baking pan is recommended to achieve the perfect thickness and texture for the brownies.
How do I know when the brownies are done baking?
Insert a toothpick in the center of the brownies. If it comes out with a few moist crumbs but no wet batter, they are done. Avoid overbaking for a fudgy center.
Can I make the brownies gluten-free?
Yes! Substitute the all-purpose flour with a gluten-free baking flour blend to make this recipe gluten-free while keeping the same consistency.
What tools do I need to make kosher brownies?
You’ll need mixing bowls, measuring cups, a whisk or spoon, a spatula, and an 8×8-inch baking pan with parchment paper. Optional tools include a sifter or offset spatula.
How do I reheat brownies to restore their gooey texture?
To reheat, microwave the brownies for 10-15 seconds to bring back their warm, gooey texture. For a special treat, serve them with dairy-free ice cream or chocolate ganache.