
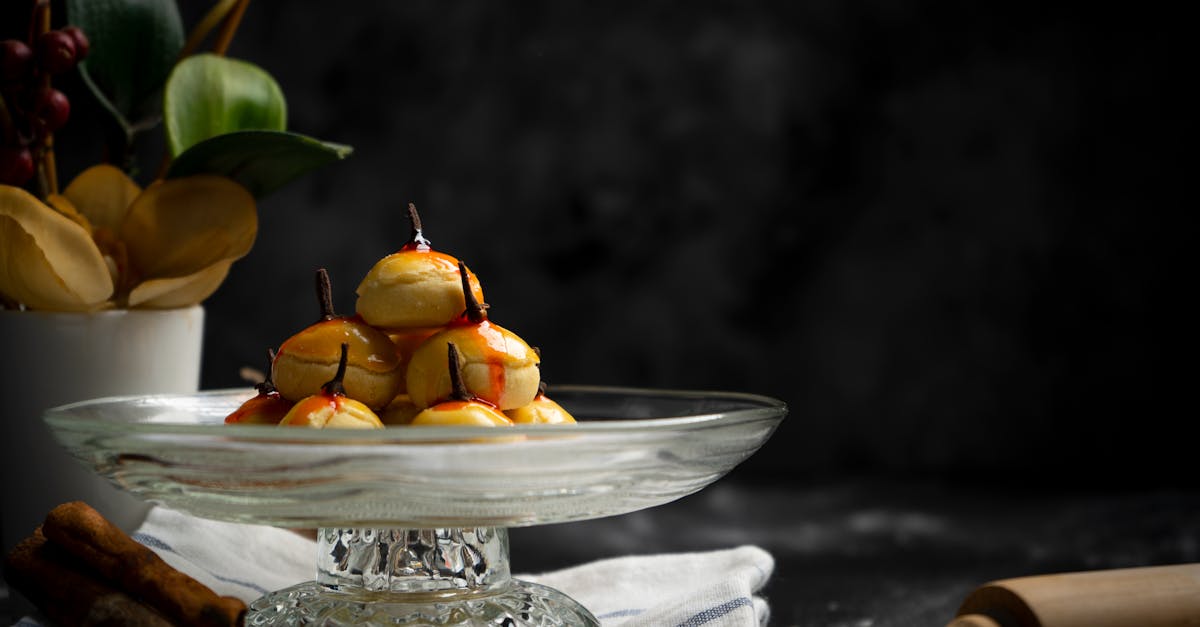
There’s nothing quite like the aroma of fresh cinnamon buns baking in the oven. With our KitchenAid Cinnamon Bun Recipe, we make creating these soft, gooey treats easier than ever. Using your KitchenAid mixer, you’ll save time and effort while achieving the perfect dough consistency every time.
Ingredients
To create our KitchenAid Cinnamon Bun Recipe, we need fresh and quality ingredients for every component. Below, we break down the essential elements into dough, filling, and glaze to keep your baking organized and efficient.
Dough Ingredients
The foundation of our cinnamon buns starts with a soft, elastic dough made possible by precise measurements and high-quality ingredients. Using our KitchenAid mixer, we combine the following:
- 1 cup whole milk, warmed (around 110°F)
- 2 ¼ teaspoons active dry yeast (one packet)
- ½ cup granulated sugar
- ⅓ cup unsalted butter, melted and cooled
- 1 teaspoon salt
- 2 large eggs, room temperature
- 4 cups all-purpose flour (more as needed)
Filling Ingredients
The rich, gooey filling is where the iconic cinnamon sugar flavor comes alive. We mix these for the perfect sweet and spicy interior:
- 1 cup packed brown sugar (light or dark)
- 3 tablespoons ground cinnamon
- ⅓ cup unsalted butter, softened
Glaze Ingredients
To finish our KitchenAid Cinnamon Bun Recipe with a luscious finish, prepare a smooth glaze that adds a sweet and creamy touch:
- 4 ounces cream cheese, softened
- ¼ cup unsalted butter, softened
- 1 ½ cups powdered sugar, sifted
- ½ teaspoon vanilla extract
- 2-3 tablespoons whole milk
| Component | Ingredient | Quantity | Notes |
|---|---|---|---|
| Dough | Whole milk | 1 cup | Warmed to around 110°F |
| Dough | Active dry yeast | 2 ¼ teaspoons (1 pkt) | |
| Dough | Granulated sugar | ½ cup | |
| Dough | Unsalted butter | ⅓ cup | Melted and cooled |
| Dough | Salt | 1 teaspoon | |
| Dough | Eggs | 2 large | Room temperature |
| Dough | All-purpose flour | 4 cups | More if needed for dough |
| Filling | Brown sugar | 1 cup | Packed |
| Filling | Ground cinnamon | 3 tablespoons | |
| Filling | Unsalted butter | ⅓ cup | Softened |
| Glaze | Cream cheese | 4 ounces | Softened |
| Glaze | Unsalted butter | ¼ cup | Softened |
| Glaze | Powdered sugar | 1 ½ cups | Sifted |
| Glaze | Vanilla extract | ½ teaspoon | |
| Glaze | Whole milk | 2-3 tablespoons | Adjust for desired glaze consistency |
Equipment Needed
To make our KitchenAid Cinnamon Bun Recipe effortlessly, using the right equipment is essential. These tools will help us achieve perfect dough texture, precise rolling, and ideal baking results.
KitchenAid Stand Mixer
The KitchenAid stand mixer is the heart of this recipe. It simplifies mixing and kneading by providing consistent power and speed. Using the dough hook attachment allows us to develop gluten perfectly without tiring our arms. Look for these features:
| Feature | Importance |
|---|---|
| Dough Hook | Ensures even kneading and perfect dough texture |
| Speed Settings | Control mixing intensity for precise results |
| Tilt-Head Design | Easy access to bowl for adding ingredients |
| Heavy-Duty Motor | Handles thick dough effortlessly |
With this equipment, the dough comes together smoothly and rises beautifully.
Baking Pan
For the cinnamon buns to bake evenly and hold their shape, choosing the right Baking Pan is critical. We recommend a:
- 9×13-inch rectangular baking pan for ideal portion sizes and even heat distribution.
- Use a metal or glass pan based on your oven type. Glass retains heat evenly while metal pans brown faster.
- Grease the pan lightly with butter or non-stick spray to prevent sticking and help buns brown perfectly.
Rolling Pin
To roll out the dough to an even thickness, a reliable Rolling Pin is a must-have. Consider:
- A solid wooden or stainless steel rolling pin for durability.
- Smooth surface reduces dough sticking.
- Use gentle even pressure to create a rectangular dough sheet about 12×18 inches for easy filling and slicing.
Our recommended equipment setup ensures the KitchenAid Cinnamon Bun Recipe produces soft, tender buns with rich flavor and ideal texture every time.
Instructions
Follow these detailed steps to create irresistibly soft and flavorful KitchenAid Cinnamon Buns using our optimized method. Each stage brings us closer to the perfect cinnamon bun experience.
Prepare the Dough
- Warm the Milk: Heat 1 cup of whole milk to about 110°F (warm to the touch, not hot).
- Activate Yeast: In the KitchenAid bowl, combine warm milk, 2 1/4 teaspoons (1 packet) active dry yeast, and 1 tablespoon granulated sugar. Let sit 5 minutes until foamy.
- Add Ingredients: Mount the dough hook on the KitchenAid mixer. Add 3 1/2 cups all-purpose flour, 1/2 teaspoon salt, 2 large eggs, and 1/4 cup unsalted butter (softened).
- Mix and Knead: Mix on low speed (speed 2) for 8-10 minutes until dough is smooth and elastic. If dough is sticky, add flour 1 tablespoon at a time until manageable.
First Rise
- Transfer the Dough: Lightly grease a large bowl with butter or cooking spray.
- Cover and Rest: Place dough in the bowl, cover with a clean kitchen towel or plastic wrap.
- Let Rise: Allow dough to rise in a warm draft-free place until doubled, approximately 1 to 1 1/2 hours.
Prepare the Filling
- Mix Filling Ingredients: In a small bowl, combine:
- 1 cup brown sugar (packed)
- 2 tablespoons ground cinnamon
- 1/2 cup unsalted butter (softened)
- Stir until creamy and well combined.
Assemble the Cinnamon Buns
- Roll Out Dough: On a lightly floured surface, roll dough into a 15×9-inch rectangle about 1/4 inch thick using the rolling pin.
- Spread Filling: Evenly spread the prepared cinnamon filling over the dough, leaving a small border on edges.
- Roll Dough: Starting from the longer side, tightly roll the dough into a log.
- Slice Buns: Cut the log into 12 equal slices using a sharp knife or dental floss.
Second Rise
- Prepare Baking Pan: Grease a 9×13-inch rectangular baking pan.
- Arrange Buns: Place the sliced buns cut-side up, spaced slightly apart.
- Cover and Rise: Cover again with towel or plastic wrap and let buns rise for 30-45 minutes until puffed.
Bake the Cinnamon Buns
| Baking Time | Temperature | Oven Type | Notes |
|---|---|---|---|
| 20-25 mins | 350°F (177°C) | Conventional or Convection | Bake until golden brown, avoid overbaking |
- Preheat oven: Set to 350°F (177°C).
- Bake: Place the pan on the center rack and bake buns 20-25 minutes.
- Cool: Remove buns and cool slightly before glazing.
Prepare the Glaze
- Combine Ingredients: In a bowl, beat together:
- 4 oz cream cheese (softened)
- 1/4 cup unsalted butter (softened)
- 1 to 1 1/2 cups powdered sugar (adjust for desired sweetness)
- 1 teaspoon vanilla extract
- 1-2 tablespoons whole milk (add gradually for preferred consistency)
- Whip until smooth and creamy.
Glaze and Serve
- Apply Glaze: While buns are warm, drizzle or spread the cream cheese glaze generously over each bun.
- Enjoy: Serve warm for a melt-in-your-mouth KitchenAid Cinnamon Bun experience that delights all senses.
Tips for Perfect Cinnamon Buns
Mastering the art of perfect KitchenAid Cinnamon Buns requires attention to detail in every step. Here are our expert tips to ensure your buns come out soft, flavorful, and beautifully golden every time.
Dough Handling Tips
- Warm the Milk Properly: Use milk warmed to about 110°F for activating the yeast—too hot will kill it, too cold will slow fermentation.
- Use the KitchenAid Dough Hook: Let your mixer do the work by kneading the dough with the dough hook at speed 2 for 8-10 minutes until the dough is smooth and elastic.
- Check Dough Consistency: The dough should be tacky but not sticky. If it sticks to your fingers, add flour a tablespoon at a time.
- First Rise: Cover the bowl tightly with a damp towel or plastic wrap for a warm, draft-free environment. Let the dough rise until doubled in size—usually about 1 to 1½ hours.
- Avoid Over-Flouring When Rolling: Sprinkle just enough flour on your surface and rolling pin to prevent sticking but keep the dough light and airy.
Baking Tips
- Preheat Oven Properly: Make sure your oven reaches 350°F before baking for even cooking and a golden crust.
- Use the Recommended Pan: A 9×13-inch pan ensures the buns bake evenly and have room to expand.
- Don’t Skip the Second Rise: After shaping the buns, allow them to rest for 30-45 minutes before baking for ultimate fluffiness.
- Watch Baking Time Closely: Bake for 25-30 minutes. Buns should be golden brown and springy to touch.
- Tent with Foil if Browning Too Fast: If the tops brown before the centers are done, loosely cover with foil.
| Oven Temp | Baking Time | Dough Temperature | Rise Time (First) | Rise Time (Second) |
|---|---|---|---|---|
| 350°F | 25-30 min | 110°F (milk) | 1-1½ hours | 30-45 minutes |
Storage Tips
- Keep Buns Covered: Store cinnamon buns in an airtight container or wrapped tightly with plastic wrap to maintain softness.
- Room Temperature Storage: Best consumed within 2 days at room temperature. Reheat in the microwave for 10-15 seconds to refresh softness.
- Freeze for Longer Storage: Wrap buns individually in plastic wrap then foil. Freeze for up to 3 months. Thaw overnight in the fridge before reheating.
- Reheat with Moisture: For softer buns after freezing, warm in the oven at 300°F for 10 minutes, placing a small oven-safe dish of water inside to retain moisture.
Conclusion
Baking cinnamon buns with the KitchenAid mixer makes the whole process smoother and more enjoyable. With the right ingredients, equipment, and techniques, we can create soft, flavorful buns that everyone will love.
Taking the time to follow each step carefully ensures consistent results and a delicious treat every time. Whether it’s for breakfast or a special occasion, these cinnamon buns are sure to impress and satisfy.
Frequently Asked Questions
What ingredients are needed for the KitchenAid Cinnamon Bun recipe?
The recipe requires whole milk, active dry yeast, granulated sugar, unsalted butter, salt, eggs, and all-purpose flour for the dough; brown sugar, ground cinnamon, and softened butter for the filling; and cream cheese, unsalted butter, powdered sugar, vanilla extract, and whole milk for the glaze.
Why use a KitchenAid mixer for making cinnamon buns?
A KitchenAid mixer simplifies the process by efficiently mixing and kneading the dough with its dough hook attachment, saving time and effort while ensuring ideal dough consistency.
What equipment is essential for baking these cinnamon buns?
You’ll need a KitchenAid stand mixer, a 9×13-inch rectangular baking pan (lightly greased), and a rolling pin to roll out the dough evenly.
How do I prepare the dough for cinnamon buns?
Warm the milk to activate the yeast, mix in sugar, butter, salt, eggs, and flour, then knead with the mixer’s dough hook. Let the dough rise until doubled in size before shaping.
What is the best way to roll out the dough?
Roll the dough on a lightly floured surface using a rolling pin, aiming for an even thickness to ensure consistent baking and filling distribution.
How long should the dough rise?
Allow the dough to rise in a warm place until it doubles in size, usually about 1 to 1.5 hours, and then after shaping, let it rise again before baking.
What temperature should the oven be for baking cinnamon buns?
Preheat your oven to 350°F (175°C) and bake the buns until they turn a golden brown, typically 20-25 minutes.
How do I store leftover cinnamon buns?
Store buns covered at room temperature for up to two days or freeze them for longer. Reheat gently to keep them soft and delicious.
Can I make the cream cheese glaze ahead of time?
Yes, the glaze can be made ahead and refrigerated. Warm it slightly before applying to the warm buns for best results.
What are the common mistakes to avoid when making cinnamon buns?
Avoid overheating milk (which can kill yeast), over-flouring the surface, skipping the second rise, and not preheating the oven properly to ensure soft, tender buns.