
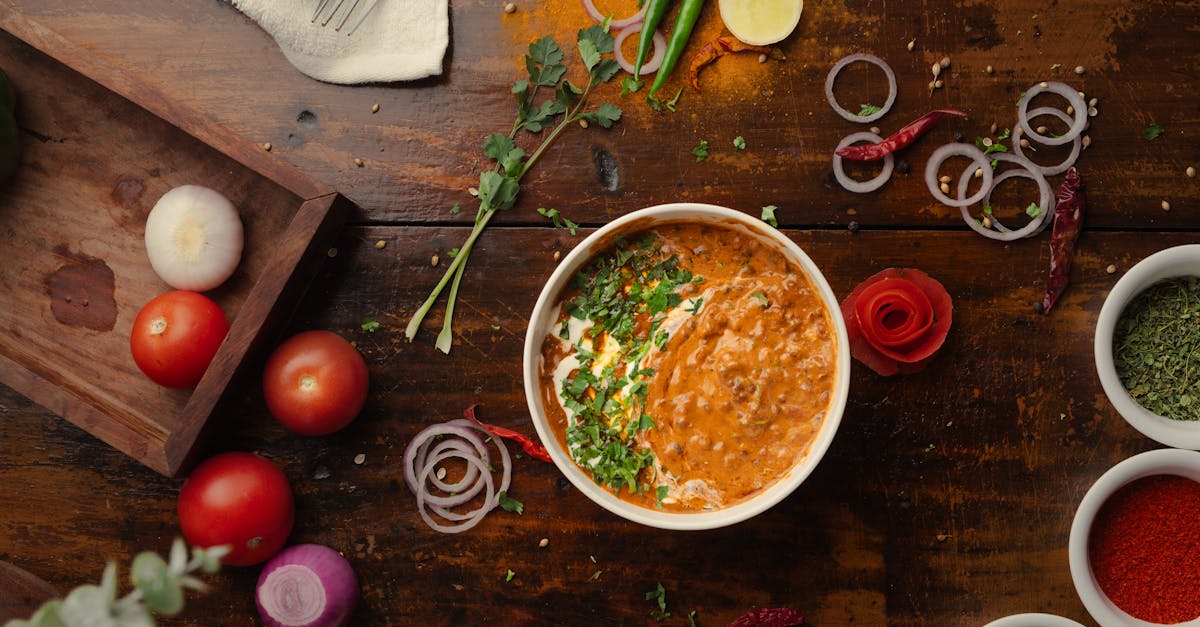
Kansas City chili stands out with its rich, bold flavors and unique twist on a classic comfort food. Unlike traditional Texan chili, this version often features a thicker sauce and a blend of spices that create a deep, savory taste we can’t get enough of. It’s a hearty dish perfect for cozy gatherings or game day celebrations.
We love how this recipe balances spices without overwhelming the palate, making it approachable for chili lovers of all kinds. Whether you’re a seasoned chili fan or trying it for the first time, our Kansas City chili recipe offers a satisfying meal that’s easy to make and full of flavor. Let’s dive into creating this iconic dish that brings a taste of the Midwest right to your kitchen.
Ingredients
To craft an authentic Kansas City Chili with its rich and robust flavor profile, we carefully select ingredients that bring depth and balance to the dish. Here’s what we use to build layers of taste and texture.
Meat and Protein
Our chili relies on hearty, flavorful proteins that form the base of this iconic Midwest dish:
- 2 pounds ground beef (preferably 80% lean for optimal juiciness)
- 1/2 pound ground pork (adds richness and tenderness)
- Optional: 1/2 cup kidney beans (for a touch of traditional Kansas City style, though beans are optional)
Vegetables and Aromatics
These components create the aromatic backdrop and add subtle sweetness and complexity:
- 1 large onion, finely chopped
- 4 cloves garlic, minced
- 1 green bell pepper, diced
- 1 medium tomato, diced or 1/2 cup canned crushed tomatoes (to deepen the sauce texture)
Spices and Seasonings
The spice blend defines the signature balanced heat and flavor intensity of Kansas City Chili:
| Spice/Seasoning | Quantity | Notes |
|---|---|---|
| Chili powder | 3 tablespoons | Provides warm chili flavor |
| Ground cumin | 2 teaspoons | Adds earthiness |
| Paprika (smoked or sweet) | 1 tablespoon | Brings subtle smoky sweetness |
| Oregano (dried) | 1 teaspoon | Classic herb lifting the profile |
| Cayenne pepper | 1/4 teaspoon | Adjust for preferred heat level |
| Salt | 1 to 1.5 teaspoons | To taste |
| Black pepper | 1/2 teaspoon | Freshly ground preferred |
| Brown sugar | 1 tablespoon | Balances acidity and heat |
Liquids and Others
- 2 cups beef broth (for depth and moisture)
- 1/2 cup tomato sauce (intensifies tomato flavor)
- 2 tablespoons Worcestershire sauce (adds umami and complexity)
- 1 tablespoon apple cider vinegar (brightness that balances richness)
- 2 tablespoons vegetable oil (for sautéing aromatics and meat evenly)
Equipment Needed
To create an authentic Kansas City Chili Recipe, having the right equipment is essential for achieving the perfect texture and depth of flavor. Here’s a list of the necessary tools and their specific uses during the cooking process:
- Large Heavy-Bottomed Pot or Dutch Oven
We recommend using a heavy-bottomed pot or Dutch oven with at least a 5-quart capacity. This allows even heat distribution and is ideal for browning the meats and slow-simmering the chili to develop that signature thick sauce.
- Wooden Spoon or Silicone Spatula
For stirring the chili, a wooden spoon or silicone spatula is best. They help in scraping the bottom without damaging the pot’s surface while evenly mixing the ingredients.
- Chef’s Knife
Precision chopping of onions, garlic, and bell peppers requires a sharp chef’s knife. This speeds up prep and ensures uniform cuts for consistent cooking.
- Cutting Board
A sturdy cutting board will provide a reliable surface for chopping the vegetables safely and efficiently.
- Measuring Spoons and Cups
Accurate measurement of spices and liquids is critical in balancing the flavor profile of our chili. Use measuring spoons and cups for consistent results.
- Can Opener
An essential tool for opening tomato sauce and kidney bean cans used in the recipe.
- Ladle
For serving the chili with ease and maintaining portion control during meals.
| Equipment | Purpose |
|---|---|
| Heavy-Bottomed Pot/Dutch Oven | Browning meat and slow simmering chili |
| Wooden Spoon/Silicone Spatula | Stirring and mixing ingredients without damage |
| Chef’s Knife | Precise chopping of vegetables |
| Cutting Board | Safe and reliable surface for chopping |
| Measuring Spoons & Cups | Accurate spice and liquid measurements |
| Can Opener | Opening canned ingredients |
| Ladle | Serving chili |
Having this equipment ready ensures our Kansas City chili cooks evenly and develops its rich bold flavors just as tradition demands.
Prep Work
Before we start simmering our Kansas City Chili, it is crucial to complete the essential prep steps precisely. Proper preparation ensures balanced flavors and a perfectly textured chili.
Preparing the Meat
We begin by choosing ground beef and optionally ground pork for richness. Use about 1 pound of each for an authentic blend. Pat the meat dry with paper towels to promote browning. This step releases moisture that can steam the meat, preventing a deep sear.
Next, heat a heavy-bottomed pot or Dutch oven over medium-high heat. Add the meat in batches, breaking it apart with a wooden spoon. Brown thoroughly until no pink remains and edges develop a golden crust. This caramelization builds the deep umami foundation distinctive to our Kansas City Chili.
Chopping Vegetables
The aromatic base consists of onions, garlic, and green bell peppers. Start with:
- 1 large onion, finely diced
- 3 cloves garlic, minced
- 1 green bell pepper, seeded and chopped
We recommend using a sharp chef’s knife and a sturdy cutting board for fine and even chopping. This precision allows the vegetables to cook evenly, releasing their natural sweetness to balance the chili’s heat.
Measuring Spices
Our signature spice blend combines both smoky and sweet elements. Accurate measurement is key to achieving the hallmark flavor profile. Here’s the spice rundown for approximately 4 servings:
| Spice | Amount | Purpose |
|---|---|---|
| Chili powder | 3 tablespoons | Base heat and flavor |
| Ground cumin | 1 tablespoon | Earthy warmth |
| Smoked paprika | 1 teaspoon | Smokiness |
| Dried oregano | 1 teaspoon | Herbal notes |
| Cayenne pepper | 1/4 teaspoon | Controlled heat kick |
| Brown sugar | 2 teaspoons | Subtle sweetness |
Use measuring spoons for precision and mix the spices in a small bowl before adding them into the pot. This ensures even distribution and balanced heat throughout the chili.
Directions
Follow these step-by-step instructions to craft an authentic Kansas City chili bursting with rich flavors and perfect texture. Each stage builds depth and complexity ensuring an unforgettable meal.
Browning the Meat
- Heat a large heavy-bottomed pot or Dutch oven over medium-high heat.
- Add 1 pound ground beef and 1/2 pound ground pork (optional) to the hot pot.
- Use a wooden spoon to break the meat into small crumbles.
- Cook the meat for 8-10 minutes until well browned and no pink remains.
- Drain excess fat leaving about 1 tablespoon in the pot for flavor.
Browning the meat first develops the deep umami base essential for Kansas City chili’s signature taste.
Cooking the Vegetables
- Add 1 medium chopped onion, 3 cloves minced garlic, and 1 diced green bell pepper to the browned meat.
- Stir occasionally and cook for 5-7 minutes until the vegetables soften and become fragrant.
- This step releases natural sweetness and layers flavor complexity.
Adding Spices and Liquids
- Stir in the spice blend carefully measured as follows:
| Spice | Quantity |
|---|---|
| Chili powder | 3 tablespoons |
| Ground cumin | 1 tablespoon |
| Paprika | 1 teaspoon |
| Dried oregano | 1 teaspoon |
| Cayenne pepper | 1/4 teaspoon |
| Brown sugar | 1 tablespoon |
- Mix 2 cups beef broth, 1 cup tomato sauce, 1 tablespoon Worcestershire sauce, and 1 teaspoon apple cider vinegar into the pot.
- Combine thoroughly ensuring spices distribute evenly.
This balanced spice blend and liquids define the Kansas City chili heat level and complexity.
Simmering the Chili
- Bring the mixture to a gentle boil.
- Reduce heat to low setting and cover with lid slightly ajar.
- Simmer for 1.5 to 2 hours, stirring every 15-20 minutes.
- Check consistency occasionally and add water or broth if it thickens too much.
Simmering slowly melds all flavors producing the thick sauce typical of Kansas City chili.
Final Adjustments and Tasting
- Taste the chili for seasoning balance.
- Add salt and freshly ground black pepper to your preference.
- Adjust heat with extra cayenne or chili powder if desired.
- Stir in 1 cup rinsed kidney beans (optional) during the last 15 minutes of cooking for texture and authenticity.
Serving Suggestions
To fully enjoy our Kansas City Chili Recipe, we recommend pairing it with classic toppings and thoughtfully chosen side dishes. These additions elevate the flavors and create a well-rounded, satisfying meal experience.
Classic Toppings
Enhance the rich and thick texture of Kansas City chili with these traditional toppings that add layers of flavor and texture:
- Shredded Cheddar Cheese: Melts beautifully over hot chili, adding a creamy, sharp contrast.
- Chopped Onions: Provide a fresh, crisp bite that balances the chili’s hearty richness.
- Sour Cream: Introduces a cool, tangy element that tones down the chili’s spice.
- Jalapeño Slices: For those who enjoy an extra kick of heat.
- Fresh Cilantro: Adds a bright, herbaceous note to the dish.
- Crushed Tortilla Chips or Cornbread Crumbles: Bring a satisfying crunch beneath the spoonful of chili.
Side Dishes to Pair With
Pairing the Kansas City Chili with well-chosen sides helps create a fulfilling meal that complements the chili’s bold profile. Below is a table outlining excellent side dishes with their key benefits:
| Side Dish | Description | Why It Works with Kansas City Chili |
|---|---|---|
| Cornbread | Slightly sweet, moist bread | Balances chili’s spice and soaks up thick sauce |
| Baked Potatoes | Soft, fluffy interior | Serves as a hearty base for chili topping |
| Coleslaw | Crisp cabbage salad with tangy dressing | Offers refreshing crunch and cuts through richness |
| Steamed Rice | Neutral, fluffy grains | Absorbs chili flavors while diluting heat if needed |
| Green Salad | Mixed greens with vinaigrette | Adds lightness and a contrasting fresh texture |
| Pickled Jalapeños | Spicy, tangy preserved peppers | Enhances chili’s heat with a piquant bite |
Choosing any of these sides can turn our Kansas City Chili Recipe into a compelling meal for casual dinners, game days, or festive gatherings.
Make-Ahead and Storage Tips
Preparing Kansas City Chili in advance is an excellent way to deepen its bold flavors and streamline mealtime. Here are our top tips for make-ahead cooking and proper storage to ensure your chili stays fresh and delicious.
Make-Ahead Preparation
- Cook chili fully and let it cool to room temperature before refrigerating or freezing. This helps preserve texture and flavor.
- For best flavor development, refrigerate the chili for at least 24 hours before reheating. The spices meld and intensify, enhancing the signature rich taste.
- If making ahead for a gathering, plan to prepare the chili 2-3 days before serving to allow flavors to harmonize perfectly.
Refrigeration Guidelines
- Transfer the cooled chili into an airtight container to avoid absorption of other fridge odors.
- Store in the refrigerator for up to 4 days.
- When reheating, warm the chili gently on medium-low heat. Stir occasionally to prevent burning and rehydrate the sauce as needed with a splash of broth or water.
Freezing Tips
- Portion the chili into freezer-safe containers or heavy-duty freezer bags.
- Label each container with the date and contents for easy identification.
- Freeze for up to 3 months to maintain optimal taste and texture.
- To thaw, move the chili to the refrigerator overnight. Reheat slowly on the stove or in a microwave-safe dish.
Reheating Instructions
- Use a heavy-bottomed pot or saucepan.
- Heat chili over low to medium heat, stirring every few minutes.
- Add a splash of beef broth or water if the chili thickens too much during reheating.
- Avoid boiling to preserve the smooth, thick sauce that defines Kansas City chili.
| Storage Method | Storage Duration | Tips |
|---|---|---|
| Refrigerator | Up to 4 days | Use airtight containers. Reheat gently. |
| Freezer | Up to 3 months | Portion in freezer-safe containers. Label clearly. |
| Thawing | Overnight (fridge) | Reheat slowly, add broth if needed. |
“Chili often tastes better the next day because the spices and ingredients have more time to meld. Plan ahead to enjoy your Kansas City chili at its flavorful best.”
By following these make-ahead and storage tips, we can ensure that our Kansas City chili remains just as hearty, thick, and flavorful whether served fresh or reheated for later enjoyment.
Conclusion
Kansas City chili offers a distinctive twist on a classic comfort food that’s both hearty and full of flavor. Its rich, thick sauce and balanced spices make it a standout dish perfect for any occasion. By following the recipe and tips, we can easily bring this Midwest favorite into our kitchens and enjoy a satisfying meal that’s sure to impress. Whether served with traditional toppings or paired with complementary sides, this chili delivers warmth and boldness in every bite. Let’s get cooking and savor the authentic taste of Kansas City chili together.
Frequently Asked Questions
What makes Kansas City chili different from traditional Texan chili?
Kansas City chili is thicker with a balanced spice blend, incorporating both ground beef and pork. It uses a mix of aromatic vegetables and spices, creating a rich, bold flavor that’s less spicy but more complex than Texan chili.
What are the key ingredients in Kansas City chili?
The key ingredients include ground beef and pork, onions, garlic, green bell pepper, tomatoes, kidney beans (optional), chili powder, cumin, paprika, oregano, cayenne, brown sugar, beef broth, tomato sauce, Worcestershire sauce, and apple cider vinegar.
What equipment do I need to make Kansas City chili?
You’ll need a large heavy-bottomed pot or Dutch oven, a wooden spoon or silicone spatula, a chef’s knife, measuring spoons and cups, a sturdy cutting board, a can opener, and a ladle for serving.
How do I make the chili’s sauce thick and flavorful?
Simmer the browned meat and cooked vegetables with the spice blend and liquids for an extended time. This slow cooking melds flavors and thickens the sauce, giving Kansas City chili its characteristic richness.
Can I prepare Kansas City chili ahead of time?
Yes! Cooking the chili and refrigerating it for at least 24 hours before serving improves the flavor. It also stores well for 4 days in the fridge and freezes up to 3 months.
What are some classic toppings for Kansas City chili?
Popular toppings include shredded cheddar cheese, chopped onions, sour cream, jalapeño slices, fresh cilantro, and crushed tortilla chips or cornbread crumbles.
What side dishes go well with Kansas City chili?
Great sides are cornbread, baked potatoes, coleslaw, steamed rice, green salad, and pickled jalapeños, all complementing the chili’s robust flavor nicely.
How should I reheat stored Kansas City chili?
Reheat gently on the stove over low to medium heat, stirring occasionally, or microwave in short intervals to prevent drying out and preserve flavor and texture.