
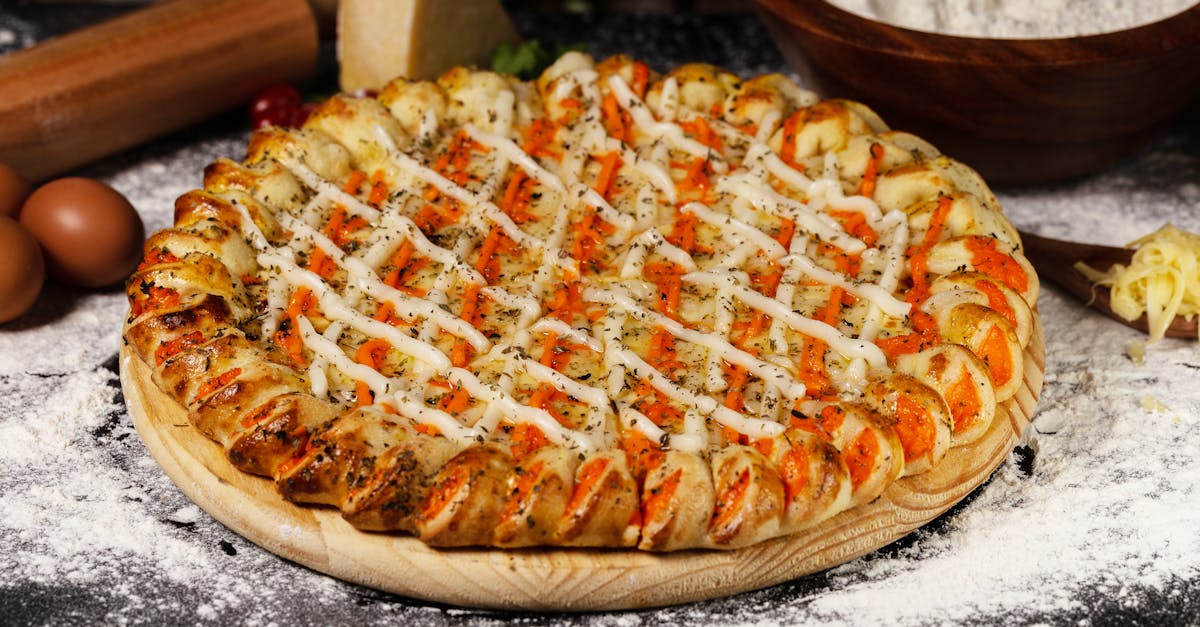
There’s nothing quite like homemade pizza cooked on a Kamado Joe grill. The secret to that perfect crust starts with the dough. Our Kamado Joe pizza dough recipe is designed to give you a crispy outside and a soft, chewy inside every time.
Using the Kamado Joe’s unique heat retention and airflow, this dough rises beautifully and cooks evenly, creating that authentic pizzeria-quality crust in your backyard. Whether you’re a seasoned griller or just getting started, this recipe is straightforward and reliable, making it easy for us to impress family and friends with every pie we bake.
Ingredients
To create the perfect Kamado Joe pizza dough, gathering the right ingredients is essential. We use a balance of dry and wet components to achieve that crispy crust and soft, chewy interior unique to this recipe.
Dry Ingredients
We start by combining these carefully measured dry ingredients to give structure and flavor to our dough:
- 4 cups (480g) bread flour — provides strong gluten for chewiness
- 1 ½ teaspoons salt — enhances flavor and strengthens dough
- 1 teaspoon sugar — aids yeast activation and browning
- 1 packet (2 ¼ teaspoons) active dry yeast — the leavening agent that makes the dough rise
Wet Ingredients
The right liquid content is vital for dough hydration and elasticity. Here are the wet ingredients we use:
- 1 ½ cups (360 ml) warm water (around 105°F/40°C) — activates yeast and hydrates flour
- 2 tablespoons olive oil — enriches dough for tenderness and flavor
| Ingredient | Amount | Purpose |
|---|---|---|
| Bread flour | 4 cups (480g) | Structure and chewiness |
| Salt | 1 ½ teaspoons | Flavor enhancement |
| Sugar | 1 teaspoon | Yeast activation & browning |
| Active dry yeast | 1 packet (2 ¼ tsp) | Leavening |
| Warm water | 1 ½ cups (360 ml) | Activates yeast & hydrates dough |
| Olive oil | 2 tablespoons | Tenderness and flavor |
With our Kamado Joe pizza dough ingredients prepared precisely, we’re set to mix and knead for that unbeatable homemade pizza base.
Equipment Needed
To craft the perfect Kamado Joe pizza dough and cook it to perfection, having the right equipment is essential. Below we outline the must-have tools and setup to streamline your pizza-making experience on the Kamado Joe grill.
Kamado Joe Grill Setup
Setting up your Kamado Joe grill properly ensures optimal heat retention and airflow for that crispy, chewy crust.
- Kamado Joe Ceramic Grill with vent control for precise temperature management
- Heat deflector or pizza stone to create indirect, even heat distribution
- Digital grill thermometer to monitor internal grill temperature around 500°F (260°C)
- Charcoal or lump hardwood charcoal for consistent, clean-burning heat
- Blaze Charcoal chimney starter to light charcoal evenly without chemicals
| Equipment | Purpose | Tips |
|---|---|---|
| Kamado Joe grill | Main cooking device | Maintain 500°F for pizza |
| Pizza stone or heat deflector | Even heat distribution on dough | Preheat for 45 minutes |
| Grill thermometer | Accurate temperature monitoring | Check periodically |
| Charcoal & chimney starter | Consistent and chemical-free fuel | Use lump hardwood charcoal |
Dough Mixing Tools
We want to mix and knead our Kamado Joe pizza dough efficiently to build great gluten structure and texture.
- Large mixing bowl (preferably glass or stainless steel) for combining ingredients
- Measuring cups and spoons for precise ingredient amounts
- Wooden spoon or dough whisk to start mixing the dough
- Kitchen scale (optional but recommended) for accuracy in weighing flour and water
- Clean countertop or dough board for kneading
- Plastic wrap or damp kitchen towel to cover dough during rise
Baking Tools
To bake our pizza with a perfect crust and toppings, the following tools support the process from prep to serving:
- Pizza peel (wooden or metal) to slide pizza onto the hot stone without deforming the dough
- Pizza cutter or sharp chef’s knife for slicing the finished pizza
- Oven mitts or heat-resistant gloves to safely handle hot tools and grill lid
- Cooling rack or pizza stand to rest the pizza briefly before slicing
By gathering these essential tools, we set ourselves up for success to master our Kamado Joe pizza dough recipe and grill like pros.
Preparing the Dough
Mastering Kamado Joe pizza dough starts with preparing the dough correctly. We’ll guide you through each critical step to ensure the perfect texture and flavor.
Mixing the Ingredients
Begin by combining the dry ingredients in a large mixing bowl:
- 4 cups bread flour – provides structure and chewiness
- 1 ½ teaspoons salt – balances flavor
- 1 teaspoon sugar – activates yeast and aids browning
- 1 packet active dry yeast (2 ¼ teaspoons) – leavens the dough
In a separate container, whisk together the wet ingredients:
- 1 ½ cups warm water (about 110°F / 43°C) – activates yeast without killing it
- 2 tablespoons olive oil – adds tenderness and richness
Slowly pour the wet ingredients into the dry mixture while stirring with a wooden spoon. Mix until the ingredients begin to come together into a shaggy dough.
| Ingredient | Quantity | Purpose |
|---|---|---|
| Bread Flour | 4 cups | Chewiness and structure |
| Salt | 1 ½ teaspoons | Flavor enhancement |
| Sugar | 1 teaspoon | Yeast activation and browning |
| Active Dry Yeast | 1 packet (2 ¼ tsp) | Leavening agent |
| Warm Water | 1 ½ cups (110°F) | Yeast activation and hydration |
| Olive Oil | 2 tablespoons | Tenderness and flavor |
Kneading the Dough
Transfer the shaggy dough onto a lightly floured surface. Knead the dough vigorously for 8 to 10 minutes. Use the heels of your hands to push the dough forward, then fold it back toward you. Repeat this motion rhythmically.
Our goal: develop gluten for elasticity and a smooth surface. The dough should become soft, stretchy, and only slightly sticky.
If the dough feels too sticky, sprinkle small amounts of flour as you knead but avoid over-flouring to keep the dough tender.
First Rise
Place the kneaded dough into a clean, lightly oiled bowl. Turn it to coat the surface lightly with oil; this prevents drying.
Cover the bowl tightly with plastic wrap or a damp kitchen towel.
Let the dough rise in a warm draft-free area for 1 to 1 ½ hours, or until doubled in size. We look for this expansion as proof that the yeast is active and the dough has developed air pockets essential for a light crust.
Shaping and Preparing the Dough
Once our dough has completed its first rise, it’s time to shape and prepare it for baking. This step is crucial for achieving that iconic Kamado Joe pizza crust with a perfect balance of crispiness and chewiness.
Dividing the Dough
We begin by dividing the dough into individual portions. For standard-sized pizzas, we recommend portions of about 8 ounces (227 grams) each. This size offers a perfect thickness when stretched and baked on the Kamado Joe.
| Portion Size | Weight (oz) | Weight (grams) | Number of Pizzas per Batch* |
|---|---|---|---|
| Small | 6 | 170 | 4 |
| Medium | 8 | 227 | 3 |
| Large | 12 | 340 | 2 |
*Based on a full batch from the recipe using 4 cups of bread flour.
We use a sharp dough scraper or a bench knife to divide the dough cleanly without tearing the gluten structure. Lightly flour each portion to prevent sticking.
Shaping the Dough into Pizzas
With the dough divided, we gently shape each portion into a tight ball. This is essential to maintain the gluten network and trap air bubbles for a light crust. To shape:
- Cup your hand over the dough ball.
- Rotate the dough on the work surface, pulling the edges underneath to create surface tension.
- Keep the dough smooth and taut without pressing out the air pockets.
Next, we let the dough rest for 10 minutes to relax the gluten, making it easier to stretch. Instead of using a rolling pin, we stretch the dough by hand:
- Press the center using your fingertips, leaving a slightly thicker edge for the crust.
- Gradually stretch outward by draping the dough over your knuckles and rotating.
- Aim for a round shape approximately 12 inches in diameter.
Second Rise
Before placing the shaped dough on the pizza peel, we allow a Second Rise to develop flavor and texture further. Cover the stretched dough with a lightly damp towel or plastic wrap and rest for 20 to 30 minutes at room temperature.
This final fermentation increases yeast activity, resulting in:
- A more flavorful crust
- Increased lightness and tenderness
- Better oven spring during baking on the Kamado Joe
During this period, avoid over-proofing the dough, which can lead to a loss of structure. Once risen, we’re ready to add toppings and move to grilling on our Kamado Joe for that authentic pizzeria-quality pizza.
Cooking the Pizza on the Kamado Joe
Mastering cooking the pizza on the Kamado Joe unlocks the secret to achieving that perfect balance of crispiness and chewiness. Let’s dive into the critical steps for preparing our grill and baking the pizza to pizzeria-quality perfection.
Preheating the Kamado Joe
Proper preheating is essential for an even, high-temperature environment that results in a crispy crust and melty cheese. Follow these steps:
- Ignite the charcoal and open the bottom and top vents fully.
- Allow the temperature to rise steadily until it stabilizes around 500°F (260°C).
- Use a digital grill thermometer to monitor the temperature near the pizza stone.
- Close the lid and vents just enough to maintain steady airflow without letting the temperature drop.
“A well-preheated Kamado Joe harnesses its unique heat retention to replicate traditional pizza ovens by evenly distributing intense heat.”
Preparing the Pizza Stone
The pizza stone plays a vital role in heat conduction and preventing soggy dough. Here’s how to prepare it:
- Place the pizza stone on the grill grate before preheating.
- Allow it to heat for at least 45 minutes to ensure even heat absorption.
- Avoid placing the dough on a cold stone, which can impede proper cooking and cause sticking.
- Lightly dust a pizza peel with flour or cornmeal to transfer the dough easily.
| Step | Description |
|---|---|
| Place Stone | On grill grate preheated |
| Preheat Duration | Minimum 45 minutes at 500°F (260°C) |
| Dust Peel | Use flour or cornmeal for anti-stick |
Baking the Pizza
With the dough stretched and toppings added, we move to baking the pizza:
- Slide the pizza off the peel onto the hot pizza stone gently.
- Close the lid immediately to trap heat.
- Bake for 8 to 12 minutes, rotating the pizza halfway through for even browning.
- Look for a golden-brown crust, bubbling cheese, and melted toppings as indicators of doneness.
- Use heat-resistant gloves to remove the pizza with the peel.
- Let rest for 2 minutes before slicing to allow flavors to set.
| Baking Parameter | Value |
|---|---|
| Temperature | 500°F (260°C) |
| Baking Time | 8 to 12 minutes |
| Rotate Pizza | At 5 to 6-minute mark |
| Rest Time | 2 minutes before slicing |
Tips for Perfect Kamado Joe Pizza Dough
Mastering the Kamado Joe pizza dough requires attention to detail at every step. Here are essential tips to ensure our dough achieves the ideal texture and responds perfectly to the unique heat of our Kamado Joe grill.
Dough Texture and Consistency
Achieving the right dough texture is crucial for that perfect crispy crust and tender chewiness. Here’s what we focus on:
- Hydration Level: Our recipe uses 1 ½ cups of warm water for 4 cups of bread flour. This ratio balances moisture for elasticity without making the dough sticky.
- Kneading: We knead the dough for 10 to 12 minutes until it becomes smooth and elastic. Proper kneading develops gluten structure which traps air bubbles for lightness.
- Resting and Rising: Covering the dough in a lightly oiled bowl and letting it double in size (about 1 to 1 ½ hours) at a warm room temperature activates yeast, enhancing flavor and lightness.
- Final Dough Feel: When ready to shape, the dough should feel soft, slightly tacky but not sticky. If the dough sticks excessively, sprinkle a small amount of flour evenly to adjust without drying it out.
| Texture Aspect | Description | Impact on Pizza Dough |
|---|---|---|
| Hydration | 1 ½ cups water per 4 cups flour | Moist & elastic dough |
| Kneading Time | 10-12 minutes | Gluten development & elasticity |
| Rising Time | 1-1 ½ hours at warm temperature | Flavor & air pocket formation |
| Final Dough Texture | Soft, slightly tacky, not sticky | Easy to shape & chewy crust |
“Proper dough texture is the foundation of achieving that signature Kamado Joe crispy yet chewy pizza crust.”
Managing Heat in the Kamado Joe
Controlling heat in the Kamado Joe grill is key to cooking our pizza dough evenly and developing that golden crust:
- Preheat Thoroughly: We preheat the grill to stabilize at about 500°F (260°C). This high consistent heat activates the yeast in the dough further while baking the pizza to perfection.
- Use a Pizza Stone or Heat Deflector: Placing a pizza stone on the grate during preheat for at least 45 minutes ensures even heat distribution, preventing hotspots and dough burning.
- Vent Control: Adjusting the Kamado Joe’s vents precisely maintains steady airflow and temperature. Opening vents fully during preheat and moderating after pizza placement helps trap heat inside the dome.
- Monitor Temperature: Using a digital grill thermometer confirms the stone surface and ambient grill temperatures stay within range, typically:
| Grill Component | Ideal Temperature |
|---|---|
| Ambient Grill Temp | 500°F (260°C) |
| Pizza Stone Surface | 475°F – 500°F (246°C – 260°C) |
- Rotate Pizza Mid-Bake: Rotating the pizza halfway through the 8 to 12 minutes baking cycle ensures even browning and crust development.
Variations and Add-Ins
To customize our Kamado Joe Pizza Dough Recipe, we can explore several variations and add-ins that enhance flavor or cater to dietary needs. These simple adjustments keep the dough versatile while ensuring it performs beautifully on the kamado grill.
Flavor Enhancements
Adding ingredients to the dough boosts flavor complexity without sacrificing texture or rise. Here are some top choices:
- Herbs and Spices
Incorporate 1-2 teaspoons of dried herbs such as oregano, basil, garlic powder, or rosemary into the dry ingredients. This layers in aromatic notes that complement classic pizza toppings.
- Cheese
Folding ¼ to ½ cup grated Parmesan or Pecorino Romano into the dough before the first rise adds a subtle savory richness. Be sure to adjust salt accordingly to maintain balance.
- Olive Oil Variations
Swap regular olive oil with a robust extra virgin olive oil infused with garlic or chili flakes for a gentle heat or pungent flavor boost embedded in the crust.
- Honey or Malt Syrup
Replace sugar with 1 tablespoon of honey or malt syrup to create subtle sweetness and promote extra browning on the crust.
“Tip: When adding flavor enhancers, reduce salt slightly to prevent overpowering the dough’s natural rise and gluten development.”
Gluten-Free Options
For gluten-sensitive diners or those following a gluten-free diet, adapting the Kamado Joe Pizza Dough Recipe is straightforward.
- Gluten-Free Flour Blend
Use 4 cups of a high-quality gluten-free flour mix formulated for yeast breads. Look for blends containing rice flour, tapioca starch, and potato starch.
- Xanthan Gum
Add 1 teaspoon of xanthan gum if your flour blend lacks it to replicate gluten’s elasticity, helping the dough hold together and rise properly.
- Hydration Adjustment
Gluten-free dough typically requires slightly more water. Increase warm water to about 1¾ cups, then adjust during mixing to get a tacky but not sticky dough.
- Rest and Rising Time
Expect longer fermentation; allow the dough about 1 to 1.5 hours for the first rise in a warm place before shaping.
| Gluten-Free Pizza Dough Ingredients | Quantity |
|---|---|
| Gluten-Free Flour Blend | 4 cups |
| Warm Water (adjustable) | 1 ¾ cups |
| Olive Oil | 2 tablespoons |
| Sugar | 1 teaspoon |
| Salt | 1 ½ teaspoons |
| Active Dry Yeast | 1 packet (2 ¼ teaspoons) |
| Xanthan Gum | 1 teaspoon |
“Reminder: Gluten-free dough is more delicate. Use a pizza peel dusted with cornmeal to transfer the dough carefully onto the Kamado Joe pizza stone.”
These Variations and Add-Ins allow us to personalize the pizza experience while ensuring the dough remains robust enough for the intense heat and airflow of our Kamado Joe grill. Experimenting helps us develop a signature crust tailored to our tastes.
Conclusion
Mastering the Kamado Joe pizza dough recipe opens up a world of delicious homemade pizzas with that perfect crust we all crave. With the right ingredients, techniques, and grill setup, we can consistently create pizzas that rival our favorite pizzerias. The versatility of this dough lets us experiment with flavors and dietary needs while still enjoying the unique benefits of cooking on a Kamado Joe.
By following these steps and tips, we’re well on our way to becoming confident pizza makers. It’s all about patience, attention to detail, and a little practice. Once you get the hang of it, there’s nothing quite like pulling a perfectly grilled pizza straight off the Kamado Joe and sharing it with family and friends.
Frequently Asked Questions
What makes Kamado Joe grill ideal for making pizza?
The Kamado Joe grill offers excellent heat retention and airflow control, allowing even cooking and proper dough rising. This creates a crispy, pizzeria-quality crust with a soft, chewy interior.
What are the key ingredients for Kamado Joe pizza dough?
The dough uses bread flour, salt, sugar, active dry yeast, warm water, and olive oil. These combine to create a tender, flavorful crust perfect for grilling.
How should I prepare the dough for best results?
Mix dry and wet ingredients separately, then combine and knead until smooth and elastic. Let it rise in a warm spot until doubled, then shape, rest, and allow a second rise before grilling.
What equipment is needed for cooking pizza on a Kamado Joe?
You’ll need a Kamado Joe grill with vent control, a pizza stone or heat deflector, a digital thermometer, mixing bowls, a pizza peel, pizza cutter, and heat-resistant gloves.
How hot should the grill be for cooking pizza?
Preheat your Kamado Joe to around 500°F (260°C). Maintaining this temperature ensures a crispy crust and evenly cooked toppings.
Can I customize the Kamado Joe pizza dough recipe?
Yes, you can add dried herbs, cheese, or infused olive oil to the dough. There is also a gluten-free version using a flour blend and xanthan gum for elasticity.
How long does it take to bake pizza on a Kamado Joe?
Bake the pizza for 8 to 12 minutes, rotating halfway through to ensure even browning. Look for a golden crust and bubbling cheese as signs it’s done.
What’s the best way to handle the dough when shaping?
Divide dough into 8-ounce portions, form tight balls to trap air, rest to relax gluten, then hand-stretch into a 12-inch round before the final rise.
How important is grill temperature control?
Very important. Use vents and a digital thermometer to maintain 500°F, ensuring consistent heat for optimal crust texture and cooking.
What should I do after baking the pizza?
Let it rest for about 2 minutes before slicing. This helps the flavors set and makes slicing easier.