
When it comes to iconic bar snacks, Joe Jost’s pickled eggs have earned their legendary status. This Long Beach institution has been serving up these tangy, flavorful treats for decades, drawing locals and visitors alike. There’s something irresistible about the perfect balance of vinegar, spices, and the creamy texture of the eggs that keeps us coming back for more.
We love how simple yet satisfying this recipe is. It’s a nostalgic nod to classic pub fare, but it’s also a great make-ahead snack for gatherings or game days. Whether you’ve had the original at Joe Jost’s or you’re trying it for the first time at home, this recipe lets us recreate that signature flavor with ease.
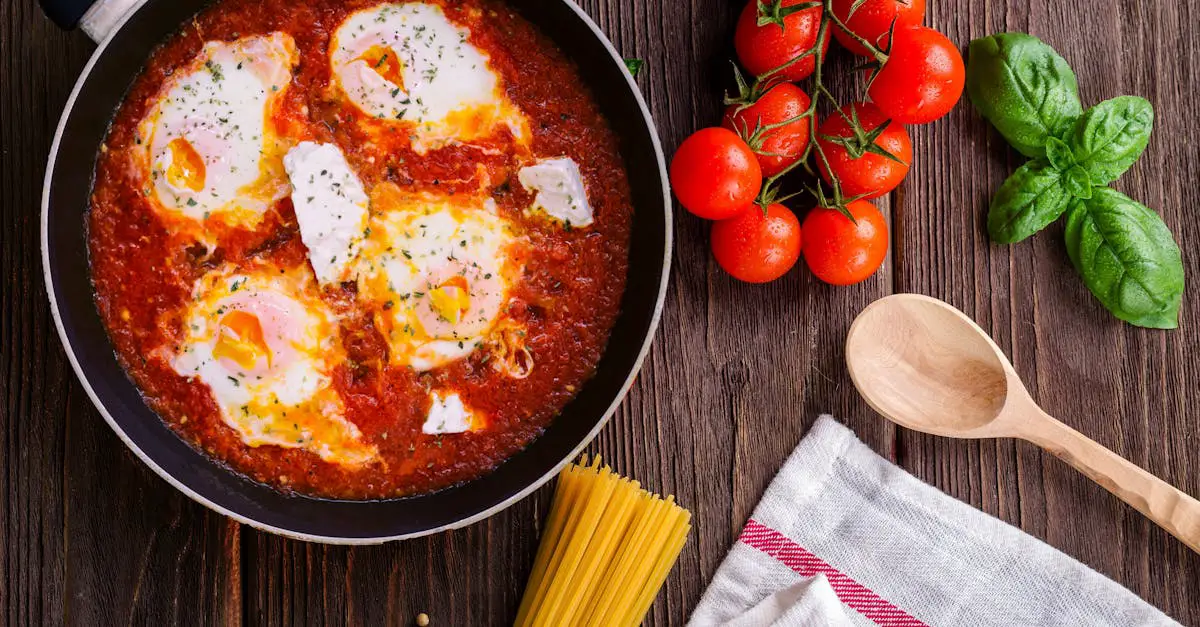
Joe Jost Pickled Eggs Recipe
Recreating the classic Joe Jost pickled eggs at home is simpler than you might expect. The combination of tangy vinegar, flavorful spices, and creamy eggs makes this an irresistible snack. Follow our step-by-step guide to bring this iconic recipe from Long Beach’s legendary bar to your kitchen.
Ingredients
Here’s what we’ll need to prepare these flavorful pickled eggs:
- 12 large eggs, hard-boiled and peeled
- 1 quart (4 cups) white vinegar
- 1 cup water
- 1 tablespoon salt
- 1 tablespoon sugar
- 1 teaspoon mustard seed
- 1 teaspoon celery seed
- 1 tablespoon black peppercorns
- 1 teaspoon crushed red pepper flakes
- 2 whole garlic cloves, peeled
- 2-3 bay leaves
Equipment
- A large glass jar or container with a tight-sealing lid
- Medium saucepan
- Slotted spoon
- Strainer
Instructions
1. Prepare the hard-boiled eggs:
Place the eggs in a single layer in a saucepan, cover them with water, and bring to a boil over medium-high heat. Once boiling, turn off the heat, cover the pot, and let the eggs sit for 10-12 minutes. Transfer to a bowl of ice water to cool, then peel them carefully to ensure the whites remain smooth.
2. Create the pickling brine:
In a medium saucepan, combine the vinegar, water, salt, sugar, mustard seed, celery seed, black peppercorns, crushed red pepper flakes, garlic cloves, and bay leaves. Bring the mixture to a gentle simmer over medium heat, stirring occasionally until the salt and sugar dissolve. Remove from heat and let the brine cool to room temperature.
3. Layer the eggs and spices in a jar:
Place the peeled eggs in a clean glass jar, layering them evenly. Pour the cooled pickling brine over the eggs, ensuring they are fully submerged. Use a clean spoon to adjust the eggs if necessary.
4. Seal and refrigerate:
Close the jar tightly with its lid and place it in the refrigerator. Allow the eggs to pickle for at least 3-5 days to absorb the tangy and spicy flavors fully. For the authentic Joe Jost experience, we recommend waiting a full week.
Flavor Tip
For a bolder flavor, let the eggs pickle for up to two weeks. Each day enhances the depth of spiciness and tang, making them even tastier.
| Tip | Details |
|---|---|
| Choose fresh eggs | Fresh eggs are less prone to cracks during cooking, ensuring better texture. |
| Use a non-reactive jar | Glass jars are ideal as they avoid chemical reactions with vinegar. |
| Adjust spice level | Control heat by adding or reducing red pepper flakes based on preference. |
Ingredients
To craft the iconic Joe Jost’s pickled eggs, we’ll need a combination of simple yet flavorful ingredients. Each component plays a vital role in recreating this legendary snack. Here’s what we’ll use:
For the Eggs:
- 12 large eggs – Hard-boiled and peeled. Fresh eggs are best for ensuring the best texture.
For the Pickling Brine:
- 3 cups white distilled vinegar – The tangy base for the pickling process. Use high-quality vinegar for the best results.
- 1 cup water – To balance the acidity of the vinegar.
- 1/2 cup granulated sugar – Adds a slight sweetness that balances the tang.
- 2 tablespoons salt – Fine table salt works best.
- 1 tablespoon mustard seeds – Brings a mild, nutty spiciness.
- 1 teaspoon celery seeds – Adds a subtle earthy flavor.
- 1 teaspoon whole peppercorns – For a hint of sharp peppery warmth.
- 2 cloves garlic – Whole, peeled, and slightly crushed for aromatic depth.
- 1–2 whole dried red chili peppers (optional) – To add a touch of heat, adjust to personal preference.
- 2 bay leaves – Imparts a subtle, herbaceous note.
Additional Needs:
- 1 large glass jar or non-reactive container – It’s important to use a non-reactive jar to store the eggs and brine properly.
By carefully preparing and combining these ingredients, we’ll achieve the tangy, savory, and nostalgic flavors that make Joe Jost’s pickled eggs so memorable.
Tools And Equipment
To recreate the legendary Joe Jost’s pickled eggs at home, having the right tools and equipment is essential. Let’s ensure precision and success by outlining exactly what we need. These items are straightforward and likely already in your kitchen, but their roles are key to achieving that perfect creamy texture and tangy flavor.
Essential Tools and Equipment
Here’s a detailed list of the tools and equipment required, along with their purposes:
| Tool/Equipment | Purpose |
|---|---|
| Stockpot | Used for boiling the eggs evenly without overcrowding, ensuring their shells peel off easily. |
| Slotted Spoon | Helps to gently transfer the eggs from boiling water to the ice bath without cracking shells. |
| Large Bowl | Required for preparing the ice water bath to stop the cooking process immediately. |
| Non-Reactive Jar (Glass) | Necessary for pickling since metal can react with the vinegar and alter the flavor. |
| Measuring Cups and Spoons | Ensures accuracy when adding vinegar, water, sugar, and spices to the brine mixture. |
| Knife/Chopping Board | Needed to crush garlic or slice chili peppers before adding them to the brine. |
| Mixing Spoon | Used to dissolve the sugar and evenly distribute spices in the pickling brine. |
| Funnel (Optional) | Makes pouring the brine into the jar easier and prevents spillage or mess. |
Why These Tools Matter
Each of these tools plays a role in ensuring that the eggs are properly cooked, the brine is accurately prepared, and the flavors develop as intended. For example, using a non-reactive glass jar is crucial to maintain the vinegar’s natural acidity without any unwanted metallic taste. Similarly, a slotted spoon minimizes damage to the eggshells during the transfer process.
Directions
Let’s dive into how to recreate the iconic Joe Jost’s pickled eggs right in your own kitchen. Follow these step-by-step instructions to achieve the perfect balance of tangy, savory, and spicy flavors.
Prep The Eggs
- Take 12 large fresh eggs and place them in a large stockpot.
- Cover the eggs with cold water, ensuring at least 1 inch of water above the eggs.
- Bring the water to a boil over medium-high heat. Once boiling, reduce the heat to low and let the eggs simmer for 10 minutes.
- Use a slotted spoon to carefully transfer the boiled eggs to an ice water bath. Let them cool for 15 minutes.
- Gently peel the eggs, ensuring the whites remain intact for a smooth surface that absorbs the pickling brine evenly.
Pro Tip: Older eggs peel easier than fresher ones. If you’re having trouble, try peeling under running water for best results.
Prepare The Pickling Brine
- In a medium saucepan, combine the following ingredients:
- 3 cups of white distilled vinegar
- 1 cup of water
- 1/2 cup of granulated sugar
- 1 teaspoon mustard seeds
- 1/2 teaspoon celery seeds
- 1 tablespoon whole peppercorns
- 3-4 dried red chili peppers (for a subtle heat)
- 2 bay leaves
- 2 garlic cloves, thinly sliced
- Stir the mixture over medium heat until the sugar fully dissolves.
- Bring the brine to a gentle simmer and cook for 5 minutes to allow the spices to infuse.
- Remove the saucepan from the heat and let it cool to room temperature.
Key Tip: Use a non-reactive saucepan (such as stainless steel or glass) to prevent any unwanted metallic taste in the vinegar brine.
Combine And Pickle
- Place the peeled hard-boiled eggs into a clean, non-reactive glass jar. Pack the eggs snugly but avoid squishing them.
- Once the brine has cooled, pour it over the eggs, ensuring they are fully submerged.
- Seal the jar tightly with a lid.
- Transfer the jar to the refrigerator and allow the eggs to pickle for at least 3-5 days. For the best results, we recommend waiting a full week to achieve the signature Joe Jost’s flavor.
| Timing Guide | Flavors Develop |
|---|---|
| 1 Day | Mild |
| 3-5 Days | Balanced |
| 7+ Days | Bold and Tangy |
Final Tip: Shake the jar gently every couple of days to ensure even distribution of spices and flavors.
Make-Ahead Instructions
When preparing Joe Jost’s pickled eggs, the key to success lies in allowing enough time for the flavors to develop. This recipe is perfect for making ahead since the eggs need a few days to pickle. Let’s walk through how we can prep these ahead of time to ensure the best results for your next gathering or snack session.
Key Timelines for Pickling:
The pickling process requires minimal effort but does involve waiting. Here is a quick breakdown to help plan ahead:
| Pickling Duration | Flavor Intensity |
|---|---|
| 1 Day | Mild, subtle tanginess |
| 3-5 Days | Balanced tang and spice |
| 7 Days | Fully infused, robust flavor |
Steps for Make-Ahead Convenience:
- Prepare Ingredients and Tools Early:
Gather all ingredients like hard-boiled eggs, vinegar, spices, and a non-reactive glass jar ahead of time. Preparing these in advance will streamline the process when you’re ready to pickle.
- Boil and Peel Eggs:
Boiling and peeling the eggs is a time-efficient task you can complete up to 3 days before pickling. Store the peeled eggs in an airtight container in the refrigerator to keep them fresh.
- Make the Brine Ahead:
To save time on the pickling day, prepare the brine up to 2 days in advance. Combine the vinegar, water, sugar, and spices in a saucepan, bring it to a simmer, and let it cool completely. Refrigerate the brine in a sealed container to preserve the aromatic flavors.
- Assemble and Pickle:
On the pickling day, layer the peeled eggs into the jar, ensuring enough room for the brine to cover them completely. Pour the pre-chilled brine over the eggs, seal the jar tightly, and refrigerate.
- Let Time Work Its Magic:
For optimal taste, allow the eggs to pickle for a minimum of 3 days. For a deeper, more nuanced flavor, we recommend waiting a full 7 days. Store the jar in the refrigerator during this time, shaking gently every other day to distribute the spices evenly.
By planning ahead, we ensure that every creamy yet tangy bite of these pickled eggs delivers the nostalgic flavors that make Joe Jost’s pickled eggs so iconic.
Serving Suggestions
When it comes to enjoying Joe Jost’s iconic pickled eggs, there are countless ways to serve them that highlight their tangy, spiced flavor and creamy texture. Let’s explore some of our favorite serving ideas for these savory snacks:
1. Classic Bar Snack Pairing
Serve the pickled eggs chilled in a small bowl on their own or with a sprinkle of black pepper and paprika for extra flavor. Pair them with a pint of your favorite lager or ale, just as they’re served at Joe Jost’s bar. The sharp vinegar notes of the eggs complement the smooth, malty richness of the beer perfectly.
2. Charcuterie Board Highlight
Incorporate these pickled eggs into an elevated charcuterie board. Place halved or whole eggs alongside slices of smoked meats, aged cheeses, crackers, and pickled vegetables. The eggs add a bold, tangy flavor that balances the richness of cheeses and meats beautifully.
3. Spicy Snack Plate
For those who enjoy heat, serve the pickled eggs with a side of hot sauce or a sprinkle of chili flakes. You can pair them with jalapeño slices, spicy peanuts, or even a few chips dusted with chili powder for a fiery snack plate.
4. Picnic-Perfect Treat
Add these eggs to your next picnic spread. Wrap individual pickled eggs in parchment paper for easy handling and pack them alongside fresh bread, cold cuts, and a crisp green salad. Their portability makes them a convenient and flavorful addition to outdoor meals.
5. Game Day Appetizer
Turn Joe Jost’s pickled eggs into a shareable game day treat. Slice the eggs in half and place them on a platter. Sprinkle with mustard seeds and garnish with parsley. Place a small cup of Dijon or whole-grain mustard in the center for dipping—this option never fails to impress a crowd.
6. Sandwich Toppers
Slice these eggs into thin rounds and use them as a zesty topping for sandwiches or burgers. The eggs’ briny tang works wonderfully with grilled meats, crunchy lettuce, and creamy spreads like mayo or aioli.
Quick Reference for Pairings
Below is a quick guide to pairing Joe Jost’s pickled eggs based on serving ideas and accompaniments:
| Serving Idea | Best Pairings |
|---|---|
| Classic Bar Snack | Lager, Ale, Black Pepper |
| Charcuterie Board | Smoked Meats, Aged Cheeses, Pickled Vegetables |
| Spicy Snack Plate | Hot Sauce, Jalapeños, Spiced Chips |
| Picnic Treat | Fresh Bread, Cold Cuts, Crisp Salad |
| Game Day Appetizer | Mustard Seeds, Parsley, Dijon Mustard Dip |
| Sandwich Topping | Grilled Meats, Lettuce, Mayo, Aioli |
Experiment with these suggestions and feel free to customize them according to your preferences. Joe Jost’s pickled eggs are incredibly versatile and pair beautifully with a variety of flavors, making them a timeless and crowd-pleasing option for any occasion.
Tips And Tricks
Here are some essential tips and tricks we swear by to make sure your homemade Joe Jost’s pickled eggs turn out just right every time. These helpful hints will elevate your pickling game while ensuring that each egg is full of the tangy, flavorful nostalgia that has made these snacks legendary.
1. Choose Fresh Eggs Wisely
- Use fresh eggs for the best texture. Older eggs tend to be easier to peel, but their texture might not hold up as well after pickling.
- If peeling becomes a challenge, try steaming the eggs instead of boiling them for a smoother peel.
2. Opt For A Non-Reactive Jar
- Always use non-reactive glass jars or food-grade ceramic containers. Avoid using metal containers, as vinegar can react with metals and alter the flavor of the brine.
3. Perfecting The Brine
- Stir the vinegar, water, sugar, and spices until fully dissolved to ensure a well-balanced flavor in every bite. Simmering the brine for 5-7 minutes helps release the oils and aromas from the spices, enhancing flavor complexity.
- For an extra kick, add an additional dried red chili pepper to the brine.
4. Marination Timing
- Patience is key here! While the eggs reach mild pickling flavors after 24 hours, waiting 3-5 days guarantees a balanced taste. If possible, let them sit for a full week to unlock the bold flavors that make Joe Jost’s pickled eggs so iconic.
- Shake the jar gently every 1-2 days to ensure the brine and spices distribute evenly.
| Pickling Time | Flavor Result |
|---|---|
| 1 day | Mild flavor |
| 3-5 days | Balanced tangy flavor |
| 7+ days | Robust and bold flavors |
5. Spice Customization
- Adjust the spice blend to match your preference. For a spicier profile, increase the amount of dried red chili peppers or add a pinch of cayenne. To mellow out the flavors, slightly reduce garlic or mustard seeds.
- Always taste test your brine before use to ensure the flavor is to your liking.
6. Cleaning And Sterilizing Jars
- Sterilized jars are essential for avoiding unwanted flavors or spoilage. Wash jars in hot, soapy water, and then sterilize in boiling water for 10 minutes. Allow them to cool before adding the eggs and brine.
7. Maintaining Consistency
- Make sure the eggs are completely submerged in the brine for even flavor absorption. Placing a small, clean weight on top of the eggs in the jar can help keep them fully immersed.
- If your jar is not sealed tightly, store it in the refrigerator to maintain food safety and preserve fresh flavors.
8. Experiment With Pairings
- Try enjoying these eggs with classic Joe Jost pairings like a cold glass of lager or a handful of pretzels and peanuts.
- Add them to salads, sandwiches, or bowls for an inventive twist on tradition.
Conclusion
Joe Jost’s pickled eggs are more than just a snack—they’re a tradition that brings people together over bold flavors and nostalgic charm. Recreating them at home allows us to capture that timeless appeal while customizing the recipe to suit our tastes. Whether we’re savoring them with a cold beer or sharing them at gatherings, these pickled eggs never fail to impress.
With the right ingredients, tools, and a little patience, we can enjoy the iconic flavors of Joe Jost’s in our own kitchen. Let’s embrace the process, experiment with spices, and make these eggs a staple for any occasion.
Frequently Asked Questions
What makes Joe Jost’s pickled eggs so unique?
Joe Jost’s pickled eggs are renowned for their tangy and savory flavor, achieved through a simple recipe featuring high-quality vinegar, spices, and creamy hard-boiled eggs. Their nostalgic taste evokes the charm of classic pub snacks, making them a beloved favorite in Long Beach.
How long should I let the eggs pickle for the best flavor?
For the richest flavor, it’s recommended to let the eggs pickle for a full week. However, you can achieve a mild taste in 1 day, or a balanced flavor after 3-5 days of pickling.
What ingredients are needed to make Joe Jost’s pickled eggs at home?
The recipe calls for 12 hard-boiled eggs, white vinegar, water, granulated sugar, and spices like mustard seeds, celery seeds, garlic, red chili peppers, peppercorns, and bay leaves for a tangy, spiced flavor.
Can I customize the spice level of the pickled eggs?
Yes! You can modify the spice level by adjusting the amount of chili peppers or other spices in the recipe, tailoring it to your personal taste preferences.
What tools do I need to make pickled eggs?
Essential tools include a stockpot for boiling eggs, a slotted spoon, and a non-reactive glass jar for pickling. These ensure the proper texture, flavor, and safety for pickling.
Why is a non-reactive jar important for pickling?
Non-reactive jars, such as those made of glass, prevent chemical reactions between the acidic vinegar and the container, preserving the flavor and safety of the pickled eggs.
How should I store pickled eggs during the pickling process?
Store the eggs in a sterilized, airtight jar in the refrigerator. Shake the jar gently every couple of days to ensure even distribution of flavors and spices.
Can I make the eggs ahead of time?
Absolutely! You can boil and peel the eggs up to three days in advance and prepare the pickling brine up to two days prior. This allows for an organized, stress-free pickling process.
How are Joe Jost’s pickled eggs traditionally served?
Traditionally, these eggs are enjoyed as a bar snack with beer but also work well on charcuterie boards, spicy snack plates, picnics, or as sandwich toppings.
Are there any tips for achieving the best texture and flavor?
Use fresh eggs, sterilize jars, simmer the brine for a complex flavor, and let the eggs pickle for at least 3-5 days. For best results, ensure consistent brine coverage and shake the jar occasionally.