
There’s something truly special about Jeni’s Chocolate Ice Cream that sets it apart from the rest. Known for its rich, creamy texture and deep chocolate flavor, this recipe brings the magic of Jeni Britton Bauer’s craft right into our own kitchens. It’s not just any chocolate ice cream—it’s a decadent treat that balances intense cocoa with a smooth, velvety finish.
We love how this recipe captures that perfect harmony of boldness and creaminess, making every spoonful a delightful experience. Whether you’re an ice cream enthusiast or just looking to impress with a homemade dessert, Jeni’s Chocolate Ice Cream is a must-try. Let’s dive into how we can recreate this iconic flavor with simple ingredients and a few easy steps.
Ingredients
To recreate Jeni’s Chocolate Ice Cream, we need to gather high-quality ingredients that deliver the rich texture and intense cocoa flavor that define this classic dessert. Below, we break down the essential components for the chocolate base and optional mix-ins and toppings to elevate your homemade ice cream.
Chocolate Base Ingredients
The foundation of Jeni’s Chocolate Ice Cream lies in a carefully balanced blend of dairy, sugar, and chocolate that ensures a creamy mouthfeel and deep cocoa richness.
| Ingredient | Quantity | Preparation Notes |
|---|---|---|
| Whole Milk | 2 cups (480 ml) | Use fresh, full-fat milk |
| Heavy Cream | 1 1/2 cups (360 ml) | Promotes silky smooth texture |
| Granulated Sugar | 3/4 cup (150 g) | Balances the bitterness of cocoa |
| Unsweetened Cocoa Powder | 1/3 cup (35 g) | Preferably Dutch-processed for rich flavor |
| High-Quality Bittersweet Chocolate | 6 oz (170 g) | Finely chopped, 60-70% cocoa content |
| Egg Yolks | 4 large | Thickens and enriches the custard base |
| Kosher Salt | 1/4 teaspoon | Enhances overall flavor |
| Vanilla Extract | 1 teaspoon | Adds subtle aromatic depth |
Note: Using Dutch-processed cocoa intensifies the chocolate flavor while maintaining smoothness. The egg yolks create a custard base that ensures the silky, luscious mouthfeel characteristic of Jeni’s recipe.
Mix-ins and Toppings (Optional)
We recommend these additions to customize your ice cream experience without overpowering the core chocolate richness.
- Chocolate Chips or Chunks — 1/2 cup (optional) — Adds delightful bursts of chocolate texture.
- Roasted Hazelnuts or Almonds — 1/3 cup, chopped — Provides a crunchy contrast.
- Sea Salt Flakes — To sprinkle on top — Accentuates the chocolate depth.
- Dark Chocolate Sauce — As a drizzle — Enhances decadence.
- Whipped Cream — To serve alongside — Adds creamy lightness.
We carefully select these options to complement Jeni’s Chocolate Ice Cream’s signature flavor profile without diluting its richness.
Equipment Needed
To perfectly recreate Jeni’s Chocolate Ice Cream at home, having the right equipment is just as important as quality ingredients. Here is a detailed list of tools that will ensure smooth preparation and that rich, creamy texture we are aiming for.
Essential Equipment List
- Ice Cream Maker: A high-quality ice cream maker is crucial for churning and freezing the custard base evenly. We recommend models with a compressor or a well-insulated bowl.
- Heavy-Bottomed Saucepan: Use this to gently heat the milk, cream, and cocoa powder mixture. A thick base prevents scorching and ensures consistent heat distribution.
- Mixing Bowls: Have several medium-sized bowls ready for whisking egg yolks, whisking the custard, and blending ingredients.
- Whisk: For thoroughly combining ingredients and incorporating air into the custard base.
- Fine-Mesh Sieve: To strain the custard and remove any lumps, ensuring that smooth texture that defines Jeni’s Chocolate Ice Cream.
- Digital Thermometer: Precise temperature control is vital when cooking the custard base. Aim for 170–175°F to achieve safe pasteurization without curdling.
- Rubber Spatula: For scraping down the sides of bowls and pans, ensuring no bit of custard is wasted.
- Measuring Cups and Spoons: Accurate measurement of ingredients like cocoa powder, sugar, and vanilla extract ensures consistent flavor.
- Candy or Baking Sheet: Optional but handy for placing in the freezer if you prepare mix-ins or toppings ahead of time.
- Storage Container: An airtight container to store the ice cream in the freezer, preserving its decadent texture and flavor.
Equipment Overview Table
| Equipment | Purpose | Tip |
|---|---|---|
| Ice Cream Maker | Churns and freezes custard base | Use a compressor model for best texture |
| Heavy-Bottomed Saucepan | Gently heats cocoa mixture | Thick bottom prevents burning |
| Mixing Bowls | Holds and mixes ingredients | Multiple sizes improve workflow |
| Whisk | Combines ingredients smoothly | Stainless steel whisk preferred |
| Fine-Mesh Sieve | Strains custard base to remove lumps | Essential for silky texture |
| Digital Thermometer | Ensures custard is cooked safely | Accurate temperature control is key |
| Rubber Spatula | Scrapes custard from bowl and pan | Flexible silicone spatula works best |
| Measuring Cups & Spoons | Accurate ingredient measurement | Calibration improves recipe consistency |
| Storage Container | Stores finished ice cream | Airtight container keeps ice cream creamy and fresh |
Our experience shows that investing in these tools will elevate the Jeni’s Chocolate Ice Cream making process. The right equipment lets us recreate Jeni’s signature balance of bold cocoa richness and smooth creaminess every time.
Prep Work
Before we dive into making Jeni’s Chocolate Ice Cream, it’s essential to focus on the prep work. Proper preparation ensures a smooth process and results in the rich, creamy texture Jeni’s is known for.
Preparing the Chocolate Mixture
We begin by carefully combining the key chocolate components to build the deep, bold flavor of this ice cream. Here’s how we prepare the chocolate mixture:
- Sift the Dutch-processed cocoa powder to remove any lumps and ensure a smooth blend.
- In a heavy-bottomed saucepan, whisk together the cocoa powder and granulated sugar, allowing these dry ingredients to mix evenly.
- Gradually add whole milk and heavy cream while whisking constantly to create a consistent chocolate base.
- Heat the mixture over medium heat, stirring frequently to prevent scorching and to dissolve the sugar completely.
- Once the mixture starts to simmer, remove it from the heat and stir in finely chopped bittersweet chocolate until fully melted, creating a perfectly smooth and glossy chocolate mixture.
- Finally, add a pinch of kosher salt and a teaspoon of vanilla extract to balance and deepen the flavor.
This process builds a robust chocolate foundation essential for capturing the signature taste of Jeni’s Chocolate Ice Cream.
Chilling the Base
Cooling the custard base properly is critical for achieving the iconic creamy texture:
- While the chocolate mixture is cooling slightly, whisk the egg yolks in a separate bowl until smooth and pale.
- Slowly temper the egg yolks by adding about 1/2 cup of the warm chocolate mixture to the yolks while whisking vigorously—this prevents curdling.
- Pour the tempered yolks back into the saucepan and cook over low heat, stirring constantly until the custard thickens enough to coat the back of a spoon. Use a digital thermometer to ensure the temperature reaches between 170°F and 175°F.
- Strain the custard through a fine-mesh sieve into a clean bowl to remove any cooked egg bits, ensuring a silky, smooth base.
- Cover the bowl tightly with plastic wrap, pressing it directly on the surface to prevent a skin from forming.
- Chill the custard in the refrigerator for at least 4 hours or ideally overnight to let the flavors meld and the base fully cool before churning.
| Step | Purpose | Temperature / Time |
|---|---|---|
| Tempering eggs | Prevent curdling | Gradual addition, whisking |
| Cooking custard | Thicken custard | 170°F–175°F |
| Straining | Remove solids for smoothness | Immediately after cooking |
| Chilling | Cool and develop flavor | 4+ hours or overnight in fridge |
By following these prep steps, we set the stage perfectly to churn a luscious, intensely chocolate-flavored ice cream that mirrors Jeni’s signature richness and creaminess.
Instructions
Follow these precise steps to craft our Jeni’s Chocolate Ice Cream with its signature rich texture and deep chocolate flavor.
Making the Ice Cream Base
- Sift ¾ cup Dutch-processed cocoa powder into a large bowl. Add 1 cup granulated sugar and whisk to combine.
- In a heavy-bottomed saucepan, gently heat 2 cups whole milk and 1 cup heavy cream over medium heat until steaming but not boiling.
- Gradually whisk the warm milk mixture into the cocoa and sugar blend to form a smooth chocolate slurry.
- Return the mixture to the saucepan and melt 6 ounces bittersweet chocolate, chopped finely, stirring constantly for an even consistency.
- Stir in ½ teaspoon kosher salt and 1 teaspoon pure vanilla extract to enhance the flavor profile.
- In a separate bowl, whisk 6 large egg yolks until slightly thickened.
- Temper the yolks by slowly adding 1 cup of the warm chocolate mixture while whisking constantly.
- Return the tempered yolk mixture to the saucepan. Cook over low heat, stirring constantly, until the custard reaches 170°F (77°C) to thicken without curdling.
- Strain the custard through a fine-mesh sieve into a clean bowl for an ultra-smooth texture.
- Cover and chill in the refrigerator for at least 4 hours, or overnight, to develop the creamy richness.
| Step | Temperature | Key Action |
|---|---|---|
| Heat milk & cream | Steaming (around 180°F) | Avoid boiling |
| Cook custard base | 170°F (77°C) | Thicken gently |
| Chill custard | Below 40°F (4°C) | Minimum 4 hours to overnight |
Churning the Ice Cream
- Pour the chilled custard into your pre-cooled ice cream maker.
- Churn according to the manufacturer’s instructions, typically for 20–30 minutes, until the mixture thickens and resembles soft-serve texture.
- During the last 5 minutes, optionally add mix-ins like ½ cup chopped dark chocolate or roasted nuts to customize your ice cream without compromising the deep chocolate flavor.
Freezing for Serving
- Transfer the churned ice cream to an airtight container.
- Press a piece of parchment paper directly on the surface to prevent ice crystals.
- Freeze for at least 4 hours until firm but scoopable.
- Before serving, let the ice cream sit at room temperature for 5 to 10 minutes for the perfect creamy mouthfeel.
Serving Suggestions
To elevate our experience with Jeni’s Chocolate Ice Cream we can explore several serving ideas that highlight its decadent texture and bold chocolate flavor. Here are some creative and classic ways to enjoy this exquisite ice cream:
Pair with Warm Desserts
Serve a generous scoop of Jeni’s Chocolate Ice Cream alongside warm desserts like brownies, chocolate lava cakes, or apple crisps. The contrast between the hot dessert and the cold ice cream creates a delightful sensation on the palate.
Add Texture with Toppings
Enhance the rich creaminess by sprinkling crunchy toppings such as:
- Toasted pecans or walnuts
- Sea salt flakes for a sweet-salty balance
- Chocolate chips or shards of dark chocolate
- Caramel or fudge sauce drizzles
These additions complement the strong cocoa notes and add exciting layers of flavor and texture.
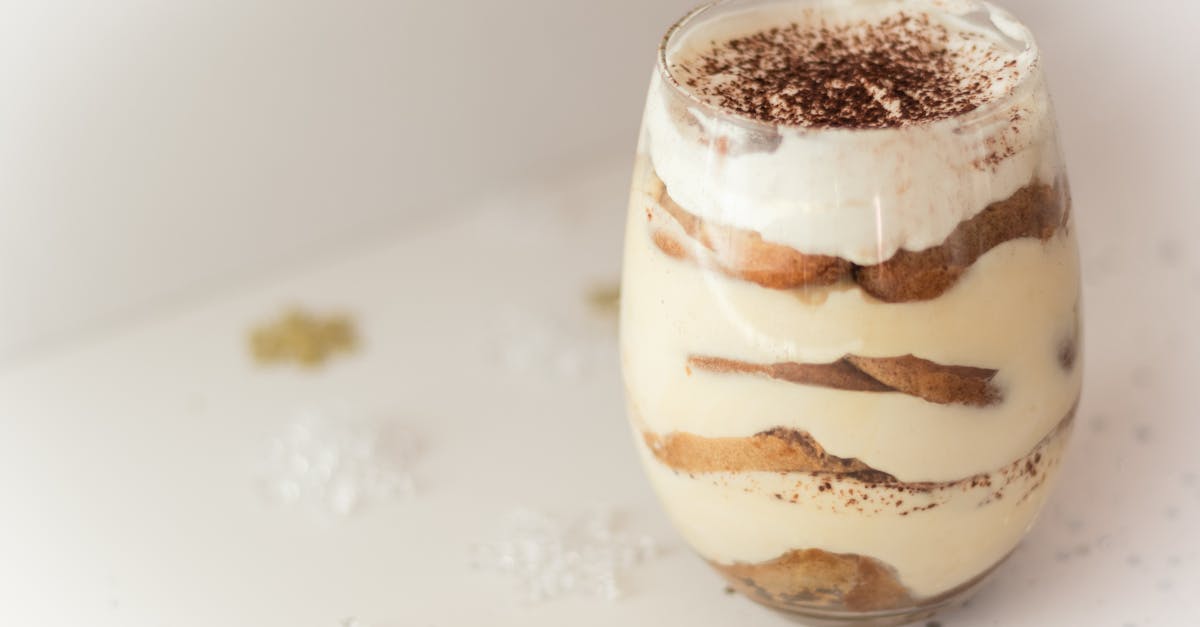
Create an Elegant Sundae
Build a sophisticated chocolate sundae using:
| Component | Description |
|---|---|
| Ice Cream | 2-3 scoops of Jeni’s chocolate |
| Fresh Berries | Strawberries or raspberries |
| Whipped Cream | Lightly sweetened |
| Chocolate Sauce | Warmed dark chocolate drizzle |
| Crushed Cookies | Optional chocolate wafers |
Layer these in a clear glass for an appealing visual and an indulgent treat perfect for entertaining guests.
Make a Chocolate Affogato
For a simple yet luxurious treat:
- Place a scoop of Jeni’s Chocolate Ice Cream in a small cup.
- Pour hot espresso over it just before serving.
The bitterness of espresso balances the ice cream’s sweetness creating a perfect harmony of flavors.
Serve with Fresh Fruit
Balance the richness by pairing the ice cream with tart or sweet fresh fruits like:
- Raspberries
- Bananas
- Cherries
- Orange segments
This adds a refreshing brightness and a splash of color to our dessert plate.
Remember: Keep the ice cream slightly softened for scooping ease but firm enough to hold shape when serving. Let it sit for 5 minutes at room temperature before plating to achieve the best texture.
“The perfect serving heightens the sensory experience making every bite of Jeni’s chocolate ice cream unforgettable.”
Incorporating these suggestions will bring out the full potential of the ice cream’s creamy, intense chocolate essence, turning it into an impressive dessert centerpiece.
Storage and Shelf Life
Proper storage plays a vital role in preserving the rich texture and deep chocolate flavor of Jeni’s Chocolate Ice Cream. Follow these steps to ensure your homemade ice cream stays fresh and indulgent:
Storage Tips
- Transfer the churned ice cream into an airtight, freezer-safe container to prevent ice crystals and freezer burn.
- Press a sheet of parchment paper or plastic wrap directly on the surface of the ice cream before sealing the container. This reduces air exposure and maintains smoothness.
- Store the container in the coldest part of the freezer, avoiding the door where temperature fluctuates.
Ideal Storage Conditions
| Condition | Description |
|---|---|
| Temperature | Maintain at or below 0 °F (-18 °C) |
| Container | Airtight and freezer-safe |
| Air Exposure | Limited by wrapping plastic or parchment on surface |
| Placement | Coldest part of the freezer |
Shelf Life
For the best taste and texture, consume Jeni’s Chocolate Ice Cream within the following time frame:
| Storage Duration | Quality Notes |
|---|---|
| Up to 1 month | Peak freshness, optimal creaminess |
| 1 to 3 months | Flavor remains rich, texture may slightly harden |
| Beyond 3 months | Possible flavor degradation and ice crystallization |
Thawing and Serving
To enjoy the ice cream’s signature creamy mouthfeel, thaw it briefly before serving:
- Remove the container from the freezer and let it sit at room temperature for 5 to 10 minutes.
- Use a sturdy scoop to serve, benefiting from the softened, scoopable texture without melting.
Conclusion
Making Jeni’s Chocolate Ice Cream at home is a rewarding experience that brings rich, velvety chocolate flavor right to your kitchen. With the right ingredients, tools, and techniques, we can recreate this iconic dessert that’s both indulgent and smooth.
Taking the time to prepare the custard base carefully and chill it properly ensures that every scoop delivers that perfect balance of bold cocoa and creamy texture. Whether enjoyed on its own or paired with your favorite toppings and desserts, this ice cream is sure to impress.
By following these steps, we can enjoy a gourmet treat anytime without leaving home, elevating our dessert game with confidence and ease.
Frequently Asked Questions
What makes Jeni’s Chocolate Ice Cream different from other chocolate ice creams?
Jeni’s Chocolate Ice Cream stands out due to its rich, creamy texture and deep, bold cocoa flavor achieved by using high-quality Dutch-processed cocoa, bittersweet chocolate, and a silky custard base made with egg yolks.
What key ingredients are needed to make Jeni’s Chocolate Ice Cream?
The essential ingredients include whole milk, heavy cream, granulated sugar, Dutch-processed cocoa powder, bittersweet chocolate, egg yolks, kosher salt, and vanilla extract.
Why is Dutch-processed cocoa recommended for this recipe?
Dutch-processed cocoa has a smoother, less acidic taste that enhances the deep chocolate flavor, providing a richer and more balanced taste in the ice cream.
What equipment do I need to make Jeni’s Chocolate Ice Cream at home?
You will need a quality ice cream maker, heavy-bottomed saucepan, mixing bowls, whisk, fine-mesh sieve, digital thermometer, rubber spatula, measuring cups and spoons, and a freezer-safe storage container.
How important is chilling the custard base?
Chilling the custard base for at least four hours or overnight is crucial for developing the ice cream’s smooth, creamy texture and ensuring the flavors meld perfectly before churning.
Can I add mix-ins or toppings to the ice cream?
Yes, optional mix-ins like chocolate chips, roasted nuts, and sea salt flakes or toppings like dark chocolate sauce and whipped cream nicely complement the rich chocolate flavor.
What’s the best way to serve Jeni’s Chocolate Ice Cream?
Serve it with warm desserts like brownies, fresh berries, whipped cream, toasted nuts, or as a chocolate affogato with hot espresso for an elevated experience.
How should I store homemade Jeni’s Chocolate Ice Cream?
Store it in an airtight, freezer-safe container with a parchment or plastic wrap layer on top in the coldest part of the freezer, ideally at 0 °F (-18 °C) or below, and consume within one month.
How long should I let the ice cream thaw before serving?
Let the ice cream sit at room temperature for 5 to 10 minutes before scooping to achieve the perfect creamy, soft texture for enjoying.