
Jello heart molds are a fun and festive way to add a splash of color and creativity to any celebration. Whether it’s Valentine’s Day, a birthday, or just a cheerful treat, this recipe brings a playful twist to classic gelatin desserts. We love how easy it is to customize with different flavors and colors to suit any occasion.
Making jello heart molds is not only simple but also a great activity to enjoy with family and friends. With just a few ingredients and a heart-shaped mold, we can create a delightful dessert that’s both visually appealing and delicious. Let’s dive into this recipe and discover how to make the perfect jello hearts that will wow your guests every time.
Ingredients
To create our vibrant and delicious Jello Heart Mold, we will need the following ingredients. Precise measurements ensure perfect texture and flavor every time.
| Ingredient | Quantity | Preparation Details |
|---|---|---|
| Gelatin dessert mix | 1 package (3 oz) | Choose your favorite flavor (e.g., strawberry, cherry, raspberry) |
| Boiling water | 1 cup (240 ml) | Needed to dissolve the gelatin completely |
| Cold water | 1 cup (240 ml) | Adds the right consistency to the mixture |
| Non-stick spray | As needed | To lightly grease the heart mold for easy release |
Optional additions to enhance our Jello Heart Mold include:
- Fresh fruit pieces (like strawberries or blueberries) to add a delightful texture
- Whipped cream for serving
- Edible glitter or sprinkles for decoration
Let’s gather these ingredients and ensure they’re ready for quick use. Properly preparing our ingredients sets the foundation for beautifully shaped, vibrant jello hearts that will wow everyone.
Equipment Needed
To create perfect Jello Heart Molds, having the right equipment is essential. Here’s a detailed list of what we need for easy preparation and flawless results:
- Heart-Shaped Silicone Mold
A flexible heart-shaped mold allows us to easily release the jello without cracking or breaking the delicate edges.
- Mixing Bowls
Use medium and large bowls for dissolving gelatin powder in hot water and for mixing cold water or additional ingredients thoroughly.
- Measuring Cups and Spoons
Precise measurements are key for the best texture and flavor. We’ll measure boiling water and cold water accurately with these tools.
- Whisk or Spoon
A whisk ensures the gelatin powder completely dissolves into the hot water, resulting in smooth, lump-free jello.
- Non-stick Spray
Lightly spraying the mold with non-stick cooking spray helps with releasing the jello without sticking.
- Refrigerator Space
Ensure you have enough cold flat space in your refrigerator to place the molds as they set. Keep molds uncovered during the chilling process to avoid condensation.
- Optional: Fruit Knife and Cutting Board
For those adding fresh fruit pieces inside or on top of the mold, these are necessary for precise cutting.
| Equipment | Purpose |
|---|---|
| Heart-Shaped Mold | Creates jello in heart forms, easy release |
| Mixing Bowls | For combining gelatin with water |
| Measuring Cups | Accurate water measurement |
| Whisk or Spoon | Dissolve gelatin thoroughly |
| Non-stick Spray | Prevent sticking during unmolding |
| Refrigerator Space | To chill and set jello molds |
| Fruit Knife & Board | Optional: prepare fresh fruit toppings |
Tip: When choosing a heart mold, silicone is preferable over plastic for more flexible and damage-free removal.
Using this equipment will streamline our process and help achieve that iconic glossy, firm, and flavorful Jello Heart Mold shape that impresses every guest.
Preparing the Jello Mixture
To create vibrant and perfectly molded Jello Heart Molds, preparing the jello mixture correctly is essential. Let’s walk through the best practices for selecting flavors and mixing the gelatin to achieve a glossy, firm, and delicious result.
Choosing Your Jello Flavors
Selecting the right jello flavor sets the foundation for our heart molds. We recommend using flavors with bright colors and clear profiles to make the shapes pop. Some popular options include:
- Strawberry for a classic red heart
- Cherry for deep red richness
- Raspberry for a bold pink tint
- Lime for a refreshing green accent
- Blueberry for a vibrant blue heart
Pro Tip: Use complementary flavors for layering or mixing fresh fruit inside the mold. For example, strawberry jello pairs wonderfully with sliced strawberries or raspberries.
| Flavor | Color | Flavor Profile | Suggested Fresh Fruit |
|---|---|---|---|
| Strawberry | Bright Red | Sweet and fruity | Strawberries, Raspberries |
| Cherry | Dark Red | Rich and slightly tart | Cherries, Blueberries |
| Raspberry | Deep Pink | Tangy and sweet | Raspberries |
| Lime | Bright Green | Tart and refreshing | Kiwi, Lime slices |
| Blueberry | Vibrant Blue | Mildly sweet | Blueberries |
Mixing Instructions
Follow these step-by-step instructions for preparing the jello mixture to guarantee that our heart molds set perfectly:
- Boil the Water: Bring 1 cup (240 ml) of water to a rolling boil.
- Dissolve the Gelatin: Pour the boiling water over 1 packet (3 oz or 85 g) of gelatin mix in a bowl.
- Stir Thoroughly: Whisk vigorously for 2 minutes until the gelatin powder completely dissolves and the mixture looks clear.
- Add Cold Water: Stir in 1 cup (240 ml) of cold water. This cools down the mix to a temperature perfect for setting.
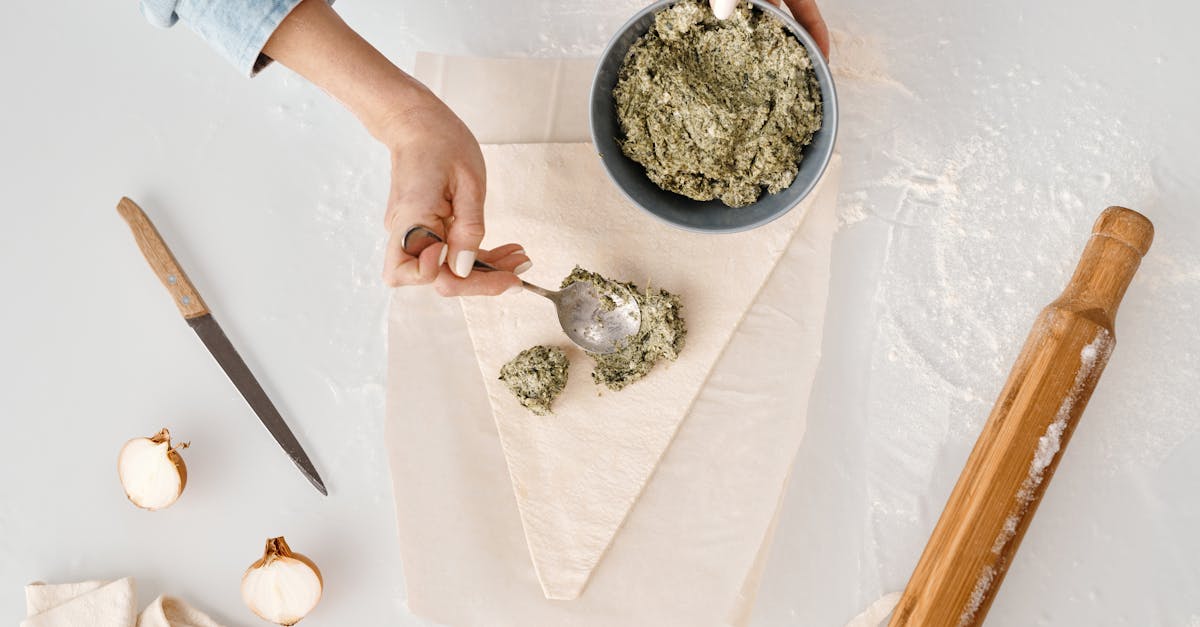
- Optional Enhancements: At this stage, gently fold in fresh fruit pieces or edible glitter if desired, taking care not to break the fruit apart.
- Prepare the Mold: Lightly spray the heart-shaped silicone mold with non-stick spray to ensure easy release.
- Pour the Mixture: Carefully pour the prepared mixture into the molds, leaving a small gap at the top to prevent spills.
“The key to a shiny and firm jello heart is completely dissolving the gelatin in boiling water and allowing it to cool before refrigerating.”
| Step | Action | Amount | Notes |
|---|---|---|---|
| 1 | Boil water | 1 cup (240 ml) | Rolling boil required |
| 2 | Add gelatin mix | 1 packet (3 oz / 85 g) | Use flavored gelatin |
| 3 | Whisk mixture | 2 minutes | Mix until clear and fully dissolved |
| 4 | Add cold water | 1 cup (240 ml) | Helps cool mixture for setting |
| 5 | Optional add-ins | Fresh fruit / edible glitter | Fold gently to avoid breakage |
| 6 | Prepare mold | Non-stick spray | For easy jello release |
| 7 | Pour mixture into molds | To fill molds | Leave slight gap to avoid overflow |
Once poured, immediately refrigerate the molds to allow the jello hearts to set fully and maintain their stunning forms.
Preparing the Heart Mold
Before pouring our vibrant jello mixture, Preparing the Heart Mold properly is essential to ensure the shapes come out perfectly every time. Let’s walk through the necessary steps to get our Jello Heart Mold ready for a smooth release.
Cleaning and Greasing the Mold
Start with a clean mold. Any dust or residue can affect the texture and appearance of our jello hearts. Wash the heart-shaped silicone mold with warm soapy water then rinse thoroughly. Dry completely with a soft cloth or air dry.
| Step | Action | Detail |
|---|---|---|
| 1 | Wash the mold | Use warm water and mild dish soap |
| 2 | Rinse thoroughly | Ensure no soap residue remains |
| 3 | Dry completely | Use a lint-free cloth or allow to air dry |
Next, lightly grease the mold to aid in the smooth release of our jello creations. While silicone molds are naturally flexible, a thin coat of non-stick spray or a light brushing of vegetable oil ensures our jello heart molds pop out without tearing or sticking.
Pro Tip: Use a paper towel to spread the oil evenly and avoid pooling inside the crevices of the heart design. This creates a smooth surface for the jello to set against.
Our mold is now perfectly primed for pouring in the jello mixture. This careful preparation step preserves the stunning shape and makes unmolding a breeze, helping us showcase the vibrant colorful hearts flawlessly.
Pouring the Jello Into the Mold
Once our heart mold is perfectly prepped, it’s time to pour the jello mixture carefully. This step requires a steady hand to ensure the vibrant, glossy gelatin fills the mold evenly, preserving the iconic heart shape without spilling over the edges.
Layering for Multi-Color Effect (Optional)
To create a striking multi-color jello heart, we pour each color layer slowly and allow it to set before adding the next. This technique builds beautiful contrast and depth.
Follow these steps for layering:
| Step Number | Action | Tips |
|---|---|---|
| 1 | Pour the first color into the mold | Fill only halfway to avoid overflow |
| 2 | Refrigerate 15-20 minutes or until firm | Check firmness by gently touching the surface |
| 3 | Pour the next color layer over the first | Pour slowly over the back of a spoon to prevent mixing |
| 4 | Repeat refrigeration and pouring as needed | Let each layer fully set to maintain distinct separation |
| 5 | Refrigerate the entire mold 2-4 hours | Ensure the whole jello heart is completely firm before unmolding |
“Slow and steady pouring combined with proper chilling preserves each layer’s vibrant color and clean lines within the heart shape.”
For a flawless finish, avoid pouring while the previous layer is still liquid to maintain crisp boundaries. This layering method really elevates the presentation, making these jello hearts the centerpiece for any celebration.
Setting the Jello
To achieve perfectly shaped jello hearts, setting the jello properly is crucial. This step ensures the vibrant colors and flavors solidify into stunning heart molds that are easy to release and serve.
Refrigeration Time and Tips
After pouring the jello mixture into the heart-shaped silicone molds, refrigerate immediately to lock in the shape and texture. The ideal refrigeration time is key for firm jello that holds its perfect heart form without sticking or collapsing.
| Refrigeration Time | Notes |
|---|---|
| 2 to 4 hours | For a standard single-color jello heart |
| 30 to 45 minutes/layer | If making multi-layered jello hearts |
| Overnight (optional) | For extra firm set and ease of removal |
Important Tips for Refrigeration:
- Place the molds on a flat surface in the refrigerator to prevent uneven setting or slanting shapes.
- Cover the molds loosely with plastic wrap or a clean kitchen towel to prevent condensation droplets from forming on top.
- If creating layers, allow the first layer to set firmly before adding the next. This helps maintain distinct layers without colors blending.
“Patience during refrigeration is essential for a flawless release. Rushing may cause the jello to deform or stick to the mold.”
By following these refrigeration guidelines, we guarantee each jello heart mold will be visually striking and delightfully firm, ready to impress your guests at any celebration.
Removing Jello from the Mold
Removing our Jello Heart Mold perfectly without damage is essential for a stunning presentation. With the right technique, we can release the jello smoothly, preserving its vibrant heart shape and glossy finish.
Tips for Easy Release
To achieve a flawless removal of our Jello Heart Mold, follow these key tips:
- Chill Thoroughly: Ensure the jello has set completely by refrigerating for at least 2 to 4 hours or overnight for extra firmness. A fully set jello will release cleanly from the mold.
- Loosen the Edges: Gently run a thin, flexible knife or small spatula around the edges of the heart mold to break the seal without tearing.
- Warm Water Technique: Briefly dip the bottom of the silicone mold into warm water for 5 to 10 seconds. This softens the mold slightly, helping the jello slide out easily.
- Invert Carefully: Place a serving plate over the mold, hold both firmly, and invert the mold. Give a gentle shake or tap to release the jello heart.
- Avoid Excess Force: Never pull or pry aggressively. Silicone molds are flexible enough for an effortless pop when handled correctly.
- Spray the Mold: Before pouring the jello mixture, lightly coat the mold with a non-stick spray for smooth release.
| Step | Purpose | Tips |
|---|---|---|
| Chill completely | Firmness for easy removal | Cover loosely to prevent condensation |
| Run knife around edges | Breaks adhesion | Use a butter knife to avoid cutting jello |
| Warm water dip | Softens silicone for release | Submerge bottom only briefly |
| Invert on serving plate | Transfers jello heart neatly | Support both mold and plate firmly |
| Gentle shake or tap | Encourages release without damage | Use light, rhythmic motions |
| Use non-stick spray | Prevents sticking before setting | Apply sparingly for best results |
Serving Suggestions
To showcase our Jello Heart Mold creations beautifully and delightfully, presentation and complementary accompaniments play essential roles. Here are our best serving suggestions to elevate the experience:
- Plate Presentation
Gently place each firm jello heart on a chilled dessert plate. Use a white or pastel-colored plate to highlight the vibrant hues of the jello. Arrange hearts spaced evenly for visual appeal.
- Garnishing Options
Add a dollop of freshly whipped cream or a swirl of vanilla yogurt on the side to enhance the creamy texture contrast. Sprinkle edible glitter or finely chopped fresh mint leaves over the top for sparkle and a pop of color.
- Fruit Pairings
Pair the jello hearts with fresh fruit that complements the chosen jello flavor. For example:
| Jello Flavor | Ideal Fresh Fruit Pairing |
|---|---|
| Strawberry | Sliced strawberries, kiwi |
| Cherry | Pitted cherries, raspberries |
| Raspberry | Blueberries, blackberries |
| Lime | Pineapple chunks, mango |
| Blueberry | Lemon slices, grapes |
- Serving Temperature
Serve the jello hearts chilled but not overly cold to avoid dulling flavors. Allow them to sit at room temperature for 5 minutes before serving.
- Creative Displays
For gatherings, arrange multiple hearts on a large platter lined with fresh mint or edible flower petals. Use a layered heart mold variety for a vibrant rainbow effect that attracts immediate attention.
- Accompanying Beverages
Pair the dessert with light and refreshing drinks such as sparkling water with citrus, iced herbal tea, or a fruity punch. Avoid heavy or overly sweet beverages that might overpower the delicate jello flavors.
As we serve our Jello Heart Molds, these suggestions ensure a memorable presentation and a burst of flavor in every bite. They are perfect for special occasions and casual celebrations alike, making every moment more vibrant and festive.
Make-Ahead Instructions
Preparing our Jello Heart Mold ahead of time guarantees a smooth celebration day and perfectly set jello hearts ready to impress. Here are the essential steps to follow for effective make-ahead preparation:
Step 1: Prepare and Pour the Jello Mixture
- Mix the gelatin dessert with boiling water until fully dissolved.
- Add cold water and stir to combine evenly.
- For multi-layered hearts, pour the first layer gently into the heart-shaped silicone mold, ensuring an even thickness.
- Refrigerate each layer separately to set firmly before adding the next, following the timing guidelines below.
Step 2: Refrigeration Timelines
| Jello Type | Setting Time | Notes |
|---|---|---|
| Single-color Jello Heart | 2 to 4 hours | Place on a flat surface for even setting |
| Multi-layer Jello Hearts | 30 to 45 minutes/layer | Cover loosely to prevent condensation |
| Extra Firm (Optional) | Overnight | Adds extra stability for transport |
Tip: Always place molds on a sturdy flat surface inside the fridge to avoid spills or uneven setting.
Step 3: Covering and Storage
- Cover the molds loosely with plastic wrap or an inverted airtight container to prevent moisture buildup.
- Avoid sealing too tightly to prevent condensation drops which can affect the surface texture.
Step 4: Advanced Preparation
- We recommend making jello hearts 1 to 2 days ahead of your event.
- This buffer allows full firming and ease of removal from molds without damage.
- For multi-layer molds, plan to prepare each color and layer sequentially to stay on schedule.
Step 5: Removing from the Mold
- Chill the molded hearts thoroughly before unmolding.
- Run warm water briefly on the outside of the silicone mold to loosen edges.
- Invert and gently press the mold to release the jello heart effortlessly.
By following this detailed make-ahead plan, we ensure our Jello Heart Mold maintains its shape, vibrant colors, and eye-catching design when it’s time to serve.
Conclusion
Creating jello heart molds is a fun and rewarding way to add a festive touch to any celebration. With just a few simple ingredients and the right tools, we can craft beautiful, flavorful treats that impress every time.
By experimenting with colors, flavors, and decorations, we keep the process exciting and customizable for any occasion. Whether for a party or a cozy family gathering, these jello hearts bring joy and a splash of creativity to the table.
Let’s keep these tips in mind and enjoy making jello heart molds that not only look stunning but taste delicious too.
Frequently Asked Questions
What ingredients do I need to make jello heart molds?
You need gelatin dessert mix, boiling water, cold water, and non-stick spray. Optional ingredients include fresh fruit, whipped cream, and edible glitter for decoration.
What equipment is essential for creating jello heart molds?
You’ll need a heart-shaped silicone mold, mixing bowls, measuring cups and spoons, a whisk or spoon, and refrigerator space for setting the jello.
How do I prepare the jello mixture for heart molds?
Dissolve the gelatin mix in boiling water, add cold water, and stir well. You can fold in fresh fruit or edible glitter before pouring into molds.
What’s the best way to fill the heart molds?
Clean and lightly grease the silicone molds, then pour the jello mixture evenly using a steady hand to maintain the heart shape.
How long should I refrigerate jello heart molds?
Single-color molds take 2 to 4 hours, while multi-layered hearts require 30 to 45 minutes per layer. Overnight refrigeration gives extra firmness.
Can I make multi-colored jello heart molds?
Yes, use a layering technique by pouring and refrigerating each color separately until firm before adding the next layer.
How far in advance can I prepare jello heart molds?
Make them 1 to 2 days in advance for the best firmness and ease of removal from molds.
What are some serving tips for jello heart molds?
Serve on chilled plates, garnish with whipped cream or fresh mint, and pair with fresh fruit that complements the jello flavor.
How can I remove the jello hearts from the mold without damage?
Use flexible silicone molds and gently press the bottom to release the jello. Avoid forcing to prevent breaking the shapes.
What flavors are recommended for jello heart molds?
Popular flavors include strawberry, cherry, raspberry, lime, and blueberry, each paired well with matching fresh fruits for decoration.