
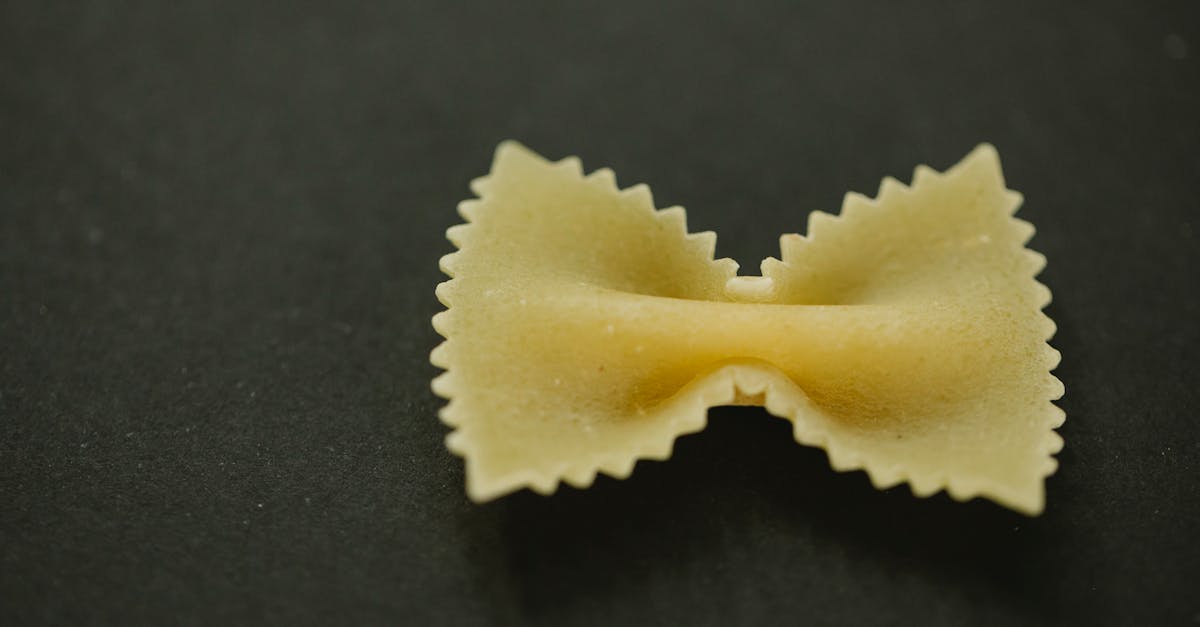
Italian Bow Tie Cookies, also known as “Struffoli,” bring a delightful twist to traditional holiday treats. These charming cookies are shaped like tiny bows, offering a perfect balance of crispiness and a melt-in-your-mouth texture. Originating from Italy, they carry a rich history of family gatherings and festive celebrations.
We love how these cookies combine simple ingredients with a unique shape that’s both fun to make and impressive to serve. Whether you’re baking for a special occasion or just want to enjoy a taste of Italian tradition, this recipe is easy to follow and yields delicious results every time. Let’s dive into creating these beautiful bow tie cookies that will surely become a favorite in your cookie jar.
Ingredients
To create perfectly authentic Italian Bow Tie Cookies, we need to gather a few essential ingredients that come together to form the delicate dough, the irresistible filling, and optional garnishes to elevate the presentation and flavor. Here’s everything we’ll need to bring this classic treat to life.
Dough Ingredients
Our Italian Bow Tie Cookie dough is the foundation of this recipe. Each ingredient plays a vital role in achieving the crisp yet tender texture and beautiful golden color.
- 2 cups all-purpose flour, plus extra for dusting
- 3 large egg yolks, at room temperature
- 1/2 cup granulated sugar
- 1/4 cup unsalted butter, softened
- 1 tablespoon white wine or dry Marsala wine
- 1 teaspoon pure vanilla extract
- 1/4 teaspoon salt
- Vegetable oil, for frying (about 2 cups)
Filling Ingredients
These cookies often feature a sweet filling that adds contrast to their delicate crunch. Our classic version uses a simple but flavorful filling.
- 1 cup ricotta cheese, drained well
- 1/2 cup powdered sugar, sifted
- 1 teaspoon lemon zest
- 1/2 teaspoon pure vanilla extract
- Pinch of ground cinnamon (optional)
Optional Garnishes
To add an extra festive touch or enhance the flavor, we can use these garnishes to finish our Italian Bow Tie Cookies perfectly.
| Garnish | Purpose |
|---|---|
| Powdered sugar | Light dusting for delicate sweetness |
| Honey drizzle | Adds shine and stickiness, enhancing flavor |
| Toasted almonds | Adds crunch and nutty richness |
| Colored sprinkles | Provides a cheerful festive look |
| Citrus zest | Adds fresh aromatic brightness |
Using these ingredients ensures our Italian Bow Tie Cookies not only look authentic but truly capture the traditional taste and festive spirit we love.
Equipment Needed
To make authentic Italian Bow Tie Cookies, we need the right equipment to ensure each step is smooth and precise. Here is a list of essential tools that will help us achieve that perfect bow tie shape and delightful texture:
- Mixing Bowls: Use medium and large bowls to combine the dough ingredients and mixing the ricotta filling separately.
- Whisk and Wooden Spoon: Whisk to blend egg yolks and sugar smoothly. A wooden spoon is excellent for folding ingredients and dough mixing.
- Measuring Cups and Spoons: Accurate measurements of flour, sugar, butter, and other ingredients guarantee consistent results.
- Rolling Pin: A sturdy rolling pin is crucial for rolling the dough evenly to the right thickness.
- Sharp Knife or Pizza Cutter: To cut the dough into precise rectangles or squares before forming the bow ties.
- Skimmer or Slotted Spoon: For safely removing the fried cookies from hot oil.
- Heavy-bottomed Pot or Deep Fryer: Essential for frying the bow tie cookies in vegetable oil at the right temperature.
- Cooling Rack: Allows cookies to drain and cool evenly without becoming soggy.
- Zester or Fine Grater: For zesting lemon to add authentic citrus notes to the filling or garnishes.
- Sifter or Fine Mesh Strainer: To dust powdered sugar evenly over the finished cookies.
- Thermometer (optional but recommended): To monitor oil temperature, ideally 350°F (175°C) for frying.
| Equipment | Purpose |
|---|---|
| Mixing Bowls | Mixing dough and filling |
| Whisk | Blending eggs and sugar |
| Wooden Spoon | Folding ingredients and mixing dough |
| Measuring Cups | Accurate ingredient measurement |
| Rolling Pin | Rolling dough evenly |
| Knife or Pizza Cutter | Cutting dough shapes |
| Skimmer / Slotted Spoon | Removing fried cookies safely |
| Heavy-bottomed Pot | Frying cookies evenly |
| Cooling Rack | Draining and cooling cookies |
| Zester | Adding citrus flavor |
| Sifter | Dusting powdered sugar |
| Thermometer (optional) | Monitoring frying oil temperature |
Prep Work
Before diving into the cooking process, proper prep work sets us up for success in crafting authentic Italian Bow Tie Cookies. Let’s ensure every component is ready for seamless assembly and delicious results.
Preparing the Dough
We start by creating a smooth dough that forms the base of our Italian Bow Tie Cookies.
- Combine dry ingredients: In a large mixing bowl, sift together all-purpose flour, a pinch of salt, and sugar. Sifting ensures a light texture without lumps.
- Add wet ingredients: Incorporate egg yolks, softened butter, a splash of dry white wine (this adds a subtle flavor twist), and vanilla extract.
- Mix thoroughly: Use a wooden spoon first to bring the ingredients together, then knead by hand on a floured surface until the dough is elastic and smooth. Avoid overworking to keep the cookies tender.
- Rest the dough: Wrap dough in plastic wrap and let it rest for at least 30 minutes in the refrigerator. This relaxes the gluten and makes rolling easier.
| Ingredient | Measurement | Prep Notes |
|---|---|---|
| All-purpose Flour | 2 ½ cups | Sift before use |
| Sugar | ½ cup | Fine granulated |
| Egg Yolks | 3 | Room temperature |
| Butter | 6 tbsp | Softened |
| Dry White Wine | 3 tbsp | Adds subtle aroma |
| Vanilla Extract | 1 tsp | Pure vanilla preferred |
| Salt | ½ tsp | Enhances flavor |
Preparing the Filling
The filling adds a creamy, sweet contrast to the crisp cookies:
- Mix the base: In a medium bowl, combine ricotta cheese with powdered sugar. Use a whisk to achieve a smooth, no-lump texture.
- Add flavorings: Stir in freshly grated lemon zest and, optionally, a pinch of cinnamon for warmth.
- Chill: Cover and refrigerate the filling until firm, about 20 minutes, to make spreading easier during assembly.
| Filling Ingredient | Measurement | Description |
|---|---|---|
| Ricotta Cheese | 1 cup | Well-drained, smooth |
| Powdered Sugar | ⅓ cup | For sweetness |
| Lemon Zest | 1 tsp | Freshly grated |
| Cinnamon (optional) | ¼ tsp | Adds warmth and depth |
With the dough resting and the filling chilling, we’re perfectly aligned to shape and assemble our delightful Italian Bow Tie Cookies.
Instructions
Follow these step-by-step instructions to craft perfectly shaped and delicious Italian Bow Tie Cookies. Each stage—from rolling the dough to filling and folding—ensures authentic texture and flavor.
Rolling Out the Dough
- Lightly flour your work surface and rolling pin to prevent sticking.
- Remove the dough from the refrigerator and let it sit at room temperature for 5 minutes for easier handling.
- Roll the dough into a rectangle about 1/8 inch (3 mm) thick. Aim for uniform thickness to ensure even frying.
- If the dough springs back, allow it to rest for an additional 3–5 minutes before continuing.
| Step Number | Action | Details |
|---|---|---|
| 1 | Lightly flour surface | Prevents sticking |
| 2 | Rest dough at room temp | 5 minutes for pliability |
| 3 | Roll dough to 1/8 inch thickness | Ensures even frying and texture |
Cutting and Shaping the Bow Tie Cookies
- Using a sharp knife or pizza cutter, cut the rolled-out dough into rectangles measuring 2 inches by 1 inch (5 cm by 2.5 cm).
- For each rectangle, pinch the center gently to form the classic bow tie shape.
- Make sure each cookie is securely pinched to hold the shape during frying.
Pro Tip: Maintain consistent cookie sizes for uniform cooking and presentation.
| Measurement | Recommended Size |
|---|---|
| Rectangle length | 2 inches (5 cm) |
| Rectangle width | 1 inch (2.5 cm) |
Filling and Folding the Cookies
- On each shaped bow tie, place about 1/2 teaspoon of the ricotta filling prepared earlier.
- Carefully fold one side over the filling, pressing edges lightly to seal but keep the bow tie form intact.
- If you prefer, you can leave the cookies unfilled and simply fry them as is; both options are traditional and delicious.
- Place the filled cookies on a parchment-lined tray to prevent sticking before frying.
“Filling the cookies adds a luscious surprise within but keep the filling quantity moderate to avoid bursting during frying.”
By following these precise instructions, we ensure our Italian Bow Tie Cookies turn out crispy, flavorful, and visually delightful.
Baking Directions
Now that we have shaped and filled our Italian Bow Tie Cookies, it’s time for the baking process. Following precise steps for oven preparation and baking will guarantee crisp, golden finishes and that traditional delightful texture.
Preheating the Oven
We start by preheating the oven to ensure an even cooking temperature from the moment the cookies go inside. Set your oven to 350°F (175°C). This moderate temperature helps the cookies bake through without burning the delicate edges.
- Position your rack in the center of the oven.
- Allow the oven to fully reach 350°F before placing the cookies inside.
- Using an oven thermometer can help confirm your oven’s accuracy.
Consistent heat promotes the perfect golden-brown color and keeps the filling soft yet stable.
Baking Time and Temperature
Bake the cookie trays on the center rack for 12 to 15 minutes. The baking duration depends slightly on your oven’s heat circulation and cookie size.
| Step | Temperature | Baking Time | Indicators of Doneness |
|---|---|---|---|
| Preheat Oven | 350°F (175°C) | – | Oven is fully heated |
| Bake Cookies | 350°F (175°C) | 12 to 15 minutes | Light golden edges, firm base |
| Cool on Rack | Room Temp | 5 minutes | Slight firm texture before serving |
Pro Tips:
- Keep an eye on the edges to avoid overbrowning. The cookies should be a light golden shade.
- Rotate your baking sheets halfway through baking to ensure even color and crispness.
- After baking, transfer cookies to a wire rack to cool. This prevents moisture buildup that can soften their signature crunch.
By closely following these steps, our Italian Bow Tie Cookies will boast the ideal balance of crispiness and tender ricotta filling, creating a festive treat worthy of any celebration.
Cooling and Serving
After baking our Italian Bow Tie Cookies, proper cooling and thoughtful serving will enhance their crisp texture and delightful flavors. Let’s explore the best ways to cool and present these festive treats.
Cooling Tips
- Transfer the cookies immediately from the oven onto a wire cooling rack to prevent moisture buildup on the bottom.
- Allow the cookies to cool completely for approximately 20 to 30 minutes; this step ensures the exterior crisps up while the filling sets perfectly.
- Avoid stacking the cookies while warm to maintain their signature bow tie shape and prevent sogginess.
- If needed, gently separate any cookies that stick together once cooled to preserve their appearance and texture.
| Cooling Step | Purpose | Time Estimate |
|---|---|---|
| Transfer to wire rack | Promote air circulation | Immediately post-bake |
| Cool at room temperature | Crisp the cookie surface, set filling | 20 – 30 minutes |
| Avoid stacking | Preserve shape and texture | Until fully cooled |
Serving Suggestions
- Serve the Italian Bow Tie Cookies on a decorative platter, arranged neatly to showcase their iconic bow shape.
- Lightly dust the cookies with powdered sugar or drizzle with a touch of warm honey for a sweet finish that complements the ricotta filling.
- Sprinkle toasted almonds, colored sprinkles, or a hint of lemon zest on top for added texture, color, and flavor contrast.
- Pair these cookies with a warm cup of espresso or a refreshing glass of sweet dessert wine to elevate your Italian gathering or festive celebration.
- For gifting, nestle the cookies in parchment-lined boxes or tins with decorative ribbons to share the joy and tradition authentically.
Make-Ahead and Storage Tips
To enjoy our Italian Bow Tie Cookies at their freshest, proper make-ahead planning and storage techniques are essential. Here are our expert tips to keep these festive treats crispy and flavorful.
Make-Ahead Preparation
- Dough: Prepare the dough up to 24 hours in advance. Wrap tightly in plastic wrap and refrigerate. Allow the dough to rest at room temperature for 15 minutes before rolling to ensure easier handling.
- Filling: The ricotta filling can be made 1–2 days ahead. Store it in an airtight container in the refrigerator to maintain freshness and flavor.
- Assembled Cookies: If you prefer to assemble the bow tie cookies ahead of time, fill and shape them, then lay them on a parchment-lined tray. Cover loosely with plastic wrap and refrigerate for up to 12 hours before frying or baking.
Storage Guidelines
After baking or frying, ensure that your Italian Bow Tie Cookies cool completely on a wire rack to prevent sogginess. For optimal texture and taste, follow the storage methods outlined below:
| Storage Method | Duration | Container Type | Notes |
|---|---|---|---|
| Room Temperature | Up to 3 days | Airtight container | Keep in a cool, dry place away from sunlight. |
| Refrigeration | Up to 1 week | Airtight container | Helps extend freshness but may slightly soften cookies. Bring to room temp before serving. |
| Freezing | Up to 1 month | Freezer-safe airtight container or bag | Freeze after cooling completely. Thaw at room temperature before serving. |
Reheating Tips
To revive the crispness of refrigerated or frozen cookies:
- Preheat your oven to 325°F (163°C).
- Arrange cookies on a baking sheet lined with parchment paper.
- Warm for 5–7 minutes, checking frequently to prevent overbrowning.
- Allow cookies to cool briefly to firm up the texture before serving.
“A warm cookie tastes just as delightful as fresh-out-of-the-oven!”
Additional Tips
- Avoid stacking cookies directly on top of one another during storage to maintain their bow tie shape and prevent breakage.
- If using honey or powdered sugar as garnish, add these just before serving to keep their texture intact.
- When freezing, separate layers with parchment paper to prevent sticking.
By following these make-ahead and storage recommendations, we ensure our Italian Bow Tie Cookies stay crisp, flavorful, and ready to impress whenever the occasion calls for a sweet Italian celebration.
Conclusion
Making Italian Bow Tie Cookies brings a wonderful blend of tradition and flavor to any kitchen. With a few simple ingredients and some careful steps, we can create a treat that’s both beautiful and delicious.
These cookies not only satisfy our sweet cravings but also connect us to a rich cultural heritage. Whether for celebrations or everyday enjoyment, they’re sure to impress and delight.
Let’s embrace the joy of baking these charming cookies and share them with friends and family, making every bite a special moment.
Frequently Asked Questions
What are Italian Bow Tie Cookies (Struffoli)?
Italian Bow Tie Cookies, also known as Struffoli, are traditional Italian treats shaped like bow ties. They feature a crisp texture and can be filled or unfilled, often enjoyed during festive occasions and family celebrations.
What ingredients do I need to make Italian Bow Tie Cookies?
The essential ingredients include all-purpose flour, egg yolks, sugar, butter, wine, vanilla, salt, vegetable oil (for frying), ricotta cheese, powdered sugar, lemon zest, and optional cinnamon. Garnishes like powdered sugar, honey, and toasted almonds are also common.
What equipment is required to make these cookies?
You will need mixing bowls, a whisk, wooden spoon, measuring cups and spoons, rolling pin, sharp knife or pizza cutter, skimmer or slotted spoon, heavy-bottomed pot or deep fryer, cooling rack, zester or fine grater, sifter, and optionally, a thermometer.
How should I prepare the dough for these cookies?
Sift dry ingredients, then mix with wet ingredients and knead until smooth and elastic. Chill the dough in the refrigerator for at least 30 minutes to relax the gluten before rolling and cutting.
Can Italian Bow Tie Cookies be made with or without filling?
Yes. The cookies can be filled with a sweet ricotta mixture for extra flavor or fried plain for a traditional version. Both ways result in delicious, crispy treats.
What is the recommended baking temperature and time?
Preheat your oven to 350°F (175°C) and bake the cookies for 12 to 15 minutes. Bake until the edges are lightly golden and the base feels firm to ensure crispness.
How should I cool and serve the cookies?
Cool the cookies on a wire rack for 20 to 30 minutes after baking to keep them crisp. Serve dusted with powdered sugar or drizzled with honey, and garnish with almonds or sprinkles for a festive look.
Can I prepare these cookies in advance?
Yes, you can prepare the dough and filling ahead of time. Store dough refrigerated and the filling chilled. Baked cookies keep well at room temperature or refrigerated and can be frozen for longer storage.
What are some tips to keep the cookies fresh?
Store cookies in an airtight container at room temperature or in the fridge depending on the filling. Reheat briefly to restore crispness. Avoid moisture to maintain texture and avoid sogginess.
What drinks pair well with Italian Bow Tie Cookies?
Espresso and sweet dessert wines complement these cookies perfectly, enhancing their rich flavor and making them ideal for festive or casual gatherings.