
Combining the convenience of the Instant Pot with the classic versatility of a Dutch oven opens up a world of delicious possibilities. These Instant Pot Dutch oven recipes bring together the best of both cooking worlds—speed and rich, deep flavors. Whether we’re simmering hearty stews or baking crusty bread, this method lets us enjoy comfort food without spending hours in the kitchen.
Using the Instant Pot as a Dutch oven means we get that slow-cooked taste in a fraction of the time. It’s perfect for busy weeknights or when we want to impress guests with minimal effort. Let’s explore recipes that make the most of this dynamic duo, turning simple ingredients into unforgettable meals.
Overview of Instant Pot Dutch Oven Recipes
Combining the Instant Pot with a Dutch oven revolutionizes how we approach home cooking. This dynamic duo lets us enjoy the rich flavors and slow-cooked textures typically reserved for traditional stovetop or oven methods—but in a fraction of the time. Our recipes are designed to maximize these tools’ strengths, blending pressure cooking speed with the Dutch oven’s even heat distribution.
Why Use an Instant Pot with a Dutch Oven?
The Instant Pot’s pressure and temperature control accelerates cooking while locking in moisture. The Dutch oven, known for its thick cast-iron walls and ability to maintain steady heat, enhances the depth of flavor through searing, braising, and baking. This combo is perfect for:
- Developing caramelized crusts before pressure cooking.
- Simmering stews where flavor melds are essential.
- Baking artisanal breads with crisp, golden crusts.
- Creating one-pot meals with minimal cleanup.
Key Steps to Mastering Instant Pot Dutch Oven Cooking
| Step | Action | Purpose | Tips |
|---|---|---|---|
| 1 | Sear ingredients in Dutch oven | Build rich flavor layers | Use medium-high heat, avoid overcrowding |
| 2 | Transfer Dutch oven insert to Instant Pot base | Enable pressure cooking functionality | Ensure sealing ring is properly placed |
| 3 | Select appropriate pressure setting | Achieve tender, even cooking | Use manual or specific preset based on recipe |
| 4 | Release pressure carefully | Maintain texture and safety | Opt for natural release with stews, quick release for vegetables |
| 5 | Finish with optional baking or simmering | Develop crust or thicken sauces | Use sauté mode or under broiler if applicable |
What Makes These Recipes Exceptional?
By combining the Instant Pot’s efficiency with the Dutch oven’s versatility, we create dishes that:
- Have deep, concentrated flavors usually requiring hours.
- Maintain moist, tender textures without drying out.
- Utilize minimal hands-on time, perfect for busy lifestyles.
“This synergy allows us to explore dishes from succulent braises to crusty artisan breads—all from one powerful kitchen setup.”
Our upcoming recipes leverage this technique for home cooks who want to save time but never compromise on taste. We encourage you to experiment with different proteins, vegetables, and seasoning blends to fully embrace the versatility of Instant Pot Dutch oven recipes.
Essential Tools and Equipment
To master Instant Pot Dutch Oven recipes effectively, having the right tools is essential. We must carefully select both an Instant Pot model and a compatible Dutch oven insert to ensure optimal cooking results.
Choosing the Right Instant Pot
Selecting the best Instant Pot for these recipes involves considering capacity, functionality, and compatibility.
| Feature | Recommendation | Reason |
|---|---|---|
| Capacity | 6 to 8 quarts | Ideal size for family meals and versatile enough for larger Dutch oven inserts |
| Programs | Pressure cook, sauté, slow cook | Necessary for searing and pressure cooking steps intrinsic to Dutch oven recipes |
| Material | Stainless steel inner pot | Durable and retains heat well for consistent cooking |
| Additional Features | Manual pressure release, delayed start, keep warm | Adds flexibility and convenience during cooking stages |
We recommend models like Instant Pot Duo or Instant Pot Ultra because they include all these critical features. The stainless steel inner pot supports high-heat sautéing to brown ingredients before pressure cooking, boosting flavor depth.
Selecting a Suitable Dutch Oven Insert
When using a Dutch oven inside the Instant Pot, size and material matter most. Not all Dutch ovens fit well or work efficiently with every Instant Pot model.
| Attribute | Ideal Characteristic | Why It Matters |
|---|---|---|
| Size | 5 to 7 quarts | Fits inside the Instant Pot’s inner pot without restricting lid closure |
| Material | Enameled cast iron or stainless steel | Even heat distribution, non-reactive surface favoring flavor preservation |
| Shape | Round with tall sides | Retains moisture and allows for thorough braising and searing |
We prefer an enameled cast iron Dutch oven insert designed for use inside pressure cookers. Its heavy lid seal and thick walls lock in moisture enhancing the braising effect. Make sure whichever insert you choose fits comfortably within your Instant Pot, allowing for proper sealing and pressure build-up.
“Using the right Dutch oven insert in your Instant Pot transforms one-pot meals into deeply flavorful dishes with minimal fuss.”
By combining a compatible Instant Pot and a well-fitted Dutch oven insert, we unlock the full potential of this cooking method. These tools create the perfect environment to develop rich, layered flavors while enjoying the convenience of rapid pressure cooking.
Ingredients for Instant Pot Dutch Oven Recipes
To unlock the full potential of Instant Pot Dutch Oven recipes, it’s essential to stock your kitchen with versatile ingredients. These staples and fresh items form the backbone of hearty, flavorful meals that cook quickly and deeply satisfy.
Common Pantry Staples
Having a well-stocked pantry ensures we can whip up delicious dishes anytime. Here are the essential pantry ingredients that work seamlessly in Instant Pot Dutch Oven cooking:
- Olive oil or other cooking oils for searing and sautéeing
- All-purpose flour for thickening sauces or dusting meats before searing
- Dried herbs and spices such as thyme, rosemary, bay leaves, paprika, cumin, and black pepper
- Salt (kosher or sea salt for seasoning)
- Canned tomatoes (whole, diced, or crushed) to build rich bases for stews and braises
- Broth or stock (vegetable, chicken, or beef) to infuse moisture and flavor during pressure cooking
- Beans and legumes (canned or dried, soaked beforehand) for protein-packed meals
- Rice or grains like quinoa or barley to complement stews or act as side dishes
- Vinegar and Worcestershire sauce to add acidity and depth to braised dishes
- Garlic powder and onion powder to boost savory notes when fresh options aren’t available
Fresh Ingredients to Keep on Hand
Fresh ingredients elevate our Instant Pot Dutch Oven recipes by adding brightness and texture. Here are the key fresh items we recommend keeping ready:
| Ingredient | Purpose |
|---|---|
| Onions | Base for sautéeing, adding sweetness and aroma |
| Garlic cloves | Adds depth and bold savory flavor |
| Carrots | Provides natural sweetness and texture |
| Celery stalks | Builds rich flavor for stocks and stews |
| Fresh herbs | Parsley, thyme, rosemary for garnish and aroma |
| Bell peppers | Adds color and subtle sweetness |
| Potatoes | Great for hearty stews and braised dishes |
| Mushrooms | Imparts umami richness to sauces |
| Fresh tomatoes | Enhances freshness in sauces and braises |
| Lemon or lime | Adds acidity to balance richness |
By keeping these staples and fresh ingredients at the ready, we create a versatile foundation for countless Instant Pot Dutch Oven recipes that taste rich, comforting, and satisfying every time.
Preparing Your Ingredients
Proper preparation is key to unlocking the full potential of Instant Pot Dutch Oven recipes. By prepping ingredients methodically, we ensure even cooking and maximum flavor extraction from every component.
Prepping Vegetables and Proteins
We start by washing all fresh vegetables thoroughly to remove any dirt or residue. For root vegetables like carrots and celery, peeling and dicing into uniform pieces ensures they cook evenly inside the Dutch oven insert. Aromatics such as onions and garlic should be finely chopped or minced to release their robust flavors during the searing stage.
When it comes to proteins, whether we use beef, chicken, or pork, trimming excess fat improves texture without sacrificing juiciness. Cutting meat into consistent chunks or strips helps achieve even browning and prevents uneven cooking under pressure. For recipes that incorporate beans or legumes, soaking them if required guarantees optimal tenderness.
Here is a quick guide for prepping common vegetables and proteins:
| Ingredient | Prep Step | Purpose |
|---|---|---|
| Carrots | Peel and dice | Ensures uniform cooking |
| Celery | Trim ends and dice | Enhances texture and flavor |
| Onion | Peel and finely chop | Releases aromatic richness |
| Garlic | Peel and mince | Intensifies depth in dishes |
| Beef/Pork | Trim fat and cut into chunks | Promotes even searing |
| Chicken | Trim and cut into portions | Cooks quickly and uniformly |
| Dried Beans | Soak overnight if required | Softens and speeds pressure cook |
Measuring and Organizing Ingredients
Accurate measuring is critical for both flavor balance and cooking efficiency. We recommend using digital scales for proteins and dry ingredients while employing liquid measuring cups for broths and oils. Precision here helps prevent under or over seasoning and guarantees the right liquid volume so the Instant Pot seals pressure properly.
To streamline the cooking process, we organize all ingredients in small bowls or containers before starting. This mise en place technique allows us to add components in the correct sequence without delay, minimizing the risk of overcooking delicate herbs or vegetables.
| Ingredient Type | Measurement Tool | Recommended Practice |
|---|---|---|
| Proteins | Digital kitchen scale | Weigh for portion consistency |
| Dry Ingredients | Measuring spoons/cups | Level measurements precisely |
| Liquid Ingredients | Liquid measuring cup | Measure at eye level for accuracy |
| Fresh Herbs | Small bowls | Pre-chop and set aside |
Combining careful preparation with precisely measured ingredients ensures every Instant Pot Dutch Oven recipe we make delivers rich flavor and perfect texture every time.
Cooking Techniques for Instant Pot Dutch Oven Recipes
Mastering Instant Pot Dutch Oven recipes means understanding key cooking techniques that maximize flavor while saving time. Let’s explore how sautéing, pressure cooking, and slow cooking elevate our dishes using this powerful combination.
Sautéing in the Dutch Oven Insert
Sautéing is a critical first step to build deep flavors. Using the Dutch oven insert inside the Instant Pot, we can brown meats, soften vegetables, and toast spices directly before pressure cooking or slow cooking. This technique unlocks complex aromas by triggering the Maillard reaction that develops savory notes.
Steps for Perfect Sautéing:
- Set Instant Pot to Sauté mode on medium heat.
- Add oil or fat as prescribed (usually 1-2 tablespoons).
- Heat the Dutch oven insert until the oil shimmers.
- Add proteins in batches to avoid overcrowding; brown each side thoroughly.
- Remove browned proteins; sauté aromatics like onions and garlic until softened.
- Deglaze the insert with broth, wine, or water scraping browned bits for added flavor.
Sautéing allows us to lock in moisture and boost the richness before moving to the next cooking stage.
Pressure Cooking Basics
Pressure cooking shortens cooking time dramatically while intensifying flavors and tenderizing ingredients. The sealed environment traps steam raising the temperature above boiling point, cooking food quickly without drying it out.
Key Pressure Cooking Guidelines:
| Step | Detail |
|---|---|
| Seal it | Ensure lid is locked and pressure valve is sealed properly |
| Select program | Use Pressure Cook/Manual mode for controlled cooking times |
| Set pressure level | High pressure is typical for tougher cuts and beans |
| Determine cooking time | Refer to recipe; typical times range 10-45 minutes dependent on protein and texture |
| Natural vs. Quick Release | Natural release allows continued cooking and flavor melding; quick release stops cooking fast |
Our Instant Pot Dutch oven recipes often call for an initial pressure cook followed by additional simmering or baking.
Using the Slow Cook Function
The slow cook function is perfect for recipes requiring gentle heat over extended periods, ideal for stews, braises, and baked dishes that develop tender textures and nuanced flavors.
Slow Cook Tips:
- Remove the pressure lid and replace with the transparent glass lid if available.
- Set Instant Pot to Slow Cook mode adjusting the temperature setting (Low, Medium, or High).
- Cooking times vary from 4-10 hours depending on the dish.
- Stir occasionally if needed to promote even cooking and prevent sticking.
- Finish with a sauté if you want to thicken sauces or add finishing flavor.
Using the slow cooker setting on the Dutch oven insert replicates traditional slow braising but with the convenience of modern technology, allowing us to savor slow-cooked textures without standing over a stove.
By mastering these fundamental techniques—sautéing for flavor foundation, pressure cooking for speed and tenderness, and slow cooking for depth and texture—we unlock the true potential of Instant Pot Dutch oven recipes, producing delicious, richly flavored meals with efficiency and ease.
Step-by-Step Directions for Popular Recipes
Following these step-by-step directions will help us maximize the benefits of our Instant Pot Dutch Oven combo. Each recipe combines quick pressure cooking with the deep flavors developed through searing and braising in the Dutch oven insert.
Hearty Beef Stew
This Hearty Beef Stew perfectly showcases the melding of rich flavors and tender textures achieved by using our Instant Pot alongside a Dutch oven. Let’s break down the process clearly.
Ingredients
- 2 lbs beef chuck, cut into 1-inch cubes, trimmed of excess fat
- 2 tbsp olive oil
- 1 large onion, diced
- 3 garlic cloves, minced
- 3 carrots, peeled and sliced
- 2 celery stalks, sliced
- 2 cups beef broth
- 1 cup red wine (optional for depth)
- 1 tbsp tomato paste
- 1 tsp dried thyme
- 1 tsp dried rosemary
- 2 bay leaves
- Salt and pepper to taste
- 2 tbsp all-purpose flour (for coating beef)
- 1 cup frozen peas (added at the end)
Step-by-Step Instructions
- Prepare the Beef:
Pat the beef cubes dry. Season generously with salt and pepper. Toss the beef in flour to coat evenly. This step helps to create a thickened stew base after pressure cooking.
- Sear the Meat (Using Dutch Oven Insert):
Set the Instant Pot to ‘Sauté’ mode. Heat olive oil until shimmering. Sear beef in batches until browned on all sides, about 3-4 minutes per batch. Remove beef and set aside.
- Sauté Aromatics:
Add diced onion, carrots, and celery to the pot. Cook about 5 minutes until softened. Stir in minced garlic and cook for 30 seconds until fragrant.
- Deglaze the Pot:
Pour in red wine or a splash of beef broth. Use a wooden spoon to scrape browned bits off the bottom; these bits add intense flavor.
- Add Remaining Ingredients:
Return beef to the pot. Stir in tomato paste, beef broth, thyme, rosemary, and bay leaves. Stir well to combine.
- Pressure Cook:
Seal the lid properly and set the Instant Pot to ‘Pressure Cook’ or ‘Manual’ for 35 minutes on high pressure.
- Natural Pressure Release:
Allow pressure to release naturally for 10 minutes before quick releasing any remaining pressure.
- Finish the Stew:
Remove bay leaves. Stir in frozen peas and let them warm for 3-5 minutes on ‘Sauté’ mode.
- Adjust Seasoning & Serve:
Taste and adjust salt and pepper if needed. Serve hot with crusty bread for a complete meal.
Cooking Times and Settings
| Step | Time | Instant Pot Setting |
|---|---|---|
| Searing Beef | 10-12 minutes | Sauté |
| Sautéing Vegetables | 5-6 minutes | Sauté |
| Pressure Cooking | 35 minutes | High Pressure |
| Natural Release | 10 minutes | N/A |
| Final Warming | 3-5 minutes | Sauté |
“Searing the beef first in the Dutch oven insert unlocks those deep, caramelized flavors that set our stew apart from ordinary recipes.”
By following these precise steps we ensure our Instant Pot Dutch Oven Beef Stew delivers every time with tender meat and a luscious sauce packed with savory aromas.
Chicken and Vegetable Soup
Let’s prepare a comforting Chicken and Vegetable Soup using our Instant Pot Dutch Oven method. This recipe combines tender chicken, vibrant vegetables, and rich broth to create a nourishing meal in a fraction of the traditional time.
Prep
- Chicken thighs – 1.5 pounds, boneless skinless, trimmed and cut into 1-inch pieces
- Carrots – 3 medium, peeled and diced
- Celery stalks – 2, chopped
- Yellow onion – 1 large, diced
- Garlic cloves – 4, minced
- Potatoes – 2 medium, peeled and chopped into 1-inch cubes
- Green beans – 1 cup, trimmed and halved
- Chicken broth – 6 cups, low sodium preferred
- Olive oil – 2 tablespoons
- Dried thyme – 1 teaspoon
- Dried rosemary – 1/2 teaspoon
- Bay leaf – 1
- Salt and pepper – to taste
- Fresh parsley – 2 tablespoons chopped, for garnish
We recommend chopping all vegetables uniformly to ensure even cooking and a perfect texture. Measuring the broth and herbs ahead streamlines the cooking process inside the Instant Pot Dutch Oven.
Cook
- Sauté the aromatics: Set the Instant Pot to the “Sauté” mode. Add the olive oil to the Dutch oven insert. Once hot, add diced onion, carrots, celery, and garlic. Cook for 4-5 minutes until softened and fragrant, stirring frequently.
- Sear the chicken: Add the chicken pieces to the sautéed vegetables. Stir and cook for 3-4 minutes until lightly browned on all sides. This step locks in flavor and adds depth to the soup.
- Add potatoes, green beans, and seasonings: Mix in the chopped potatoes, green beans, thyme, rosemary, bay leaf, salt, and pepper. Stir well to combine all ingredients evenly.
- Pour in broth: Add the measured chicken broth carefully, ensuring ingredients are fully submerged. Use a wooden spoon to scrape up any browned bits from the bottom to avoid the burn notice.
- Pressure cook: Seal the Instant Pot lid and set the pressure valve to sealing. Select “Pressure Cook” or “Manual” on high pressure for 8 minutes. The combination of pressure cooking and the Dutch oven’s even heat distribution will quickly tenderize chicken and vegetables while infusing rich flavor.
- Natural release: When cooking finishes, allow a natural pressure release for 10 minutes, then carefully turn the valve to “venting” to release any remaining steam.
- Final touch: Open the lid carefully, remove the bay leaf, and stir the soup. Taste and adjust salt and pepper as needed. Garnish with chopped fresh parsley before serving.
| Step | Time | Key Tip |
|---|---|---|
| Sauté vegetables | 4-5 minutes | Cook until softened and aromatic |
| Sear chicken | 3-4 minutes | Brown pieces for deeper flavor |
| Pressure cook | 8 minutes | High-pressure setting in Instant Pot |
| Natural release | 10 minutes | Preserves texture and moisture |
This method harnesses the full potential of our Instant Pot Dutch Oven technique, delivering a hearty, flavorful Chicken and Vegetable Soup with tender bites and a rich comforting broth every time.
Vegetarian Chili
Our Instant Pot Dutch Oven Vegetarian Chili delivers bold flavors and hearty textures in a fraction of the time. Let us walk you through the simple prep and cooking steps to enjoy this nourishing, meat-free delight.
Prep
To start, gather and prepare all the ingredients carefully. Precise chopping ensures even cooking and builds rich layers of flavor essential for a robust chili.
- 1 tablespoon olive oil
- 1 large onion, diced
- 3 cloves garlic, minced
- 2 medium carrots, peeled and diced
- 1 red bell pepper, chopped
- 1 green bell pepper, chopped
- 1 jalapeño, seeded and minced (optional for heat)
- 1 (28 oz) can diced tomatoes
- 1 (15 oz) can black beans, drained and rinsed
- 1 (15 oz) can kidney beans, drained and rinsed
- 1 cup vegetable broth
- 2 tablespoons chili powder
- 1 tablespoon cumin
- 1 teaspoon smoked paprika
- 1/2 teaspoon cayenne pepper (adjust to taste)
- Salt and pepper, to taste
- 1/4 cup fresh cilantro, chopped (for garnish)
Preparation tips:
- Dice onions and peppers uniformly to ensure they soften evenly.
- Mince garlic finely to release maximum aroma.
- Rinse canned beans thoroughly to reduce sodium and improve flavor.
Cook
Using the Dutch oven insert inside our Instant Pot, we sauté ingredients to build a depth of flavor before pressure cooking to meld spices and soften the vegetables.
| Step | Action | Details |
|---|---|---|
| 1 | Preheat Dutch oven insert | Select “Sauté” mode, heat olive oil |
| 2 | Sauté aromatics | Add onions, garlic, carrots; cook 5–7 min till softened |
| 3 | Add peppers and jalapeño | Cook 3 more minutes, stirring frequently |
| 4 | Stir in spices | Add chili powder, cumin, smoked paprika, cayenne; cook 1 minute to bloom spices |
| 5 | Add tomatoes, beans, broth | Mix thoroughly, scraping bottom to deglaze |
| 6 | Pressure cook | Seal lid, set to “Manual” high pressure for 10 minutes |
| 7 | Natural release | Let pressure release naturally for 10 min before quick release remaining pressure |
| 8 | Adjust seasoning | Taste and add salt, pepper as needed |
| 9 | Garnish and serve | Top with fresh cilantro and optional toppings |
Pro Tip: Sautéing ingredients in the Dutch oven insert creates a rich base enhancing the natural sweetness of the vegetables and intensifying your chili’s flavor.
This Instant Pot Dutch Oven Vegetarian Chili combines convenience with deep, satisfying taste — perfect for busy days when we crave something nourishing and full of soul.
Tips for Perfect Results
Mastering Instant Pot Dutch Oven recipes requires attention to detail and a few strategic practices to ensure every dish emerges flavorful, tender, and perfectly cooked. Below, we share essential tips to help us avoid pitfalls and adjust cooking parameters precisely for outstanding outcomes.
Avoiding Common Mistakes
To achieve rich flavors and ideal textures, we must steer clear of typical errors:
- Overcrowding the Dutch Oven: Avoid filling the insert beyond two-thirds capacity. Overcrowding traps steam unevenly, leading to uneven cooking and diminished searing effectiveness.
- Skipping the Sear Step: Searing meats and aromatics in the Dutch oven before pressure cooking develops deep caramelized flavors. Neglecting this step results in flatter taste profiles.
- Using Incompatible Inserts: Ensure the Dutch oven insert fits snugly inside the Instant Pot to maintain pressure integrity. A poor fit may cause incomplete sealing and cooking failures.
- Ignoring Liquid Requirements: Always add the recommended amount of liquid, typically 1 to 1.5 cups, to build proper pressure. Insufficient liquid risks burn warnings or undercooking.
- Rushing Release of Pressure: Use natural release for delicate proteins like chicken or beans to preserve texture. Quick releasing too early can cause toughness or excessive moisture loss.
“Patience and precision transform simple ingredients into memorable meals when using the Instant Pot Dutch oven combination.“
Adjusting Cooking Times and Settings
Each recipe may call for specific pressure settings and time adjustments to match ingredient quantities and desired textures. Consider the following guidelines:
| Ingredient/Preparation | Pressure Setting | Cooking Time Range | Notes |
|---|---|---|---|
| Searing (Sauté mode) | N/A | 5-10 minutes | Use high heat to brown meats and soften veggies |
| Beef Stew (cubed beef, root veggies) | High Pressure | 30-35 minutes | Use natural release for tender meat |
| Chicken and Vegetable Soup | High Pressure | 8-12 minutes | Natural release helps keep chicken juicy |
| Vegetarian Chili (beans, veggies) | High Pressure | 15-20 minutes | Quick release after cooking to preserve veggie texture |
Always customize the time to the size and cut of your proteins or the density of vegetables. We recommend starting with the lower end of the time range and extending if necessary after checking texture.
We should also utilize preset modes (e.g., “Soup,” “Meat/Stew,” “Bean/Chili”) when available, adapting manual adjustments based on personal preference and recipe results.
Applying these tips ensures our Instant Pot Dutch Oven recipes deliver consistent, mouthwatering dishes with minimal trial and error.
Make-Ahead Instructions and Storage Tips
Mastering Instant Pot Dutch Oven recipes includes understanding the best ways to make ahead and store your meals. Proper preparation and storage maintain flavor, texture, and nutrition for quick, satisfying meals later.
Freezing and Reheating
Freezing Instant Pot Dutch Oven dishes is a fantastic way to save time and enjoy homemade meals anytime. Follow these key steps for optimal results:
- Cool completely before freezing to prevent condensation and freezer burn.
- Portion meals into airtight containers or heavy-duty freezer bags to preserve freshness.
- Label containers with the recipe name and date frozen to track storage time.
| Dish Type | Frozen Storage Duration | Reheating Method |
|---|---|---|
| Hearty Beef Stew | 3–4 months | Thaw overnight, reheat on stovetop or Instant Pot “Sauté” mode until hot |
| Chicken and Vegetable Soup | 2–3 months | Microwave or reheat gently on stove, stirring occasionally |
| Vegetarian Chili | 3–4 months | Thaw in fridge, reheat in Instant Pot on “Slow Cook” or stovetop |
Reheating Tips:
- Avoid reheating directly from frozen for best texture and flavor.
- Use low and slow methods in the Instant Pot to revive moisture and deepen flavors.
- Stir occasionally to ensure even heating and prevent scorching.
Meal Prep Ideas
Batch cooking with the Instant Pot Dutch Oven opens endless possibilities for streamlined weeknight dinners and busy-day nourishment. Here’s how we save time and maintain freshness:
- Prepare large batches of base recipes such as stews, soups, or chili on weekends.
- Portion into single or family-sized containers for grab-and-go convenience.
- Create versatile meals by planning complementary sides like rice, bread, or roasted vegetables to refrigerate or freeze separately.
- Customize each portion with fresh garnishes or add-ins after reheating, for example sour cream, herbs, or cheese for chili.
“The secret to effortless weeknight dinners lies in thoughtfully organized meal prep combined with the rich, time-saving magic of the Instant Pot Dutch Oven.”
By implementing these Make-Ahead Instructions and Storage Tips, we unleash the full potential of our Instant Pot Dutch Oven recipes—getting nourishing, deeply flavored meals ready when we need them most.
Cleaning and Maintaining Your Instant Pot and Dutch Oven Insert
Proper cleaning and maintenance are essential for keeping our Instant Pot and Dutch oven insert in top condition, ensuring longevity and optimal performance for every recipe we create.
Cleaning the Instant Pot Inner Pot
- Remove the inner pot immediately after cooking to prevent food residue from hardening.
- Wash with warm, soapy water using a soft sponge or non-abrasive cloth.
- For stubborn stains or stuck-on food, soak the pot for 15-20 minutes before scrubbing gently.
- Avoid using steel wool or abrasive scrubbers to protect the stainless steel surface.
- Dry thoroughly with a soft towel to prevent water spots.
- If odor lingers, mix 1 tablespoon of baking soda with water, scrub gently, then rinse thoroughly.
Cleaning the Dutch Oven Insert
- Allow the Dutch oven to cool naturally before cleaning to prevent warping.
- Use warm water and mild dish soap with a non-abrasive sponge.
- For tough, baked-on food, sprinkle coarse salt inside and scrub with a damp cloth.
- Avoid sudden temperature changes to preserve the enameled coating.
- After washing, dry immediately to prevent rust and maintain the enamel finish.
- Occasionally, condition cast iron inserts (non-enameled) with a thin layer of vegetable oil to protect the surface.
Cleaning the Instant Pot Lid and Sealing Ring
- Detach the sealing ring and wash with warm, soapy water; ensure it is completely dry before reattaching.
- Clean the lid’s outer and inner surfaces with a damp cloth.
- Check and clean the steam release valve regularly, removing any debris.
- Replace the sealing ring every 12-18 months or if deformed for optimal sealing and safety.
Maintenance Tips for Longevity
| Component | Maintenance Tip | Frequency |
|---|---|---|
| Instant Pot Inner Pot | Inspect for scratches or discolorations; avoid metal utensils to reduce damage | After every use |
| Dutch Oven Insert | Check enamel for chips or cracks; avoid high heat on empty pot | Before each use |
| Sealing Ring | Replace regularly to maintain airtight seal | Every 12-18 months |
| Steam Release Valve | Clean and test for proper function | Monthly |
Important Reminders
“Regular cleaning after each use prevents buildup, maintains taste integrity, and extends the lifespan of both appliances.”
- Never submerge the Instant Pot base in water; clean exterior with a damp cloth only.
- Store the Dutch oven with the lid off or loosely placed to avoid moisture accumulation and odors.
- Always follow the manufacturer’s instructions for cleaning to preserve warranties and product quality.
By following these cleaning and maintenance steps carefully, we ensure our Instant Pot Dutch oven recipes deliver consistently excellent results while protecting our valuable kitchen tools.
Conclusion
Mastering Instant Pot Dutch oven recipes opens up a world of flavorful and efficient cooking. With the right tools and techniques, we can create hearty meals that satisfy both our taste buds and busy schedules.
By embracing this method, we not only save time but also elevate everyday ingredients into comforting dishes packed with depth and richness. It’s a smart way to enjoy home-cooked meals without the hassle.
Let’s keep experimenting and refining our approach to make the most of this powerful cooking duo in our kitchens.
Frequently Asked Questions
What are the benefits of combining an Instant Pot with a Dutch oven?
Combining an Instant Pot with a Dutch oven speeds up cooking while enhancing flavors. The Instant Pot offers quick pressure cooking, and the Dutch oven provides even heat distribution and great searing or braising, making meals rich and tender with minimal effort.
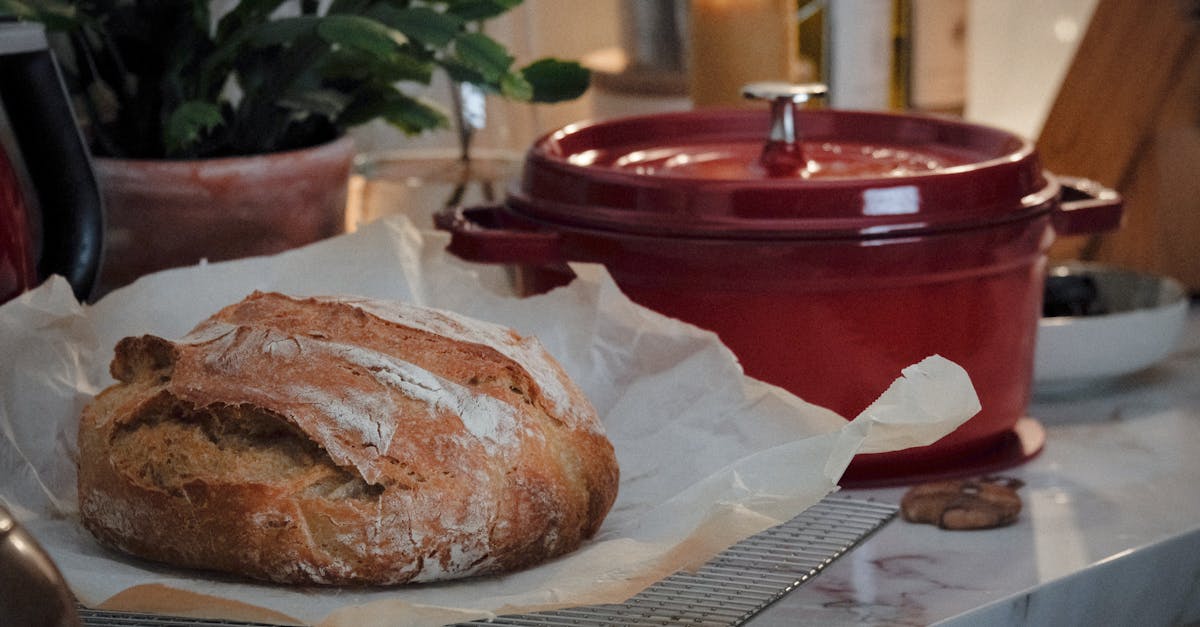
Can I bake bread using the Instant Pot and Dutch oven combination?
Yes, you can bake bread in the Dutch oven insert inside the Instant Pot. This method allows you to cook bread faster while achieving a crusty, flavorful loaf thanks to even heat and moisture retention.
What size Instant Pot and Dutch oven should I use?
A 6 to 8-quart Instant Pot with multiple cooking functions and a stainless steel inner pot is ideal. Your Dutch oven insert should fit well inside the Instant Pot, typically around 5 to 6 quarts, with materials like enameled cast iron preferred.
What essential ingredients should I keep for these recipes?
Keep pantry staples like olive oil, flour, dried herbs, canned tomatoes, broth, beans, and grains. Fresh ingredients such as onions, garlic, carrots, celery, and herbs are also key for flavor and texture in Instant Pot Dutch oven recipes.
How should I prepare ingredients for best results?
Wash, peel, and chop vegetables uniformly; trim and cut proteins into consistent sizes. Measure accurately using tools like digital scales and liquid measuring cups to ensure even cooking and balanced flavors.
What cooking techniques are used with this method?
Sautéing in the Dutch oven insert builds base flavors, pressure cooking speeds up tenderizing and flavor development, and slow cooking provides a low, steady heat for rich texture in stews and braises.
How do I store and reheat meals made with this method?
Store leftovers in airtight containers in the fridge for up to 3-4 days or freeze for longer storage. Reheat gently on the stove or microwave to maintain texture and flavor without overcooking.
What common mistakes should I avoid when using this combination?
Avoid not searing ingredients first, overcrowding the Dutch oven, ignoring proper pressure settings, and skipping ingredient preparation. These errors can lead to uneven cooking and bland flavors.
How do I clean and maintain my Instant Pot and Dutch oven insert?
Clean the Instant Pot inner pot and Dutch oven with warm, soapy water; avoid abrasive cleaners on enamel. Remove and wash the sealing ring regularly. Dry thoroughly and store properly to maintain performance and longevity.
Are Instant Pot Dutch oven recipes suitable for busy weeknights?
Absolutely. This combination cuts cooking time significantly while delivering deep, comforting flavors, making it perfect for quick, hearty meals during busy schedules.