
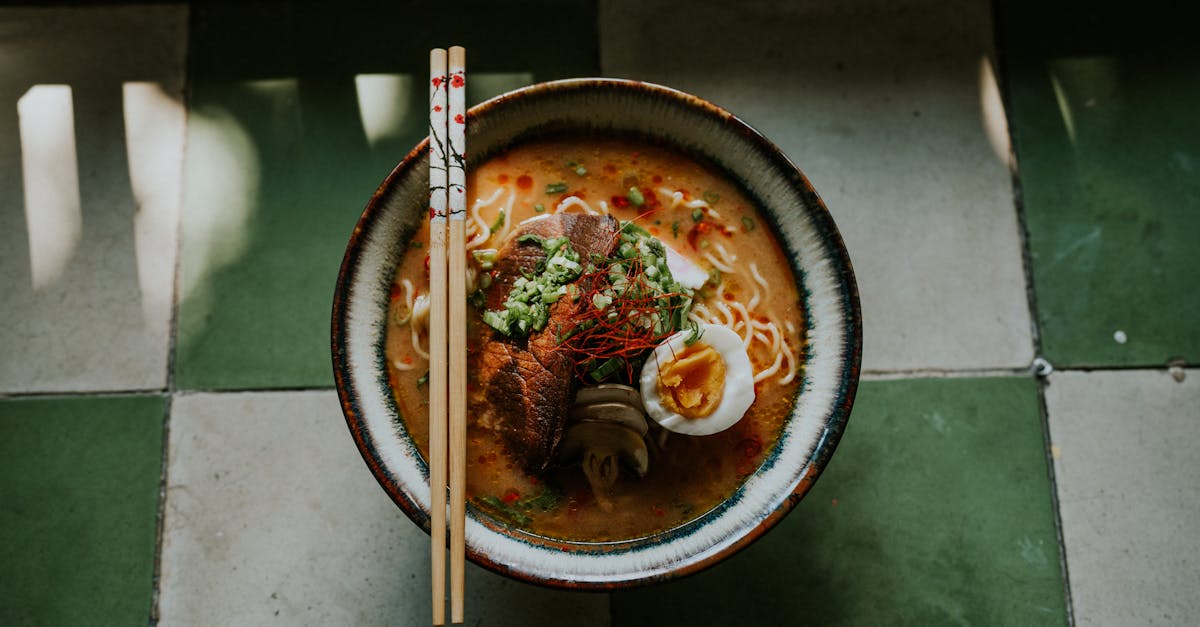
When the seasons change or we’re feeling a little run-down, there’s nothing quite like a warm, nourishing immunity broth to give our bodies a natural boost. Packed with wholesome ingredients like fresh vegetables, healing herbs, and immune-supporting spices, this recipe is a simple yet powerful way to support our health from the inside out.
Immunity Broth Recipe
Here is our step-by-step guide to preparing this nourishing Immunity Broth, packed with fresh vegetables, healing herbs, and immune-boosting spices. Let’s get started!
Ingredients
Make sure to gather these essential ingredients before you begin:
- 1 tablespoon olive oil
- 1 medium onion, finely chopped
- 4 garlic cloves, minced
- 1 inch fresh ginger, grated
- 2 medium carrots, peeled and sliced
- 2 celery stalks, chopped
- 8 cups vegetable broth
- 1 cup mushrooms, sliced
- 1 teaspoon turmeric powder
- 1 teaspoon ground black pepper
- 1 teaspoon dried thyme
- 1 teaspoon dried oregano
- 1 bay leaf
- 1/4 teaspoon cayenne pepper (optional, for a mild kick)
- 1 cup chopped kale or spinach
- Juice of half a lemon
- Salt to taste
Equipment
Here’s what we’ll need to prepare and cook the broth:
| Equipment | Quantity |
|---|---|
| Large stock pot | 1 |
| Wooden spoon | 1 |
| Measuring spoons | 1 set |
| Chopping board | 1 |
| Chef’s knife | 1 |
Step-by-Step Instructions
- Heat Oil: Warm the olive oil in a large stock pot over medium heat.
- Sauté Aromatics: Add the onions, garlic, and ginger. Stir for 2-3 minutes until fragrant and translucent.
- Cook Vegetables: Toss in the sliced carrots and celery. Cook for another 5 minutes, stirring occasionally.
- Add Mushrooms: Stir in the mushrooms and let them cook for about 3 minutes until they soften.
- Mix Spices: Sprinkle in the turmeric powder, black pepper, thyme, oregano, and cayenne pepper (if using). Stir well to coat the vegetables evenly.
- Pour in Broth: Slowly add the vegetable broth, scraping the bottom of the pot to release any stuck bits of flavor.
- Add Bay Leaf: Drop in the bay leaf and bring the mixture to a gentle boil.
- Simmer and Blend Flavors: Reduce heat to low, cover the pot, and simmer for 20-25 minutes to let the flavors meld.
- Add Greens: Stir in the chopped kale or spinach during the last 5 minutes of cooking.
- Season and Finish: Squeeze in the lemon juice and taste. Add salt as needed to bring all the flavors together.
Our Immunity Broth smells comforting and earthy with its bold mix of spices and herbs. Serve it warm as a healing sip or pair it with a light side dish to complete your meal. This recipe yields about 6 servings.
Ingredients
To create a nourishing and immune-supporting broth, we need a combination of fresh produce, healing herbs, and optional proteins. Below, we’ve categorized the essentials for ease.
Vegetables
These vegetables add layers of flavor and nutrients crucial for immunity boosting:
- 2 tablespoons olive oil
- 1 large yellow onion, diced
- 4 cloves garlic, minced
- 1 tablespoon fresh ginger root, grated
- 3 medium carrots, peeled and chopped
- 2 celery stalks, sliced
- 1 cup mushrooms, thinly sliced
Herbs And Spices
Herbs and spices are the backbone of our immunity broth’s medicinal qualities:
- 1 teaspoon turmeric powder
- ½ teaspoon ground black pepper
- 1 teaspoon ground cumin
- 1 teaspoon paprika
- ½ teaspoon chili flakes (optional, for heat)
- 1 small bunch fresh parsley or cilantro, chopped
- 1 bay leaf
Proteins (Optional)
For a heartier broth, we can add optional plant-based or animal proteins:
- 1 cup cooked lentils
- 1 cup shredded rotisserie chicken
- ½ block firm tofu, cubed
Liquids
- 6 cups vegetable broth (or chicken broth for non-vegan)
- 2 cups water, adjust for consistency
- 1 tablespoon apple cider vinegar, optional for tang
Equipment Needed
To create this comforting and nutrient-packed immunity broth, we only need a few essential kitchen tools. Each piece of equipment plays a crucial role in ensuring the process is seamless and efficient. Here’s what we’ll be using:
Kitchen Essentials
- Large stockpot or Dutch oven: A sturdy pot, preferably 6 quarts or more, is ideal for simmering the broth and accommodating all ingredients comfortably.
- Ladle: A large, deep ladle helps us serve the broth with ease.
- Sharp chef’s knife: For dicing vegetables and finely mincing ingredients like garlic and ginger.
- Cutting board: To provide a stable and spacious surface for prepping the vegetables.
- Wooden or silicone spoon: For stirring the ingredients during cooking.
- Fine mesh strainer (optional): If you prefer a clear broth, this is handy for straining out solids.
- Measuring cups and spoons: To ensure precise measurements of liquids, spices, and herbs.
Optional Tools
- Immersion blender: If desired, we can partially blend the finished broth for a thicker consistency.
- Peeler: Helps with peeling ginger and carrots smoothly to retain maximum freshness.
- Storage containers or mason jars: Perfect for storing leftover broth in the refrigerator or freezer for later use.
Having these tools on hand guarantees an effortless and enjoyable cooking experience while preparing our healing immunity broth. Each item ensures precision, convenience, and efficiency at every step.
Directions
This immunity broth is simple to make with minimal effort and maximum flavor. Follow these easy steps, and you will have a warm, nutrient-packed broth ready to enjoy or store.
Prep The Ingredients
- Start by gathering and prepping all your ingredients to streamline the cooking process.
- Peel and mince:
- 1 medium yellow onion
- 4 garlic cloves
- 1 inch of fresh ginger
- Chop into small pieces:
- 2 large carrots
- 3 celery stalks
- 2 cups of mushrooms (cleaned and trimmed)
- Measure the spices:
- 1 teaspoon turmeric
- ½ teaspoon cumin
- ½ teaspoon paprika
- ¼ teaspoon black pepper
- Have liquids ready:
- 8 cups vegetable or chicken broth
- 1 tablespoon apple cider vinegar (optional)
Sauté And Season
- Heat 2 tablespoons of olive oil in a large stockpot or Dutch oven over medium heat. Allow the oil to warm until it shimmers slightly.
- Add the onions, stirring frequently for 3-4 minutes or until translucent.
- Stir in garlic and ginger, cooking for 1 minute until aromatic.
- Mix in your turmeric, cumin, paprika, and black pepper, coating the aromatics evenly. Cooking the spices for 30 seconds helps release their full flavor and benefits.
- Toss in the carrots, celery, and mushrooms, stirring occasionally for 5-7 minutes until softened.
Simmer The Broth
- Pour in the vegetable or chicken broth and add 1 bay leaf. Bring the mixture to a gentle boil over medium-high heat.
- Reduce the heat to low, cover the pot, and let it simmer for 30 minutes to extract the nutrients and flavors from the vegetables and spices.
- Periodically stir, ensuring nothing sticks to the bottom.
- Add optional ingredients such as shredded rotisserie chicken, cooked lentils, or cubed tofu in the last 10 minutes if you’d like a heartier broth.
Strain And Store
- Once simmered, remove the broth from heat and let it cool slightly. If you prefer a clear broth, strain it through a fine-mesh strainer into a large bowl or container. For a heartier texture, keep all the vegetables in the broth.
- Transfer the strained or unstrained broth into storage containers for easy meal prep. For larger batches, use freezer-safe containers to store portions for up to 3 months.
- Reheat gently for serving, garnishing with fresh parsley or cilantro for a burst of freshness.
Cooking Summary
| Steps | Approx. Time |
|---|---|
| Prep ingredients | 10 minutes |
| Sauté aromatics | 10 minutes |
| Simmer the broth | 30 minutes |
| Strain and store | 5 minutes |
Make-Ahead And Storage Tips
Keeping immunity broth ready in advance is a game-changer for busy schedules and unexpected wellness needs. Whether you’re freezing batches or refrigerating small portions, proper storage ensures the broth retains its flavor and immune-supporting nutrients.
Freezing The Broth
Freezing is one of the best methods to preserve the immunity broth for weeks without compromising its quality. Here’s how we recommend doing it:
- Allow the broth to cool completely before freezing to protect its texture and flavor.
- Portion the broth into airtight, freezer-safe containers or silicone freezer bags. Leave some headspace to allow for expansion during freezing.
- For shorter storage needs, consider freezing broth in silicone ice cube trays for easy single-serving portions. Once frozen, transfer the cubes to a freezer bag.
- Label each container or bag with the date for easy tracking. The immunity broth stays fresh for up to 3 months in the freezer.
When reheating, thaw the broth overnight in the refrigerator or reheat directly from frozen on the stovetop over low heat, stirring occasionally. Avoid rapid reheating, as it can affect the broth’s delicate flavors and nutrients.
Storing In The Refrigerator
If you’ll consume the immunity broth within a few days, refrigerating is the best option:
- Allow the broth to cool completely before transferring to the refrigerator to avoid condensation and temperature fluctuations.
- Store in airtight glass jars or BPA-free plastic containers with tight-fitting lids to maintain freshness.
- Use the broth within 4–5 days for the best taste and nutritional value.
We suggest providing gentle reheating on the stovetop or in the microwave. Stir occasionally and ensure even heating before serving. This helps retain the broth’s therapeutic properties and enhances its comforting flavors.
| Storage Method | Storage Container | Shelf Life |
|---|---|---|
| Freezing | Freezer containers/bags | Up to 3 months |
| Refrigeration | Airtight jars/containers | 4–5 days |
Following these Make-Ahead And Storage Tips guarantees that your nourishing immunity broth is always ready to support you and your family whenever needed.
Variations And Customizations
There are countless ways to personalize this immunity broth recipe, allowing us to adapt it to dietary preferences or enhance its nutritional value. Explore these options to make the broth your own!
Vegan Option
For a fully plant-based version, we can use vegetable broth as the base and skip any animal-based additions. Replace optional rotisserie chicken or bone broth with protein-rich vegan alternatives like:
- Cooked lentils
- Chickpeas
- Cubed tofu or tempeh
Adding nutritional yeast will introduce a savory depth of flavor, often called “umami,” while boosting the broth with extra B vitamins.
Adding Proteins
If we prefer a heartier broth, adding high-quality proteins can take this dish to the next level. Here’s a quick guide:
| Protein Option | Preparation Notes | Benefits |
|---|---|---|
| Shredded Chicken | Add pre-cooked rotisserie chicken after simmering. | Adds lean protein and texture. |
| Lentils (Brown/Green) | Rinse and cook directly in the broth. | High in fiber and plant protein. |
| Firm Tofu Cubes | Add during the last 10 minutes of simmering. | Vegetarian, packed with amino acids. |
Feel free to mix and match depending on your nutrition goals or texture preferences.
Supercharging With Additional Boosters
Elevate this immunity broth by including superfood ingredients with added health benefits. Let’s enhance both taste and well-being by stirring in:
- Apple cider vinegar: A tangy kick while aiding digestion.
- Matcha or spirulina powder: Mix small quantities to flood the broth with antioxidants.
- Seaweed (Wakame or Nori): Adds minerals like iodine and iron.
- Fresh turmeric root: Increases anti-inflammatory properties—grate directly into the simmering broth.
- Lemon juice: Brightens the flavor while delivering a Vitamin C boost.
For spice enthusiasts, additional chilies, cayenne pepper, or even a pinch of smoked paprika can add excitement.
Serving Suggestions
When it comes to enjoying our immunity broth recipe, the possibilities are endless. This versatile and nutrient-packed broth can be served as a light meal, a base for more substantial dishes, or even as a soothing pick-me-up when you need a health boost. Here are some of our favorite serving ideas to inspire you:
Standalone Comfort Bowl
Ladle the warm immunity broth into a deep bowl, topping it with freshly chopped parsley or cilantro for added freshness. Pair it with a slice of crusty whole-grain bread or a small serving of rice, quinoa, or noodles to create a simple yet hearty meal. For a burst of color and texture, consider sprinkling toasted seeds like sunflower or pumpkin on top.
Uplifting Appetizer
Serve the broth as a starter in smaller cups or bowls. Its light yet satisfying flavor works beautifully to prepare the palate for a main course. Add a drizzle of olive oil or a squeeze of fresh lemon juice for a refreshing finish.
Nourishing Soup Base
Use the broth as a base to build a more filling soup. Add your choice of cooked grains, diced vegetables, or proteins like shredded chicken or tofu. Simmer together until heated through, and finish with a dash of black pepper or red chili flakes for a touch of spice.
DIY Immunity Bowls
Create vibrant “immunity bowls” by layering the broth with unique toppings. Combine steamed greens, roasted sweet potatoes, and your favorite beans. Sprinkle with nutritional yeast or even a handful of seaweed strips for enhanced nutrients. Let everyone assemble their bowl for a fun, interactive dining experience.
Pair with Tea Time
For a comforting midday pick-me-up, enjoy a warm cup of immunity broth alongside a light snack like whole-grain crackers, roasted nuts, or a fruit salad. This is perfect for colder months or when you feel under the weather.
Customization Tip Table
Customize your serving styles further with this quick reference:
| Additions | Use Case | Tips |
|---|---|---|
| Cooked Lentils | To make the dish heartier | Add during the last 10 minutes |
| Lemon Juice | For a zesty flavor and added Vitamin C | Squeeze just before serving |
| Coconut Milk | For a creamy texture and rich depth of flavor | Stir in 1/4 cup while reheating |
| Fresh Herbs | Brightens and aromatizes the broth | Sprinkle just before devouring |
No matter how you choose to serve our immunity broth, it’s sure to provide comfort and nourishment. Each serving style is designed to maximize the flavor and health benefits while providing variety and personalization.
Conclusion
Immunity broth is more than just a recipe; it’s a comforting, versatile tool for supporting wellness. With its nutrient-rich ingredients and customizable options, it fits seamlessly into any lifestyle, whether you’re looking for a quick meal prep solution or a soothing remedy during colder months.
By making it ahead and storing it properly, we can ensure we’re always prepared to nourish ourselves and our loved ones. This adaptable recipe invites creativity while prioritizing health, making it a staple in any kitchen. Let’s embrace the simplicity and healing power of this wholesome broth.
Frequently Asked Questions
What is an immunity broth?
Immunity broth is a nourishing soup made with wholesome ingredients like vegetables, herbs, and spices. It helps boost your immune system, particularly during seasonal changes or when feeling under the weather.
What ingredients are essential for making immunity broth?
Key ingredients include olive oil, onions, garlic, ginger, carrots, celery, mushrooms, vegetable broth, and spices such as turmeric, cumin, and black pepper. Optional proteins like lentils, chicken, or tofu can be added for extra nourishment.
Can I customize the immunity broth recipe?
Yes, the recipe is highly adaptable. You can make it vegan by using vegetable broth and plant-based proteins or add flavors like nutritional yeast, superfoods, or extra spices to suit your taste.
How long can I store immunity broth?
Refrigerate immunity broth for 4–5 days or freeze it in airtight containers for up to three months. Be sure to cool it completely before storing and label it for easy tracking.
What’s the best way to reheat immunity broth?
Reheat the broth gently over low to medium heat on the stovetop to maintain its flavors and nutrients. Avoid boiling to preserve its therapeutic qualities.
Can I use the immunity broth as a meal base?
Absolutely! Immunity broth is versatile and can be enjoyed as a standalone soup, base for other soups, or in DIY bowls with toppings like grains, greens, or proteins.
Are there superfood ingredients I can add to boost the broth?
Yes, consider adding superfoods like apple cider vinegar, turmeric root, spirulina, matcha, seaweed, or lemon juice to enhance its nutritional value and benefits.
Can I make immunity broth ahead of time?
Yes, immunity broth is perfect for meal prep. Prepare it in large batches, refrigerate or freeze portions, and reheat as needed for a quick, nourishing meal.
What equipment do I need to make the broth?
You’ll need a large stockpot or Dutch oven, chef’s knife, cutting board, ladle, wooden spoon, and measuring tools. Optional tools include an immersion blender and storage containers.
Is immunity broth suitable for a vegan diet?
Yes, you can easily make it vegan by using vegetable broth and plant-based proteins like lentils, tofu, or chickpeas. Nutritional yeast can also be added for flavor and nutrients.