
Crunchy, tangy, and perfectly sweet, icicle pickles are a delightful throwback to old-fashioned canning traditions. These crisp, sweet pickles get their name from their long, slender shape, resembling icy stalactites. They’ve been a favorite in Southern kitchens for generations, adding a touch of nostalgia to any meal or snack.
What makes icicle pickles so special is their unique balance of sweetness and tang, making them a versatile treat. Whether we’re pairing them with sandwiches, serving them alongside barbecue, or enjoying them straight from the jar, they never disappoint. Plus, they’re surprisingly easy to make at home, and the results are far better than anything store-bought. Let’s dive into this timeless recipe and bring a little homemade charm to our pantry.
Icicle Pickle Recipe
Making icicle pickles is a delightful process that allows us to savor the perfect combination of crunchy texture and sweet-tart flavor. Follow our detailed step-by-step instructions to create this classic pickle recipe in your own kitchen.
Ingredients
Here’s what we’ll need to make these delicious icicle pickles:
- 5 lbs cucumbers (preferably small, firm cucumbers, sliced into long, slender spears)
- 2 cups pickling lime (for crispness)
- 4 cups vinegar (white distilled for a sharp tang)
- 4 cups granulated sugar (divided into 2 cups and 2 cups for separate uses)
- 2 cups water
- 1/4 cup salt (non-iodized pickling salt preferred)
- 2 tsp celery seed
- 1 tsp whole cloves
- 1 stick of cinnamon (broken into pieces)
Steps to Make Icicle Pickles
1. Prepare the Cucumbers
- Rinse the cucumbers under cold water and slice them lengthwise into spears resembling slender icicles.
- Soak the slices in a solution made from the pickling lime and 1 gallon of water for 24 hours. Stir occasionally to ensure even crisping.
2. Rinse and Rehydrate
- After 24 hours, drain the lime water. Rinse the cucumber slices thoroughly under running water, repeating several times to remove any lime residue.
- Cover the cucumbers with fresh water and let them sit for 3 hours. Replace the water every hour to ensure they are fully rehydrated and residue-free.
3. Create the Pickling Brine
- In a large pot, combine vinegar, 2 cups of sugar, water, and salt. Stir well.
- Add celery seed, cloves, and cinnamon for a fragrant, spiced brine. Heat the mixture over medium-high heat until it comes to a boil.
4. Heat and Soak
- Pour the hot brine over the cucumber slices in a non-reactive container (glass or stainless steel is best). Cover and refrigerate overnight to let the flavors infuse.
5. Cook and Sweeten
- The next day, pour the brine and cucumber slices back into a large pot. Add the remaining 2 cups of sugar.
- Heat the mixture over medium heat and bring it to a boil. Simmer for 15-20 minutes for better absorption of flavors.
6. Pack and Seal
- Sterilize mason jars and lids by boiling them in water for at least 10 minutes. Carefully pack the hot cucumber slices into the jars, leaving about 1/2 inch headspace.
- Pour the hot brine over the cucumbers, completely submerging them, and wipe the jar rims clean.
- Seal the jars with sterilized lids and process them in a water bath canner for 10 minutes to ensure proper preservation.
7. Cool and Store
- Allow the jars to cool at room temperature for 12-24 hours. Listen for the satisfying “pop” indicating a successful seal.
- Store the jars in a cool, dark place. While the pickles can be enjoyed after one week, the flavors intensify and improve after one month.
Quick Notes for Success
| Step | Key Details |
|---|---|
| Lime Soak | Soak for 24 hours to ensure crunchiness, rinse thoroughly to remove lime. |
| Brine Ingredients | Vinegar, sugar, and spices deliver a perfect blend of tartness and sweetness. |
| Sealing Process | Sterilizing jars and lids is critical for long-term storage. |
By using fresh cucumbers, aromatic spices, and a well-balanced brine, we capture the magic of homemade icicle pickles.
Ingredients
To craft the perfect batch of icicle pickles, we need a combination of fresh produce, pantry staples, and aromatic spices. Each ingredient plays a critical role in achieving the signature crunchy texture and perfect balance of sweetness and tang. Here’s exactly what we’ll need:
Fresh Produce
- 4 pounds of cucumbers (preferably long and slender) – wash thoroughly and slice into spears or rounds.
Tip: Choose firm, dark-green cucumbers for the best pickles.
Pantry Staples
- 1 cup of pickling lime – used during the soaking process to ensure a crisp texture.
- 2 cups of distilled white vinegar – essential for creating the tangy brine.
- 6 cups of granulated sugar – brings the sweet balance to our pickles.
- 1/2 cup of canning salt – free of additives that may cloud the brine.
Aromatic Spices
- 1 tablespoon of whole cloves – infuses warm and slightly sweet notes.
- 1 tablespoon of allspice berries – adds depth and spice to the brine.
- 4 cinnamon sticks – amplifies the flavor profile with woody, sweet undertones.
Necessary Tools
To ensure our pickles are preserved safely and retain their quality, be sure to have the following on hand:
- Large non-reactive bowl: for soaking cucumbers.
- Canning jars and lids: sterilized for safe storage.
- Large pot: for preparing the brine and sealing jars.
- Cheesecloth: for bundling spices to prevent residue in the brine.
Tools And Equipment
To successfully make icicle pickles, we need the right tools and equipment to ensure both safety and the best results. Below is a list of must-have items and their purposes:
Essential Tools
- Large Non-Reactive Bowl: Necessary for soaking cucumbers in the pickling lime solution. Avoid materials like aluminum or copper, as they might react with the lime.
- Sterilized Canning Jars: Crucial for long-term storage and preservation. Use pint or quart-sized jars based on your preference.
- Lids and Rings for Canning: Ensure an airtight seal for the pickles. Always use clean, undamaged lids.
- Large Pot: Required for preparing the pickling brine and processing jars.
- Cheesecloth: Handy for bundling whole spices like cloves, allspice berries, and cinnamon sticks, making it easy to remove them later.
- Jar Lifter: Ensures safe handling of hot jars during the water bath process.
- Wide-Mouth Funnel: Helps transfer the pickling brine and cucumbers into jars without spillage.
- Measuring Cups and Spoons: Ensures precise measurements of sugar, vinegar, and spices.
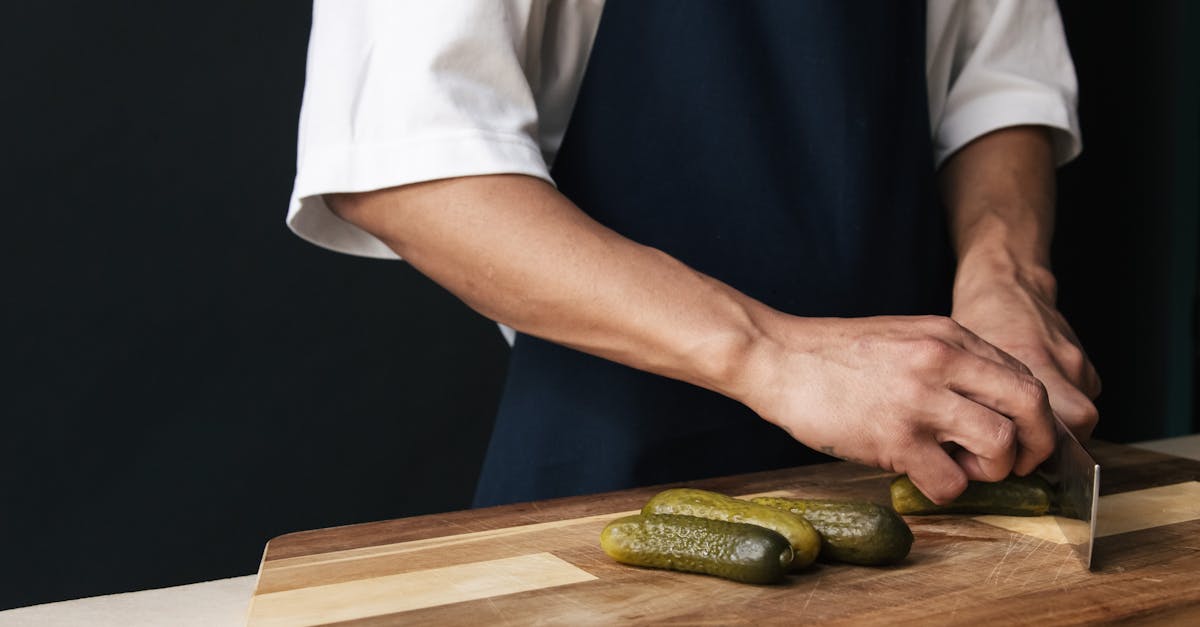
- Cutting Board and Sharp Knife: Used for slicing cucumbers lengthwise into their distinctive icicle shape.
Recommended Equipment: Quick Reference Table
| Tool/Equipment | Purpose |
|---|---|
| Large Non-Reactive Bowl | Soaking cucumbers without chemical reactions |
| Sterilized Canning Jars | Safe, long-term storage |
| Lids and Canning Rings | For sealing jars securely |
| Large Pot | Heating brine; water bath for canning |
| Cheesecloth | Bundling spices for easy removal |
| Jar Lifter | Handling hot jars during processing |
| Wide-Mouth Funnel | Prevents spillage when filling jars |
| Measuring Cups/Spoons | Ensures accuracy in ingredient quantities |
| Cutting Board/Sharp Knife | Slicing cucumbers into consistent icicle-shaped sticks |
Having the right tools ensures we achieve that perfect blend of crunch and flavor in our homemade icicle pickles. Every piece of equipment works together to create a seamless pickling process. Prepare these tools in advance for a smoother, more enjoyable pickle-making experience.
Directions
Follow our step-by-step guide to craft homemade icicle pickles with just the right balance of crunch, sweetness, and tang. Each stage is outlined clearly to ensure your pickling journey is simple and seamless.
Prep
- Wash and slice cucumbers: Rinse 4 pounds of fresh cucumbers thoroughly under cold running water to remove dirt. Slice them lengthwise into uniform spears, maintaining that classic icicle shape.
- Lime soak for crunch: In a large non-reactive bowl, dissolve 1 cup pickling lime in 1 gallon of water. Submerge cucumber slices in the lime solution, ensuring they’re fully covered. Let them soak for 24 hours for that signature crispness.
- Rinse thoroughly: After the soak, drain the cucumbers and rinse them under cold water 3 to 4 times to remove all traces of lime. This is critical to ensure a clean, safe pickle.
Brining The Cucumbers
- Prepare the salt brine: In the same large non-reactive bowl, dissolve 1/2 cup canning salt in 1 gallon of water. Stir well to ensure the salt completely dissolves.
- Soak the cucumbers: Place the rinsed cucumbers into the salt brine. Let them sit for 3 hours. This step helps enhance the overall flavor of the pickles.
- Drain the brine: After 3 hours, drain the brine completely and set the cucumbers aside.
Preparing The Pickling Syrup
- Create the spice bundle: Using cheesecloth, bundle 3 sticks of cinnamon, 1 tablespoon of whole cloves, and 1 tablespoon of allspice berries. Tie securely to keep the spices contained.
- Prepare the syrup: In a large pot, combine 6 cups of granulated sugar, 2 cups of distilled white vinegar, and 1 cup of water. Add the spice bundle to the pot.
- Heat the mixture: Bring the syrup to a simmer over medium heat, stirring occasionally to dissolve the sugar completely. Allow it to simmer gently for 10 minutes to infuse the spices and develop depth of flavor.
- Cool the syrup slightly: Remove the pot from the heat and let it sit for 10 minutes. Discard the spice bundle.
Canning The Pickles
- Pack the jars: Using sterilized canning jars, carefully pack the cucumber spears vertically into the jars, leaving 1/2 inch of headspace at the top.
- Add syrup to jars: Using a wide-mouth funnel, pour the prepared pickling syrup over the cucumbers, ensuring they’re fully submerged.
- Seal the jars: Wipe the rims of the jars with a clean, damp cloth, then place the lids and screw on the rings until just fingertip-tight.
- Process in a canner: Place the jars in a water bath canner. Ensure the water covers the jars by at least 1 inch. Process the jars in boiling water for 10 minutes for proper preservation.
- Cool and store: Once processed, remove the jars with a jar lifter and place them on a towel-lined countertop. Let them cool undisturbed for 12-24 hours. Check for proper seals before storing the jars in a cool, dark place.
| Steps | Time Required |
|---|---|
| Lime soak | 24 hours |
| Salt brine soak | 3 hours |
| Preparing pickling syrup | 20 minutes (includes heating and cooling) |
| Canning and processing | 10 minutes (plus cooling for 12-24 hrs) |
Enjoy these homemade icicle pickles as a delightful addition to any meal or snack! Their crisp texture and perfectly balanced flavor are worth every step.
Make-Ahead Instructions
Making icicle pickles is a process that benefits greatly from planning ahead, allowing the flavors to fully develop and making the experience smoother. Here’s how we can prepare effectively:
Preparation Steps to Simplify the Process
- Cucumber Selection and Storage:
Choose the freshest slender cucumbers, ideally free of blemishes. Once purchased, refrigerate them to maintain their crispness if you’re not making the pickles immediately. Use them within 24-48 hours for the best texture.
- Soaking in Pickling Lime:
The soaking process with pickling lime needs a minimum of 12-24 hours to enhance the crispiness of the cucumbers. This step can be done the day before starting the pickling process.
Tip: Place the soaked cucumbers in the fridge overnight or in a cool, dark spot to prevent spoilage during the soaking stage.
- Spices and Brine:
Prepare the spice bundle and pickling syrup up to 24 hours in advance. Store the spices wrapped in cheesecloth and keep the pickling syrup in an airtight container in the fridge. This way, the syrup cools slightly and saves time the next day.
- Sterilizing Canning Jars:
Sterilize all jars and lids beforehand. Once sterilized, place jars upside down on a clean kitchen towel until you’re ready to fill them. Proper jar preparation ensures long-term shelf stability for our pickles.
- Organizing Tools and Equipment:
Arrange all tools such as the large pot for the water bath, the cheesecloth for spices, and the funnel for filling jars a day ahead. Doing so minimizes the stress of searching for items while working.
Suggested Timeline
| Task | Time Required | Make-Ahead Notes |
|---|---|---|
| Selecting cucumbers | 10-15 minutes | Best done on the same day as soaking |
| Lime soaking | 12-24 hours | Can be stored overnight |
| Brine preparation | 15-20 minutes | Make and store in fridge up to 24 hrs |
| Sterilizing jars | 20-30 minutes | Do up to a day in advance |
| Setting up tools | 10 minutes | Organize prior to cooking day |
Storage Tips
Proper storage is essential to preserve the crunchy texture and bold flavors of our icicle pickles. Following the right methods ensures they remain fresh and safe to enjoy for months. Let’s dive into the best practices:
1. Choose the Right Jars
We recommend using sterilized glass canning jars with tightly sealing lids. These are not only safe for food storage but also prevent any air from spoiling the pickles. Make sure the jars are thoroughly cleaned and sterilized before use. Here’s a quick reminder of the process:
- Wash jars and lids in hot, soapy water.
- Rinse thoroughly to remove all soap residue.
- Boil jars and lids in a pot of water for 10 minutes.
- Remove and let them air dry on a clean towel.
2. Cool and Seal Thoroughly
After filling the jars with cucumbers and brine:
- Allow the jars to cool slightly to ensure the heat creates a proper vacuum seal.
- Use a clean, lint-free cloth to wipe the jar rims before sealing them with lids.
- Apply firm pressure on the lids until tightly sealed.
This step is critical to maintaining a long shelf life and preserving the fresh flavors of our icicle pickles.
3. Storage Environment
Store the sealed jars in a cool, dry place away from direct sunlight. Ideal spots include:
- A pantry
- Kitchen cabinets
- A basement shelf
The best storage temperature is between 50°F and 70°F to prevent fermentation or spoilage. Avoid humid or overly warm locations, which can compromise the pickles’ texture and taste.
4. Shelf Life
Once stored correctly, homemade icicle pickles can last up to 12 months in the pantry. To maximize freshness:
- Label each jar with the date of preparation.
- Rotate older jars to the front for first use.
Here’s an overview of shelf life and usage guidance:
| Storage Situation | Shelf Life |
|---|---|
| Properly sealed & unopened jars | Up to 12 months |
| Opened and refrigerated jars | 1 to 2 months |
5. After Opening
Once the jar is opened, the pickles should be stored in the refrigerator. Ensure the lid is tightly closed each time after use to retain the brine’s potency. Opened jars are best enjoyed within 1 to 2 months for optimal taste and crunch.
6. Monitor for Spoilage
While our icicle pickles are resilient with proper storage, it’s essential to check for signs of spoilage before digging in:
- Bulging jar lids or a broken vacuum seal indicate potential contamination.
- Cloudy brine or off-putting odors suggest spoilage.
When in doubt, discard the jar to prioritize safety.
Conclusion
Making icicle pickles at home is a rewarding way to bring a touch of tradition into our kitchens. With their perfect crunch and sweet-tangy flavor, they’re a versatile treat that elevates any meal or snack. By following a few simple steps and using the right tools, we can create a batch of pickles that’s not only delicious but also long-lasting.
There’s something truly special about enjoying a jar of homemade pickles we’ve crafted ourselves. It’s more than just a recipe—it’s a way to preserve flavors and memories. Let’s embrace the process and savor the results!
Frequently Asked Questions
What are icicle pickles?
Icicle pickles are a Southern-style treat known for their long, slender shape, crunchy texture, and perfect balance of sweetness and tang. They are a versatile addition to meals and snacks, often enjoyed with sandwiches or barbecue.
Are icicle pickles easy to make at home?
Yes, icicle pickles are easy to make at home with simple ingredients like cucumbers, pickling lime, vinegar, sugar, and spices. The process involves basic preparation steps, which result in a superior, homemade product.
What ingredients are needed for icicle pickles?
The recipe typically includes fresh cucumbers, pickling lime, distilled white vinegar, granulated sugar, canning salt, and aromatic spices like cloves, allspice berries, and cinnamon sticks.
Why is pickling lime used in the recipe?
Pickling lime helps soak the cucumbers to ensure they stay crunchy, which is a key characteristic of icicle pickles.
How long can I store icicle pickles?
Properly sealed jars can last up to 12 months when stored in a cool, dry place. Once opened, store pickles in the refrigerator and consume them within 1 to 2 months.
What tools do I need to make icicle pickles?
Essential tools include a large non-reactive bowl, sterilized canning jars, a large pot for brine preparation, cheesecloth for spices, and a reliable sealing method for jars.
How do I ensure the jars are properly sealed?
To ensure proper sealing, sterilize the jars before use, tightly secure the lids, and allow the jars to cool undisturbed after filling them.
Can I make icicle pickles ahead of time?
Yes, the recipe can be made ahead. This allows the flavors to develop more over time, enhancing the taste of the pickles.
Where should I store canned icicle pickles?
Store canned icicle pickles in a cool, dark, and dry place away from direct sunlight. Opened jars should always be kept in the refrigerator.
How can I tell if my homemade pickles have spoiled?
Look for signs of spoilage, such as an unusual odor, mold, or a change in texture and color. Discard any jar that shows these signs to ensure safety.