
There’s something magical about perfectly shaped ice cream balls that instantly elevate any dessert experience. With our Ice Cream Recipe Ball Maker, we can easily create those smooth, round scoops that look as good as they taste. This handy tool takes the guesswork out of serving and adds a fun twist to homemade ice cream.
Ingredients
To create perfectly shaped ice cream balls using our Ice Cream Recipe Ball Maker, we need the right ingredients to ensure smooth texture and delightful flavor. Below is a list of essential ingredients that work best for this recipe. We recommend measuring each precisely to achieve consistent results every time.
- 2 cups heavy cream (cold) – provides richness and creaminess
- 1 cup whole milk (chilled) – balances texture for scoopability
- 3/4 cup granulated sugar – adds sweetness without graininess
- 1 tablespoon pure vanilla extract – enhances flavor depth
- Pinch of salt – accentuates sweetness and overall taste
For variations, each ingredient can be adjusted or combined with mix-ins like chocolate chips or fresh fruit, but this base blend guarantees smoothness compatible with our Ice Cream Recipe Ball Maker.
| Ingredient | Quantity | Purpose |
|---|---|---|
| Heavy cream | 2 cups | Provides creaminess and fat |
| Whole milk | 1 cup | Smooths texture |
| Granulated sugar | 3/4 cup | Sweetens |
| Vanilla extract | 1 tablespoon | Adds aromatic flavor |
| Salt | Pinch | Balances sweetness |
Equipment Needed
To achieve perfectly shaped scoops using the Ice Cream Recipe Ball Maker, having the right equipment is essential. Below we detail the primary tool and additional supplies needed to streamline the ice cream making and serving process.
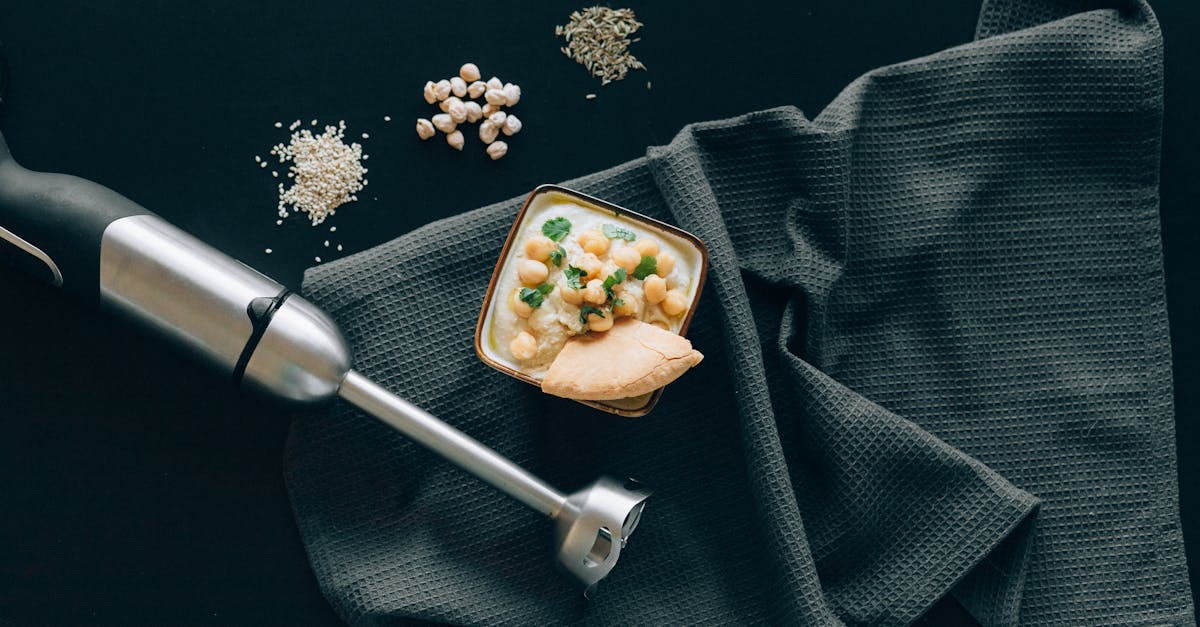
Ice Cream Recipe Ball Maker
The Ice Cream Recipe Ball Maker is the heart of our process. This tool is specially designed to create smooth, uniform ice cream balls effortlessly. Its ergonomic handle and non-stick surface ensure easy scooping without sticking or melting. When selecting your ball maker, opt for one with a sturdy build and comfortable grip to maintain precision and comfort during use.
Key features to look for:
| Feature | Benefit |
|---|---|
| Non-stick coating | Smooth release of ice cream scoops |
| Ergonomic handle | Ease of use and reduced hand fatigue |
| Stainless steel scoop | Durability and ease of cleaning |
| Size options | Versatility for different scoop sizes |
Additional Tools and Supplies
To complement the Ice Cream Recipe Ball Maker, several additional tools will help us create and serve our ice cream balls flawlessly:
- Mixing Bowls: Large enough to mix ingredients thoroughly before freezing.
- Measuring Cups and Spoons: Precise measurements guarantee consistency.
- Electric Mixer or Whisk: For whipping heavy cream and blending ingredients uniformly.
- Freezer-safe Containers: To store the ice cream mixture and maintain texture during freezing.
- Spatula: To scrape bowls clean and fold in mix-ins delicately.
- Serving Bowls or Cones: To present our beautifully shaped ice cream balls attractively.
Having these tools ready and organized enhances the ease of preparation and guarantees that each scoop made with the Ice Cream Recipe Ball Maker comes out perfect every time.
Prep Work
Before we start scooping with the Ice Cream Recipe Ball Maker, precise preparation lays the foundation for perfect ice cream balls. Our prep work sets up the texture, flavor, and scoopability for a flawless dessert experience.
Preparing the Ice Cream Mixture
To create a smooth base compatible with the Ice Cream Recipe Ball Maker, follow these steps carefully:
- Combine Ingredients: In a large mixing bowl, pour the following measured ingredients:
- 2 cups heavy cream, chilled
- 1 cup whole milk, cold
- 3/4 cup granulated sugar
- 2 teaspoons pure vanilla extract
- 1/4 teaspoon salt
- Mix Thoroughly: Using an electric mixer or a whisk, blend the ingredients on medium speed for 3 to 5 minutes. This step dissolves the sugar evenly and incorporates air, enhancing creaminess and scoopability.
- Optional Add-ins: Gently fold in your choice of mix-ins—like 1/2 cup chocolate chips, fresh fruit, or crushed nuts—only after the base is thoroughly mixed to maintain a smooth texture.
Key Tips:
“Ensuring the sugar fully dissolves in the cream and milk mixture guarantees a smooth final product that doesn’t crystallize during freezing.”
| Ingredient | Quantity | Preparation Note |
|---|---|---|
| Heavy Cream | 2 cups | Chilled |
| Whole Milk | 1 cup | Cold |
| Granulated Sugar | 3/4 cup | Measure precisely |
| Vanilla Extract | 2 teaspoons | Pure extract recommended |
| Salt | 1/4 teaspoon | Adds balance to sweetness |
Chilling the Mixture
Proper chilling is crucial to achieving the ideal consistency for the Ice Cream Recipe Ball Maker:
- Initial Chill: Cover the ice cream base with plastic wrap, pressing it lightly onto the mixture’s surface to prevent ice crystals from forming. Refrigerate for at least 2 hours or overnight for best results.
- Freeze Before Scooping: Transfer the chilled mixture into a freezer-safe container. Freeze for 4 to 6 hours until the mixture firms but remains scoopable, typically showing a slightly soft center.
- Pre-Scoop Preparation: Remove the mixture from the freezer 5 minutes before scooping to soften slightly. This step ensures the Ice Cream Recipe Ball Maker glides through smoothly without cracking the ice cream.
Instructions
Follow these clear steps to achieve perfectly shaped ice cream balls using the Ice Cream Recipe Ball Maker. Our process guarantees smooth, round scoops every time.
Using the Ice Cream Recipe Ball Maker
- Prepare the Ball Maker:
Before scooping, ensure the ball maker’s non-stick surface is clean and slightly chilled. This step prevents sticking and helps form smooth balls.
- Warm the Scoop Slightly:
Dip the scoop in warm water for about 10 seconds, then shake off excess water. A warm scoop glides through the ice cream easily.
- Position the Ball Maker:
Hold the ergonomic handle firmly, and position the scoop horizontally on the surface of the semi-frozen ice cream.
- Scoop with Confidence:
Press the scoop into the ice cream with even pressure. Rotate your wrist slightly if needed to form a perfect sphere.
- Release the Ice Cream Ball:
Use the scoop’s release mechanism or gently tap the ball maker’s edge on the container side to drop the ice cream ball cleanly.
Shaping the Ice Cream Balls
- Maintain the Ice Cream Consistency:
The ice cream base should be firm but scoopable — ideally frozen for 4 to 6 hours and removed from the freezer 5 minutes before scooping.
- Form Uniform Spheres:
Use consistent pressure and scoop depth for each ball to achieve uniform size and shape.
- Handle With Care:
Use a clean spatula or serving spoon to transfer the ice cream balls to cones or serving bowls to maintain their shape.
- Serve Immediately or Chill:
Place formed balls on a parchment-lined tray if not serving immediately. Store in the freezer to keep the perfectly shaped ice cream balls intact.
| Step | Tip | Reason |
|---|---|---|
| Warm the Scoop | 10 seconds in warm water | Prevents sticking |
| Chill Ice Cream Base | Freeze 4-6 hours, thaw 5 min | Ideal firmness for scooping |
| Use Even Pressure | Rotate wrist while scooping | Creates smooth round spheres |
| Transfer Carefully | Use spatula or spoon | Maintains ice cream ball shape |
Directions for Serving
Serving the perfectly shaped ice cream balls made with our Ice Cream Recipe Ball Maker elevates the dessert experience. Here, we share our top tips on presentation and storage to ensure each serving looks as delightful as it tastes.
Presentation Ideas
To make every scoop visually stunning and appealing, follow these creative suggestions:
- Elegant bowls or classic cones highlight the smooth roundness of the ice cream balls.
- Arrange 2-3 ice cream balls per serving for a balanced, inviting portion.
- Garnish with fresh fruit slices, mint sprigs, or a drizzle of chocolate or caramel sauce to add color and flavor contrast.
- Use a piping bag to apply whipped cream rosettes around the ice cream balls for an extra touch of sophistication.
- For parties, consider serving ice cream balls on mini waffle cone cups or edible waffle bowls for effortless, mess-free enjoyment.
- Add texture by sprinkling crushed nuts, cookie crumbs, or edible glitter atop the balls.
Tip: Place the serving dish on a chilled plate to keep the ice cream from melting too fast and to maintain that perfect scoop shape.
Storage Tips
Proper storage preserves the texture and ease of use of your ice cream balls when not serving immediately.
| Step | Instruction |
|---|---|
| 1. Initial Freezing | After scooping, place ice cream balls on a parchment-lined tray in a single layer to prevent sticking. |
| 2. Hard Freeze | Freeze the tray for at least 1 hour until the ice cream balls are firm. |
| 3. Transfer & Store | Move the frozen balls into an airtight container or freezer-safe zip bag. Layer with parchment paper between layers to avoid clumping. |
| 4. Keep Temperature Stable | Store in the coldest part of the freezer to maintain perfect texture and prevent ice crystals. |
| 5. Thaw Before Serving | Remove balls from the freezer 5 minutes prior to serving to soften slightly, ensuring smooth scooping with the ball maker next time. |
With these presentation and storage tips paired with our Ice Cream Recipe Ball Maker, every serving becomes a visually and sensorially delightful treat.
Make-Ahead Instructions
Preparing your ice cream in advance ensures smooth and effortless scooping with the Ice Cream Recipe Ball Maker. Follow these detailed make-ahead steps to achieve perfect ice cream balls every time.
Step 1: Prepare and Chill the Ice Cream Base
- Combine all ingredients for the base (heavy cream, whole milk, sugar, vanilla extract, salt) as per the recipe.
- Mix thoroughly to achieve a smooth texture.
- Cover the bowl tightly with plastic wrap.
- Refrigerate for a minimum of 2 hours to allow flavors to meld and the mixture to chill completely.
Step 2: Freeze the Chilled Mixture
- Transfer the chilled mixture into a freezer-safe container.
- Freeze for 4 to 6 hours, or until the ice cream is firm but scoopable.
- For best results, stir the mixture gently once or twice during early freezing to prevent large ice crystals.
Step 3: Pre-scoop Preparation
- Remove the ice cream container from the freezer 5 minutes prior to scooping.
- This step softens the ice cream slightly for easier use with the Ice Cream Recipe Ball Maker without compromising shape.
Step 4: Storing Pre-scooped Ice Cream Balls
If you want to prepare ice cream balls ahead of serving, use these storage tips:
| Action | Details |
|---|---|
| Scoop ice cream balls | Use the Ice Cream Recipe Ball Maker to create smooth, uniform spheres |
| Place on parchment-lined baking sheet | Prevent sticking and maintain shape |
| Freeze immediately | Freeze for at least 1 hour until balls are solid |
| Transfer to airtight container | Store the balls in a single layer or with parchment sheets between layers |
| Maintain freezer temperature | Keep at or below 0°F (-18°C) for best texture preservation |
Pro Tips for Make-Ahead Success
“The key to flawless scooping and shape-retention lies in consistent temperature control and proper chilling times.“
- Always use airtight containers to prevent ice crystals and freezer burn.
- Label your containers with date and flavor for easy retrieval.
- Avoid thawing and refreezing; scoop just before serving or freeze pre-scooped balls thoroughly.
- Warm your Ice Cream Recipe Ball Maker scoop briefly in warm water and dry before scooping for smooth release.
By following these Make-Ahead Instructions, we’ll ensure that our delicious ice cream balls remain creamy, smooth, and beautifully shaped, ready to impress every time we serve them.
Cleaning and Maintenance of the Ice Cream Recipe Ball Maker
Proper cleaning and maintenance of the Ice Cream Recipe Ball Maker ensure it remains in optimal condition for consistently perfect scoops. Follow these steps to extend the lifespan of your ball maker and maintain its non-stick performance.
Step 1: Immediate Cleaning After Use
- Rinse the ball maker under warm running water immediately after use to prevent ice cream residue from hardening.
- Use a soft sponge or cloth with mild dish soap to gently wipe the scoop and handle.
- Avoid abrasive scrubbers that can damage the non-stick coating.
Step 2: Deep Cleaning for Stubborn Residue
- Soak the ball maker in warm soapy water for 5-10 minutes if ice cream residue is stuck.
- Use a soft-bristled brush to clean crevices and the scoop’s edge.
- Rinse thoroughly to remove all soap traces.
Step 3: Drying and Storage
- Dry the ball maker completely with a soft towel to prevent water spots and corrosion.
- Store it in a dry place away from direct sunlight and moisture to preserve the non-stick surface and metal parts.
Step 4: Periodic Maintenance Checks
- Inspect the ergonomic handle and scoop joint periodically for any looseness or wear.
- If the scoop’s non-stick coating shows signs of wear, consider re-coating with a food-safe spray or replacing the tool for best performance.
Quick Reference: Cleaning and Maintenance Schedule
| Task | Frequency | Method |
|---|---|---|
| Rinse after each use | Every use | Warm water rinse & soft sponge |
| Deep clean | Weekly or as needed | Soak + soft brush |
| Dry thoroughly | After every clean | Soft towel |
| Inspect for damage | Monthly | Visual and physical check |
| Re-coat or replace scoop | As needed | Food-safe spray or new tool |
Pro Tip: To maintain the smooth glide of the Ice Cream Recipe Ball Maker, occasionally dip the scoop in warm water before scooping. This reduces sticking and keeps your non-stick surface protected.
By adhering to these cleaning and maintenance steps, our Ice Cream Recipe Ball Maker will serve us perfectly shaped ice cream balls for many delightful desserts to come.
Conclusion
Using the Ice Cream Recipe Ball Maker transforms homemade ice cream into a fun and elegant treat. It helps us serve perfectly shaped scoops that impress both in appearance and taste. With the right preparation and care, this tool becomes an essential part of our dessert routine.
By following the tips on chilling, scooping, and storage, we can enjoy smooth and consistent results every time. Plus, maintaining the ball maker properly ensures it stays reliable for many sweet moments ahead. This simple addition to our kitchen makes ice cream serving effortless and enjoyable.
Frequently Asked Questions
What is the Ice Cream Recipe Ball Maker?
The Ice Cream Recipe Ball Maker is a kitchen tool designed to create perfectly smooth, round ice cream scoops, enhancing both the presentation and enjoyment of homemade ice cream.
What ingredients do I need for the ice cream base?
You need heavy cream, whole milk, granulated sugar, vanilla extract, and a pinch of salt. Optional mix-ins like chocolate chips or fresh fruit can be added for variety.
What features should I look for in an Ice Cream Ball Maker?
Look for a non-stick surface, an ergonomic handle, stainless steel scoop, and size options to ensure easy scooping and versatile use.
How do I prepare the ice cream base for best results?
Combine chilled heavy cream, cold milk, sugar, vanilla, and salt. Mix thoroughly until smooth, chill for at least 2 hours, then freeze for 4-6 hours before scooping.
Can I prepare the ice cream balls ahead of time?
Yes. Scoop the ice cream balls, place them on a parchment-lined tray, freeze, then store in airtight containers to maintain freshness and prevent freezer burn.
How do I use the Ice Cream Ball Maker properly?
Chill the ball maker slightly and warm the scoop in water. Use even pressure and wrist rotation to form spheres, then gently transfer to serving dishes.
What is the best way to clean the Ice Cream Ball Maker?
Clean it immediately after use with warm water and mild soap. For stubborn residue, deep clean as needed, dry thoroughly, and store properly to maintain its non-stick surface.
How can I prevent ice cream from sticking to the scoop?
Warm the scoop in warm water before use and slightly chill the ball maker surface. This creates a smooth glide and forms perfect ice cream balls easily.
What other tools do I need for homemade ice cream?
Essential tools include mixing bowls, measuring cups and spoons, an electric mixer or whisk, freezer-safe containers, a spatula, and serving bowls or cones.
Why is chilling the ice cream base important?
Chilling allows the mixture to thicken and flavors to meld, resulting in a smoother texture and easier scooping when frozen properly.