
There’s something magical about making ice cream right at home, and our Ice Cream Ball Recipe for Vanilla Ice Cream makes it fun and easy. This hands-on method lets us shake and roll our way to creamy, delicious ice cream without any fancy equipment. It’s perfect for family gatherings or a fun activity with friends.
Ingredients
To create the perfect Ice Cream Ball Recipe Vanilla Ice Cream, precise ingredient measurements are essential. Below we detail everything you need to make rich and creamy vanilla ice cream using the ice cream ball method.
For the Vanilla Ice Cream Mixture
- 2 cups heavy cream (cold for best texture)
- 1 cup whole milk (helps achieve smooth creaminess)
- 3/4 cup granulated sugar (balances sweetness perfectly)
- 1 tablespoon pure vanilla extract (for authentic vanilla flavor)
- Pinch of salt (enhances overall taste)
For the Ice Cream Ball Layer
To freeze and churn the ice cream with our ice cream ball, these ingredients form the essential freezing mixture:
| Ingredient | Quantity | Purpose |
|---|---|---|
| Ice cubes | 4 cups | Provides cold environment |
| Rock salt or kosher salt | 1/2 cup | Lowers freezing point for faster freezing |
Additional Ingredients and Optional Mix-Ins
We can customize our vanilla ice cream with extra flavors or textures. Here are optional additions we recommend:
- 1/2 cup chocolate chips (for a delightful crunch)
- 1/2 cup chopped nuts (almonds, pecans, or walnuts for texture)
- Fresh fruit pieces (strawberries or blueberries for natural sweetness)
- Caramel or fudge sauce (swirled in for luscious richness)
Use these ingredients as desired to make your homemade ice cream ball treat truly unique and delicious.
Equipment Needed
To make the Ice Cream Ball Recipe Vanilla Ice Cream come to life, we need just a few simple tools. These items ensure the process runs smoothly and the ice cream turns out perfectly creamy and delicious every time.
Essential Equipment List
- Ice Cream Ball: A double-sealed plastic ball designed to hold the ice cream mixture inside while shaking.
- Measuring Cups and Spoons: For precise measurement of ingredients, especially sugar and vanilla extract.
- Mixing Bowl: To combine the cream, milk, sugar, vanilla, and salt before pouring into the ice cream ball.
- Whisk or Spoon: To thoroughly mix the ice cream base until smooth.
- Large Mixing Bowl or Bucket (optional): For holding the ice and rock salt mixture if your ice cream ball doesn’t have an insulated container.
- Towels or Oven Mitts: To hold the cold ice cream ball comfortably while shaking, protecting our hands from the chill.
- Timer or Stopwatch: To track the shaking time—usually about 10 to 15 minutes for best results.
- Freezer-safe Container with Lid: For storing leftover ice cream and allowing it to firm up if needed before serving.
Equipment Overview Table
| Equipment | Purpose | Notes |
|---|---|---|
| Ice Cream Ball | Core device for shaking and freezing | Must be double-sealed to prevent leaks |
| Measuring Tools | Accurate measurement of ingredients | Essential for balance of flavor |
| Mixing Bowl & Whisk | Blend ingredients evenly | Use a medium size for easy pouring |
| Ice Container | Holds ice & salt to create freezing environment | Can be a bucket or large bowl |
| Protective Gloves | Heat insulation during shaking | Use towels if gloves unavailable |
| Timer | Monitor shaking duration | Prevent over or under mixing |
| Storage Container | Store and freeze finished ice cream | Airtight to prevent ice crystals |
Prep Work
Before we start shaking the Ice Cream Ball, it’s essential to prepare the ingredients and equipment properly. This sets us up for a smooth and successful vanilla ice cream-making experience.
Preparing the Ice Cream Mixture
To create the perfect vanilla ice cream base, we need to combine our ingredients accurately and mix them thoroughly.
- In a mixing bowl, pour the following:
- 1 cup heavy cream (chilled)
- 1 cup whole milk (chilled)
- ¾ cup granulated sugar
- 2 teaspoons pure vanilla extract
- A pinch of salt
- Using a whisk or a sturdy spoon, gently mix until the sugar dissolves completely and the mixture is smooth.
- Make sure the mixture is well-chilled before adding it to the ice cream ball. We recommend refrigerating it for at least 30 minutes for best results.
| Ingredient | Quantity | Preparation Details |
|---|---|---|
| Heavy cream | 1 cup | Chilled |
| Whole milk | 1 cup | Chilled |
| Granulated sugar | ¾ cup | No prep |
| Pure vanilla extract | 2 teaspoons | No prep |
| Salt | Pinch | No prep |
Preparing the Ice Cream Ball Mold
Proper preparation of the ice cream ball mold ensures no leaks and an effective freezing process.
- Open the ice cream ball and pour in the well-chilled vanilla ice cream mixture.
- Securely seal the ball with its lid, ensuring it is double-locked to avoid any leakage during shaking.
- For ice and salt:
- Fill the outer compartment or a large mixing bowl with ice cubes.
- Add rock salt or kosher salt to the ice—about a 3:1 ratio of ice to salt works best to lower the freezing point.
- Wear protective gloves or wrap the ball in a towel to keep your hands comfortable during shaking.
- Place a timer within reach to monitor the shaking time, ideally 10 to 15 minutes.
| Step | Detail | Tip |
|---|---|---|
| Filling ice cream ball | Pour in chilled ice cream mixture | Avoid overfilling |
| Sealing | Double-lock lids securely | Check for leaks |
| Ice and salt mixture | Mix 3 parts ice with 1 part rock or kosher salt | Use plenty for fast freezing |
| Handling | Use gloves or towel | Protect hands from cold |
Instructions
Follow these step-by-step instructions to make delicious homemade vanilla ice cream using the Ice Cream Ball Recipe. This method is simple, fun, and requires no special equipment beyond the ice cream ball itself.
Step 1: Making the Vanilla Ice Cream Base
- Chill ingredients: Place heavy cream and whole milk in the fridge for at least 1 hour before starting.
- In a mixing bowl, combine the following:
- 1 cup heavy cream (cold)
- 1 cup whole milk (cold)
- ¾ cup granulated sugar
- 1 tbsp pure vanilla extract
- A pinch of salt
- Whisk the ingredients vigorously until the sugar dissolves completely and the mixture is smooth and uniform.
- Cover the bowl and refrigerate the mixture while preparing the ice and salt for the freezing process.
Step 2: Pouring the Mixture into the Ice Cream Ball Mold
- Ensure the double-sealed ice cream ball is clean and dry.
- Open the ice cream ball and carefully pour the vanilla ice cream base into the inner chamber, leaving about ½ inch from the top for expansion.
- Secure the lid tightly, making sure the seal is airtight to prevent leaks during shaking.
- Double check the seal with your fingers before proceeding.
Step 3: Freezing the Ice Cream Ball
- Prepare the freezing mixture in a large bowl or bucket:
| Ingredient | Quantity | Notes |
|---|---|---|
| Ice cubes | Enough to fill | Large quantity to surround the ball |
| Rock salt | About ½ to 1 cup | Lowers freezing point for faster freeze |
- Submerge the sealed ice cream ball into the ice and salt mixture, ensuring it is surrounded on all sides.
- Wear protective gloves or wrap the ball with a towel to avoid discomfort from the cold.
- Shake the ice cream ball vigorously for 10 to 15 minutes, rotating it constantly.
- Tip: Set a timer for 5-minute intervals to maintain consistent shaking and rest your hands briefly if needed.
- Check the consistency after the first 10 minutes; the mixture should begin to thicken and freeze.
Step 4: Unmolding and Serving
- Remove the ice cream ball from the ice bath carefully.
- Open the ice cream ball and use a spatula or spoon to scoop out the creamy homemade vanilla ice cream.
- Transfer the ice cream into a freezer-safe container if not serving immediately.
- Optionally, add favorite mix-ins such as chocolate chips, chopped nuts, or fresh fruit at this stage.
- Serve the ice cream in bowls or cones and enjoy your freshly churned vanilla ice cream.
Tips for Perfect Ice Cream Ball Results
To achieve the creamiest and most delicious vanilla ice cream using our Ice Cream Ball Recipe we must follow these essential tips carefully.
Use the Right Ingredients at Proper Temperatures
- Always start with chilled heavy cream and whole milk. Cold ingredients speed up the freezing and churning process inside the ball for a smooth texture.
- Measure ingredients precisely using standard measuring cups and spoons to maintain the perfect balance for the ice cream base.
- Use pure vanilla extract for authentic flavor that stands out.
Securely Seal the Ice Cream Ball
- Ensure the ball is double-sealed with no leaks before adding the ice cream base. A tight seal prevents salt water from entering and ruining the texture.
- Check the sealing ring and lids for any damage before use.
Prepare the Ice and Salt Mixture Correctly
- Combine ice cubes and rock salt (or kosher salt) in the correct ratio to lower the melting point and freeze the mixture effectively.
- Use enough ice and salt to surround the ball completely, ensuring even freezing.
| Ingredient | Quantity for Ice Mixture | Purpose |
|---|---|---|
| Ice cubes | 4-6 cups | Provides freezing cold environment |
| Rock salt/kosher salt | 1/2 to 3/4 cup | Lowers ice melting point |
Shake Consistently and Comfortably
- Shake the ball vigorously and continuously for 10 to 15 minutes. Consistent movement churns the ice cream evenly preventing iciness.
- Use protective gloves or a thick towel to grip the ball comfortably and protect your hands from the cold.
- Shake in short intervals if needed to avoid fatigue but maintain momentum.
Check for Desired Texture
- After shaking, check the ice cream’s consistency through the transparent part of the ball or by gently opening it.
- The ideal texture resembles soft serve and can firm up more in the freezer if preferred.
Customize with Mix-ins at the Right Time
- Add mix-ins like chocolate chips or nuts after the base is partially frozen when the ice cream starts to thicken inside the ball.
- This ensures even distribution without sinking to the bottom.
Clean and Store Properly
- Immediately rinse and dry the ice cream ball after use to prevent salt buildup and prolong its lifespan.
- Store leftover ice cream in a freezer-safe container with a tight lid to keep it fresh longer.
Variations and Flavor Ideas
To elevate our Ice Cream Ball Recipe Vanilla Ice Cream and make each batch exciting, we can explore a variety of delicious flavor twists and mix-ins. Here are some creative ideas that add unique tastes and textures to our homemade vanilla ice cream:
1. Classic Flavor Swirls
Enhance the creamy vanilla base with these simple yet irresistible additions:
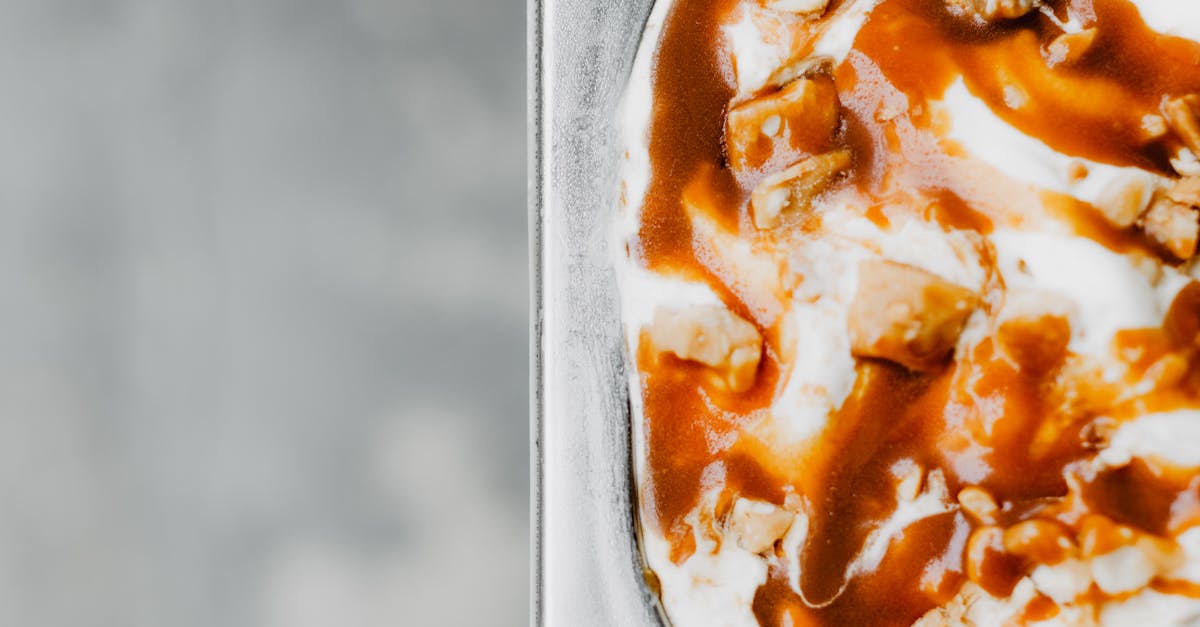
- Chocolate Swirl: Drizzle warm fudge or chocolate syrup in the ice cream after removing it from the ball. Gently fold it in for beautiful marbling.
- Caramel Ripple: Add a thick caramel sauce swirl for a buttery, rich flavor contrast.
- Fruit Purees: Mix in raspberry or strawberry puree to add natural sweetness and a vibrant twist.
2. Crunchy and Nutty Mix-Ins
Adding texture boosts the experience. Consider these crunchy delights:
- Chopped Nuts: Walnuts, pecans, or almonds toasted lightly to bring a lovely aroma and crunch.
- Cookie Crumbles: Crushed Oreos, graham crackers, or shortbread cookies folded in for added sweetness and texture.
- Toffee Bits: Sprinkle in toffee pieces for a caramelized crunch that contrasts the smooth ice cream.
3. Fresh Fruit and Zesty Enhancements
Fresh ingredients brighten and balance the richness:
- Berries: Fresh blueberries, raspberries, or chopped strawberries for bursts of flavor.
- Citrus Zest: Grate lemon or orange zest into the base before freezing to give a refreshing aroma and tang.
- Mint Leaves: Finely chop fresh mint for a cooling, fresh taste.
4. Bold and Decadent Flavors
For those who want to experiment:
- Espresso Shot: Add a teaspoon or two of instant espresso powder for a coffee-flavored vanilla ice cream.
- Spices: Cinnamon, cardamom, or nutmeg can be whisked into the base for warmth and depth.
- Coconut Flakes: Toasted coconut adds a tropical flair and crunchy texture.
Mix-In Timing and Tips
To get the best consistency and flavor balance, follow this guideline:
| Step | When to Add | Tips |
|---|---|---|
| Liquid flavorings | When mixing base ingredients before freezing | Stir well for even flavor distribution |
| Solid mix-ins | After ice cream forms but is still soft (10-15 min) | Quickly fold in to avoid melting |
| Swirls and sauces | After freezing and before serving | Fold gently to maintain texture and swirls |
Pro Tip: For the smoothest texture, avoid overmixing solid ingredients after freezing. This helps maintain the creamy mouthfeel of our ice cream.
Storing and Serving Suggestions
To keep our Vanilla Ice Cream fresh and creamy after making it with the Ice Cream Ball Recipe, proper storage is essential. Here’s how we can store and serve this delightful treat for maximum enjoyment:
Storing Vanilla Ice Cream
- Transfer Immediately: Once the ice cream is ready, transfer it to a freezer-safe airtight container. This prevents ice crystals from forming and preserves the smooth texture.
- Cover with Plastic Wrap: Place a piece of plastic wrap directly on the surface of the ice cream before sealing the lid for an extra moisture barrier.
- Freeze Quickly: Store the container in the coldest part of the freezer. Aim to consume within 1 to 2 weeks for the best flavor and texture.
- Avoid Frequent Temperature Changes: Keep the ice cream consistently frozen. Minimize taking it in and out to avoid melting and refreezing, which causes texture loss.
| Storage Step | Purpose | Tips |
|---|---|---|
| Airtight container | Prevents freezer burn | Use containers with tight-fitting lids |
| Plastic wrap surface | Maintains moisture | Press wrap directly on ice cream surface |
| Coldest freezer spot | Keeps ice cream solid | Avoid freezer door storage |
| Consume within timeframe | Ensures freshness and optimal texture | Best within 1-2 weeks |
Serving Suggestions
- Scoop at Room Temperature: Allow the ice cream to sit at room temp for 3-5 minutes before scooping for easy serving and creamy texture.
- Pair with Toppings: Enhance the experience by adding fresh fruits, crushed nuts, chocolate shavings, caramel drizzle or your favorite sauces.
- Serve in Stylish Bowls: Use chilled bowls or waffle cones to keep the ice cream cold longer and provide aesthetic appeal.
- Create Sundaes: Layer the vanilla ice cream with brownies, cookie crumbles, or whipped cream for a decadent treat.
Pro Tips for Serving
“For perfectly smooth scoops, gently warm the scoop in hot water, then dry before serving.”
Adding mix-ins right before serving preserves the best texture and flavor contrast.
By following these storing and serving suggestions, we ensure our homemade vanilla ice cream remains as delicious and refreshing as the moment it was made with the ice cream ball.
Conclusion
Making vanilla ice cream with the Ice Cream Ball Recipe is a rewarding and enjoyable experience that brings everyone together. It’s a simple way to create a creamy, delicious treat right at home without fancy equipment.
With just a few ingredients and some shaking, we can customize flavors and textures to suit any preference. This hands-on method turns ice cream making into a fun activity that’s perfect for any occasion.
Let’s keep experimenting with mix-ins and serving ideas to make every batch even better. Homemade ice cream has never been this easy or satisfying!
Frequently Asked Questions
What is the Ice Cream Ball Recipe for vanilla ice cream?
The Ice Cream Ball Recipe is a fun, simple method to make vanilla ice cream at home without special equipment. You shake a sealed ball containing the ice cream mixture surrounded by ice and salt, which freezes the cream into delicious ice cream in about 10-15 minutes.
What ingredients do I need for the vanilla ice cream mixture?
You need heavy cream, whole milk, granulated sugar, pure vanilla extract, and a pinch of salt. Optional mix-ins include chocolate chips, nuts, fresh fruit, or caramel sauce to customize your flavor.
What type of ice and salt mixture is required?
Use ice cubes with rock salt or kosher salt. The salt lowers the freezing point, making the ice mixture cold enough to freeze your ice cream properly.
Why is it important to chill the ingredients before starting?
Chilling the heavy cream and milk helps the mixture freeze faster and creates a smoother, creamier texture in your homemade ice cream.
How long should I shake the ice cream ball?
Shake consistently and comfortably for about 10 to 15 minutes until the mixture hardens into ice cream. Use a timer to avoid under or over-shaking.
How do I prevent leaks when using the ice cream ball?
Ensure the ice cream ball is double-sealed and securely closed before shaking. Check the seal twice to avoid spills during the freezing process.
Can I make different flavors with this ice cream ball method?
Yes! You can add swirls like chocolate or caramel, mix-ins like nuts or cookie crumbs, and flavors such as espresso or spices for creative variations.
How should I store leftover homemade vanilla ice cream?
Transfer the ice cream to a freezer-safe airtight container, cover it with plastic wrap to maintain moisture, and store it in the coldest part of your freezer.
What equipment do I need for the Ice Cream Ball Recipe?
You need an ice cream ball, measuring cups and spoons, a mixing bowl, a whisk or spoon, and optionally a large bowl or bucket for the ice and salt mixture. Gloves or towels help handle the cold ball comfortably.
When should I add mix-ins to the ice cream?
Add mix-ins once the ice cream starts to firm up, usually after about 10 minutes of shaking, to ensure they are well incorporated without melting or sinking.