
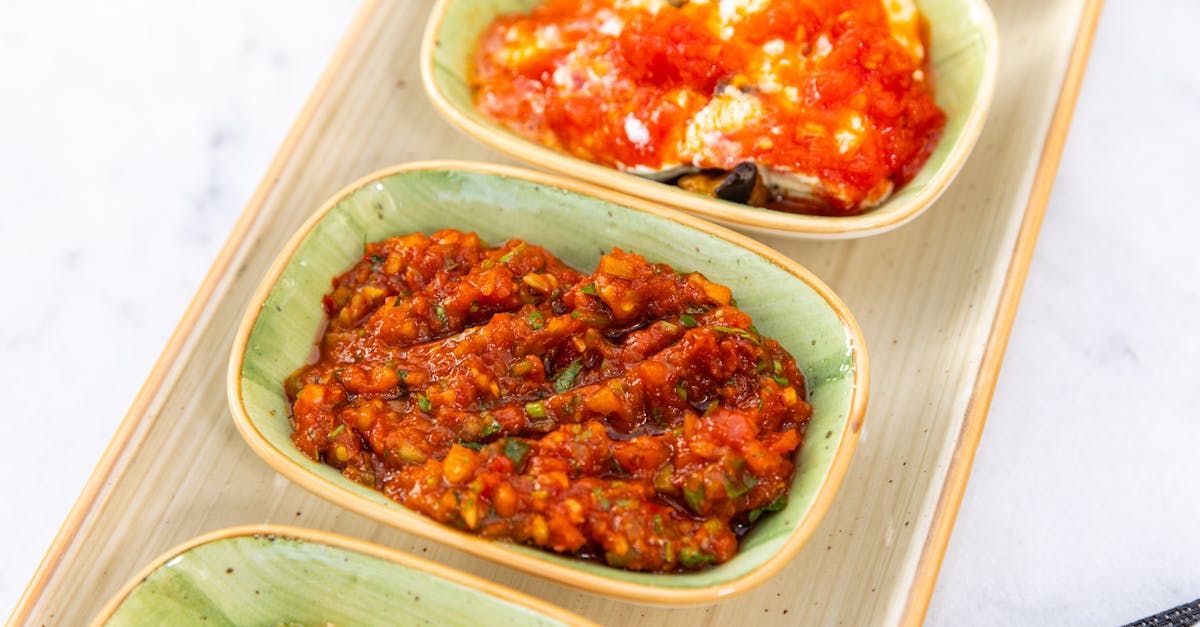
Huggi is a traditional South Indian comfort food that brings warmth and flavor to any meal. This simple yet satisfying dish combines rice and lentils into a wholesome one-pot recipe that’s perfect for busy weeknights or cozy family dinners. Its rich history and regional variations make it a favorite across many households.
We love how easy it is to prepare Huggi without compromising on taste. With just a few ingredients and straightforward steps, you can create a hearty dish that’s both nutritious and delicious. Whether you’re new to South Indian cuisine or looking to add a new twist to your meal rotation, this Huggi recipe will quickly become a go-to favorite. Let’s dive into making this flavorful classic that’s packed with comforting spices and wholesome goodness.
Ingredients
To prepare an authentic Huggi Recipe, we need a balanced combination of Main Ingredients, carefully selected Spices and Seasonings, and a few Optional Ingredients to enhance flavor and texture. Below is the detailed list to get us started.
Main Ingredients
Our Huggi relies on simple wholesome staples that create a comforting one-pot meal:
- Rice – 1 cup, washed and soaked for 30 minutes
- Toor dal (split pigeon peas) – 1/2 cup, washed and soaked for 30 minutes
- Water – 3 cups, for cooking the rice and dal together
- Fresh grated coconut – 1/4 cup, for mild creaminess
Spices and Seasonings
The true soul of Huggi lies in its aromatic spices. We highlight these essentials:
- Mustard seeds – 1 teaspoon
- Cumin seeds – 1/2 teaspoon
- Green chilies – 2, slit lengthwise
- Ginger – 1 teaspoon, finely chopped
- Turmeric powder – 1/4 teaspoon
- Salt – 1 teaspoon or to taste
- Curry leaves – 10 leaves, fresh for best flavor
Optional Ingredients
To customize or enrich our Huggi, consider adding:
- Chana dal (split chickpeas) – 1 tablespoon, for additional texture
- Asafoetida (hing) – a pinch, aids digestion and flavor
- Ghee – 1 tablespoon, to drizzle on top before serving
- Grated carrots or peas – 1/4 cup, for a subtle vegetable sweetness
- Cashew nuts – 2 tablespoons, lightly roasted for garnish
| Category | Ingredient | Quantity |
|---|---|---|
| Main Ingredients | Rice | 1 cup |
| Toor dal (split pigeon peas) | 1/2 cup | |
| Water | 3 cups | |
| Fresh grated coconut | 1/4 cup | |
| Spices and Seasonings | Mustard seeds | 1 teaspoon |
| Cumin seeds | 1/2 teaspoon | |
| Green chilies | 2 | |
| Ginger (finely chopped) | 1 teaspoon | |
| Turmeric powder | 1/4 teaspoon | |
| Salt | 1 teaspoon or to taste | |
| Curry leaves | 10 leaves | |
| Optional Ingredients | Chana dal (split chickpeas) | 1 tablespoon |
| Asafoetida (hing) | A pinch | |
| Ghee | 1 tablespoon | |
| Grated carrots or peas | 1/4 cup | |
| Cashew nuts (lightly roasted) | 2 tablespoons |
Armed with these ingredients, we are ready to bring the comforting flavors of Huggi to life in the next steps.
Equipment and Tools Needed
To prepare an authentic Huggi Recipe, it is essential to have the right equipment and tools on hand. These tools ensure efficient cooking and help us achieve the perfect texture and flavor balance for this traditional dish.
Essential Equipment
- Heavy-bottomed pot or pressure cooker
We recommend a heavy-bottomed pot for even heat distribution or a pressure cooker to speed up the cooking of rice and dal together, essential for the one-pot Huggi texture.
- Frying pan or skillet
Used for tempering the mustard seeds, cumin, curry leaves, and green chilies in oil or ghee to unlock the full aroma of spices.
- Wooden spatula or spoon
To stir the mixture gently without breaking the rice grains and to mix the tempering evenly.
- Measuring cups and spoons
Accurate measurement ensures perfect consistency and spice balance.
- Fine grater
For fresh grated coconut and optional carrots if we include them in the recipe.
- Strainer or sieve
Useful for rinsing and draining rice and lentils properly to clean away excess starch and impurities.
- Mixing bowl
For soaking the rice and toor dal before cooking to reduce cooking time.
Optional But Helpful Tools
- Mortar and pestle or spice grinder
For grinding fresh spices or coarse powders when we want an extra fresh flavor profile.
- Serving bowl
To present the Huggi in a traditional or family-style manner once cooked.
| Tool | Purpose | Importance |
|---|---|---|
| Heavy-bottomed pot | Cook rice and dal evenly | Essential |
| Pressure cooker | Quick cooking of Huggi | Recommended |
| Frying pan or skillet | Temper spices and aromatics | Essential |
| Wooden spatula | Stir without breaking rice | Essential |
| Measuring cups/spoons | Accurate ingredient measurement | Essential |
| Fine grater | Grate fresh coconut and carrots | Important |
| Strainer or sieve | Rinse and drain rice/lentils | Essential |
| Mixing bowl | Soak rice and dal to shorten cooking | Important |
| Mortar & pestle/grinder | Grind fresh spices (optional) | Optional |
| Serving bowl | Present Huggi attractively | Optional |
“Having the right tools helps us respect the delicate balance of flavors and textures that make Huggi a treasured South Indian comfort food.”
By preparing these equipment and tools beforehand, we streamline the cooking process and ensure a delicious, authentic Huggi with minimal hassle.
Prep Work
Before we dive into cooking Huggi, proper preparation ensures smooth, efficient cooking and authentic flavors. Let’s get started by preparing the ingredients and handling the essential soaking and washing tasks.
Preparing the Ingredients
To capture the true essence of Huggi, every ingredient must be prepped with care:
- Rice and Toor Dal: Measure precise quantities to balance texture and taste.
- Spices and Aromatics: Chop green chilies finely and rinse curry leaves gently to avoid bruising.
- Fresh Grated Coconut: Use freshly grated coconut for that signature nutty aroma.
- Optional Add-ins: If using grated carrots, peas, or cashew nuts, prepare them by washing and chopping as needed.
Organizing your ingredients beforehand allows us to focus on cooking without interruptions.
Soaking and Washing Steps
Soaking and washing play a crucial role in achieving the perfect Huggi texture and flavor:
| Ingredient | Soaking Time | Washing Instructions |
|---|---|---|
| Toor Dal | 20-30 minutes | Rinse under cold water until water runs clear |
| Rice | 15-20 minutes | Rinse 3-4 times to remove excess starch |
| Chana Dal (optional) | 20 minutes | Rinse thoroughly before soaking |
“Soaking dal and rice not only reduces cooking time but also enhances digestibility and texture.”
We soak the lentils and rice separately in clean water. After soaking, drain thoroughly. Washing ensures we remove impurities and excess starch, preventing the dish from becoming too sticky or mushy. This careful preparation helps us get closer to the comforting, fluffy consistency that defines Huggi.
Cooking Instructions
Let’s dive into the step-by-step process to create the perfect Huggi. Following these instructions will ensure every bite is flavorful and authentic.
Cooking the Lentils and Grains
- Measure and rinse the rice and toor dal under cold water until the water runs clear. This removes excess starch and impurities.
- Soak the rice and dal mixture in water for 20–30 minutes. Soaking softens the grains to create a fluffy texture after cooking.
- In a heavy-bottomed pot or pressure cooker, add the soaked rice and dal along with 3 cups of water.
- Cook over medium heat:
- If using a pot, bring to a boil, then reduce heat to low, cover, and simmer for 20-25 minutes, stirring occasionally to prevent sticking.
- If using a pressure cooker, cook for 3-4 whistles on medium heat.
- Once cooked, the mixture should be thick but soft. Use a spoon to fluff gently and set aside.
| Ingredient | Quantity | Notes |
|---|---|---|
| Rice | 1 cup | Washed and soaked |
| Toor dal | 1/2 cup | Washed and soaked |
| Water | 3 cups | For cooking |
Preparing the Tempering
- Heat 2 tablespoons of ghee or oil in a frying pan over medium heat.
- Add the following spices and ingredients in order:
- 1 teaspoon mustard seeds: Allow them to pop, releasing their aroma.
- 1 teaspoon cumin seeds: Toast until fragrant.
- A pinch of asafoetida (hing): For digestive and flavor enhancement.
- 1 tablespoon chana dal: Fry until golden brown for nutty flavor.
- 2 chopped green chilies: Adjust based on your spice preference.
- 10-12 curry leaves: Add freshness and distinct aroma.
- (Optional) Cashew nuts: Fry until golden for richness.
- Stir continuously to avoid burning and ensure even cooking of spices.
“The tempering is the heart of Huggi, infusing the dish with its signature aroma and taste.“
Combining Ingredients
- Slowly pour the hot tempering over the cooked rice and dal mixture.
- Add 1/2 cup freshly grated coconut, mixing gently to combine.
- Season with salt to taste. Start with 1 teaspoon and adjust as needed.
- Optionally, stir in finely grated carrots or peas for added texture and nutrition.
- Cover and let the Huggi rest for 5 minutes. This allows the flavors to meld perfectly.
- Fluff the Huggi once more before serving.
By following these techniques, we bring together all elements for a satisfying and authentic Huggi Recipe that highlights South Indian culinary tradition.
Serving Suggestions
Huggi is best enjoyed fresh and warm. To elevate this wholesome South Indian dish, we recommend pairing it with classic sides and thoughtful garnishes that complement its texture and flavors perfectly.
Traditional Accompaniments
Pairing Huggi with these time-honored accompaniments enhances the overall meal experience:
- Spiced Coconut Chutney: The creamy texture and mild spice of coconut chutney balance the earthiness of Huggi.
- Sambar: A flavorful lentil and vegetable stew adds a tangy and spicy dimension.
- Pickled Mango or Lemon Pickle: Adds a punch of tartness and spice, perfect to contrast the mildness of Huggi.
- Plain Yogurt or Curd: The cooling effect of yogurt rounds out the spices and adds creaminess.
- Papad or Appalam: Crispy savory crackers provide a satisfying crunch to the soft Huggi.
| Accompaniment Type | Flavor Profile | Purpose in Dish |
|---|---|---|
| Spiced Coconut Chutney | Creamy, Mild Spice | Balances earthiness |
| Sambar | Tangy, Spicy | Adds vibrant depth |
| Pickled Mango/Lemon Pickle | Tart, Spicy | Provides contrast |
| Plain Yogurt or Curd | Cool, Creamy | Soothes palate |
| Papad/Appalam | Crispy, Savory | Adds textural contrast |
Garnishing Ideas
To finish Huggi with a pop of color and flavor, consider these garnishing options:
- Fresh Coriander Leaves: Adds a bright herbal note and visual freshness.
- Grated Fresh Coconut: Enhances texture and adds subtle sweetness.
- Roasted Cashew Nuts: Provides richness and a delightful crunch.
- A Dash of Ghee: Brings a shiny, glossy finish and buttery flavor.
- Sautéed Mustard Seeds and Curry Leaves: Intensifies aroma and adds a traditional touch.
“A sprinkle of fresh herbs and nuts transforms a comforting bowl of Huggi into a feast for all senses.”
By combining these accompaniments and garnishes, we bring out the true essence of Huggi — a balanced dish rich in flavor, texture, and cultural heritage.
Tips and Variations
When preparing our Huggi Recipe, small tweaks can make a world of difference. We can customize this traditional dish to suit various dietary needs and elevate its flavors with simple yet effective adjustments.
Dietary Modifications
To accommodate different dietary preferences and restrictions while retaining the essence of Huggi, consider the following modifications:
| Dietary Need | Modification | Notes |
|---|---|---|
| Gluten-Free | Use naturally gluten-free rice and lentils | Traditional Huggi is naturally gluten-free |
| Vegan | Substitute ghee with coconut oil or vegetable oil | Keeps the dish plant-based without sacrificing richness |
| Low-Fat | Reduce or omit oil/ghee for tempering | Use non-stick cookware to avoid sticking |
| High-Protein | Add cooked chickpeas or moong dal | Boosts protein content naturally |
| Low-Carb | Replace part of rice with cauliflower rice | Adjust soaking and cooking times accordingly |
We also recommend soaking the rice and lentils a bit longer for better digestibility, especially important for sensitive stomachs. Using fresh coconut enriches the taste and nutrition, but dried coconut flakes can be a substitute in a pinch.
Flavor Enhancements
To intensify the authentic taste of Huggi, these flavor boosters work wonders:
- Spice it up: Increase the amount of green chilies or add a pinch of red chili powder during tempering for a bold heat kick.
- Nutty goodness: Toast cashew nuts or peanuts separately and sprinkle on top before serving for added crunch and aroma.
- Herb infusion: Mix in freshly chopped coriander or mint leaves at the final stage to brighten the dish.
- Tangy twist: A squeeze of fresh lemon juice just before serving adds a refreshing citrus note.
- Aromatic tempering: Incorporate a small piece of cinnamon stick or a few cloves while sautéing mustard seeds and cumin for a subtle warm spice undertone.
“Enhancing the flavors carefully preserves the heart of Huggi while making it uniquely ours.”
Applying any combination of these tips ensures our Huggi Recipe stays versatile and enticing every time we make it.
Make-Ahead and Storage Instructions
To enjoy Huggi at your convenience, mastering the make-ahead and storage techniques is essential. This will help us preserve the distinctive flavors and texture of this traditional comfort food.
Make-Ahead Tips
- Prepare the cooked rice and toor dal mixture in advance and store it in an airtight container in the refrigerator for up to 24 hours.
- Keep the tempering (tadka) separate to maintain its crisp texture. Reheat and add it just before serving to retain the aromatic spices.
- If you prefer, soak the rice and dal the night before to speed up the cooking process on busy days.
Storing Huggi
Proper storage ensures that Huggi stays fresh and flavorful. Follow these guidelines:
| Storage Method | Duration | Notes |
|---|---|---|
| Refrigeration | Up to 2 days | Store in an airtight container. Reheat gently. |
| Freezing | Up to 1 month | Freeze in portioned containers. Thaw overnight in the fridge. |
| Tempering Storage | Up to 2 days in the fridge | Store separately in a small airtight container. |
Reheating Instructions
To reheat Huggi without compromising its texture:
- Place the refrigerated or thawed Huggi in a saucepan.
- Add a splash of water or ghee to prevent drying out.
- Warm over low heat, stirring gently until heated through.
- Add the freshly prepared tempering just before serving to revive the authentic flavor.
“Always avoid reheating Huggi multiple times to maintain its delicate texture and freshness.”
Additional Storage Notes
- Avoid freezing the tempering; it loses its crispness and aroma.
- If preparing Huggi for meal prep, divide into single-serving portions for easy reheating.
- For longer storage, freezing is the best option, but consume within a month to enjoy optimal taste.
By following these make-ahead and storage instructions, we can savor the comforting flavors of Huggi anytime while keeping its traditional essence intact.
Conclusion
Huggi is more than just a meal—it’s a comforting tradition that brings warmth to any table. With its simple ingredients and straightforward preparation, it’s a dish that fits perfectly into our busy lives without sacrificing flavor or nutrition.
By experimenting with the suggested variations and accompaniments, we can make Huggi truly our own while honoring its rich South Indian roots. Whether enjoyed fresh or prepared ahead, this recipe offers a versatile and satisfying option for any occasion.
Let’s embrace Huggi as a delicious way to connect with culture and create memorable meals that nourish both body and soul.
Frequently Asked Questions
What is Huggi, and where does it originate from?
Huggi is a traditional South Indian comfort food made from rice and lentils combined into a nutritious one-pot dish. It is popular for its simple preparation and rich cultural history, often enjoyed during family meals and busy weeknights.
What are the main ingredients needed to make Huggi?
The main ingredients include rice, toor dal (split pigeon peas), water, fresh grated coconut, and essential spices like mustard seeds, cumin seeds, green chilies, and curry leaves. Optional additives like chana dal, asafoetida, ghee, grated vegetables, and cashew nuts can enhance flavor and texture.
What kitchen equipment is required to prepare Huggi?
You’ll need a heavy-bottomed pot or pressure cooker for cooking rice and dal, a frying pan for tempering spices, and measuring cups. Optional tools include a mortar and pestle for grinding spices and a serving bowl for presentation.
Why is soaking rice and dal important in the Huggi recipe?
Soaking rice and dal enhances digestibility and improves the texture by making them softer. This step ensures the final Huggi dish has a fluffy, well-cooked consistency.
How is tempering used in Huggi preparation?
Tempering involves sautéing spices like mustard seeds, cumin seeds, curry leaves, and green chilies in ghee or oil. This process infuses the dish with rich flavors and is mixed into the cooked rice and dal to complete the dish.
What are some traditional accompaniments for serving Huggi?
Huggi is typically served with spiced coconut chutney, sambar, pickled mango or lemon, plain yogurt, and crispy papad. These sides complement Huggi’s flavors and enrich the meal.
Can Huggi be customized for dietary preferences?
Yes, Huggi can be tailored to be gluten-free, vegan, low-fat, high-protein, or low-carb by adjusting ingredients and cooking methods. Flavor can also be intensified by adding more spices, fresh herbs, or toasted nuts during preparation.
How should I store and reheat leftover Huggi?
Store Huggi in an airtight container in the refrigerator for up to two days or freeze for up to one month. Keep the tempering separate to maintain crispness. Reheat gently on the stove or microwave, adding a little water if needed to retain moisture.
Is Huggi suitable for people new to South Indian cuisine?
Absolutely! Huggi’s simple recipe and mild flavors make it an excellent introduction to South Indian food, perfect for beginners eager to explore traditional dishes with ease.
What garnishes can enhance the flavor and presentation of Huggi?
Fresh coriander leaves, grated coconut, roasted cashew nuts, a drizzle of ghee, and sautéed mustard seeds with curry leaves make wonderful garnishes that boost both taste and visual appeal.