
Chicken tenders are a classic comfort food that never goes out of style. Houston’s Chicken Tenders put a flavorful twist on this beloved dish with a crispy coating and juicy, tender meat inside. Whether you’re craving a quick weeknight dinner or a crowd-pleasing appetizer, this recipe delivers on taste and texture every time.
Ingredients
To achieve Houston’s Chicken Tenders signature crispy exterior and juicy interior, we carefully select ingredients that balance flavor and texture. Below are the exact components required for the chicken, breading, and dipping sauce.
For the Chicken Tenders
- 1 ½ pounds chicken tenders, trimmed and patted dry
- 1 cup buttermilk (for marinating)
- 1 teaspoon garlic powder
- 1 teaspoon onion powder
- 1 teaspoon smoked paprika
- ½ teaspoon salt
- ½ teaspoon black pepper
For the Breading
- 1 ½ cups all-purpose flour
- 1 cup panko breadcrumbs (for extra crunch)
- 1 tablespoon cornstarch (helps crispiness)
- 2 teaspoons paprika
- 1 teaspoon cayenne pepper (adjust for heat preference)
- 1 teaspoon garlic powder
- 1 teaspoon onion powder
- 1 teaspoon salt
- ½ teaspoon black pepper
For the Dipping Sauce
- ½ cup mayonnaise
- 2 tablespoons ketchup
- 1 tablespoon honey
- 1 tablespoon yellow mustard
- 1 teaspoon apple cider vinegar
- ½ teaspoon smoked paprika
- Pinch of cayenne pepper (optional for kick)
| Ingredient Group | Key Ingredients & Notes |
|---|---|
| Chicken Tenders | Fresh tenders, marinated in flavorful buttermilk mixture |
| Breading | Combination of flour, panko, spices, and cornstarch for ultimate crunch |
| Dipping Sauce | Blend of creamy mayo, tangy mustard, sweet honey, and smoky spices |
By layering spices both in the marinade and breading, we create layers of bold flavor that define Houston’s Chicken Tenders. The dipping sauce complements perfectly with a balance of sweet and tangy notes.
Equipment Needed
To make Houston’s Chicken Tenders with that perfect crispy exterior and juicy interior, we need precise tools. Using the right equipment ensures even cooking and consistent results every time. Here is a list and description of the essential kitchen tools:
| Equipment | Purpose |
|---|---|
| Mixing Bowls | For marinating chicken and combining breading ingredients. |
| Whisk | To blend marinade and dipping sauce components smoothly. |
| Measuring Cups & Spoons | To measure spices, liquids, and dry ingredients accurately. |
| Tongs | To handle chicken pieces safely during breading and frying. |
| Wire Rack | To drain excess oil and keep tenders crispy after frying. |
| Large Skillet or Deep Fryer | For frying tenders to golden perfection. Use a heavy-bottomed skillet or a thermometer-controlled deep fryer for temperature accuracy. |
| Cooking Thermometer | To maintain oil temperature between 350°F and 375°F for optimal crispiness and inside juiciness. |
| Paper Towels | For blotting the fried tenders and reducing excess oil. |
| Baking Sheet | To hold the tenders before and after frying, often lined with parchment or foil. |
Pro Tip: Using a wire rack on a baking sheet keeps our chicken tenders crisp by letting air circulate around them instead of trapping steam.
By having these tools ready and well organized, we’ll execute the recipe smoothly and achieve that signature Houston’s Chicken Tenders experience every time.
Prep Work
Getting our Houston’s Chicken Tenders ready for cooking starts with precise prep work. We focus on preparing the chicken perfectly and organizing our breading station for a seamless breading process.
Preparing the Chicken
To ensure our chicken tenders are juicy and flavor-packed, we begin by:
- Trimming any excess fat or connective tissue from the chicken tenders.
- Marinating the tenders in cold buttermilk mixed with the marinade spices (paprika, garlic powder, onion powder, salt, and pepper) for at least 30 minutes or up to 4 hours. This step tenderizes the meat and infuses it with bold flavor.
- After marinating, we drain the tenders well but keep them moist for optimal breading adhesion.
Setting Up the Breading Station
An efficient station helps us create the signature crispy crust. We arrange three shallow dishes as follows:
| Dish Position | Contents | Purpose |
|---|---|---|
| 1st Dish | All-purpose flour seasoned with salt, pepper, and cayenne | Initial coating to dry surface |
| 2nd Dish | Beaten eggs (or egg and a splash of water) | Helps breadcrumbs stick |
| 3rd Dish | Panko breadcrumbs mixed with paprika and a pinch of salt | Final crunchy crust |
We use tongs to move tenders through each station without contaminating ingredients. This setup guarantees an even, flavorful coating that fries to golden perfection every time.
Instructions
Follow these detailed steps to achieve perfectly Houston’s Chicken Tenders with a crispy golden crust and juicy interior. Precision in breading and frying sets the foundation for the best flavor and texture.
Breading the Chicken Tenders
- Remove the marinated chicken tenders from the refrigerator. Let any excess buttermilk drip off gently to avoid soggy coating.
- Set up your breading station with three shallow dishes in this order:
- Dish 1: Seasoned flour (flour mixed with salt, pepper, paprika, garlic powder, and cayenne).
- Dish 2: Beaten eggs lightly whisked for even coating.
- Dish 3: Panko breadcrumbs combined with a pinch of the same spices used in the flour for an extra flavor boost.
- Take each chicken tender and:
- Dredge thoroughly in the seasoned flour, pressing lightly to adhere.
- Dip into the beaten eggs, coating the tender completely for the breadcrumb layer to stick.
- Roll in the seasoned panko breadcrumbs, pressing firmly to ensure an even and thick crust.
- Place each breaded tender on a wire rack. This prevents the coating from becoming soggy while you prepare the rest.
Frying the Chicken Tenders
- Heat oil in a large skillet or deep fryer to 350°F (175°C). Use a thermometer for precise temperature control; this keeps the coating crispy without absorbing excess oil.
- Carefully add the breaded tenders in batches to avoid overcrowding. Overcrowding drops the oil temperature and results in greasy tenders.
- Fry each batch for 3 to 4 minutes per side, turning with tongs once golden brown. Look for a deep golden color and an internal temperature of 165°F (74°C) for perfectly cooked chicken.
- Using tongs, remove tenders and place them on a wire rack set over a baking sheet lined with paper towels. This setup drains excess oil and maintains crispness.
- Repeat until all tenders are fried. Let them rest for a couple of minutes before serving alongside the honey-ketchup dipping sauce.
| Step | Details | Temperature & Time |
|---|---|---|
| Oil Heat | Heat oil in skillet/deep fryer | 350°F (175°C) |
| Frying Time | Fry tenders per batch | 3-4 minutes per side |
| Internal Temperature Goal | Check with cooking thermometer | 165°F (74°C) |
| Draining Method | Use wire rack and paper towels | Immediate after frying |
Pro Tip: Always keep your oil between 350°F and 360°F when frying each batch to keep that perfect golden crunch while ensuring the tenders cook evenly through.
Directions for Making the Dipping Sauce
To complement our Houston’s Chicken Tenders, the dipping sauce must balance sweet, tangy, and creamy flavors perfectly. Follow these detailed steps to create the ideal sauce that enhances every bite.
- Gather the Ingredients
We need the following ingredients measured precisely for the best flavor balance:
| Ingredient | Quantity | Notes |
|---|---|---|
| Mayonnaise | 1/2 cup | Use full-fat for creaminess |
| Ketchup | 1/4 cup | Provides tang and subtle sweetness |
| Honey | 2 tablespoons | Adds natural sweetness |
| Apple cider vinegar | 1 tablespoon | Brightens the sauce with acidity |
| Garlic powder | 1/2 teaspoon | Adds subtle savory depth |
| Smoked paprika | 1/2 teaspoon | Brings mild smokiness and warmth |
| Ground black pepper | 1/4 teaspoon | Enhances overall complexity |
| Salt | 1/4 teaspoon | Balances flavors |
- Combine the Ingredients
In a medium mixing bowl:
- Add the mayonnaise, ketchup, and honey first.
- Whisk these ingredients together until fully blended and smooth.
- Next, stir in the apple cider vinegar, garlic powder, smoked paprika, black pepper, and salt.
- Continue whisking until the sauce is uniform in color and texture.
- Adjust for Flavor
Taste the sauce and adjust seasoning if needed. If you prefer it sweeter, add an extra 1 teaspoon of honey. For more tang, increase apple cider vinegar by 1/2 teaspoon increments.
- Chill Before Serving
Cover the bowl with plastic wrap and refrigerate the sauce for at least 30 minutes to allow the flavors to meld. This step enhances the boldness and depth of the dipping sauce.
“The key to our Houston’s Chicken Tenders recipe is pairing that crispy tender exterior with a sauce that hits every note of sweet, tangy, and spicy.”
- Serve
Transfer the dipping sauce to a small serving bowl. Place it alongside the freshly fried chicken tenders on a platter to enjoy immediately.
By following these steps precisely, we achieve a dipping sauce that is creamy yet zesty, elevating our Houston’s Chicken Tenders to restaurant-quality perfection every time.
Serving Suggestions
To maximize the enjoyment of our Houston’s Chicken Tenders, we recommend a variety of serving options that perfectly complement their crispy texture and bold flavors.
- Classic Pairings
Serve the chicken tenders alongside crispy golden fries or waffle fries for a traditional comfort food experience. Adding a fresh coleslaw or crunchy pickle slices balances the richness and adds a refreshing contrast.
- Dipping Sauce Presentation
Present the signature dipping sauce in individual ramekins or a large shared bowl. This allows everyone to indulge in the perfect balance of sweet, tangy, and creamy flavors that elevate the tenders. Garnish the sauce with a sprinkle of smoked paprika or finely chopped fresh herbs like parsley for added color and aroma.
- Creative Side Suggestions
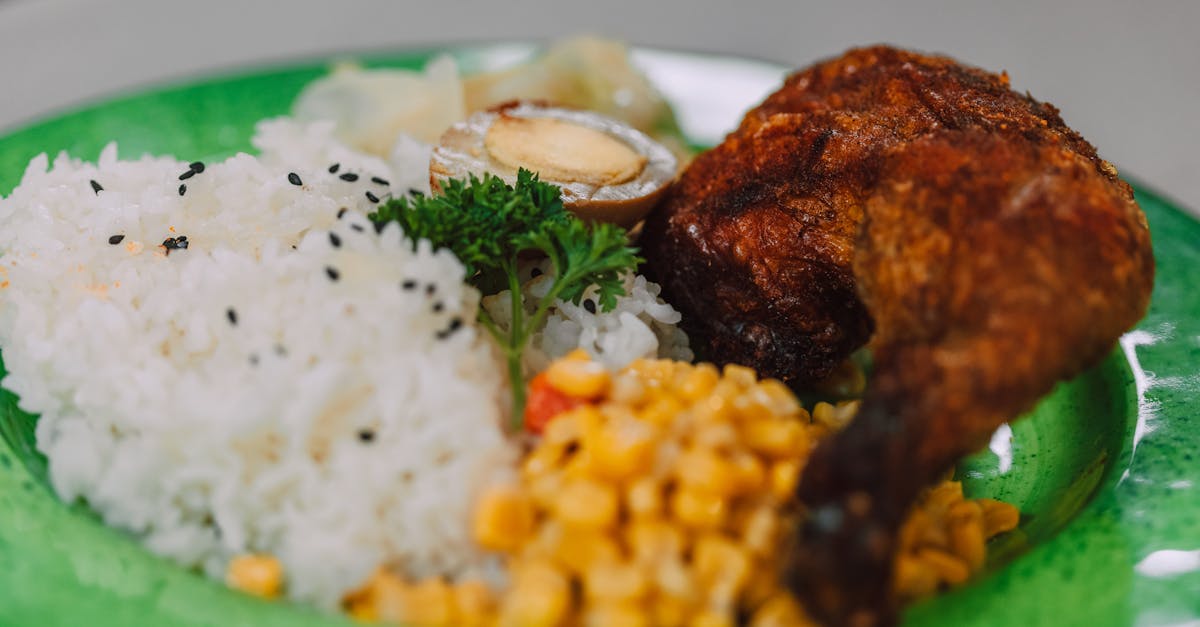
- Sweet Potato Fries: Their natural sweetness pairs well with the mildly spicy coating of the tenders.
- Corn on the Cob: Lightly buttered with a sprinkle of chili powder to echo the tenders’ seasoning.
- Macaroni and Cheese: Offers a creamy, indulgent contrast to the crisp chicken.
- Plating for Sharing
For gatherings, arrange the tenders on a large platter over a wire rack to keep them crisp. Add small bowls of assorted dipping sauces—honey mustard, spicy ranch, or barbecue—to provide variety and cater to different tastes.
- Garnishing Ideas
Fresh lemon wedges on the side add a zesty brightness when squeezed over the tenders, cutting through the richness and enhancing all flavors. Fresh herbs such as chopped cilantro or parsley also add visual appeal and a hint of freshness.
Serving Suggestions Table
| Serving Style | Accompaniments | Flavor Contrast | Presentation Tips |
|---|---|---|---|
| Classic Comfort | French fries, coleslaw, pickle slices | Crunchy and creamy | Individual ramekins for sauce |
| Sweet & Spicy Combo | Sweet potato fries, corn on the cob | Sweet and smoky | Garnish sauce with smoked paprika |
| Indulgent Pairing | Macaroni and cheese | Creamy and crispy | Use wire rack on platter |
| Party Platter | Assorted dipping sauces | Variety of flavors | Arrange tenders in neat rows |
| Fresh & Zesty | Lemon wedges, fresh herbs | Bright and fresh | Sprinkle herbs on tenders |
Pro Tip: Keep the tenders warm and crispy by placing them on a wire rack inside a low oven (around 200°F / 93°C) if serving a large group or preparing them in batches.
Utilizing these serving suggestions will turn our Houston’s Chicken Tenders into a versatile dish that excels whether at a casual family dinner or an impressive appetizer for entertaining friends.
Make-Ahead Tips
Preparing Houston’s Chicken Tenders in advance can save valuable time while maintaining their signature crispy texture and juicy interior. Here are our expert tips for making the process efficient without compromising quality.
Marinate Ahead
- Marinate the chicken tenders in the spiced buttermilk mixture for up to 24 hours in the refrigerator. This extended marination deeply infuses flavor while ensuring the meat stays tender and moist.
- For best results, cover the bowl tightly with plastic wrap or use a sealed container to prevent odor absorption and maintain freshness.
Breading Station Setup
- Assemble the breading station as usual but bread the tenders right before frying to prevent the coating from becoming soggy.
- Alternatively, you can bread the tenders, place them on a parchment-lined baking sheet, and refrigerate for up to 4 hours. Lightly cover with plastic wrap to preserve the crunch but avoid sealing too tightly.
Frying and Storage
- If frying in advance, cook the tenders as specified and drain on a wire rack.
- Reheat tenders in a preheated oven at 375°F (190°C) for 8 to 10 minutes to restore crispiness without drying out the meat.
- Avoid microwave reheating as it causes sogginess and loss of texture.
Dipping Sauce Preparation
- Prepare the dipping sauce up to 3 days ahead. Store it in an airtight container in the fridge to allow flavors to meld and intensify.
- Stir well before serving to recombine ingredients.
| Make-Ahead Step | Timeframe | Storage Method | Notes |
|---|---|---|---|
| Marinate chicken tenders | Up to 24 hours | Covered bowl or sealed container | Enhances tenderness and flavor |
| Breaded tenders | Up to 4 hours | Wrapped loosely in plastic wrap | Prevents sogginess |
| Fried tenders | Up to 24 hours | Wire rack, then airtight container | Reheat in oven for crispiness |
| Dipping sauce | Up to 3 days | Airtight container in fridge | Flavors intensify when chilled |
Pro Tip: To keep your fried tenders as crispy as freshly made, always rest them on a wire rack rather than paper towels. This lets excess oil drain and air circulate, preserving that irresistible crunch during both short-term holding and reheating.
With these make-ahead tips, we can confidently prepare Houston’s Chicken Tenders for busy days or entertaining without sacrificing the quality that makes this recipe a standout comfort food favorite.
Conclusion
Houston’s Chicken Tenders bring together crispy texture and bold flavors that make every bite satisfying. With a simple yet precise method, we can recreate this beloved comfort food right at home. The combination of marinated chicken, seasoned breading, and a perfectly balanced dipping sauce ensures a dish that’s both delicious and versatile.
Whether we’re preparing a quick dinner or entertaining friends, these tenders deliver consistent results that everyone will enjoy. Taking the time to follow the steps and use the right tools makes all the difference in achieving that restaurant-quality finish. Let’s get cooking and savor every crispy, juicy bite!
Frequently Asked Questions
What makes Houston’s Chicken Tenders unique?
Houston’s Chicken Tenders stand out due to their crispy, crunchy breading layered with bold spices and juicy, tender meat marinated in buttermilk. The accompanying sweet and tangy dipping sauce enhances the overall flavor.
How do I achieve the perfect crispy coating on chicken tenders?
Use a three-step breading process: dredge in seasoned flour, dip in beaten eggs, then coat with spiced panko breadcrumbs. Maintain oil temperature at 350°F (175°C) and fry until golden brown.
What ingredients are essential for the dipping sauce?
The dipping sauce combines mayonnaise, ketchup, honey, apple cider vinegar, garlic powder, smoked paprika, black pepper, and salt for a balanced sweet, tangy, and creamy flavor.
Can I prepare the chicken tenders in advance?
Yes. You can marinate the chicken for up to 24 hours, prep the breading station early, and fry the tenders ahead of time. The dipping sauce can be made up to three days prior.
What equipment is needed to make Houston’s Chicken Tenders?
Essential tools include mixing bowls, a whisk, measuring cups and spoons, tongs, a wire rack, a large skillet or deep fryer, a cooking thermometer, and paper towels.
How do I keep the chicken tenders crispy after frying?
Place the fried tenders on a wire rack set over a baking sheet to drain excess oil and allow air circulation. Keep them warm in a low oven if serving later.
What are some good sides to serve with Houston’s Chicken Tenders?
Classic sides include crispy fries and coleslaw. Creative options are sweet potato fries and macaroni and cheese, which complement the tenders well.
What temperature should the chicken tenders be cooked to?
Cook the tenders until they reach an internal temperature of 165°F (74°C) to ensure they are safe to eat and juicy inside.
How long should the chicken be fried?
Fry each batch for 3 to 4 minutes per side, or until the breading is golden brown and the chicken is thoroughly cooked.