
Houston’s Chicken Fingers have earned a special place in the hearts of comfort food lovers everywhere. Known for their crispy golden crust and juicy, tender inside these chicken fingers bring a perfect balance of flavor and texture that keeps us coming back for more. Whether you’re craving a quick snack or a satisfying meal they deliver every time.
What sets Houston’s Chicken Fingers apart is their unique seasoning blend and the secret to that irresistible crunch. We’re excited to share a recipe that captures the authentic taste right in your own kitchen. Get ready to enjoy a classic favorite that’s easy to make and sure to impress family and friends alike.
Ingredients
To recreate Houston’s Chicken Fingers at home, we need the right ingredients that contribute to their crispy texture and flavor-packed seasoning. Below we break down the essential components for the chicken, breading, and dipping sauce.
For the Chicken Fingers
- 2 pounds chicken tenders or boneless, skinless chicken breasts cut into strips
- 1 cup buttermilk (for tenderizing and flavor)
- 1 teaspoon garlic powder
- 1 teaspoon smoked paprika
- 1 teaspoon salt
- 1/2 teaspoon black pepper
For the Breading
- 1 1/2 cups all-purpose flour
- 1/2 cup cornstarch (helps achieve extra crispiness)
- 1 tablespoon garlic powder
- 1 tablespoon onion powder
- 2 teaspoons smoked paprika
- 1 teaspoon cayenne pepper (adjust to heat preference)
- 1 teaspoon salt
- 1/2 teaspoon black pepper
- Vegetable oil for frying (enough for 2–3 inches in the pan)
For the Dipping Sauce
| Ingredient | Quantity | Notes |
|---|---|---|
| Mayonnaise | 1/2 cup | Creamy base |
| Ketchup | 2 tablespoons | Adds sweetness and color |
| Honey | 1 tablespoon | Balances tanginess with sweetness |
| Garlic powder | 1/2 teaspoon | Boosts savory flavor |
| Paprika | 1/2 teaspoon | Adds subtle smoky aroma |
| Hot sauce | 1 teaspoon | Optional for a spicy kick |
This trio of components ensures every bite of our Houston’s Chicken Fingers offers the perfect mix of crispy coating, juicy chicken, and a flavorful dipping experience.
Tools and Equipment
To make Houston’s Chicken Fingers perfectly crispy and flavorful, having the right Tools and Equipment is essential. Below we list the must-have kitchen items to execute the recipe with precision and ease.
Essential Tools for Preparation
- Mixing bowls (at least two): One for the buttermilk marinade and another for the flour and spice breading.
- Whisk: To blend the marinade ingredients evenly.
- Tongs: For safely handling and flipping the chicken fingers during breading and frying.
- Measuring spoons and cups: Accurate measurements ensure consistency in seasoning and batter.
Equipment for Cooking
- Deep fryer or heavy-bottomed skillet: We recommend a deep fryer set to 350°F for consistent frying results. If using a skillet, maintain oil temperature precisely with a thermometer for even cooking.
- Cooking thermometer: To measure oil temperature and confirm chicken internal temperature hits 165°F for safe consumption.
- Cooling rack with a baking sheet: To drain excess oil and keep the chicken fingers crispy without sogginess.
- Paper towels: For initial oil absorption when removing chicken from the frying oil.
Optional Tools for Serving
- Serving platter: Present the chicken fingers attractively for guests.
- Dipping bowls: Individual bowls for the signature Houston dipping sauce enhance presentation and convenience.
| Tool/Equipment | Purpose | Notes |
|---|---|---|
| Mixing Bowls | Marinate chicken and prepare breading | Use two separate bowls |
| Whisk | Blend marinade ingredients | Ensures even seasoning |
| Tongs | Handle chicken safely | Prevent breading mess on hands |
| Measuring Spoons & Cups | Precise measurements | Consistency in flavor |
| Deep Fryer or Heavy Skillet | Fry chicken fingers to golden crisp | Maintain 350°F oil temperature |
| Cooking Thermometer | Monitor oil & internal chicken temp | Food safety and proper cooking |
| Cooling Rack & Baking Sheet | Drain oil and keep chicken crispy | Avoid soggy texture |
| Paper Towels | Absorb excess oil | Before cooling |
| Serving Platter & Dipping Bowls | Serve chicken and sauce attractively | Optional but enhances experience |
Using these proper tools and equipment ensures that our Houston’s Chicken Fingers come out every bit as delicious, crispy, and juicy as the originals from the restaurant. Let’s prepare our kitchen for success with these essentials.
Prep Work
Before we dive into cooking, setting up our Houston’s Chicken Fingers recipe correctly is essential. This step ensures every bite is crispy, flavorful, and perfectly seasoned.
Preparing the Chicken
First, let’s prep the chicken to lock in moisture and infuse flavor. Use chicken tenders or boneless skinless chicken breasts cut into uniform strips about 3 to 4 inches long for even cooking.
Next, marinate the chicken in a buttermilk mixture seasoned with:
- 1 cup buttermilk
- 1 teaspoon garlic powder
- 1 teaspoon smoked paprika
- 1 teaspoon salt
- ½ teaspoon black pepper
This marinade tenderizes the chicken and blends the signature smoky aroma we love. Cover and refrigerate for at least 1 hour, ideally overnight, to maximize juiciness and seasoning absorption.
Mixing the Breading and Sauce
While the chicken marinates, let’s prepare the breading and signature dipping sauce that define Houston’s Chicken Fingers.
Breading Mix
Combine these dry ingredients in a shallow bowl:
| Ingredient | Measurement |
|---|---|
| All-purpose flour | 1 ½ cups |
| Cornstarch | ½ cup |
| Garlic powder | 1 ½ teaspoons |
| Onion powder | 1 teaspoon |
| Smoked paprika | 1 teaspoon |
| Cayenne pepper | ¼ teaspoon (optional for heat) |
| Salt | 1 teaspoon |
| Black pepper | ½ teaspoon |
Whisk these thoroughly to create a balanced spice blend that delivers that crispy, flavorful coating.
Dipping Sauce
For our classic dipping sauce, mix in a small bowl:
- ½ cup mayonnaise
- 2 tablespoons ketchup
- 1 tablespoon honey
- ½ teaspoon garlic powder
- ½ teaspoon smoked paprika
- A few dashes of hot sauce (optional for a kick)
This sauce complements the chicken fingers with the perfect balance of sweetness, tanginess, and smoky spice.
Cooking Instructions
Follow these steps carefully to achieve crispy and juicy Houston’s Chicken Fingers that rival the original. Precision and timing are key for the best results.
Breading the Chicken Fingers
- Remove the chicken tenders from the marinade, allowing excess buttermilk to drip off. This prevents soggy breading.
- Place the prepared breading mix in a shallow dish or large plate.
- Dredge each chicken strip thoroughly in the breading mix.
- Press gently to ensure the coating adheres evenly and covers the chicken completely.
- Set the breaded chicken fingers on a wired cooling rack.
- Let them rest for 10 minutes to allow the breading to set, which improves crispiness during frying.
Frying to Perfection
- Heat vegetable oil in a deep fryer or heavy-bottomed skillet to a steady 350°F (175°C). Use a cooking thermometer to maintain accuracy.
- Carefully lower a few breaded chicken fingers into the hot oil.
- Avoid overcrowding the pan to keep the temperature steady.
- Fry for 4 to 5 minutes per batch, turning occasionally until the chicken fingers are a golden brown with a crispy crust.
- Use tongs to transfer cooked chicken fingers to a cooling rack set over a baking sheet.
- This prevents them from sitting in excess oil and keeps the crust crisp.
- Let the chicken rest for 2 to 3 minutes before serving to lock in juices.
| Step | Temperature | Time | Key Tips |
|---|---|---|---|
| Heat oil | 350°F (175°C) | – | Use thermometer to maintain |
| Fry chicken | 350°F (175°C) | 4-5 minutes | Do not overcrowd the fryer |
| Drain & rest | Room temperature | 2-3 minutes | Use wire rack over baking sheet |
Serving Suggestions
To elevate our Houston’s Chicken Fingers experience, pairing them with the right sides and attention to presentation truly enhances every bite. Let’s explore how to serve this iconic dish with flair and flavor.
Recommended Sides
We suggest complementing the crispy and juicy chicken fingers with sides that balance texture and flavor. Here are our top picks:
- Crispy French Fries: Classic and golden, perfectly salted to contrast the savory chicken.
- Coleslaw: A cool and tangy companion that adds crunch and refreshes the palate.
- Macaroni and Cheese: Rich and creamy for comfort pairing.
- Cornbread Muffins: Slightly sweet to play off the savory spices.
- Pickle Spears: A sharp and acidic bite to cut through the richness.
| Side Dish | Flavor Profile | Texture | Why It Works |
|---|---|---|---|
| French Fries | Salty and crispy | Crunchy | Provides a satisfying crisp contrast |
| Coleslaw | Tangy and fresh | Crunchy/Creamy | Cleanses the palate and adds freshness |
| Macaroni and Cheese | Creamy and cheesy | Soft | Adds richness and balances spice |
| Cornbread Muffins | Sweet and moist | Soft | Mellow sweetness complements spices |
| Pickle Spears | Sharp and acidic | Crisp | Cuts through richness, balances flavors |
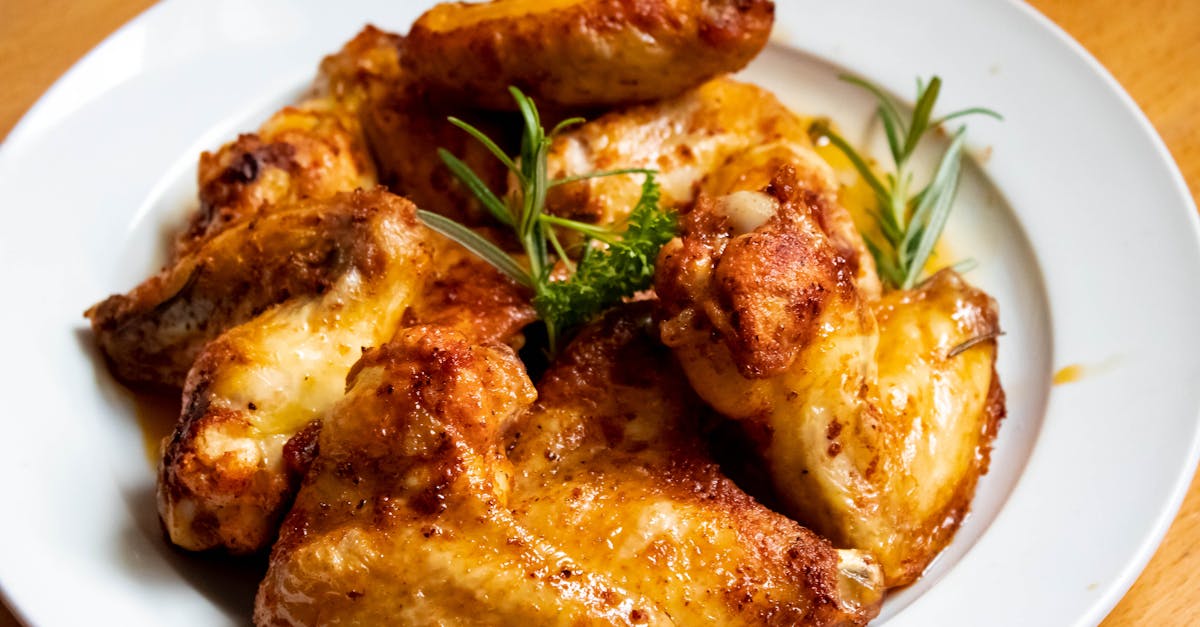
Presentation Tips
To create a memorable serving experience for our Houston’s Chicken Fingers, consider these tips:
- Use a rustic wooden board or platter to highlight the golden color of the chicken fingers visually.
- Arrange the chicken strips in a slightly overlapping row or in a circular pattern for inviting appeal.
- Serve the signature dipping sauce in small bowls placed strategically around the platter.
- Garnish with chopped fresh parsley or a sprinkle of smoked paprika for color contrast and aroma.
- Add small ramekins of recommended sides for an enticing buffet-style presentation.
- For casual gatherings, offer plenty of paper napkins or small plates to match the comfort food vibe.
By combining these sides and presentation ideas, we transform our homemade Houston’s Chicken Fingers into a dish that looks as irresistible as it tastes.
Make-Ahead Tips
To enjoy our Houston’s Chicken Fingers with minimal effort on the day of serving, we can prepare several components ahead of time. Proper advance preparation preserves the signature crispiness and juicy texture that make this dish so beloved.
Marinate the Chicken in Advance
For the most flavorful and tender results, marinate the chicken tenders overnight in the buttermilk mixture seasoned with garlic powder, smoked paprika, salt, and black pepper. This step:
- Locks in moisture
- Infuses the chicken with deep flavor
- Softens the meat for that perfect bite
Place the marinating chicken in an airtight container or cover the bowl tightly with plastic wrap, then refrigerate for at least 8 hours or up to 24 hours.
Prepare Breading Mix Ahead
To streamline the cooking process, we recommend mixing the breading ingredients ahead of time. Store the seasoned flour and cornstarch blend in an airtight container at room temperature for up to 3 days. This saves time when breading the chicken, allowing us to focus on frying to golden perfection.
Make the Dipping Sauce Ahead
The signature dipping sauce can be made up to 3 days in advance. Since the flavors meld beautifully over time, prepare the sauce and refrigerate it in a sealed jar or container. This also removes prep time on serving day while enhancing the tangy, sweet, and smoky notes.
Frying and Storage
If we want to prepare the chicken fingers fully before serving, fry them just as instructed—until golden and crispy at 350°F (175°C) for 4 to 5 minutes. Then:
- Drain excess oil on a rack lined with paper towels
- Cool completely at room temperature
Once cooled, place in an airtight container and refrigerate for up to 24 hours. Reheat in a preheated oven at 375°F (190°C) for 10 minutes to restore crispiness without drying out the chicken.
| Make-Ahead Step | Storage Duration | Storage Method | Reheating Instructions |
|---|---|---|---|
| Marinate Chicken | 8 to 24 hours | Airtight container, refrigerated | Proceed to bread and fry fresh |
| Breading Mix | Up to 3 days | Airtight container, room temp | Use directly for breading |
| Dipping Sauce | Up to 3 days | Sealed jar/container, refrigerated | Ready to serve cold |
| Cooked Chicken Fingers | Up to 24 hours | Airtight container, refrigerated | Oven at 375°F (190°C) for 10 minutes |
Helpful Quote
“Prepping Houston’s Chicken Fingers ahead saves time and amplifies flavor without sacrificing freshness or crunch.”
By following these make-ahead tips we can ensure our chicken fingers are as crispy and juicy as freshly made, with less stress and more time to enjoy with family and friends.
Conclusion
Recreating Houston’s Chicken Fingers at home lets us enjoy a crispy, flavorful comfort food anytime. With the right seasoning, marinating, and frying techniques, we can achieve that perfect balance of juicy interior and crunchy coating.
Taking a little extra time to prep and pair with tasty sides turns this simple dish into a memorable meal. Whether for a casual family dinner or entertaining friends, these chicken fingers never disappoint.
By following the recipe and tips, we’re set to bring a beloved Houston classic right to our own kitchen with confidence and ease.
Frequently Asked Questions
What makes Houston’s Chicken Fingers so popular?
Houston’s Chicken Fingers are loved for their crispy exterior and juicy interior, combined with a unique seasoning blend that delivers a distinct flavor and perfect texture.
What are the main ingredients needed to make Houston’s Chicken Fingers?
You’ll need chicken tenders or boneless, skinless breasts, buttermilk, garlic powder, smoked paprika, salt, pepper, flour, cornstarch, cayenne pepper, vegetable oil, and ingredients for the dipping sauce like mayonnaise, ketchup, and honey.
How long should I marinate the chicken?
Marinate the chicken for at least one hour, but overnight is best to lock in moisture and maximize flavor.
What’s the ideal frying temperature and time?
Fry the chicken fingers in oil heated to 350°F (175°C) for 4 to 5 minutes, until they’re golden brown and cooked through.
How can I keep the chicken fingers crispy after frying?
Place the cooked chicken on a wire cooling rack rather than paper towels to maintain crispiness and prevent sogginess.
What dipping sauce goes best with Houston’s Chicken Fingers?
A blend of mayonnaise, ketchup, honey, garlic powder, paprika, and optional hot sauce creates a sweet, tangy, and smoky dipping sauce that complements the chicken well.
Can I make the chicken fingers ahead of time?
Yes, marinate the chicken, prepare the breading mix, and make the dipping sauce in advance. Store cooked fingers properly and reheat carefully to keep them crispy.
What sides pair well with Houston’s Chicken Fingers?
Classic sides like crispy French fries, coleslaw, macaroni and cheese, cornbread muffins, and pickle spears balance flavors and textures perfectly.
What tools do I need to make Houston’s Chicken Fingers at home?
You’ll need mixing bowls, a whisk, tongs, measuring cups and spoons, a deep fryer or heavy skillet, a cooking thermometer, a wire rack with a baking sheet, and paper towels.
How do I ensure the breading sticks well to the chicken?
After marinating, dredge the chicken evenly in the breading mix and let it rest for 10 minutes before frying to help the coating set properly.