
Peppermints aren’t just a refreshing treat for us—they can also add a special twist to homemade horse treats. Incorporating peppermint into horse treats not only provides a delightful flavor but can also help freshen your horse’s breath and soothe their digestive system. It’s a simple way to show your horse some extra love with tasty, healthy snacks.
Ingredients
To create delicious horse treat recipes with peppermints, we need to gather a few essential ingredients. These will ensure our treats are both tasty and beneficial for our equine friends.
Basic Ingredients for Horse Treats
We start with simple wholesome staples that serve as the base for most horse treats:
- Rolled oats — 2 cups (provides texture and nutrition)
- Whole wheat flour — 1 cup (binds ingredients and adds fiber)
- Applesauce (unsweetened) — ½ cup (natural sweetness and moisture)
- Molasses — 2 tablespoons (adds flavor and acts as a binder)
- Water — ¼ cup, adjust for dough consistency
- Vegetable oil — 1 tablespoon (adds moisture and shine)
These ingredients create a firm dough ideal for shaping into bite-sized treats.
Peppermints and Flavor Variations
Peppermints are the star ingredient that offers freshness and soothing benefits. We use:
| Ingredient | Quantity | Notes |
|---|---|---|
| Crushed peppermint candies | ¼ cup | Use equine-safe peppermints, crushed finely for even distribution |
| Peppermint extract | 1 teaspoon | Enhances natural peppermint flavor without extra sugar |
To customize our treats, we can add:
- Carrots, finely grated — for natural sweetness and crunch
- Chopped fresh mint leaves — boost freshness and digestive aid properties
- Ground flaxseed — adds healthy omega-3s and texture
Incorporating these peppermint-based ingredients engages the horses’ senses with a refreshing, mildly sweet aroma while supporting digestive health and fresh breath.
Equipment Needed
To create delicious and nutritious horse treats with peppermints, having the right equipment ensures a smooth process and consistent results. Below are the essential tools to gather before beginning our recipe.
Mixing Tools
We rely on sturdy and efficient mixing tools to combine our ingredients evenly and prepare the perfect dough infused with peppermint flavor. Here’s what we need:
- Large Mixing Bowl: Preferably a wide, deep bowl made of glass or stainless steel for easy stirring and folding.
- Wooden Spoon or Silicone Spatula: For mixing the wet and dry ingredients thoroughly without damaging the peppermint candies.
- Measuring Cups and Spoons: Accurate measurements of oats, flour, molasses, and peppermint extract are crucial for consistency.
- Rolling Pin (optional): Helpful if we decide to roll out the dough for uniform thickness before cutting.
- Cookie Cutters: Fun shapes encourage engagement and make the treat-giving experience special for our horses.
| Tool | Purpose |
|---|---|
| Large Mixing Bowl | Holds all ingredients for mixing |
| Wooden Spoon | Combines ingredients without scraping |
| Measuring Cups/Spoons | Ensures accurate ingredient ratios |
| Rolling Pin | Flattens dough evenly (optional) |
| Cookie Cutters | Shapes treats attractively |
Storage Containers
Proper storage is vital to keep our peppermint horse treats fresh and flavorful, maintaining their quality for multiple feedings.
- Airtight Containers: Glass or BPA-free plastic containers with secure lids prevent moisture and air from degrading the treats.
- Resealable Bags: For portioning treats and easy access during outdoor activities or trail rides.
- Labeling Supplies: Use waterproof markers or labels to note the date of preparation to monitor freshness.
| Container Type | Best Use |
|---|---|
| Airtight Container | Long-term treat storage |
| Resealable Bag | Portable and single-use portions |
| Labels | Track treat freshness and content |
With these tools, we can confidently execute our horse treat recipes with peppermints to ensure both flavor and health benefits shine through every bite.
Prep Work
Before we begin crafting our horse treat recipes with peppermints, getting all ingredients and tools ready ensures a smooth process and consistent results. Let’s dive into the essential preparation steps to maximize flavor and maintain nutritional balance.
Preparing Peppermints for Treats
To unlock that distinctive peppermint flavor and safely incorporate our treats, start by crushing the peppermint candies finely. This helps distribute the minty taste evenly throughout the dough without posing a choking hazard for horses.
- Use a clean rolling pin or the bottom of a heavy pan to gently crush the peppermints placed inside a sealed plastic bag.
- Aim for a texture similar to coarse sugar or small granules rather than powder.
- Avoid large shards that can be sharp or tough to chew.
If using peppermint extract, measure it precisely to maintain the right balance—too much can overpower the treat and be unpalatable for horses.
| Peppermint Preparation Step | Recommended Method | Notes |
|---|---|---|
| Crushing peppermints | Seal in plastic bag, crush gently with rolling pin | Achieve coarse granules, not powder |
| Peppermint extract usage | Use measuring spoons for accuracy | Limit to 1 tsp per batch |
Measuring and Organizing Ingredients
Accurate measurement and organization are crucial for replicable results and balanced nutrition. Lay out all the base ingredients alongside peppermint components on a clean surface before starting.
- Use dry measuring cups for flour, oats, and crushed candies.
- Liquid measuring cups are best for applesauce, molasses, water, and oil.
- Organize optional ingredients such as grated carrots, chopped fresh mint, or ground flaxseed separately for easy additions.
| Ingredient Type | Measuring Tool | Preparation Notes |
|---|---|---|
| Rolled oats & flour | Dry measuring cups | Level off to ensure accuracy |
| Molasses & oil | Liquid measuring cups | Pour at eye level for precision |
| Peppermints (crushed) | Dry measuring cups | Ensure evenly crushed |
| Peppermint extract | Measuring spoons | Add carefully, avoid overuse |
| Optional add-ins | Prep separately | Ready but add after base mixing |
By preparing our peppermints carefully and measuring all components with precision, we set the stage for creating flavorful and healthy peppermint-infused horse treats that our horses will love.
Instructions
Let’s walk through the step-by-step process of making our horse treat recipes with peppermints. Following these clear directions will help us create delicious, healthy treats that our horses will eagerly enjoy.
Mixing the Treat Base
- Combine Dry Ingredients: In a large mixing bowl, add 2 cups of rolled oats and 1 1/2 cups of whole wheat flour. Stir these together thoroughly to distribute the dry ingredients evenly.
- Add Wet Ingredients: Pour in 1/2 cup of unsweetened applesauce, 2 tablespoons of molasses, 1/4 cup of vegetable oil, and 1/4 cup of warm water. Using a wooden spoon or silicone spatula, mix until the dough comes together into a slightly sticky ball.
- Optional Boosters: If using, gently fold in 1/4 cup of grated carrots, 2 tablespoons of ground flaxseed, or 2 tablespoons of chopped fresh mint leaves for extra nutrition and flavor.
Tip: Avoid overmixing to keep the texture tender yet sturdy for shaping.
Incorporating Peppermints
- Crush Peppermint Candies: Carefully crush 1/4 cup of peppermint candies using a rolling pin or meat mallet inside a sealed plastic bag. We want a coarse texture for flavor bursts without large chunks that are hard to chew.
- Add Peppermint Extract: Measure precisely 1 teaspoon of peppermint extract to add to the dough. This ingredient brings a fresh minty essence that livens up the treats and soothes the horse’s breath and digestion.
- Combine Peppermints with Dough: Sprinkle the crushed peppermint candies over the dough and pour in the peppermint extract. Gently fold everything together until the peppermint pieces and extract are well incorporated and evenly distributed.
Shaping the Treats
- Prepare Your Work Surface: Lightly flour a clean surface with whole wheat flour to prevent sticking.
- Roll Out Dough: Using a rolling pin, roll the dough to approximately 1/4 inch thick. This thickness ensures treats bake evenly and hold their shape.
- Cut Into Shapes: Use cookie cutters or a knife to shape the dough into bite-sized treats. Popular shapes include stars, hearts, or simple rounds.
- Place on Baking Sheet: Arrange the cut treats on a parchment-lined baking sheet, spacing them about 1 inch apart.
- Bake Details:
| Temperature | Time | Notes |
|---|---|---|
| 350°F (175°C) | 15-20 min | Treat edges turn golden |
- Cool Completely: Allow the treats to cool fully on a wire rack before storing or serving to horses.
“The perfect peppermint-infused horse treats are firm enough to hold their shape but gentle for a horse’s bite.”
By following these steps meticulously, we ensure every horse treat with peppermint bursts with flavor and delivers freshness and digestive comfort in every bite.
Baking or Setting Directions
To achieve the perfect texture and flavor in our horse treats with peppermints, we offer two effective methods: baking and no-bake setting. Both ensure the treats hold their shape and preserve the delightful peppermint essence.
Oven Method
- Preheat the oven to 350°F (175°C) for consistent baking results.
- Place the prepared dough on a lightly floured surface and roll it out to about 1/2 inch thickness.
- Use your chosen cookie cutters to shape the dough into bite-sized pieces suitable for horses.
- Arrange the cutouts on a parchment-lined baking sheet, spacing them about 1 inch apart to allow even heat circulation.
- Bake the treats for 12 to 15 minutes, or until the edges show a subtle golden hue, indicating a firm and dry texture.
- Remove the baking sheet from the oven and let the treats cool completely on a wire rack, which helps maintain crispness.
- Once fully cooled, store the treats in an airtight container.
| Step | Temperature | Time | Thickness | Notes |
|---|---|---|---|---|
| Preheat Oven | 350°F | – | – | For consistent baking |
| Roll Dough | – | – | 1/2 inch | Ensure even thickness |
| Bake Treats | 350°F | 12 to 15 mins | – | Edges lightly golden |
| Cool Treats | Room Temp | 30 mins | – | Use wire rack for crispness |
No-Bake Option
- Prepare the dough and mix in the crushed peppermint and extract as directed.
- Press the dough firmly into silicone molds or shape by hand into small, firm balls or discs.
- Place the shaped treats on a baking sheet lined with parchment paper.
- Allow the treats to set at room temperature for at least 4 hours or refrigerate for 1 to 2 hours to speed up the firming process.
- Once set, carefully remove the treats from molds or parchment.
- Store the no-bake treats in an airtight container in a cool, dry place or refrigerated for extended freshness.
| Step | Temperature | Time | Notes |
|---|---|---|---|
| Shape Treats | Room Temp | – | Use silicone molds or hands |
| Set Treats | Room Temp/Refrigerate | 4 hours / 1-2 hours | Refrigeration speeds firming |
| Store Treats | Cool, dry place/Refrigerator | – | Airtight container recommended |
By following either the baking or no-bake directions, we ensure our horse treats with peppermints maintain a satisfying bite and a refreshing peppermint aroma that horses will love.
Cooling and Storing Treats
Proper cooling and storage of our peppermint-infused horse treats are essential to preserve their texture, flavor, and nutritional benefits. Let’s explore the best ways to cool and store these treats to keep them fresh and enticing for our horses.
Proper Cooling Techniques
Cooling the treats properly prevents sogginess and preserves the crunchy texture that horses enjoy. After baking or setting the treats:
- Transfer the treats to a wire cooling rack immediately.
- Allow them to cool completely at room temperature for at least 30 minutes.
- Avoid stacking the treats while warm to prevent moisture buildup.
- For no-bake treats, ensure they are firm and set before moving to storage—this typically requires 1 to 2 hours in a cool, dry place or refrigerated.
This step ensures the peppermint flavor stays vibrant and the treats maintain their structural integrity.
Storage Tips to Maintain Freshness
Storing our horse treats with peppermints correctly prolongs their shelf life and keeps them delicious.
| Storage Method | Details | Shelf Life | Tips |
|---|---|---|---|
| Airtight Containers | Use containers with a tight seal | Up to 2 weeks at room temp | Store in a cool, dry place |
| Resealable Plastic Bags | Remove excess air before sealing | 1 week at room temp or 3 weeks refrigerated | Consider double-bagging for extra protection |
| Refrigerator | Ideal for longer storage | Up to 1 month | Bring treats to room temp before serving |
| Freezer | For long-term storage | Up to 3 months | Thaw treats overnight before use |
Additional storage tips:
- Store treats away from direct sunlight and heat sources to prevent melting of the peppermint candies.
- Label containers with preparation dates to keep track of freshness.
- If treats develop an off smell or texture, discard immediately to protect horse health.
Serving Suggestions
Offering horse treats with peppermints can turn every snack time into an enjoyable and healthy experience. Let’s explore the best ways to serve these refreshing treats to our equine friends.
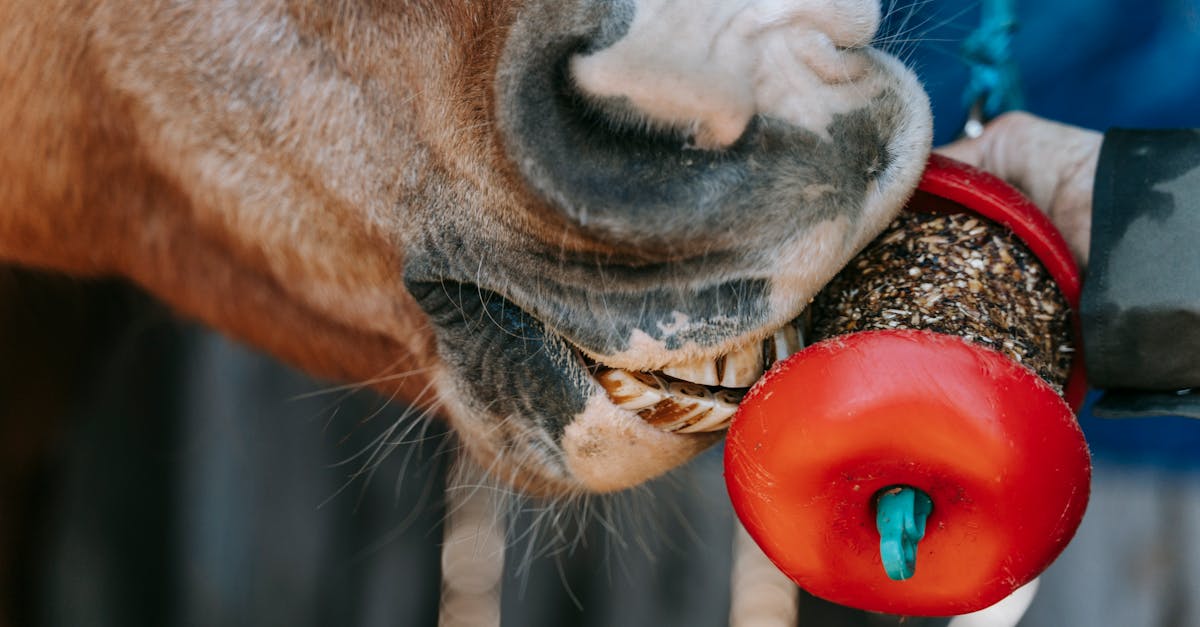
How to Offer Peppermint Treats to Horses
When it comes to serving peppermint-infused horse treats, presentation and moderation are key. We recommend the following:
- Offer treats by hand: This encourages bonding and allows us to monitor the intake carefully. Hold a single treat between your thumb and forefinger at horse level.
- Limit portions: One or two treats per session prevent overfeeding and maintain a balanced diet.
- Use treats as rewards: Incorporate peppermint treats as positive reinforcement during training or after a good ride.
- Provide fresh water nearby: Peppermint has a cooling effect that complements hydration.
- Avoid mixing with sugary human snacks: Ensure horses only access treats formulated specifically for them to avoid digestive upset.
“The ideal way to offer peppermint horse treats is slow, steady, and loving—making snack time both a pleasure and a healthy habit.”
Occasions and Frequency
We want to incorporate peppermint horse treats thoughtfully within a horse’s routine. Here’s a recommended frequency and occasions for serving:
| Occasion | Suggested Frequency | Notes |
|---|---|---|
| Training sessions | 1-2 treats per session | Use as positive reinforcement |
| Post-ride reward | 1-2 treats per day | Helps soothe and refresh after exercise |
| Special occasions | Up to 3 treats | Birthdays or holidays to add a festive touch |
| Daily snack | 1 treat max per day | Maintains routine without overindulgence |
We should avoid overfeeding peppermint treats to maintain digestive health and prevent excessive caloric intake. The natural soothing properties of peppermint shine best when treats are given in controlled amounts, making every bite count.
Serving horse treats with peppermints responsibly enhances both health benefits and enjoyment for our horses, forging stronger connections and healthier habits.
Safety Tips
Ensuring the safety of our horses while offering horse treats with peppermints is paramount. We must carefully consider ingredients and serving sizes to promote health and happiness.
Peppermint Considerations for Horses
Peppermint is generally safe and beneficial for horses when used in moderation. However, we must observe the following:
- Use only natural peppermint extracts and crushed peppermint candies free from harmful additives.
- Avoid treats with high sugar content to prevent digestive upset and dental issues.
- Introduce peppermint treats gradually to monitor for any adverse reactions.
- If a horse has a history of digestive problems, consult a veterinarian before offering peppermint-infused treats.
- Store treats away from direct sunlight and moisture to prevent spoilage and maintain peppermint potency.
Treat Quantity Recommendations
Feeding the right quantity of peppermint horse treats is essential to maintain our horse’s well-being while enjoying the flavor and benefits. Here is our recommended serving guideline:
| Horse Weight | Daily Treat Quantity | Notes |
|---|---|---|
| Under 800 lbs | 1 – 2 small peppermint treats | Suitable for ponies and smaller breeds |
| 800 – 1200 lbs | 2 – 3 small peppermint treats | Ideal for average-sized horses |
| Over 1200 lbs | 3 – 4 small peppermint treats | Suitable for larger or more active horses |
“Treats should never exceed 10% of the horse’s total daily caloric intake to avoid nutritional imbalance.”
Always offer fresh water alongside peppermint treats to aid digestion and keep horses hydrated.
By following these safety tips, we ensure our peppermint horse treats remain a delightful and secure addition to our horse’s diet.
Conclusion
Crafting peppermint-infused horse treats is a rewarding way to combine flavor and health benefits in every bite. With simple ingredients and easy methods, we can create snacks that our horses will love and that support their well-being.
By following proper preparation, baking, or no-bake techniques, and storing treats correctly, we’re ensuring freshness and safety. Offering these treats thoughtfully strengthens our bond with our horses while keeping their digestive health in check.
Peppermint treats add a refreshing twist to traditional snacks, making treat time enjoyable and beneficial for both us and our equine friends.
Frequently Asked Questions
What are the benefits of adding peppermint to homemade horse treats?
Peppermint enhances flavor, freshens a horse’s breath, and soothes digestive issues. It adds a pleasant taste and supports overall horse health.
What ingredients are needed to make peppermint horse treats?
Key ingredients include rolled oats, whole wheat flour, applesauce, molasses, water, vegetable oil, crushed peppermint candies, and peppermint extract. Optional add-ins are grated carrots, fresh mint leaves, and ground flaxseed.
What equipment do I need to make these homemade treats?
You’ll need a large mixing bowl, wooden spoon or silicone spatula, measuring cups and spoons, a rolling pin (optional), and cookie cutters.
How do I safely crush peppermint candies for the treats?
Place candies in a sealed plastic bag and gently crush with a rolling pin or mallet until coarsely broken. Avoid powdering to keep texture.
What are the basic steps to make peppermint horse treats?
Mix dry and wet ingredients to form dough, fold in crushed peppermint and extract, shape into bite-sized pieces, then either bake or set without baking.
What temperature and time should I bake the peppermint treats?
Preheat the oven to 350°F and bake treats for 12 to 15 minutes until lightly golden.
Can these peppermint treats be made without baking?
Yes, press dough into molds or shape by hand and let set at room temperature or refrigerate until firm.
How should I store homemade peppermint horse treats?
Store treats in airtight containers or resealable bags to keep them fresh. Refrigerate or freeze for longer storage.
How many peppermint treats can I safely give my horse?
Limit treats to one or two small pieces per session, keeping total treats under 10% of daily calories.
When is the best time to offer peppermint horse treats?
Use treats as rewards during training, after rides, special occasions, or as occasional snacks to bond with your horse.
Are there any safety tips for feeding peppermint treats to horses?
Ensure treats use natural ingredients, feed in moderation, watch for adverse reactions, and consult your vet if you have concerns about digestive health.
Can peppermint treats help with my horse’s digestion?
Yes, peppermint is known to soothe the digestive system, making these treats beneficial beyond just flavor.