
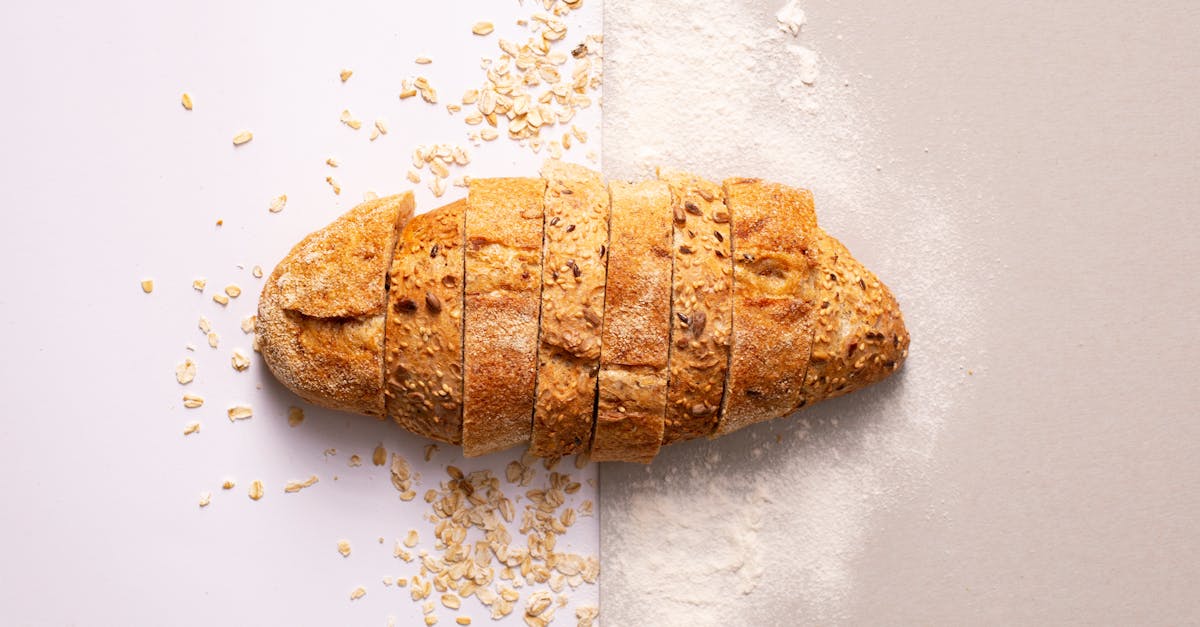
There’s something truly special about baking sourdough bread at home, especially when it’s infused with the natural sweetness of honey and the wholesome goodness of oats. Our Honey Oat Sourdough Bread recipe brings together these simple ingredients to create a loaf that’s both hearty and slightly sweet, perfect for breakfast or sandwiches.
Ingredients
To craft our Honey Oat Sourdough Bread, we carefully select ingredients that bring out the perfect balance of flavor, texture, and nutrition. Each component plays a vital role in achieving that ideal rise and tender crumb.
For the Sourdough Starter
The foundation of our bread is a lively sourdough starter, full of natural yeast and bacteria that give the bread its distinctive tang and texture.
- 100 g whole wheat flour (freshly milled if possible)
- 100 g warm water (around 78°F/25°C)
- 1 tablespoon active sourdough starter (from previous batch or store-bought)
For the Dough
Our dough blends wholesome oats with the subtle sweetness of honey, enriching the sourdough’s earthy character.
| Ingredient | Quantity | Notes |
|---|---|---|
| 500 g bread flour | High-protein for strong gluten | |
| 100 g rolled oats | Plus extra for topping | |
| 350 g water | Lukewarm (about 80°F/27°C) | |
| 10 g salt | Fine sea salt | |
| 3 tablespoons honey | Raw or pure for natural sweetness | |
| 200 g active sourdough starter | Fed and bubbly |
For the Topping
The final touch enhances the rustic look and adds a delightful crunch.
- 2 tablespoons rolled oats (to sprinkle on top)
- 1 teaspoon honey water mixture (1:1 honey and warm water) brushed lightly for gloss and gentle sweetness
Equipment Needed
To bake our Honey Oat Sourdough Bread successfully, having the right equipment is essential. Each tool plays a specific role in developing the dough, achieving an even rise, and creating that perfect golden crust with a tender crumb. Below, we list and explain the key equipment for this recipe.
| Equipment | Purpose |
|---|---|
| Mixing Bowl | A large bowl for combining ingredients and allowing dough to ferment. |
| Digital Kitchen Scale | Measures ingredients precisely for consistent results. |
| Bench Scraper | Helps in folding, shaping dough, and cleaning surfaces. |
| Dough Whisk or Spoon | Useful for initial mixing without overworking the dough. |
| Proofing Basket (Banneton) | Supports the dough during its final rise, giving structure and a traditional shape. |
| Linen Cloth or Clean Kitchen Towel | Used to cover dough during proofing to prevent drying out. |
| Dutch Oven or Baking Stone | Provides steady, radiant heat essential for the perfect crust development. |
| Oven Mitts | Safety tool to handle hot equipment confidently. |
| Sharp Razor Blade or Lame | Scores the dough to control expansion and create decorative patterns. |
| Pastry Brush | Applies the honey-water glaze for an enticing glossy finish. |
| Cooling Rack | Allows the bread to cool properly, preventing soggy crusts. |
Using these expertly chosen tools assures that we can focus on the detailed steps, knowing our tools will support us in crafting a delicious Honey Oat Sourdough Bread. Each piece enhances control over fermentation, shaping, and baking—keys to sourdough success.
Preparing the Sourdough Starter
To achieve the perfect Honey Oat Sourdough Bread, we must pay close attention to preparing our sourdough starter. This natural leavening agent lends flavor depth and the essential rise to our bread.
Feeding the Starter
Feeding our starter regularly keeps it active and bubbly, essential for a strong fermentation process. Here’s our feeding routine:
- Discard half of the existing starter to maintain manageable volume.
- Add 50 g whole wheat flour for nutrients and flavor.
- Add 50 g warm water (about 75°F) to encourage yeast activity.
- Mix thoroughly until smooth and free of lumps.
- Cover loosely with a breathable cloth or lid and leave at room temperature (70-75°F) for 6-8 hours until bubbly and doubled in size.
We repeat this feeding process daily, ensuring the starter develops a pleasant tangy aroma and vigorous bubbles, signaling its health and readiness.
Checking Readiness
Before mixing our dough, we verify the starter’s strength with these simple tests:
| Test | Description | Result Indicating Readiness |
|---|---|---|
| Float Test | Drop a teaspoon of starter into water | Starter floats, indicating good aeration |
| Bubbling & Rising | Starter shows visible bubbles and doubles in size | Ready for use in dough for optimal rising |
| Aroma Check | Should smell pleasantly sour, not off or moldy | Indicates a healthy active culture |
“If it passes these tests, our starter is primed to infuse our Honey Oat Sourdough Bread with lively texture and rich flavor.”
Maintaining a robust sourdough starter is the foundation for baking success and ensures delicious results every time.
Making the Dough
Now that our starter is bubbly and ready, we begin shaping the base for our Honey Oat Sourdough Bread by carefully making the dough. This stage sets the foundation for flavor, texture, and structure.
Mixing Ingredients
We start by combining the core dry and wet ingredients to form a cohesive mixture. Precise measurement is critical here for consistent results.
| Ingredient | Amount | Notes |
|---|---|---|
| Bread flour | 500 g | High-protein for strong gluten |
| Lukewarm water | 350 g | Around 75°F / 24°C |
| Active sourdough starter | 100 g | Well-fed, bubbly |
| Rolled oats | 50 g | Adds texture and flavor |
| Fine sea salt | 10 g | Enhances dough flavor |
| Honey | 25 g (about 1 tbsp) | Provides natural sweetness |
In a large mixing bowl, we combine the bread flour and lukewarm water first. Using our hands or a stiff spatula, we mix until no dry flour remains. This initial blend encourages even hydration before adding other ingredients.
Autolyse Stage
Next, we let this mixture rest for 30 to 45 minutes. This rest period, known as the autolyse, allows the flour to fully absorb the water. This hydrates the gluten network developing a tender crumb and improving dough extensibility.
“During autolyse, enzymes begin breaking down starches and proteins in the flour, resulting in better dough handling and enhanced flavor.“
Adding Honey and Oats
After autolyse, we introduce the honey, rolled oats, salt, and the active sourdough starter. We distribute the salt evenly to avoid inhibiting yeast activity. Incorporating honey at this point allows it to dissolve and blend well, contributing a subtle natural sweetness throughout the bread.
We gently fold the oats into the dough to preserve their texture without deflating the developing gluten network.
Kneading
For kneading, we use the stretch and fold technique every 30 minutes over 2 hours rather than traditional kneading. This gentle approach strengthens the dough’s structure without overworking it.
Steps:
- Wet your hands slightly to prevent sticking.
- Reach under the dough, stretch it upward, and fold it over itself.
- Rotate the bowl 90 degrees; repeat this motion four times per session.
- Cover the dough and rest for 30 minutes between folds.
This process develops elasticity and air retention resulting in an open crumb with a chewy texture ideal for our Honey Oat Sourdough Bread.
First Rise (Bulk Fermentation)
The first rise, or bulk fermentation, is a crucial stage in developing the structure and flavor of our Honey Oat Sourdough Bread. During this time, the dough ferments, allowing natural yeast and bacteria to work together, creating the perfect balance of tang and texture.
Timing and Temperature
Controlling timing and temperature is vital for a successful bulk fermentation. We recommend fermenting the dough at a consistent 78°F (25°C) to optimize yeast activity and enzymatic reactions.
| Stage | Temperature | Duration | Notes |
|---|---|---|---|
| Bulk Fermentation | 78°F (25°C) | 3 to 4 hours | Dough should roughly double in size |
| Cooler Option | 70°F (21°C) | 5 to 6 hours | Slower rise enhances flavor depth |
“The dough is ready when it has expanded significantly but still holds its shape.” Over-fermentation can cause it to collapse, while under-fermentation results in dense crumb and less flavor development.
Stretch and Fold Technique
To build gluten strength and redistribute air bubbles during bulk fermentation, we perform a series of stretch and folds every 30 minutes, totaling 3 to 4 folds.
Steps to execute the stretch and fold:
- Wet your hands to prevent sticking.
- Gently lift one side of the dough from the bowl.
- Stretch it upward without tearing.
- Fold it over the rest of the dough.
- Rotate the bowl 90 degrees and repeat on all four sides.
This technique:
- Develops gluten network without heavy kneading.
- Improves dough elasticity.
- Promotes even fermentation.
Performing stretch and folds strengthens the dough’s structure, enabling it to hold more gas and resulting in an airy, chewy crumb essential for our Honey Oat Sourdough Bread’s signature texture.
Shaping the Dough
Once the dough has completed its bulk fermentation and feels aerated yet still resilient, we begin the critical step of shaping. Proper shaping is essential to create surface tension that helps the dough hold its form and rise evenly during the final proof.
Step 1: Preparing the Work Surface
Lightly flour a clean countertop or work surface to prevent sticking. Avoid adding too much flour as it can dry out the dough’s surface and hinder oven spring.
Step 2: Transferring and Pre-shaping
Gently turn the dough out onto the floured surface. Using a bench scraper or your hands, fold the dough onto itself to tighten its outer membrane. We recommend using the “bowl to board” technique:
- Scoop the dough with a bench scraper
- Fold the edges towards the center
- Rotate the dough as you continue folding to create tension
This pre-shape helps develop elastic strength and sets the foundation for the final shape. Cover loosely with a towel and let it rest for 20 to 30 minutes to relax the gluten.
Step 3: Final Shaping
After the bench rest, it’s time to create the loaf’s final form. For our Honey Oat Sourdough Bread, we use a round boule shape for rustic appeal.
How to Shape a Boule:
| Action | Description | Key Tips |
|---|---|---|
| Flatten dough | Gently press the dough into a rough rectangle | Avoid deflating air pockets |
| Fold edges | Fold edges toward the center creating tension | Use your fingertips gently |
| Cup and pull | Cup your hands around dough and pull it towards you on the floured surface | This creates a taut, smooth surface |
| Final tension | Rotate while pulling to tighten the skin | Aim for a smooth, rounded boule |
Step 4: Placing in Proofing Basket
Sprinkle a little rolled oats or rice flour into a floured banneton or proofing basket. Place the shaped boule seam-side up into the basket to support its structure during final proof.
Step 5: Final Cover and Proof
Cover the dough with a plastic wrap or shower cap to retain moisture. Let it proof at room temperature for 2 to 3 hours or refrigerate overnight for an extended cold proof which enhances flavor complexity.
Pro Tip: Proper shaping creates a glossy, crisp crust and open airy crumb once baked. Avoid rushing this step to ensure a beautiful rise and texture.
By following these shaping steps, our Honey Oat Sourdough Bread will have a stunning form with excellent oven spring, enhancing its signature chewy bite and naturally sweet oat undertones.
Second Rise (Proofing)
The second rise, also known as proofing, is essential for developing the final flavor and texture of our Honey Oat Sourdough Bread. This step allows the dough to relax, ferment further, and build the delicate crumb structure that defines artisan sourdough.
Proofing in a Banneton or Bowl
After shaping, we transfer the dough to a banneton or a lightly floured bowl to maintain its shape and create a rustic pattern on the crust. The banneton’s spiral ridges encourage airflow and support surface tension, promoting an even rise.
- Prepare your banneton or bowl: Dust it generously with rice flour or a mix of rice and all-purpose flour to prevent sticking and enhance the bread’s characteristic pattern.
- Transfer the dough gently: Place the shaped dough seam-side up into the banneton or bowl, handling it carefully to preserve the surface tension developed during shaping.
- Cover for proofing: Use a clean kitchen towel or plastic wrap to cover. This prevents drying out while allowing the dough to ferment slowly.
- Proofing temperature and timing:
| Temperature | Duration | Notes |
|---|---|---|
| Room temperature (70-75°F / 21-24°C) | 2 to 4 hours | Faster rise, lighter flavor development |
| Refrigerator (38-45°F / 3-7°C) | 8 to 16 hours (overnight) | Slower fermentation, richer flavor and better crust |
Refrigerated proofing also helps with easier handling and enhances the honey’s natural sweetness and oat nuances in our sourdough.
“Patience during proofing translates into a tender crumb and deep flavor for Honey Oat Sourdough Bread—trust the dough to rise beautifully.“
Once the dough has puffed noticeably and springs back slowly to gentle pressure, it is ready for baking—this indicates the perfect proof.
Preheating the Oven and Preparing for Baking
Before baking our Honey Oat Sourdough Bread, preheating the oven is critical for achieving the desired crust and crumb. Proper oven temperature and setup ensure optimal heat retention and even baking.
Using a Dutch Oven or Baking Stone
To capture the artisan crust and tender crumb we desire, we recommend using either a Dutch oven or a baking stone. Both methods create a hot, steam-filled environment that promotes excellent oven spring and a golden, crackling crust.
| Method | Preparation Steps | Key Benefits |
|---|---|---|
| Dutch Oven | 1. Place the empty Dutch oven with lid in the oven. 2. Preheat at 475°F (246°C) for 45 minutes before baking. 3. Carefully transfer dough into the hot pot. 4. Cover with lid for first 20 minutes to trap steam. 5. Remove lid for remaining bake time for crust development. |
Traps steam internally Ensures deep oven spring Creates crisp crust |
| Baking Stone | 1. Place the stone low in the oven. 2. Preheat oven to 500°F (260°C) for 45 minutes. 3. Place a shallow pan of water on a lower rack to generate steam. 4. Slide dough onto the hot stone using a peel or parchment paper. 5. Lower temperature to 450°F (232°C) after initial bake period. |
Provides even radiant heat Enhances crust texture Steam maintains moisture early in bake |
We suggest preheating to 475°F (246°C) for 45 minutes whether using a Dutch oven or baking stone to ensure your baking vessel is thoroughly heated. This step is crucial for developing the honey oat sourdough’s characteristic oven spring — the rapid rise when exposed to hot air.
“Preheating the baking vessel to a high temperature is the key to unlocking the sourdough’s full texture and flavor potential.“
When transferring the dough, be gentle to preserve its shape and air bubbles. If using a Dutch oven, we recommend placing the dough directly onto parchment for an easy and safe transfer.
By mastering these preheating and preparation steps, we set the stage for our Honey Oat Sourdough Bread to achieve its signature tender crumb and beautifully caramelized crust.
Baking the Bread
Now that our dough is perfectly proofed and our oven preheated, it’s time to bring the Honey Oat Sourdough Bread to life. This phase transforms our careful preparation into a golden, aromatic loaf full of character.
Scoring the Loaf
Scoring is essential for controlling the bread’s expansion during baking. It allows the loaf to rise evenly and creates that signature rustic pattern on top.
- Using a sharp lame or a razor blade, hold the blade at a 30 to 45-degree angle.
- Make 2 to 3 swift slashes about 1/4 inch deep on the dough surface.
- We prefer a simple cross or a few curved lines to highlight the oats and moist crumb beneath the crust.
- Avoid deep cuts that can deflate the dough or uneven scoring which can cause irregular bursts.
“Scoring is not just decorative, it’s functional artistry shaping the rise’s direction.”
Baking Time and Temperature
To achieve the perfect balance between a chewy crumb and a deeply caramelized crust, temperature and timing are key.
| Stage | Temperature | Duration | Notes |
|---|---|---|---|
| Initial Bake (with lid) | 475°F (246°C) | 20 minutes | Creates steam environment for oven spring |
| Final Bake (lid removed) | 450°F (232°C) | 20 to 25 minutes | Develops crust color and crunch |
- Place the dough carefully into the preheated Dutch oven or onto the baking stone.
- Cover or close the lid immediately to trap steam.
- After 20 minutes, remove the lid and continue baking to form a golden, crisp crust.
- Check for a hollow sound by tapping the loaf’s bottom to verify doneness.
Adding Steam
Steam is crucial to developing the Honey Oat Sourdough Bread’s beautiful crust and airy texture.
- When using a Dutch oven, the lid traps natural steam released from the dough.
- For baking stones, add steam manually:
- Place an empty metal pan on the oven bottom while preheating.
- Just before loading the loaf, pour 1 cup of hot water into the pan to create steam.
- Immediately close the oven door to trap steam inside.
- The steam delays crust formation allowing the bread to rise fully before setting the crust, providing that characteristic crackling sound and lustrous color.
“Steam is the secret ingredient that turns our handcrafted dough into a bakery-worthy marvel.”
By carefully scoring, baking at the precise temperature, and adding steam, we ensure our Honey Oat Sourdough Bread emerges with an open crumb, glossy golden crust, and a flavor that celebrates the richness of honey and oats in every bite.
Cooling and Storing the Bread
After baking our Honey Oat Sourdough Bread to a perfect golden crust, the next critical phase is cooling and storing. Proper handling here preserves the texture and flavor that make this bread exceptional.
Cooling the Bread
- Remove the bread from the Dutch oven or baking stone immediately after baking.
- Place the loaf on a wire rack to cool. This allows air circulation around the bread preventing moisture buildup and soggy crust.
- Let the bread cool completely, ideally for at least 2 hours.
“Cutting the bread too soon traps steam and affects the crumb structure.”
- During cooling, the bread’s interior crumb sets, and the crust firms to a delightful crunch.
| Step | Purpose | Detail |
|---|---|---|
| Remove bread | Prevent residual heat softening the crust | Use oven mitts carefully |
| Place on rack | Enable air flow to maintain crust texture | Wire rack is preferred |
| Cool fully | Ensure crumb is set and moisture evaporates | At least 2 hours |
Storing the Bread
- Once fully cooled, store the bread in a paper bag or loosely wrapped in a clean kitchen towel to maintain crust crispness.
- Avoid sealing the bread in plastic unless you plan to consume within 1 day, as this traps moisture and softens the crust.
- For longer storage, slice the bread and freeze it in airtight freezer bags.
- Thaw slices at room temperature.
- Toast or warm before serving to revive freshness.
| Storage Method | Duration | Notes |
|---|---|---|
| Paper bag/towel | Up to 2 days | Keeps crust crisp, crumb soft |
| Plastic bag | 1 day or less | Softens crust, use if consumed quickly |
| Freezer (sliced) | Up to 1 month | Best for preserving flavor and texture |
Tips for Maintaining Freshness
- Keep bread at room temperature, away from direct sunlight and heat sources.
- Avoid refrigeration, which accelerates staling by drying the bread.
- Reheat slices in a toaster or oven to restore the signature chewy crumb and honeyed aroma.
By following these comprehensive steps, we ensure our Honey Oat Sourdough Bread stays fresh, flavorful, and texturally delightful for every slice.
Tips for Best Results
To achieve the perfect Honey Oat Sourdough Bread, attention to detail at every step is essential. Here are our top tips to ensure consistently excellent results.
1. Maintain an Active Sourdough Starter
An active starter is the heart of our bread.
- Feed it regularly with whole wheat flour and warm water about every 12 hours.
- Perform the float test to confirm readiness: a small spoonful of starter should float in water, indicating proper fermentation.
- Use the starter at its peak rise for maximum leavening power and flavor.
2. Precise Ingredient Measurements
Consistent success starts with accurate measurements. Use a digital kitchen scale for:
- Bread flour
- Rolled oats
- Water
- Honey
- Salt
Measure all ingredients before mixing to avoid errors.
| Ingredient | Quantity | Measurement Tip |
|---|---|---|
| Bread Flour | 500g | Weigh precisely for dough structure |
| Rolled Oats | 75g | Use rolled, not instant, oats |
| Lukewarm Water | 350g | Around 78°F (25°C) for optimal absorption |
| Honey | 50g | Organic preferable for best flavor |
| Fine Sea Salt | 10g | Distribute evenly during mixing |
3. Master the Autolyse Phase
Allowing the flour and water to rest for 30–45 minutes before mixing in starter, oats, salt, and honey helps:
- Develop gluten
- Improve dough extensibility
- Enhance crumb tenderness
The autolyse is key to our bread’s airy texture.
4. Perform Stretch and Fold Correctly
Instead of traditional kneading, we use stretch and fold every 30 minutes during bulk fermentation:
- Gently lift and stretch the dough
- Fold it over itself from all sides
- Repeat 3 to 4 times total
This method strengthens gluten without overworking, yielding an open crumb and chewy texture.
5. Control Fermentation Temperature and Timing
Temperature directly affects yeast activity and flavor development.
- Maintain 78°F (25°C) for a standard 3-4 hour bulk fermentation.
- Or lower to about 70°F (21°C) for a slower fermentation that deepens flavor.
Avoid over-fermentation which causes collapse, or under-fermentation causing dense crumb.
| Fermentation Stage | Temperature | Duration | Notes |
|---|---|---|---|
| Bulk Fermentation | 78°F (25°C) | 3 to 4 hours | Balanced rise and flavor |
| Bulk Fermentation | 70°F (21°C) | 6 to 8 hours | Enhanced tang and complex taste |
| Final Proof | Room temperature (70°F) | 1.5 to 2 hours | Puffy but springy to touch |
| Final Proof (Cold) | Refrigerator (38°F) | 8 to 12 hours overnight | Develops flavor complexity |
6. Shape with Confidence
Proper shaping builds the surface tension needed for even oven spring:
- Use gentle but deliberate folds toward the center
- Create tight skin on the dough surface without tearing
- Use a bench scraper to lift and shape as needed
A well-shaped boule rises beautifully and develops a crisp crust.
7. Use Proper Scoring Technique
Scoring guides the loaf’s expansion and enhances its rustic appearance:
- Use a sharp lame or serrated knife
- Score at a 30 to 45-degree angle about ¼ inch deep
- Make confident long strokes rather than short cuts
This controls bursting and promotes an attractive bloom.
8. Optimize Baking Environment
Choose between a Dutch oven or baking stone to trap steam and generate oven spring.
- Preheat the vessel for at least 45 minutes at 475°F (246°C).
- Bake with the lid on for 20 minutes to hold steam, then remove lid and reduce to 450°F (232°C) for 20-25 minutes to finish crust.
- Alternatively, add a metal pan of water to the oven to create steam manually.
9. Cooling and Storage Best Practices
- Cool bread on a wire rack at room temperature for at least 2 hours before slicing.
- Store in a paper bag or loosely wrapped in a kitchen towel to maintain crust crispness.
- Avoid refrigeration which accelerates staling.
- For longer keeping, slice and freeze in airtight bags, then reheat slices in a toaster or oven when ready to enjoy.
Conclusion
Baking Honey Oat Sourdough Bread at home is a rewarding journey that combines patience and precision. With the right starter, ingredients, and techniques, we can create a loaf that’s both flavorful and nourishing.
Every step, from fermentation to baking, plays a crucial role in achieving that perfect crust and tender crumb. By embracing the process, we not only enjoy delicious bread but also deepen our appreciation for traditional baking.
Let’s keep experimenting and refining our skills to make each batch better than the last. Happy baking!
Frequently Asked Questions
What ingredients are needed to make Honey Oat Sourdough Bread?
You need high-protein bread flour, rolled oats, lukewarm water, fine sea salt, honey, and an active sourdough starter made from whole wheat flour, warm water, and starter culture.
How do I know if my sourdough starter is ready to use?
Your starter should be bubbly, have a pleasant tangy aroma, pass the float test (a spoonful floats in water), and rise and fall predictably after feeding.
What is the purpose of the autolyse stage in dough making?
Autolyse allows flour to absorb water fully, improving gluten development and resulting in a tender crumb and better dough texture.
How often should I perform stretch and folds during bulk fermentation?
Perform stretch and folds every 30 minutes for a total of 3 to 4 times during the 3 to 4 hour bulk fermentation.
What is the ideal temperature for fermenting the dough?
The optimal fermentation temperature is about 78°F (25°C). Cooler temperatures around 70°F (21°C) slow fermentation but deepen flavor.
Why is shaping the dough important before the final proof?
Shaping creates surface tension, which helps the dough rise evenly and develop an appealing texture and crust during baking.
How long should the final proof last?
Proof the dough at room temperature for 2 to 4 hours or refrigerate overnight to enhance flavor complexity.
Can I use a baking stone instead of a Dutch oven?
Yes, a baking stone is a great alternative to a Dutch oven and helps develop a crisp crust when properly preheated.
What is the purpose of scoring the bread before baking?
Scoring controls how the bread expands in the oven and creates an attractive rustic pattern on the crust.
How should I cool and store Honey Oat Sourdough Bread?
Cool completely on a wire rack for at least 2 hours. Store in a paper bag or kitchen towel to keep crust crisp and freeze sliced bread for longer storage. Avoid refrigeration to prevent staling.