
Who doesn’t love a creamy, chocolate-covered treat on a stick? Eskimo Pie popsicles have been a nostalgic favorite for decades, combining the perfect balance of rich chocolate and velvety vanilla ice cream. Instead of reaching for a store-bought version, why not make your own at home? It’s easier than you’d think and so much more satisfying.
Ingredients
To craft these delicious homemade Eskimo Pie popsicles, we need a simple mix of approachable ingredients. Gathering high-quality components will ensure our frozen dessert is rich, creamy, and perfectly indulgent. Below is the list of what we’ll need, arranged by usage:
For the Vanilla Ice Cream Base:
- 2 cups heavy cream
- 1 cup whole milk
- 1/2 cup granulated sugar
- 2 teaspoons pure vanilla extract
For the Chocolate Coating:
- 1 1/2 cups semi-sweet chocolate chips
- 3 tablespoons coconut oil (for a silky, crackling finish)
For Assembling and Equipment:
- Popsicle molds (preferably silicone for easy release)
- Wooden popsicle sticks
- Medium mixing bowls
- Microwave-safe bowl or double boiler for melting chocolate
Notes on Ingredient Selection:
- Opt for pure vanilla extract for authentic flavor—avoid artificial options.
- Coconut oil is essential for ensuring the chocolate coating hardens into a crisp shell.
- Use high-quality chocolate chips with a smooth melt for the best results.
Tools And Equipment
Creating Homemade Eskimo Pie Popsicles requires a few essential tools. Having the right equipment ensures a seamless process and helps us achieve that perfect blend of creamy vanilla goodness enrobed in a silky chocolate shell. Here’s what we need:
Essential Tools:
- Silicone Popsicle Molds: These molds give our Eskimo Pie popsicles their classic shape. They also make it easy to remove the popsicles without cracking the chocolate shell.
- Wooden Popsicle Sticks: A key component for handheld convenience, they also give the popsicles an authentic aesthetic.
- Mixing Bowls: We’ll need a few mixing bowls to prepare the vanilla base and chocolate coating separately.
- Whisk or Electric Mixer: For blending the vanilla ice cream mixture until smooth and lump-free.
- Small Saucepan or Double Boiler: To gently melt the chocolate and coconut oil, ensuring a smooth, glossy coating.
- Spatula or Spoon: To mix ingredients thoroughly and scrape down the sides of the bowls.
- Measuring Cups and Spoons: To ensure precise measurements for both the ice cream base and the chocolate shell.
- Baking Sheet with Parchment Paper: For placing dipped popsicles while the chocolate coating sets.
Recommended Add-ons:
- Thermometer: Helps us monitor the temperature of the melted chocolate to prevent scorching.
- Freezer-Safe Container: Useful for storing finished popsicles to maintain their quality and flavor.
Equipment Summary in Table:
| Tool/Equipment | Purpose |
|---|---|
| Silicone Popsicle Molds | Shapes the popsicles and allows easy removal. |
| Wooden Popsicle Sticks | Provides structure for handheld use. |
| Mixing Bowls | Mixes the vanilla base and chocolate coating. |
| Whisk/Electric Mixer | Ensures a smooth, even mixture. |
| Small Saucepan/Double Boiler | Melts chocolate and coconut oil gently. |
| Spatula or Spoon | Mixes ingredients and scrapes bowls’ edges. |
| Measuring Cups and Spoons | Ensures ingredients are precise for consistency. |
| Baking Sheet + Parchment | Holds dipped popsicles while chocolate sets. |
| Thermometer (Optional) | Prevents chocolate from overheating. |
| Freezer-Safe Container | Keeps popsicles fresh for extended storage. |
Directions
Let’s dive into making our Homemade Eskimo Pie Popsicles step-by-step. Follow these detailed instructions for a smooth and rewarding experience.
Prep
- Prepare the vanilla ice cream base: In a mixing bowl, combine 2 cups of heavy cream, 1 cup of whole milk, ¾ cup of granulated sugar, and 1 tablespoon of pure vanilla extract. Whisk or use an electric mixer until fully blended and the sugar dissolves.
- Refrigerate the mixture for at least 30 minutes to let the flavors meld together.
- Set up your workspace: Arrange your silicone molds and wooden sticks on a clean, flat surface. Ensure all tools—mixing bowls, spatula, and whisk—are within reach.
Make The Chocolate Coating
- Melt the chocolate: Using a double boiler or a small saucepan over low heat, combine 1 cup of semi-sweet chocolate chips and 2 tablespoons of coconut oil.
- Stir continuously with a spatula until the mixture is smooth and glossy. Avoid overheating to maintain the chocolate’s silky texture.
- Remove the chocolate mixture from heat and let it cool slightly. It should be warm but not hot to the touch—approximately 85°F to 90°F. (Use a thermometer, if available, to check the temperature.)
Assemble The Popsicles
- Pour the vanilla mixture: Carefully fill each silicone mold with the prepared vanilla ice cream base, leaving about ¼ inch space at the top.
- Insert the wooden sticks into the molds, ensuring they’re centered and securely positioned.
- Freeze the molds for at least 6 hours, or until the popsicles are completely solid.
Freeze The Popsicles
- Once the popsicles are frozen, remove them from the molds by gently running warm water over the outside of the silicone mold.
- Dip each popsicle into the chocolate coating, ensuring full coverage. Use a spoon to help if needed.
- Place the coated popsicles onto a baking sheet lined with parchment paper.
- Optional: For a fun twist, sprinkle chopped nuts, coconut flakes, or sprinkles onto the chocolate before it hardens.
- Return the popsicles to the freezer for 30 minutes to 1 hour to allow the chocolate to set fully.
- Work quickly when dipping the popsicles to prevent melting.
- Store the finished popsicles in a freezer-safe container with parchment paper between layers to prevent sticking.
Tips For Success
Creating homemade Eskimo Pie popsicles can be an enjoyable and rewarding experience. To help ensure your popsicles turn out perfectly creamy and evenly coated in chocolate, we’ve compiled a list of essential tips and tricks. Follow these pointers for a smooth and stress-free process:
1. Use Quality Ingredients
- Opt for high-quality heavy cream and pure vanilla extract for a luscious and authentic flavor in the ice cream base.
- For the chocolate coating, choose semi-sweet chocolate chips made with real cocoa butter for a smooth finish.
- Using refined coconut oil will give your chocolate coating a shiny, even layer that hardens quickly when dipping.
2. Master the Chocolate Coating
- Melt the chocolate and coconut oil combination slowly using a double boiler or carefully in the microwave to avoid burning.
- The ideal dipping temperature for the chocolate is around 85-90°F for a smooth texture. Use a thermometer for accuracy.
- If the chocolate starts to thicken, reheat it gently to maintain the correct consistency.
| Melting Method | Advantages | Disadvantages |
|---|---|---|
| Double Boiler | Even heat distribution | Needs additional setup |
| Microwave | Quick and convenient | Risk of overheating or burning |
3. Prepare the Silicone Molds Correctly
- Ensure that the popsicle molds are thoroughly clean and dry before pouring in the ice cream mixture. This prevents ice crystals from forming.
- Insert wooden sticks firmly into the mold slots to ensure proper placement and stability during freezing.
4. Freeze Completely
- Allow at least 4-6 hours of freezing time to ensure the popsicles are solid before dipping in chocolate. Overnight freezing is ideal for the best results.
- Test the popsicles by gently pressing the surface; they should feel completely firm and cold without any soft spots.
5. Work Quickly During the Dipping Process
- Keep the frozen popsicles in the freezer until ready to dip, working with one or two at a time to prevent melting.
- Hold the popsicle firmly by the stick and dip it into the warm chocolate, tilting the bowl to fully coat the surface.
- Let any excess chocolate drip off before laying the popsicle on parchment paper to set.
6. Add Toppings Immediately
- If using toppings like chopped nuts, sprinkles, or shredded coconut, sprinkle them on as soon as the dipped popsicle comes out of the chocolate. The coating hardens quickly, so timing is key.
7. Use Proper Storage Techniques
- Once the chocolate coating has set, store the popsicles in a freezer-safe container lined with parchment paper. Place a layer of parchment between popsicles to prevent sticking.
- For the best flavor and texture, consume the popsicles within 1-2 weeks.
8. Clean Up Smartly
- Use a rubber spatula to scrape any remaining chocolate from the bowl for minimal waste. Leftover chocolate can be refrigerated and reused for other recipes.
- Soak tools like the whisk, spatula, or double boiler in warm soapy water right after use to make cleaning easier.
Variations And Add-Ons
Creating homemade Eskimo Pie popsicles opens the door to endless customization. We can experiment with flavors, textures, and toppings to elevate the classic treat and make it uniquely ours. Below, we’ve shared some exciting ideas for variations and add-ons to inspire your next batch.
1. Flavor Twists
- Chocolate Lovers: Swap the vanilla ice cream base for chocolate. Add 2 tablespoons of cocoa powder to the mixture for a rich, indulgent twist.
- Fruit-Infused Vanilla: Blend ½ cup of fresh puréed fruit (like strawberries or mangoes) into the vanilla ice cream base for a fruity punch.
- Coffee Delight: Add 1 teaspoon of instant coffee or espresso powder to the ice cream base for a caffeinated kick.
2. Creative Chocolate Coatings
- Dark Chocolate Coating: Replace semi-sweet chocolate chips with bittersweet or dark chocolate for a more intense flavor.
- White Chocolate Glaze: Use white chocolate chips for a sweet, milky coating.
- Mint Chocolate: Mix ¼ teaspoon of peppermint extract into the melted chocolate for a refreshing finish.
3. Topping Enhancements
Sprinkle toppings over the chocolate coating before it hardens to add texture and personal flair. Here are some of our favorites:
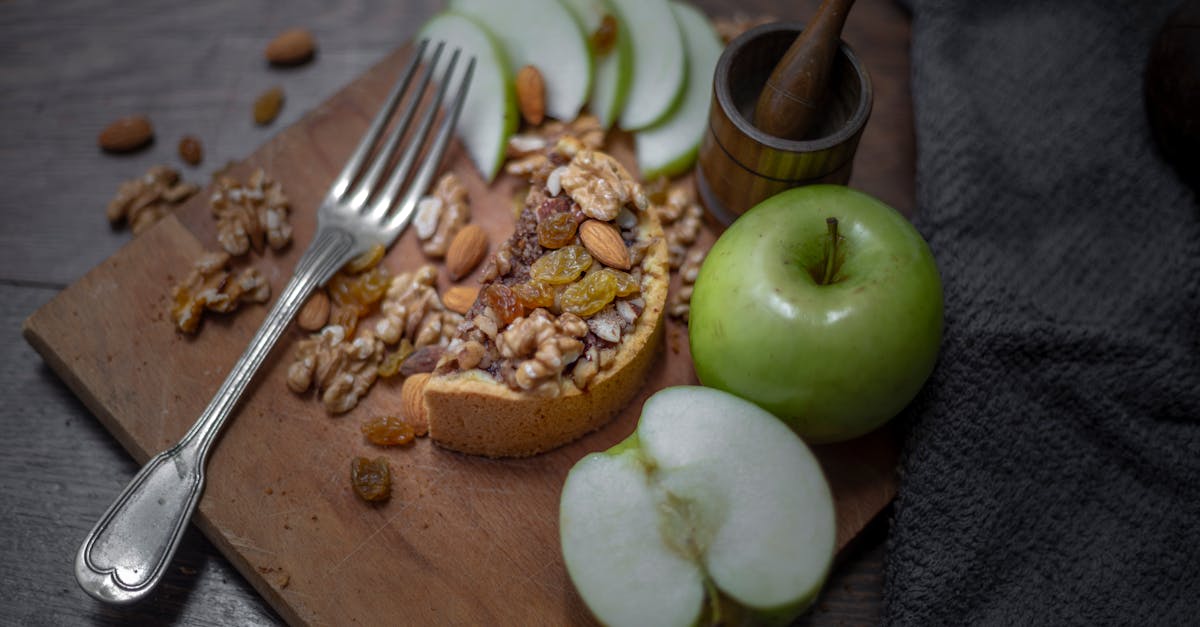
- Classic Crunch: Crushed almonds, hazelnuts, or peanuts.
- Sweet Touch: Rainbow sprinkles, toffee bits, or crumbled cookies.
- Coconut Bliss: Shredded coconut for a tropical vibe.
- Salty-Sweet Mix: Crushed pretzels or flaked sea salt for balance.
4. Dietary Modifications
We can accommodate different dietary preferences and restrictions with simple ingredient swaps:
| Dietary Need | Modification |
|---|---|
| Vegan | Use plant-based milk (like almond or oat milk), coconut cream, and dairy-free chocolate. |
| Sugar-Free | Use a sugar substitute (like stevia or monk fruit) and no-sugar-added chocolate chips. |
| Gluten-Free | Ensure all toppings and ingredients are certified gluten-free. |
5. Fun Shapes And Sizes
Experiment with our silicone molds for playful designs! Use molds shaped like stars, animals, or hearts for a whimsical touch that kids and adults alike will love.
6. Drizzle And Swirl Designs
Create artful designs by:
- Drizzling an additional layer of contrasting chocolate (white chocolate over dark chocolate looks stunning!).
- Swirling peanut butter or caramel into the ice cream mixture before freezing.
These variations and add-ons ensure every batch of Eskimo Pie popsicles is exciting and uniquely personalized. Whether you prefer crunchy textures, bold flavors, or allergen-friendly options, there’s something for everyone to enjoy.
Storage Instructions
Proper storage is essential to maintain the flavor, texture, and integrity of these homemade Eskimo Pie popsicles. Follow these simple steps to ensure your delicious creations stay fresh and ready to enjoy whenever you crave them.
Step 1: Initial Setting
Once we’ve dipped the popsicles in the chocolate coating and added any desired toppings, we should carefully place them on a baking sheet lined with parchment paper. Arrange them in a single layer to prevent sticking. Allow the popsicles to set completely in the freezer for about 30 minutes to 1 hour. This step ensures that the coating hardens evenly and any toppings remain securely adhered.
Step 2: Proper Wrapping
To preserve the freshness and prevent freezer burn, each popsicle should be individually wrapped. Use wax paper, parchment paper, or freezer-safe plastic wrap. Wrap tightly around the entire popsicle, ensuring there are no gaps where air can enter. You can also use reusable silicone bags as an eco-friendly option.
Step 3: Organizing Popsicles
Place the wrapped popsicles into a freezer-safe airtight container or a zip-top freezer bag. If storing multiple layers, separate each with a sheet of parchment paper to avoid sticking. Label the container with the date to keep track of their freshness.
Step 4: Freezing Conditions
Store the Popsicle-filled container in the coldest section of the freezer, away from the door, to maintain a consistent temperature. Keeping them at 0°F (-18°C) or below helps preserve their ideal texture and flavor.
Shelf Life
| Criteria | Timeframe |
|---|---|
| Best Quality | Up to two weeks |
| Safe Consumption | Up to one month |
While the popsicles remain safe to eat for up to a month, we recommend enjoying them within two weeks for the freshest taste and optimal chocolate texture.
Tip for Serving
When you’re ready to enjoy, remove the popsicles from the freezer and let them rest at room temperature for about 1-2 minutes. This allows the chocolate coating to soften slightly, making each bite even more indulgent.
By following these Storage Instructions, we can savor our homemade Eskimo Pie popsicles anytime while maintaining their creamy centers and rich chocolate exteriors.
Conclusion
Making homemade Eskimo Pie popsicles is a rewarding way to enjoy a classic treat with a personal touch. By using quality ingredients, experimenting with flavors, and following simple steps, we can create popsicles that are as fun to make as they are to eat.
Whether you’re sticking to the traditional recipe or adding your own twist, these popsicles are perfect for satisfying cravings and impressing family and friends. With proper storage, we can keep them fresh and ready for any occasion. Let’s get creative and enjoy every bite of these delightful frozen treats!
Frequently Asked Questions
What are Eskimo Pie popsicles?
Eskimo Pie popsicles are a nostalgic dessert combining creamy vanilla ice cream with a smooth chocolate coating. They are a beloved frozen treat enjoyed for their rich flavor and satisfying texture.
Can I make Eskimo Pie popsicles at home?
Yes! Homemade Eskimo Pie popsicles are simple to make with ingredients like heavy cream, milk, sugar, vanilla extract, chocolate chips, and coconut oil. The process is fun and allows for customization.
What tools do I need to make homemade Eskimo Pie popsicles?
You’ll need silicone molds, wooden sticks, mixing bowls, a whisk or mixer, a saucepan for melting chocolate, a spatula, measuring tools, and a baking sheet with parchment paper.
How long do homemade Eskimo Pie popsicles take to freeze?
The ice cream base should freeze for at least 4-6 hours before dipping in chocolate, and the chocolate coating sets in minutes after dipping.
What toppings can I add to Eskimo Pie popsicles?
You can add crushed nuts, sprinkles, shredded coconut, or drizzle designs with different chocolates for a personalized twist.
How can I ensure the chocolate coating is perfect?
Melt chocolate chips with coconut oil for a silky texture and work quickly while dipping. Make sure the popsicles are fully frozen for even coating.
Can I customize the flavor of the ice cream base?
Absolutely! Experiment with flavors like chocolate, fruit extracts, or coffee for unique variations.
Are there vegan or gluten-free options for Eskimo Pie popsicles?
Yes, substitute dairy with coconut milk or almond milk and use vegan chocolate for a plant-based version. Ensure ingredients are gluten-free if needed.
How should I store homemade Eskimo Pie popsicles?
Wrap each popsicle in parchment paper, place them in a freezer-safe container, and store them in the coldest part of the freezer. Consume within two weeks for the best quality.
Do I need any special techniques for cleanup?
To minimize the mess, use parchment paper for dipping and handle chocolate spills immediately. Silicone molds are easy to clean with warm, soapy water.