
Baking bread at high altitudes can be tricky, but mastering it means enjoying fresh, homemade wheat bread no matter where we live. High altitude affects how dough rises and bakes, often causing loaves to collapse or turn out dense. That’s why this High Altitude Wheat Bread Recipe is a game-changer for anyone struggling with traditional recipes.
Ingredients
To ensure success with our High Altitude Wheat Bread Recipe, we carefully select each ingredient to balance moisture, structure, and flavor. Below are the essential components divided into dry and wet categories for clarity and ease of preparation.
Dry Ingredients
The dry ingredients create the foundation of our bread’s texture and rise. Precise measurements ensure optimal gluten development and crumb structure, especially critical at high altitudes.
- 3 ½ cups whole wheat flour (preferably fresh and finely ground)
- 1 ½ teaspoons active dry yeast
- 2 tablespoons sugar (use granulated or brown sugar for added flavor)
- 2 teaspoons salt (enhances taste and controls yeast activity)
- 1 teaspoon vital wheat gluten (improves dough elasticity and rise at high altitudes)
- 1 tablespoon nonfat dry milk powder (improves browning and crumb softness)
Wet Ingredients
Balancing the wet ingredients with the dry is crucial to accommodate the drier environment found at high altitudes.
- 1 ¼ cups warm water (between 110°F and 115°F, optimal for yeast activation)
- 2 tablespoons vegetable oil (or melted butter for richness)
- 1 large egg (adds structure and moisture)
- 1 tablespoon honey (helps retain moisture and enhances flavor)
| Ingredient Type | Item | Amount | Purpose |
|---|---|---|---|
| Dry | Whole wheat flour | 3 ½ cups | Structure and bulk |
| Dry | Active dry yeast | 1 ½ teaspoons | Leavening agent |
| Dry | Sugar | 2 tablespoons | Feed yeast, flavor |
| Dry | Salt | 2 teaspoons | Flavor, yeast regulation |
| Dry | Vital wheat gluten | 1 teaspoon | Improves rise, elasticity |
| Dry | Nonfat dry milk powder | 1 tablespoon | Softness, crust color |
| Wet | Warm water | 1 ¼ cups | Hydrates ingredients, activates yeast |
| Wet | Vegetable oil | 2 tablespoons | Moisture and tenderness |
| Wet | Egg | 1 large | Adds moisture, structure |
| Wet | Honey | 1 tablespoon | Sweetness, moisture retention |
Keeping these ingredients balanced will ensure our bread rises perfectly and tastes delicious despite the challenges of baking at high altitudes.
Equipment Needed
To bake the perfect High Altitude Wheat Bread, having the right equipment is as crucial as using the proper ingredients. Each tool plays a specific role in ensuring consistent results and overcoming the unique challenges posed by high-altitude baking.
Essential Tools for Mixing and Kneading
- Large mixing bowl: Choose a bowl that accommodates at least twice the volume of your dough to allow for rising.
- Measuring cups and spoons: Accuracy matters most; use these to measure dry and wet ingredients precisely.
- Stand mixer with dough hook (optional): Speeds up kneading and develops gluten evenly. Hand kneading can substitute if needed.
- Bench scraper or spatula: Helps in handling sticky dough and scraping down the sides of the bowl.
Rising and Baking Equipment
- Loaf pan (9×5 inch recommended): Provides structure for the bread to rise uniformly. Lightly grease before use.
- Clean kitchen towel or plastic wrap: Covers dough during rising to retain moisture and warmth.
- Oven thermometer: Ensures your oven temperature is accurate, critical for high altitude adjustments.
- Cooling rack: Elevates bread after baking for even cooling and prevents sogginess.
Additional Optional Equipment
- Pastry brush: Useful for brushing the top with egg wash or melted butter to add a glossy crust.
- Digital kitchen scale: For precise ingredient weighing, especially flour and water.
| Equipment | Purpose | Notes |
|---|---|---|
| Large mixing bowl | Mixing and rising dough | Should hold double dough volume |
| Measuring cups/spoons | Precise ingredient measurement | Accuracy affects dough texture |
| Stand mixer with dough hook | Kneading dough efficiently | Optional, hand kneading works too |
| Bench scraper/spatula | Handling sticky dough | Keeps workspace clean |
| Loaf pan (9×5 inch) | Shaping bread during baking | Grease lightly before use |
| Kitchen towel/plastic wrap | Covering dough for rising | Retains moisture and warmth |
| Oven thermometer | Monitor true oven temperature | Essential for high altitude baking |
| Cooling rack | Cooling bread post-baking | Prevents soggy bottoms |
| Pastry brush | Applying finishes like egg wash or butter | Optional for crust texture |
| Digital kitchen scale | Precise weighing of ingredients | Improves recipe consistency |
By assembling these tools ahead of time, we set ourselves up for success. Each piece helps us manage the dough better and adapt to the specific nuances of baking wheat bread at high altitudes. With the correct equipment in place, we can confidently move forward to mix, knead, proof, and bake our bread to a light, airy, and flavorful perfection.
Prep Work
Before we begin, accurate preparation is key to mastering the High Altitude Wheat Bread Recipe. Here we focus on measuring ingredients precisely and making necessary adjustments for high altitude baking to ensure consistent results.
Measuring Ingredients Accurately
Precise measurements are essential for the perfect rise and texture in our high altitude wheat bread. We recommend using these guidelines to avoid common baking pitfalls:
- Use a digital kitchen scale when possible for dry ingredients to enhance accuracy.
- For measuring flour, spoon the flour into the cup, then level it off with a knife. Avoid scooping directly with the measuring cup to prevent packing.
- Liquids should be measured at eye level in a clear, marked measuring cup.
- Double-check that active dry yeast is fresh and measured precisely as it significantly impacts rising.
- Keep all ingredients at room temperature unless otherwise specified to help with even mixing and fermentation.
| Ingredient | Measurement Tips | Notes |
|---|---|---|
| Whole wheat flour | Spoon & level with knife or use scale | Avoid packing for best results |
| Active dry yeast | Use exact weight or volume | Freshness critical |
| Warm water | Measure at eye level in clear cup | Ideal temp 105-110°F (40-43°C) |
| Nonfat dry milk powder | Use scale for precise measurement | Improves texture & flavor |
“Precision at this stage sets the foundation for a successful dough and a beautiful loaf.”
Adjusting for High Altitude
Baking at high altitudes requires several adjustments to compensate for lower air pressure and faster evaporation. For our High Altitude Wheat Bread, we adapt as follows:
- Increase liquid by 1 to 2 tablespoons per cup to combat drier conditions.
- Add a small amount of additional yeast, about 10-15% more than standard, to ensure proper rise.
- Reduce sugar slightly since yeast ferments sugars faster at altitude.
- Shorten rising time by 25% to prevent over-proofing.
- Maintain oven temperature but watch the bread closely to avoid over-browning.
| Adjustment | Low Altitude | High Altitude |
|---|---|---|
| Liquid | 1 cup (240 ml) | 1 to 1 ¼ cups (240-300 ml) |
| Yeast | 2 teaspoons | 2 ¼ teaspoons (10-15% more) |
| Sugar | 2 tablespoons | 1 ½ to 1 ¾ tablespoons |
| Rising Time | 60 minutes | 45 minutes |
Following these preparation steps ensures our dough will rise evenly and bake into a light, tender loaf despite the challenges of high-altitude baking.
Mixing the Dough
Mixing the dough correctly is crucial for achieving the perfect texture and rise in our High Altitude Wheat Bread Recipe. Attention to detail during this step helps combat the unique challenges of baking at high altitudes.
Combining Dry Ingredients
We start by thoroughly combining all the dry ingredients to ensure even distribution of leavening and nutrients. This step prevents uneven rising and dense spots in the bread.
- Whole wheat flour: Use the amount specified, sifted or aerated for lighter texture.
- Active dry yeast: Distribute evenly to promote consistent fermentation.
- Vital wheat gluten: Enhances the dough structure, essential for high altitude.
- Nonfat dry milk powder: Adds tenderness and helps with browning.
- Sugar: Slightly reduced from sea-level recipes to balance quicker yeast activity.
- Salt: Critical for flavor balance and controlling yeast growth.
We recommend mixing these dry ingredients in a large bowl using a whisk or spatula until uniform in texture and color.
Adding Wet Ingredients
Next, we carefully add the wet ingredients to the dry mix to hydrate the flour and activate the yeast:
- Warm water (105°F to 110°F): Key to activating yeast without killing it.
- Vegetable oil: Adds moisture and extends freshness.
- Egg: Provides structure and richness.
- Honey: Natural sweetener that supports yeast fermentation.
We pour the warm water into the dry mix first, stirring gently to combine. Then add the oil, beaten egg, and honey. The goal is to achieve a cohesive dough that is slightly sticky but manageable.
Kneading Techniques for High Altitude
Kneading is especially important in high altitude baking to develop gluten properly for a strong dough structure that can hold gas and rise well.
| Kneading Tips | Explanation |
|---|---|
| Use a stand mixer with dough hook (optional) | Ensures consistent kneading without overworking |
| Knead 8-10 minutes by hand | Develops gluten while avoiding dough overheating |
| Add flour sparingly | Only add small amounts if dough is too sticky; avoid dry dough |
| Look for smooth elastic dough | Dough should stretch without tearing, sign of gluten development |
| Rest dough briefly during kneading | Letting dough rest 5 minutes helps relax gluten strands for easier kneading |
We recommend kneading the dough on a lightly floured surface or in the mixer until it feels elastic and springy when pressed. Proper kneading consistent with high altitude adjustments prevents dense or collapsed bread.
“Kneading well builds the dough’s strength, enabling it to rise against the lower air pressure found at high altitudes.“
By mastering this mixing phase, we set the foundation for a light, airy High Altitude Wheat Bread with a rich flavor and perfect crumb.
First Rise
The first rise is a critical step for our High Altitude Wheat Bread Recipe. This phase allows the yeast to ferment, producing gases that expand the dough, creating its structure and flavor. Mastering this stage ensures a light and airy loaf despite the challenges of high-altitude baking.
Ideal Temperature and Time
At high altitudes, controlling temperature and timing during the first rise is essential because lower air pressure can speed up fermentation. We recommend:
- Ideal temperature range: 75°F to 80°F (24°C to 27°C)
- First rise duration: 45 to 60 minutes
We can create a cozy proofing environment by covering the dough with a damp kitchen towel or plastic wrap and placing it in a warm spot free from drafts. Using an oven with the light on or a proofing box set to the ideal temperature helps maintain consistency.
| Factor | Recommendation | Reason |
|---|---|---|
| Temperature | 75°F to 80°F (24°C–27°C) | Optimal yeast activity |
| First rise time | 45 to 60 minutes | Prevents over-proofing at altitude |
| Covering | Damp towel or plastic wrap | Retains moisture and warmth |
Note: Because yeast ferments faster at high altitudes, reduce rising time by about 25% compared to sea-level recipes to prevent over-proofing, which can collapse the dough structure.
Signs of Proper Proofing
Knowing when the dough has properly risen is key to baking success. Here are the vital indicators we watch for:
- The dough should approximately double in size.
- When gently pressed with a finger, the indentation springs back slowly and partially.
- The surface becomes slightly puffed and smooth.
- Dough feels lighter and more elastic.
If the dough springs back immediately or feels tight, it needs more rising time. If the indentation does not spring back at all, the dough may be over-proofed.
Pro Tip: We do the “poke test” lightly to avoid deflating our dough. This tactile feedback is our best clue that the dough is ready for the next step.
By carefully managing the first rise temperature and time and recognizing these key signs of proofing, we set the stage for a beautifully risen and flavorful high altitude wheat bread.
Shaping the Dough
Once our dough has completed its first rise, it’s time to move on to shaping. This step is crucial for creating the final structure and texture of our High Altitude Wheat Bread. Proper shaping ensures the loaf has an even crumb and a consistent shape during the second rise and baking.
Step 1: Prepare Your Work Surface
Lightly flour a clean, flat surface or use a silicone baking mat to prevent sticking. Avoid adding too much flour as it can dry out the dough and affect the texture.
Step 2: Deflate the Dough Gently
Turn the risen dough out onto the prepared surface. Using your fingertips, gently press down to deflate the dough and release excess gas formed during the rise. This helps achieve a uniform texture.
Step 3: Shape into a Loaf
- Fold the dough edges towards the center.
- Using your hands, gently roll the dough into a tight cylinder.
- Pinch the seams firmly to seal.
- Tuck the ends underneath to create a smooth surface.
Step 4: Transfer to Loaf Pan
Place the shaped dough seam-side down into the greased 9×5-inch loaf pan. This positioning supports an even rise and a uniform shape during baking.
Step 5: Cover for the Second Rise
Cover the dough with a clean kitchen towel or plastic wrap. Place it in a warm, draft-free area to rise. Since we are baking at high altitude, reduce the rising time by approximately 25% to avoid over-proofing.
Shaping Tips to Remember
| Tip | Reason |
|---|---|
| Use minimal flour when shaping | Maintain dough moisture and avoid dense crumb |
| Seal seams tightly | Prevent air pockets and maintain loaf structure |
| Shape firmly but gently | Create tension for a better rise and tight crumb |
| Tuck ends underneath the loaf | Produce a smooth rounded top |
As we shape our dough, keep in mind the delicate balance unfolding at high elevation — less air pressure means quicker rising and a more fragile gluten network. Mastery of this shaping technique sets the stage for a beautifully textured and perfectly risen High Altitude Wheat Bread.
Second Rise
The second rise is a crucial step in our High Altitude Wheat Bread Recipe, allowing the dough to expand once again after shaping. This stage ensures a light, airy crumb and proper oven spring even in the challenging conditions of high elevation baking.
Tips for High Altitude Success
At high altitudes, the lower air pressure affects dough fermentation during the second rise. To master this phase, we must carefully control time, temperature, and dough handling. Here are our top tips:
- Shorten the rising time by approximately 20-30% compared to sea level. Over-proofing can cause the dough to collapse.
- Maintain an ideal temperature between 75°F and 80°F. Use a warm draft-free place and cover the dough with a damp towel or plastic wrap to preserve humidity.
- Gently check dough volume rather than relying solely on time. The dough should rise but not double completely, reflecting faster yeast activity at altitude.
- Handle the dough with care to avoid deflating the delicate gluten network formed during the first rise and shaping.
- If the air is particularly dry, mist the dough lightly with water before covering to prevent crust formation on the dough surface.
| Rising Parameter | Sea Level | High Altitude Adjustment |
|---|---|---|
| Rising Temperature | 75°F – 80°F | Same (75°F – 80°F) |
| Rising Time | 45 – 60 mins | Reduce by 20-30% (30 – 45 mins) |
| Dough Volume Increase | Double | About 1.5 times |
| Humidity Control | Standard | Use damp towel or misting |
“At high altitudes, timing and video observation beat the clock. Trust the dough’s look and feel to guide you through this crucial second rise.”
By following these guidelines during the second rise, we ensure our High Altitude Wheat Bread develops its characteristic light texture and perfect oven spring, avoiding common pitfalls like collapsing or overly dense loaves.
Baking Instructions
Baking High Altitude Wheat Bread requires precise oven settings and careful timing to ensure a perfect crust and crumb. Let’s explore the key steps for baking and checking your bread for doneness.
Oven Temperature and Baking Time
We preheat our oven to 375°F (190°C) to balance thorough baking with a golden crust without burning. Due to the thinner atmosphere at high altitudes, heat transfers differently, so this temperature helps achieve even cooking.
Bake the loaf in a 9×5 inch pan for approximately:
| Bread Size | Oven Temperature | Baking Time |
|---|---|---|
| 1 Loaf | 375°F (190°C) | 30 to 35 minutes |
Tips:
- Place the pan on the middle rack to ensure even heat distribution.
- Avoid opening the oven door during the first 25 minutes to prevent heat loss.
- If the top browns too quickly, tent loosely with foil to prevent burning while the interior continues to bake.
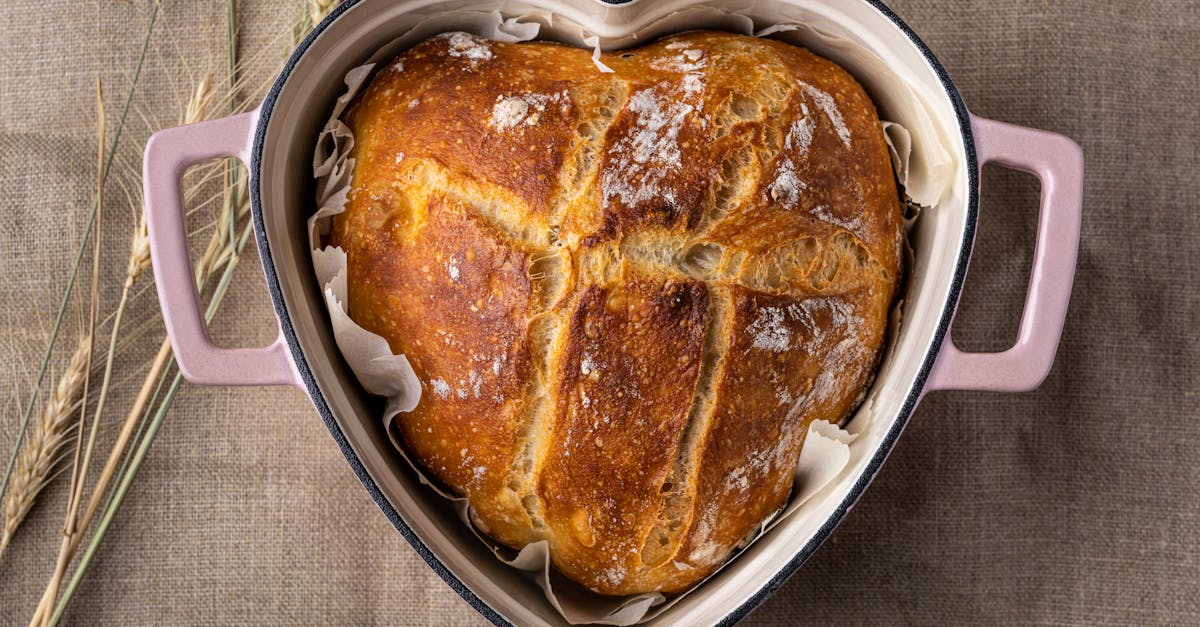
How to Test for Doneness
Confirming that our High Altitude Wheat Bread is fully baked ensures a tender crumb and perfect texture without sogginess or doughiness.
Use the following methods to test doneness:
- Internal Temperature Test:
Insert an instant-read thermometer into the center of the loaf. The ideal internal temperature is at least 200°F (93°C). This indicates the dough has baked through.
- Tap Test:
Remove the bread from the oven and gently tap the bottom of the loaf. A hollow sound signals it is baked properly.
- Visual and Texture Checks:
- The crust should be deep golden brown and firm to the touch.
- The sides will pull slightly away from the pan, indicating that the bread is released from the edges.
We always rely on a combination of these testing methods, as high altitude baking can vary slightly with oven models and humidity. Using these techniques consistently will improve our baking success and produce light, flavorful High Altitude Wheat Bread every time.
Cooling and Storage
Proper Cooling and Storage of our High Altitude Wheat Bread is essential to preserve its texture, flavor, and freshness after baking. Here’s how we ensure our bread stays perfect for days.
Cooling Process
- Remove the bread from the pan immediately after baking to prevent excess moisture buildup, which can make the crust soggy.
- Place the loaf on a wire cooling rack. This allows air to circulate freely around all sides of the bread, preventing condensation on the bottom.
- Let the bread cool at room temperature for at least 1 to 2 hours. This step is crucial as it lets the crumb set and finishes the baking process internally.
“Cooling the bread properly helps maintain the perfect crumb, ensuring every slice is light and tender.”
Storage Guidelines
To keep our High Altitude Wheat Bread fresh, storage methods vary depending on how soon we plan to consume it:
| Storage Method | Best For | Instructions | Duration |
|---|---|---|---|
| Room Temperature | Use within 2-3 days | Wrap loaf in a clean kitchen towel; store in a bread box or paper bag | 2-3 days |
| Refrigerator | Use within 1 week | Wrap bread tightly in plastic wrap or airtight container to prevent drying out | Up to 1 week |
| Freezing | Long-term storage | Slice the bread; wrap thoroughly in plastic wrap and aluminum foil, or store in airtight freezer bags | Up to 3 months |
Tip: Avoid storing bread in plastic bags at room temperature as it traps moisture, accelerating mold growth.
Reheating and Refreshing
To enjoy the bread as fresh as possible after storage:
- For room temperature or refrigerated bread, warm slices in a toaster or oven at 350°F (175°C) for 5-7 minutes.
- For frozen bread, thaw slices at room temperature before reheating. Optionally, wrap in foil and warm in the oven for 10-15 minutes to revive softness.
Following these steps ensures our High Altitude Wheat Bread retains its moist crumb, crispy crust, and nutty flavor long after coming out of the oven.
Tips for Perfecting High Altitude Wheat Bread
Mastering the art of baking high altitude wheat bread requires precision and attention to detail. Here are our essential tips to ensure every loaf turns out light, flavorful, and perfectly risen.
Adjust Liquid Content and Yeast Precisely
At high altitudes, lower air pressure causes liquids to evaporate faster. Increase liquids by 1 to 2 tablespoons per cup to keep the dough moist. Additionally, boost yeast by 10-15% to promote proper rising in thinner air.
| Ingredient | Standard Amount | High Altitude Adjustment |
|---|---|---|
| Water | 1 cup (240 ml) | 1 cup + 1-2 tbsp (255-270 ml) |
| Yeast | 2 1/4 tsp (1 packet) | 2 1/2 to 2 3/4 tsp |
| Sugar | 2 tbsp | Reduce by 1/2 tbsp |
Control Rising Times Smartly
Don’t rely solely on clocks. The dough’s behavior signals readiness better than elapsed time. Shorten both first and second rise times by 20-30% to prevent overproofing. Look for these signs:
“Dough should double in size and slowly spring back when gently pressed without deflating.”
Maintain Ideal Temperature
Aim for a warm, draft-free environment between 75°F and 80°F for proofing. We recommend using a kitchen thermometer and covering the dough with a damp towel or plastic wrap to retain humidity and warmth. This balance supports yeast activity without drying the dough.
Handle Dough Gently During Shaping
At high altitudes, gluten develops faster but is more fragile. Use minimal flour on your surface to avoid drying. When shaping into a loaf:
- Gently deflate the dough to release large air bubbles.
- Seal seams tightly to prevent air pockets.
- Tuck edges underneath for a smooth, even crust.
Monitor Oven Temperature and Baking Time Closely
Preheat to 375°F (190°C) and bake in the middle rack for 30 to 35 minutes. Here are key points to remember:
- Avoid opening the oven door during the first 25 minutes to maintain consistent heat.
- If the crust browns too quickly, tent the loaf loosely with foil.
- Confirm doneness by checking an internal temperature of at least 200°F (93°C) or tapping for a hollow sound.
Use These Tips For Success At High Altitude:
| Challenge | Our Solution |
|---|---|
| Faster drying dough | Increase liquid, handle dough gently |
| Rapid rise and collapse | Shorten rising times, do not overproof |
| Uneven oven spring | Maintain stable oven temperature, proper shaping |
| Dry or cracked crust | Tent with foil if browning too soon |
By following these strategic adjustments and paying close attention to dough behavior and baking environment, we can consistently craft moist, aromatic high altitude wheat bread with a delicious crumb and perfect texture.
Conclusion
Baking wheat bread at high altitude doesn’t have to be intimidating. With the right adjustments and techniques, we can overcome the unique challenges and enjoy fresh, flavorful loaves every time.
By paying close attention to ingredient measurements, rising times, and oven settings, our bread will rise beautifully and develop a satisfying texture. Gathering the proper tools and following each step carefully ensures consistent success in high-altitude baking.
Let’s embrace these tips and make homemade high altitude wheat bread a delicious tradition in our kitchens.
Frequently Asked Questions
Why is baking bread at high altitude challenging?
Baking at high altitude is challenging because lower air pressure affects dough rising and moisture evaporation. This can cause bread to collapse, become dense, or dry out if not adjusted properly.
What ingredients are essential for high altitude wheat bread?
Key ingredients include whole wheat flour, active dry yeast, sugar, salt, vital wheat gluten, nonfat dry milk powder, warm water, vegetable oil, an egg, and honey. These help achieve proper texture and rise.
What equipment do I need for high altitude bread baking?
You’ll need a large mixing bowl, measuring cups and spoons, a stand mixer (optional), bench scraper or spatula, a 9×5 inch loaf pan, kitchen towel or plastic wrap, oven thermometer, and a cooling rack.
How should I adjust ingredient measurements for high altitude?
Increase liquids by 1-2 tablespoons per cup, add 10-15% more yeast, slightly reduce sugar, and shorten rising time by 20-30% for best results.
What’s the best way to mix and knead dough for this recipe?
Combine dry ingredients thoroughly first, activate yeast with warm water, then knead well to develop gluten for a strong, elastic dough that rises well.
How long and at what temperature should the first rise be?
Proof the dough at 75°F to 80°F for 45 to 60 minutes until it doubles in size and springs back slowly when pressed.
What is the proper technique for shaping high altitude bread dough?
Gently deflate the dough, shape it with minimal flour, seal seams tightly, and tuck ends underneath before placing in the loaf pan to maintain structure.
How do I handle the second rise for best results?
Keep the dough at 75°F to 80°F, reduce rising time by 20-30%, check volume gently, and mist lightly if air is dry to avoid drying out dough.
What are the recommended baking temperature and time?
Preheat oven to 375°F and bake the bread in a 9×5 inch pan for 30-35 minutes. Place on the middle rack and avoid opening the door early.
How can I tell when the bread is done?
Look for a deep golden brown crust, hollow sound when tapped, and an internal temperature of at least 200°F (93°C).
What’s the best way to cool and store high altitude wheat bread?
Cool the bread on a wire rack outside the pan for 1-2 hours. Store at room temperature for 2-3 days, in the fridge up to a week, and freeze slices up to 3 months.
Any special tips for perfect high altitude wheat bread?
Be precise with liquid and yeast adjustments, control rising times based on dough behavior, maintain proper proofing temperature, handle dough gently, and watch oven settings closely.