
Baking cinnamon rolls at high altitude can be tricky, but we’ve perfected a recipe that delivers soft, fluffy, and flavorful rolls every time. High altitude affects how dough rises and bakes, so adjustments are key to avoiding dense or dry results.
Our High Altitude Cinnamon Rolls Recipe takes those challenges into account, balancing ingredients and baking times to ensure a delicious outcome. Whether you’re a seasoned baker or new to high-altitude baking, this recipe will help you enjoy classic cinnamon rolls without the guesswork.
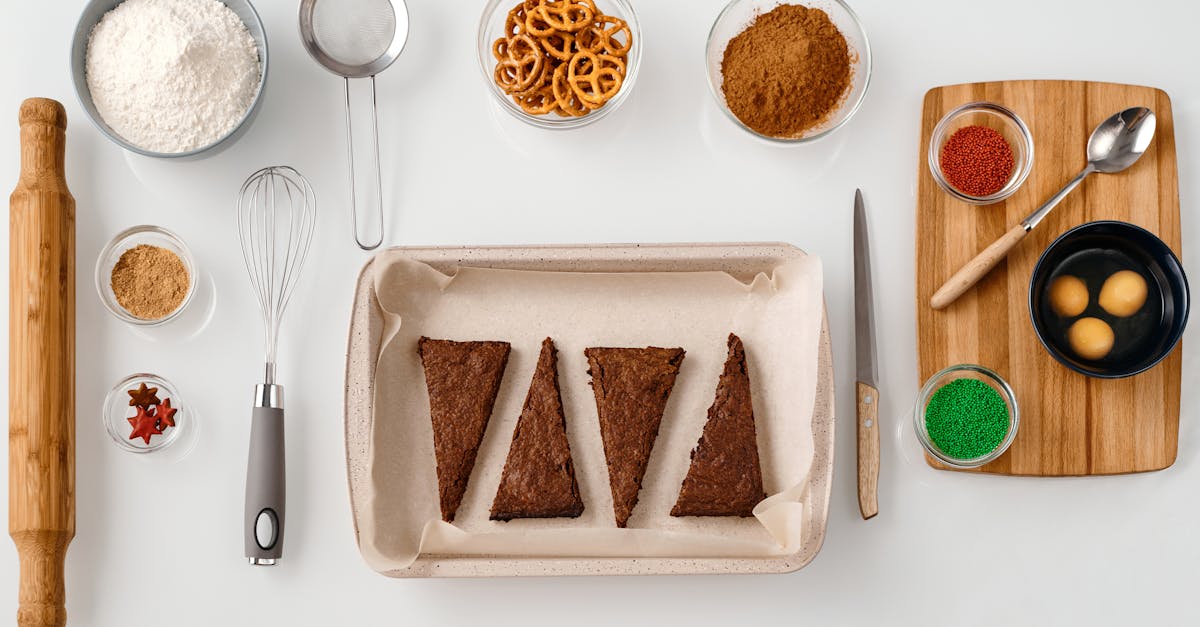
Ingredients
To master our High Altitude Cinnamon Rolls Recipe, precise ingredient measurements and quality components play a crucial role. Below, we have categorized everything you need for this perfectly adjusted high-altitude treat.
Dry Ingredients
We focus on the right flour type and leavening agents to ensure softness and the ideal rise in thinner air:
- 3 ½ cups all-purpose flour, plus extra for dusting and kneading
- ¼ cup granulated sugar
- 1 teaspoon salt
- 2 ¼ teaspoons active dry yeast (one packet) — fresh and vital for optimal leavening
- 1 teaspoon baking powder (helps with high-altitude rise adjustments)
Wet Ingredients
Balancing wet ingredients is key to keeping rolls moist without becoming doughy at altitude:
- 1 cup whole milk, warmed to about 110°F (lukewarm)
- ⅓ cup unsalted butter, melted and cooled
- 2 large eggs, room temperature
- 1 teaspoon pure vanilla extract
Cinnamon Filling Ingredients
This rich and warmly spiced filling is the heart of the rolls, adjusted to hold moisture and flavor at high altitude:
| Ingredient | Measurement | Note |
|---|---|---|
| Brown sugar | ¾ cup | Packed, for deep sweetness |
| Ground cinnamon | 2 tablespoons | Freshly ground preferred |
| Unsalted butter | ⅓ cup | Softened, room temperature |
Icing Ingredients
Our icing recipe ensures a smooth, sweet finish that won’t harden too quickly in lower humidity:
- 4 ounces cream cheese, softened
- ¼ cup unsalted butter, softened
- 1 ½ cups powdered sugar, sifted
- 1 teaspoon pure vanilla extract
- 2 tablespoons milk (add more if needed for desired consistency)
Each ingredient has been selected and measured to counteract common high-altitude baking challenges like premature drying or insufficient rise. We recommend using fresh and quality ingredients to achieve the full potential of this High Altitude Cinnamon Rolls recipe.
Equipment Needed
To achieve perfect High Altitude Cinnamon Rolls, having the right equipment is essential. Each tool plays a crucial role in handling the dough properly, ensuring consistent results despite the altitude challenges.
Essential Tools for Mixing and Preparing Dough
- Large mixing bowl: We use a generously sized bowl to give the dough room to rise without overflowing.
- Measuring cups and spoons: Accurate measurement is critical at high altitudes. Use precise measuring cups and spoons for dry and wet ingredients.
- Stand mixer with dough hook attachment (optional): This saves time and effort in kneading, providing consistent dough texture. Mixing by hand works as well but takes longer.
- Whisk: To combine wet ingredients uniformly and activate yeast evenly.
Rolling and Shaping Equipment
- Rolling pin: A sturdy rolling pin is necessary to roll the dough evenly to the correct thickness for optimal rise.
- Bench scraper or sharp knife: For cleanly cutting the rolled dough into equal portions without compressing it.
Baking Essentials
- 9×13 inch baking pan: Ideal size for baking cinnamon rolls, ensuring they rise against each other to stay soft and fluffy.
- Parchment paper or non-stick spray: We line the pan to prevent sticking and aid in even browning.
Cooling and Icing Tools
- Cooling rack: Allows rolls to cool evenly without becoming soggy on the bottom.
- Mixing bowl and spoon for icing: For blending cream cheese icing smoothly with soft butter and powdered sugar.
Summary Table: Equipment Checklist
| Equipment | Purpose | Notes |
|---|---|---|
| Large mixing bowl | Dough mixing and rising | Room for expansion |
| Measuring cups and spoons | Accurate ingredient measurement | Must be precise |
| Stand mixer & dough hook | Kneading dough efficiently | Optional but recommended |
| Whisk | Mixing wet ingredients | Activates yeast evenly |
| Rolling pin | Rolling dough to uniform thickness | Sturdy and smooth |
| Bench scraper / sharp knife | Cutting dough into rolls | Prevents dough compression |
| 9×13 inch baking pan | Baking cinnamon rolls | Perfect size for soft rise |
| Parchment paper/non-stick spray | Prevents sticking | Helps in even bake |
| Cooling rack | Cooling without sogginess | Promotes texture retention |
| Mixing bowl and spoon for icing | Preparing cream cheese icing | Smooth mixing |
Every item in our High Altitude Cinnamon Rolls Recipe equipment list ensures that we maintain control over the baking process. This control is critical to overcoming the unique rising and moisture challenges posed by high-altitude baking conditions.
High Altitude Baking Tips
Baking cinnamon rolls at high altitude requires specific adjustments to combat lower air pressure and reduced humidity, which can affect dough rise and texture. Here are the essential tips to ensure our High Altitude Cinnamon Rolls Recipe turns out perfectly:
Adjust Ingredient Ratios
- Decrease yeast slightly to prevent overly rapid rising, which can cause collapse.
- Increase flour to strengthen the dough structure, countering weaker gluten development at altitude.
- Reduce sugar a bit since sugar can weaken gluten and cause excessive browning under lower air pressure.
- Add extra liquid cautiously to compensate for faster evaporation caused by dry high-altitude air.
Modify Mixing and Kneading
- Knead the dough just enough to develop gluten elasticity, avoiding overworking, which can lead to toughness.
- Use a stand mixer with a dough hook to ensure efficient and consistent kneading, especially when adding extra flour.
Control Rising Times and Temperatures
- Shorten rising times since dough rises faster at altitude. Keep an eye on the dough and proceed once it doubles in size, even if time is less than recipe states.
- Opt for a slightly cooler rising environment to slow yeast activity and prevent over-proofing.
Baking Temperature and Time
- Increase oven temperature by 15-25°F (8-14°C) to set the structure faster and maintain moisture.
- Reduce baking time as higher temperatures cause faster browning and cooking. Start checking rolls 5 minutes earlier than normal.
| Adjustment | Recommended Change | Reason |
|---|---|---|
| Yeast | Reduce by 1/4 | Prevents over-proofing |
| Flour | Increase by 1-2 tbsp per cup | Strengthens dough |
| Sugar | Reduce by 1-2 tbsp per cup | Avoids excessive browning |
| Liquid | Increase by 1-2 tbsp per cup | Compensates for faster evaporation |
| Oven Temperature | Increase by 15-25°F (8-14°C) | Sets dough structure faster |
| Baking Time | Decrease by 5-10 minutes | Prevents overbaking |
Dough Handling Tips
- Roll out dough evenly to ensure consistent baking and prevent undercooked spots.
- When cutting rolls, use a sharp knife or bench scraper for clean edges, aiding uniform rise.
Monitor Moisture and Dough Consistency
- The dough should be slightly tacky but not sticky. Add flour little by little if overly sticky due to added liquids.
- Cover the dough with a damp cloth during rising to retain moisture without creating sogginess.
Use Essential Equipment for Precision
Having the right tools helps execute these adjustments confidently:
- Accurate measuring cups and spoons
- Stand mixer with dough hook for even kneading
- Rolling pin for uniform dough thickness
- Sharp knife or bench scraper for cutting
- 9×13 inch baking pan lined with parchment paper or sprayed with nonstick for easy release
By incorporating these high altitude baking tips, we ensure our cinnamon rolls achieve the perfect soft crumb and rich flavor despite challenging conditions.
Instructions
Follow these step-by-step instructions to create soft, fluffy, and perfectly risen High Altitude Cinnamon Rolls. Accuracy and timing are key for mastering this recipe in challenging high-altitude conditions.
Preparing the Dough
- Activate the yeast
In a small bowl, combine warm milk (110°F/43°C) with granulated sugar and active dry yeast. Stir gently and let it sit for 5-10 minutes until the mixture becomes foamy, indicating the yeast is active.
- Mix dry ingredients
In a large mixing bowl, whisk together all-purpose flour, baking powder, and salt. This ensures even distribution and proper rising.
- Combine wet ingredients
In a separate bowl, whisk the melted butter, eggs, and vanilla extract until smooth.
- Form the dough
Gradually add the foamy yeast mixture and wet ingredients into the dry ingredients. Mix using a stand mixer fitted with a dough hook or by hand until the dough starts coming together.
- Knead with precision
Knead the dough on a floured surface or with the stand mixer for 8-10 minutes. The dough should become smooth, elastic, and slightly tacky but not sticky.
- First rise
Lightly grease a large bowl with butter or non-stick spray. Place the dough inside and cover it with a clean, slightly damp cloth or plastic wrap. Let it rise in a warm, draft-free area for 45-60 minutes or until it doubles in size.
Tip: In high-altitude baking, warmer temperatures accelerate rising, so check the dough periodically.
| Step | Time | Temperature | Key Notes |
|---|---|---|---|
| Yeast Activation | 5-10 minutes | 110°F (43°C) | Foamy yeast indicates readiness |
| Kneading | 8-10 minutes | Room temperature | Smooth elastic dough |
| First Rise | 45-60 minutes | Warm, draft-free area | Dough doubles in size |
- Prepare for rolling
After the dough has risen adequately, gently punch it down to release excess air. Turn it out onto a floured surface and roll it into a rectangle approximately 16 x 12 inches.
Following this preparation sequence helps us build a sturdy yet tender dough base that will rise beautifully despite high-altitude challenges.
First Rise
Achieving the perfect first rise is crucial for our High Altitude Cinnamon Rolls. At higher elevations, the lower air pressure causes dough to rise faster and can easily overproof if unattended. To control this, we need to monitor the rise carefully and make slight temperature and time adjustments.
Step-by-Step First Rise Instructions:
- Transfer the Kneaded Dough:
Place our kneaded dough into a large, lightly greased mixing bowl. Use butter or non-stick spray so the dough does not stick to the sides during rising.
- Cover the Dough:
Tightly cover the bowl with plastic wrap or a clean damp kitchen towel. This traps moisture to prevent the dough surface from drying out while allowing it to expand.
- Ideal Rising Environment:
At high altitude, keep the dough in a warm but not hot place, between 75°F and 80°F. Temperatures above this can cause the dough to rise too quickly and collapse.
- Monitor Rising Time:
Let the dough rise until it doubles in size. This usually takes about 45 to 60 minutes at high altitude. Since rise time varies, check the dough every 15 minutes after 40 minutes. Press gently with a finger to test — if an indent remains, the dough has risen enough.
| Temperature (°F) | Rising Time (Minutes) | Description |
|---|---|---|
| 75 – 80 | 45 – 60 | Ideal for controlled rise |
| Above 80 | 30 – 45 | Dough rises fast – monitor closely |
| Below 70 | 60+ | Slower rise – may need extended time |
- Avoid Overproofing:
Overproofed dough collapses and forms dense rolls. If the dough rises too rapidly, gently punch down to release excess gas and reshape if necessary.
Tips for Success:
- Use a glass or clear bowl so you can visually monitor dough expansion easily.
- If your kitchen is colder, place the bowl on top of a warm appliance or inside an oven with only the light on to maintain consistent warmth.
- Avoid drafts or direct sunlight during rising to maintain stable conditions.
“The first rise sets the foundation for fluffy, tender cinnamon rolls — patience and precise control make all the difference at high altitudes.”
By controlling temperature and timing carefully during the first rise, we establish the perfect dough structure that will lead to soft, airy, and flavorful rolls despite the challenges of baking high above sea level.
Rolling and Filling the Dough
Once our dough has completed the first rise, it’s time for the crucial step of rolling and filling to build those beautiful layers that make cinnamon rolls irresistible. This stage requires gentle handling to preserve the dough’s airy structure developed during proofing while ensuring an even distribution of the cinnamon filling.
Step 1: Preparing the Work Surface and Dough
- Lightly flour a clean work surface to prevent sticking without adding excess flour that can dry out our dough.
- Turn the risen dough onto the floured surface.
- Using a rolling pin, gently roll the dough into a rectangular shape approximately 16 by 12 inches and about ¼ inch thick. Aim for uniform thickness to ensure even baking.
Step 2: Applying the Cinnamon Filling
Our cinnamon filling should be soft and spreadable to glide easily over the dough without tearing it.
- Spread the softened butter evenly over the dough, leaving a small border (about ½ inch) along one long edge.
- Sprinkle the brown sugar and ground cinnamon mixture generously and evenly over the butter, covering the entire surface except the reserved edge.
| Ingredient | Quantity | Notes |
|---|---|---|
| Butter | 6 tablespoons | Softened for easy spreading |
| Brown Sugar | ¾ cup | Packed |
| Ground Cinnamon | 2 tablespoons | Freshly ground preferred |
Step 3: Rolling the Dough
- Beginning from the long edge with the filling, roll the dough slowly and tightly into a log.
- Use the border without filling to seal the edge and prevent the roll from unraveling during baking.
- If the dough resists rolling, let it rest for 5 minutes. This relaxes the gluten for smooth rolling.
Step 4: Cutting the Rolls
- Using a sharp knife or bench scraper, cut the log into 12 evenly sized rolls, approximately 1½ to 2 inches thick.
- Be precise to ensure uniform sizes and even baking.
Pro Tips for Success
“Rolling and filling the dough correctly sets the stage for soft fluffy cinnamon rolls with swirls bursting with flavor.”
- Work quickly enough to keep the dough cool and prevent over-proofing.
- Maintain gentle pressure to avoid compressing the dough.
- Use a bench scraper dipped in warm water to make clean cuts without dragging the dough.
By meticulously following these steps, we maintain the perfect dough structure and infuse each cinnamon roll with rich, buttery sweetness that will shine through when baked at high altitude.
Shaping the Cinnamon Rolls
Once the dough is properly rolled and filled, it’s time to focus on Shaping the Cinnamon Rolls into perfect spirals that will bake evenly and rise beautifully at high altitude. Follow these precise steps to ensure consistent size and texture throughout.
Step 1: Rolling the Dough Log
- Begin at the long edge closest to you.
- Firmly but gently roll the dough away from you, creating a tight log.
- Ensure the roll is even by tucking the dough in as you progress to avoid gaps that could cause uneven baking.
Pro Tip: Rolling the dough log with a slight pressure helps maintain the structure of the air pockets essential for fluffy rolls at high altitudes.
Step 2: Sealing the Edge
- Pinch the seam edge firmly to seal the log.
- Tuck the edge underneath the log to prevent the dough from unraveling during the second rise and baking.
- A well-sealed edge preserves the cinnamon swirl appearance and avoids leakage of filling.
Step 3: Measuring and Cutting Rolls
Using a sharp bench scraper or a serrated knife:
| Number of Rolls | Approximate Thickness per Roll |
|---|---|
| 9 to 12 | 1 to 1.25 inches (2.5 to 3.2 cm) |
- Cut the dough log into even segments to promote uniform baking.
- Keep the cuts clean and vertical; avoid squashing the dough to maintain its fluffiness.
- Work efficiently but gently to keep the dough slightly chilled, preventing stickiness.
“Consistency in size directly impacts baking performance and texture quality of our high altitude cinnamon rolls.”
Step 4: Arranging Rolls in the Pan
- Place the rolls cut side up in the prepared 9×13 inch baking pan.
- Space them about 1/2 inch apart to allow room for the second rise and expansion.
- Avoid overcrowding to prevent rolls from merging into a single large mass.
Step 5: Preparing for the Second Rise
- Cover the pan loosely with a clean kitchen towel or plastic wrap.
- Let the rolls rise in a warm environment between 75°F and 80°F for 30 to 45 minutes or until nearly doubled.
- Monitor closely at high altitude because the dough will ferment faster.
This shaping process secures that our High Altitude Cinnamon Rolls keep their distinctive swirl and soft texture, perfectly primed for baking to golden, gooey perfection.
Second Rise
After carefully shaping our High Altitude Cinnamon Rolls and arranging them neatly in the greased 9×13 inch baking pan, it is crucial to allow the dough its second rise for optimal softness and fluffiness. This step ensures the rolls develop the perfect light texture and avoid being dense or gummy due to high-altitude conditions.
Steps for the Second Rise
- Cover the Rolls: Lightly cover the pan with a clean kitchen towel or plastic wrap. This traps moisture and prevents the dough from drying out on the surface.
- Ideal Temperature: Place the covered rolls in a warm, draft-free spot. The ideal environment temperature is between 75°F and 80°F to encourage even rising without rushing the process.
- Duration: Allow the rolls to rise for 30 to 45 minutes or until they have nearly doubled in size. High altitude causes faster fermentation, so keep a close eye to avoid over-proofing.
- Check Carefully: Gently press one roll with your fingertip. If the indentation springs back slowly and partially, it’s ready for baking. If it springs back quickly, give it a few more minutes; if it doesn’t spring back at all, it may be over-proofed.
Why the Second Rise Matters at High Altitude
| Issue Caused by Improper Second Rise | Effect on Rolls |
|---|---|
| Under-proofing | Dense texture, tighter crumb |
| Over-proofing | Collapsed rolls, coarse texture |
| Uneven rising environment | Uneven texture and baking results |
At high altitudes, reduced air pressure accelerates yeast activity, making the second rise a more delicate process compared to sea level. Controlling this step carefully allows the dough to develop the right amount of gas bubbles, leading to those signature soft, airy rolls with a tender crumb.
Pro Tips for Success
- Avoid warming the rolls near a hot oven or sunlight to prevent over-fermentation.
- If your kitchen is cool, create a makeshift warming box by turning on the oven light and placing the dough inside, uncovered, but watch closely.
- Resist the urge to rush the process; patience here pays off in perfect texture and flavor.
By mastering the second rise with these precise steps and attention, we set the stage for a flawless bake, ensuring our cinnamon rolls will emerge golden, gooey, and irresistible.
Baking
Baking our High Altitude Cinnamon Rolls requires precise attention to temperature, timing, and oven settings to overcome the challenges introduced by thinner air. Follow these steps closely for consistently soft, fluffy, and golden rolls.
Preheat the Oven
- Preheat your oven to 375°F (190°C). This slightly higher temperature helps set the structure quickly and prevents the rolls from drying out.
- Position the oven rack in the middle to ensure even heat distribution.
Prepare the Baking Pan
- Lightly grease a 9×13 inch pan with unsalted butter or use parchment paper to prevent sticking.
- Arrange the cinnamon rolls with some space between each to allow for final expansion during baking.
Baking Time and Temperature
| Step | Temperature | Duration | Notes |
|---|---|---|---|
| Bake | 375°F (190°C) | 18–22 minutes | Starts browning on top, internal temp ~190°F |
| Check at 15m | – | – | Test doneness by visual cues and slight springiness |
- Avoid opening the oven door prematurely to prevent heat loss and uneven rising.
- Use a thermometer if possible; the internal dough temp should reach approximately 190°F (88°C) for perfectly baked rolls.
Visual and Texture Cues for Doneness
- Rolls should be golden brown on the surface.
- The tops will be slightly firm but with a tender spring when lightly pressed.
- The edges may crisp slightly, creating a contrast to the soft interior.
Post-Baking Handling
- Remove rolls from the oven and place the pan on a cooling rack.
- Let the rolls cool 10 to 15 minutes to set before applying icing.
- This resting period ensures the icing melts slightly without sliding off, creating that signature luscious coating.
“Patience during cooling is key to maximizing the gooey texture of the cinnamon and sugar filling as it settles warm inside soft rolls.”
Icing the Cinnamon Rolls
- While still warm, generously spread the cream cheese icing prepared earlier.
- Use an offset spatula or butter knife to cover each roll evenly for rich flavor and beautiful presentation.
Following these baking instructions tailored for high altitude guarantees rolls that are soft, moist, and perfectly risen, defeating the usual issues of dryness or toughness common in elevated climates.
Cooling and Glazing
Once the high altitude cinnamon rolls finish baking, proper cooling and glazing are essential steps to enhance their flavor and texture. We’ll guide you through these final touches to achieve the perfect presentation and taste.
Preparing the Icing
To prepare the classic cream cheese icing that complements our cinnamon rolls perfectly, we follow precise proportions and techniques to ensure it is smooth and rich. Here’s what we need:
- 4 oz cream cheese, softened
- 2 tbsp unsalted butter, softened
- 1 cup powdered sugar, sifted
- 1/2 tsp vanilla extract
- 1 to 2 tbsp milk (adjust for desired consistency)
Steps to prepare:
- In a medium bowl, combine the softened cream cheese and butter.
- Beat with an electric mixer on medium speed until creamy and smooth, about 2 minutes.
- Gradually add the powdered sugar, continuing to mix slowly to prevent dust cloud formation.
- Mix in vanilla extract.
- Add milk little by little until the icing reaches a creamy but spreadable texture.
“Smooth, creamy icing is the perfect balance to the soft, fluffy high altitude cinnamon rolls—neither too thick nor too runny.”
| Ingredient | Amount | Preparation |
|---|---|---|
| Cream Cheese | 4 oz | Softened |
| Unsalted Butter | 2 tbsp | Softened |
| Powdered Sugar | 1 cup | Sifted |
| Vanilla Extract | 1/2 tsp | — |
| Milk | 1 to 2 tbsp | Adjusted for consistency |
Applying the Icing
The timing for applying icing is crucial for the best flavor and texture in our high altitude cinnamon rolls.
- Allow the rolls to cool on a wire rack for 10 to 15 minutes after baking. Cooling slightly prevents the icing from melting completely and sliding off.
- Using a butter knife or small offset spatula, generously spread the cream cheese icing over the warm cinnamon rolls. The residual warmth will slightly melt the icing giving it a glossy finish and helping it seep into every crevice.
- For an extra indulgent touch, apply an extra dollop of icing to each roll just before serving.
Tip: If you prefer a thinner glaze, stir a bit more milk into the icing before spreading, but be cautious not to add too much or it will become too runny.
By carefully cooling and glazing, we lock in moisture and enhance the richness of our fluffy, elevated cinnamon rolls, creating a treat that’s irresistible at every bite.
Serving Suggestions
To maximize the enjoyment of our High Altitude Cinnamon Rolls, let’s explore some perfect serving ideas that highlight their soft texture and rich flavors. These suggestions will elevate the eating experience whether for breakfast, brunch, or a cozy dessert.
Serve Warm to Enhance Softness and Flavor
- Serve the cinnamon rolls warm, ideally after they have cooled for about 10 to 15 minutes post-baking.
- Apply the cream cheese icing while the rolls are still warm for a glossy, melt-in-the-mouth finish that locks in moisture.
- If needed, gently reheat rolls in the oven at 300°F (150°C) for 5 minutes to refresh their softness before serving.
Pair With Beverages That Complement Cinnamon
A well-chosen drink can elevate our cinnamon rolls’ warm spices and creamy sweetness. Consider these pairings:
| Beverage | Flavor Profile | Serving Tip |
|---|---|---|
| Coffee | Robust and slightly bitter | Use a medium roast with cream |
| Chai Tea | Spiced, aromatic, with hints of cinnamon | Serve hot with milk |
| Hot Chocolate | Sweet and creamy | Top with whipped cream for indulgence |
| Spiced Apple Cider | Fruity and cinnamon-spiced | Serve warm with a cinnamon stick |
Add Fresh Fruit or Nuts for Texture Contrast
- Serve with a side of fresh berries such as blueberries or strawberries to add a tangy balance.
- Sprinkle toasted pecans or walnuts on the icing for a crunchy contrast that complements the cinnamon filling.
Create Cinnamon Roll Breakfast Platters
- Arrange cinnamon rolls on a large platter accompanied by:
- Scrambled eggs or a vegetable frittata for a savory balance.
- A selection of yogurt and granola for a wholesome contrast in textures.
- Freshly squeezed orange juice or a citrus fruit salad to add brightness.
Customize with Extra Toppings
Personalize your cinnamon rolls according to taste preferences by adding:
- A drizzle of maple syrup or honey for extra sweetness.
- A light dusting of powdered sugar for an elegant finishing touch.
- A spoonful of whipped cream or butter served alongside for added richness.
“Serving our High Altitude Cinnamon Rolls warm with complementary beverages and fresh accompaniments enhances their soft, fluffy texture and rich cinnamon flavor, creating a delightful sensory experience.”
By applying these serving suggestions, we highlight the best qualities of our cinnamon rolls and make every bite an indulgent pleasure.
Make-Ahead and Storage Tips
To ensure we enjoy the freshest and most flavorful High Altitude Cinnamon Rolls, preparation and storage are key. Here are our best tips to make this process seamless.
Make-Ahead Options
- Prepare the dough in advance: We can mix, knead, and complete the first rise the night before. After punching down the dough, cover it tightly with plastic wrap and refrigerate.
- Shape and arrange the rolls: The next morning, shape the rolls, place them in the baking pan, cover, and allow them to complete the second rise before baking.
- Night-before icing prep: Make the cream cheese icing ahead and refrigerate it in an airtight container. Bring it to room temperature, stirring gently before using.
This approach not only fits busy schedules but also enhances flavor development due to the slow fermentation in the fridge.
Storage Guidelines
| Storage Method | Condition | Duration | Notes |
|---|---|---|---|
| Room Temperature | Covered with plastic or foil | Up to 24 hours | Best for immediate consumption |
| Refrigerator | Airtight container | 3–4 days | Warm before serving for softened texture |
| Freezer | Individually wrapped and sealed | Up to 2 months | Thaw overnight in fridge before reheating |
Reheating Instructions
- Preheat oven to 350°F (175°C).
- Place rolls in an oven-safe dish.
- Cover loosely with foil to prevent drying.
- Heat for 10–15 minutes or until warmed through.
- Apply icing if desired, for that fresh-baked taste.
We avoid microwaving to prevent uneven heating and sogginess, preserving the fluffy texture we want in every bite.
Key Tips for Success
- Always cool the rolls completely before storing to avoid condensation buildup.
- For make-ahead rising, refrigerate dough to slow fermentation and improve flavor.
- When freezing, wrap rolls tightly to prevent freezer burn and maintain moisture.
By mastering these make-ahead and storage strategies, we guarantee that every batch of High Altitude Cinnamon Rolls delights even when prepared ahead or saved for later.
Conclusion
Baking cinnamon rolls at high altitude doesn’t have to be a challenge when you have the right recipe and techniques. With careful adjustments and attention to detail, we can create soft, fluffy rolls that rival any bakery’s.
By using quality ingredients and following precise steps, our cinnamon rolls come out perfectly risen and full of flavor every time. Plus, the tips we’ve shared make the process manageable for bakers of all skill levels.
We encourage you to try this recipe and enjoy the rewarding experience of fresh, homemade cinnamon rolls that rise beautifully even in thinner air. Your kitchen will soon be filled with irresistible aromas and delicious results worth sharing.
Frequently Asked Questions
What adjustments are needed for baking cinnamon rolls at high altitude?
High altitude baking requires reducing yeast, increasing flour slightly, and lowering sugar. Baking temperature and time may also need adjustment to prevent dryness or density. Controlling rising times and dough moisture is crucial for soft, fluffy rolls.
What are the key ingredients for high altitude cinnamon rolls?
Essential ingredients include all-purpose flour, granulated sugar, salt, active dry yeast, and baking powder for dry components; warmed milk, melted butter, eggs, and vanilla for wet; brown sugar, cinnamon, softened butter for filling; and cream cheese, powdered sugar, butter, vanilla, and milk for icing.
Which equipment is essential for making high altitude cinnamon rolls?
You’ll need a large mixing bowl, accurate measuring tools, a stand mixer with dough hook, rolling pin, bench scraper or knife, 9×13 inch baking pan, parchment paper or non-stick spray, cooling rack, and mixing bowl with spoon for icing.
How do I handle dough rising at high altitude?
Because yeast acts faster, monitor rising closely and shorten rising times if needed. Cover dough to retain moisture, maintain a stable rising temperature, and avoid direct heat to prevent over-proofing and drying out.
What is the ideal baking temperature and time for these cinnamon rolls?
Preheat your oven to 375°F (190°C). Bake the rolls for 18–22 minutes, watching for a golden color and soft, springy texture to judge doneness.
How should I apply icing for the best flavor?
Apply cream cheese icing while the rolls are still warm but not hot. This melts the icing slightly, locking in moisture and enhancing the flavor and presentation.
Can I prepare cinnamon rolls ahead of time?
Yes, you can prepare the dough in advance and refrigerate it for slow fermentation. Shape the rolls the next morning for fresh baking. Properly cool and wrap rolls before storing at room temperature or freezing.
How should I store leftover cinnamon rolls?
Keep leftover rolls at room temperature for up to two days in an airtight container, refrigerate for up to a week, or freeze tightly wrapped for up to three months. Reheat gently to preserve softness.
What are some good serving suggestions for high altitude cinnamon rolls?
Serve warm with cream cheese icing. Pair with coffee, chai, hot chocolate, or spiced apple cider. Add fresh fruit or nuts for texture, or customize with maple syrup or whipped cream for extra indulgence.
Why is ingredient quality important for this recipe?
High quality and fresh ingredients ensure proper rise, flavor, and texture, especially essential at high altitude where conditions challenge typical baking results.