
As the crisp air of fall settles in, nothing feels more comforting than the warm aroma of a freshly baked apple cake. Our Harvest Apple Cake Recipe captures the essence of the season with juicy apples and a blend of cozy spices that make every bite a celebration of autumn’s best flavors.
This cake is perfect for family gatherings or a simple weekend treat. It’s moist tender and packed with natural sweetness from the apples, making it a delightful way to enjoy the harvest. Whether you’re a seasoned baker or just looking for a delicious fall dessert, this recipe is sure to become a favorite in our kitchen.
Let’s dive into creating a classic dessert that brings the spirit of the season right to our table.
Ingredients
To create our Harvest Apple Cake, we gather fresh and high-quality ingredients that bring out the warm, tender flavors of fall. Below are the components thoughtfully divided for ease of use and clarity.
Dry Ingredients
We start by combining the dry elements that provide structure and balance to our cake’s luscious texture:
- 2 ½ cups (320g) all-purpose flour, sifted for lightness
- 1 ½ teaspoons baking powder for rise
- ½ teaspoon baking soda to enhance softness
- ½ teaspoon salt for flavor balance
- ½ cup (100g) granulated sugar to cut sharp apple tartness
- ½ cup (110g) packed light brown sugar for subtle caramel notes
| Ingredient | Measurement | Purpose |
|---|---|---|
| All-purpose flour | 2 ½ cups (320g) | Base structure |
| Baking powder | 1 ½ teaspoons | Leavening agent |
| Baking soda | ½ teaspoon | Tenderness |
| Salt | ½ teaspoon | Flavor enhancer |
| Granulated sugar | ½ cup (100g) | Sweetness |
| Light brown sugar | ½ cup (110g) | Moistness, caramel flavor |
Wet Ingredients
The wet ingredients infuse moisture and richness, crucial for that dense yet fluffy crumb:
- 2 large eggs, at room temperature
- 1 cup (240ml) vegetable oil for moistness without heaviness
- 1 teaspoon pure vanilla extract to deepen flavor layers
- ½ cup (120ml) buttermilk for tenderness and slight tang
Spices and Add-ins
This Harvest Apple Cake gets its distinctive warm and cozy personality from a thoughtful blend of spices and texture boosts:
- 3 medium apples, peeled, cored, and chopped finely — choose crisp varieties like Granny Smith or Honeycrisp for a perfect balance
- 1 ½ teaspoons ground cinnamon for that signature warm spice
- ½ teaspoon ground nutmeg to round out flavor
- ¼ teaspoon ground cloves to add subtle depth
- ½ cup (50g) chopped walnuts or pecans, toasted for crunch and earthiness (optional)
- ¼ cup raisins or dried cranberries for bursts of tart sweetness (optional)
Equipment Needed
To make our Harvest Apple Cake perfectly, we need the right equipment that ensures smooth preparation and optimal baking results. Here is what we recommend having on hand:
- Mixing Bowls: At least two medium-sized bowls—one for dry ingredients, one for wet ingredients.
- Electric Mixer or Whisk: An electric hand mixer speeds up combining ingredients but a sturdy whisk works well for manual mixing.
- Measuring Cups and Spoons: Precise measurements are essential for balancing flavors and achieving the right cake texture.
- Apple Peeler, Corer, and Slicer: This tool simplifies prepping the apples quickly and uniformly, which we want for even distribution in the batter.
- Spatula: A flexible silicone spatula helps fold ingredients gently, especially when incorporating apples and nuts.
- 9-inch Round Cake Pan or Bundt Pan: Choose either depending on your preference. Ensure it’s well greased or lined with parchment paper to avoid sticking.
- Cooling Rack: Once baked, we transfer the cake here to cool evenly, preventing sogginess.
- Oven Thermometer (optional but recommended): To verify the oven is at the ideal 350°F, guaranteeing consistent baking temperature.
| Equipment | Purpose | Recommendation |
|---|---|---|
| Mixing Bowls | Separate wet and dry mixing | Medium size, 2+ needed |
| Electric Mixer/Whisk | Combine ingredients smoothly | Electric for speed, whisk manual |
| Measuring Cups & Spoons | Accurate ingredient amounts | Standard set |
| Apple Peeler/Corer/Slicer | Prep apples uniformly | Manual or electric |
| Silicone Spatula | Fold ingredients delicately | Flexible and easy to clean |
| 9-inch Cake Pan or Bundt Pan | Bake cake evenly | Greased or parchment-lined |
| Cooling Rack | Even cooling after baking | Wire rack preferred |
| Oven Thermometer (Optional) | Confirm baking temperature | Ensures accurate heat |
By preparing these tools ahead, we streamline our process. Each piece of equipment plays a crucial role in achieving the moist texture and warm flavor that define our beloved Harvest Apple Cake.
Prep Work
Before we dive into mixing our Harvest Apple Cake, let’s get everything ready to ensure a smooth baking experience. Proper prep sets the stage for a perfectly moist and flavorful cake.
Preparing the Apples
Peeling, coring, and slicing the apples uniformly is crucial for even baking and consistent texture. We recommend using a sharp apple peeler, corer, and slicer to speed up the process and maintain precision.
- Choose crisp apples such as Granny Smith, Honeycrisp, or Fuji for balanced sweetness and tartness.
- Peel each apple completely to avoid chewy skin pockets.
- Core and slice apples into 1/4-inch thick slices for even distribution.
- Toss the sliced apples immediately in a small bowl with 1 tablespoon lemon juice to prevent browning and enhance brightness.
This step preserves the natural sweetness and freshness of the apples, which is vital for the Harvest Apple Cake’s signature flavor.
Measuring and Sifting Ingredients
Accurate measurement and proper sifting of dry ingredients guarantee consistent texture and rise in our cake.
| Ingredient | Measurement | Preparation Details |
|---|---|---|
| All-purpose flour | 2 ½ cups | Sifted to remove lumps |
| Baking powder | 1 ½ teaspoons | Sifted with flour |
| Baking soda | ½ teaspoon | Sifted with flour |
| Salt | ½ teaspoon | Sifted with flour |
| Granulated sugar | 1 cup | Measured precisely |
| Light brown sugar | ½ cup, packed | Measured and leveled |
- Use a digital scale or dry measuring cups for precision.
- Always sift flour and leavening agents together at least twice to aerate and eliminate clumps.
- Mix sugars thoroughly with dry ingredients before combining with wet to distribute sweetness evenly.
“Exact measurements and thorough sifting help create the light, moist crumb that defines our Harvest Apple Cake.”
By completing these prep steps, we ensure our ingredients are ready to come together perfectly in the mixing stage.
Instructions
Follow these step-by-step instructions to create our Harvest Apple Cake with the perfect balance of spice, moisture, and tender crumb.
Mixing the Batter
- In a large bowl, whisk together the dry ingredients: 2 ½ cups all-purpose flour, 1 ½ teaspoons baking powder, 1 teaspoon baking soda, ½ teaspoon salt, 1 cup granulated sugar, and ¾ cup light brown sugar. Sifting these together ensures an even distribution for a consistent rise.
- In a separate bowl, combine the wet ingredients: beat 3 large eggs, 1 cup vegetable oil, 2 teaspoons vanilla extract, and 1 cup buttermilk until smooth and well blended.
- Gradually pour the wet ingredients into the dry mixture. Use a spatula or an electric mixer on low speed to mix until just combined. Avoid overmixing to keep the cake tender and fluffy.
Incorporating the Apples
- Prepare 3 medium apples by peeling, coring, and slicing them evenly. We suggest using crisp varieties like Granny Smith or Honeycrisp for the best flavor and texture.
- Toss the apple slices in 1 tablespoon lemon juice to prevent browning and enhance their tartness.
- Gently fold the apples into the batter with a flexible silicone spatula to ensure even distribution without breaking the slices.
- Optionally, stir in ½ cup chopped nuts or ½ cup dried cranberries for added texture and flavor.
| Ingredient | Measurement | Notes |
|---|---|---|
| Apples (peeled & sliced) | 3 medium | Granny Smith, Honeycrisp |
| Lemon juice | 1 tablespoon | Prevent browning |
| Nuts (optional) | ½ cup | Chopped walnuts or pecans |
| Dried cranberries (optional) | ½ cup | For added texture |
Preparing the Baking Pan
- Preheat the oven to 350°F (175°C). Use an oven thermometer to verify the temperature for perfect baking.
- Grease a 9-inch round or Bundt pan thoroughly with softened butter or non-stick spray. Then dust the pan lightly with flour to prevent sticking.
- Alternatively, line the bottom of the pan with parchment paper for extra insurance against sticking.
- Pour the batter evenly into the prepared pan, smoothing the top gently with a spatula to promote even rising.
- Place the pan on the center rack in the oven for 50 to 60 minutes or until a toothpick inserted in the center comes out clean.
By following these detailed steps, we guarantee a moist Harvest Apple Cake with enticing autumn aromas and a delicate crumb that delights every bite.
Baking Directions
To achieve the perfect Harvest Apple Cake, it is crucial to follow the baking steps precisely. Proper oven temperature and timing ensure a moist texture and even bake, while checking for doneness avoids undercooked or dry results.
Oven Temperature and Timing
Preheat the oven to a steady 350°F (175°C) to create an ideal environment for the cake to rise and cook evenly. We recommend using an oven thermometer to verify the temperature since accuracy directly affects the cake’s texture.
Place the prepared cake pan on the center rack for uniform heat distribution. Bake covered or uncovered, depending on your pan type, usually for 50 to 60 minutes. Start checking at 50 minutes to prevent overbaking.
| Aspect | Detail |
|---|---|
| Oven Temperature | 350°F (175°C) |
| Baking Time | 50 to 60 minutes |
| Rack Position | Center |
| Pan Preparation | Greased and floured or parchment-lined |
Checking for Doneness
To confirm that our Harvest Apple Cake is perfectly baked, use these reliable methods:
- Insert a clean toothpick or cake tester into the center of the cake.
- If it comes out clean or with just a few moist crumbs, the cake is done.
- If wet batter sticks to the tester, continue baking and check every 5 minutes.
- The cake edges should slightly pull away from the pan, indicating doneness.
- The top will have a golden-brown hue and spring back lightly when pressed.
“Remember, overbaking can dry out the cake, so precise timing and temperature control are key to a tender moist crumb filled with rich apple flavor.“
By following these baking directions, we ensure our Harvest Apple Cake delivers the warm, comforting taste and texture that make it a treasured fall dessert.
Cooling and Serving
Proper cooling and thoughtful serving bring out the full flavor of our Harvest Apple Cake. Let’s explore how to cool this moist cake perfectly and enhance it with ideal toppings.
Cooling the Cake
After baking at 350°F for 50 to 60 minutes, follow these steps for optimal cooling:
- Remove the cake from the oven gently using oven mitts.
- Place the pan on a cooling rack to allow air circulation around the cake.
- Let the cake cool in the pan for about 15 to 20 minutes. This allows the cake to firm up, easing removal.
- Run a butter knife along the edges of the pan to loosen the cake.
- Invert the cake onto the cooling rack carefully to remove it from the pan.
- Allow the cake to cool completely, approximately 1 to 2 hours, before serving or applying toppings. This prevents melting or sogginess.
| Cooling Step | Time | Purpose |
|---|---|---|
| Cooling in pan | 15 to 20 minutes | Allows slight firming |
| Cooling on rack | 1 to 2 hours (complete) | Ensures even cooling and sets texture |
Suggested Toppings and Garnishes
To complement the warm spices and juicy apples in the cake, consider these toppings and garnishes that bring texture, flavor, and presentation appeal:
- Cream Cheese Frosting: A smooth, tangy layer that balances sweetness. Spread evenly or pipe for decorative effect.
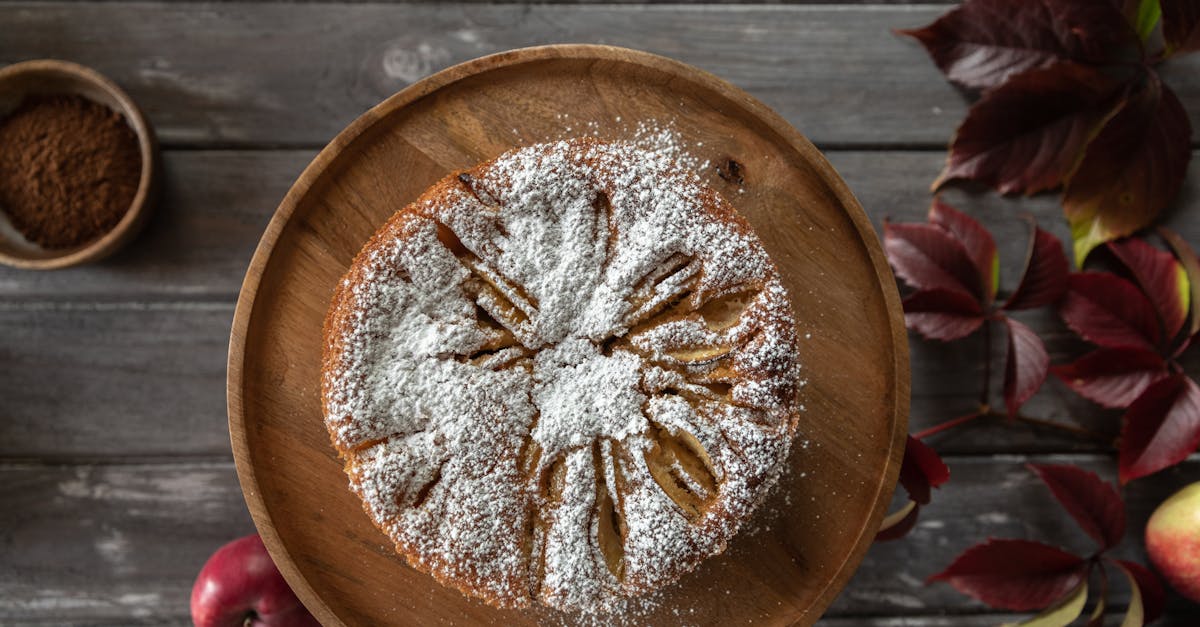
- Powdered Sugar Dusting: Lightly sifted over the top for a simple, elegant look and subtle sweetness.
- Chopped Toasted Walnuts or Pecans: Adds crunch and deep nutty flavor.
- Caramel Sauce Drizzle: Warm caramel enhances the cozy fall flavors of the cake.
- Fresh Apple Slices or Cinnamon Sticks: Use around the serving plate for a festive touch.
- Whipped Cream: Light and airy, provides a delightful contrast to the cake’s moist density.
“Tip: Combine toppings like cream cheese frosting with a sprinkle of chopped nuts for an indulgent mouthfeel.”
Here is a summary of topping options for easy selection:
| Topping | Flavor Profile | Serving Suggestions |
|---|---|---|
| Cream Cheese Frosting | Tangy, rich | Spread fully or pipe decoratively |
| Powdered Sugar | Mildly sweet | Light dusting via sieve |
| Toasted Walnuts/Pecans | Crunchy, nutty | Sprinkle over frosting or plain cake |
| Caramel Sauce | Sweet, buttery | Drizzle warm over sliced servings |
| Fresh Apple & Cinnamon | Crisp, aromatic | Use as garnish around plate |
| Whipped Cream | Light, airy | Dollop on individual slices |
Use these finishing touches to elevate our Harvest Apple Cake into a memorable centerpiece for your autumn table.
Make-Ahead Tips
To enjoy our Harvest Apple Cake with ease and preserve its delicious flavors, implementing smart make-ahead strategies is essential. Here’s how we can prepare in advance for a flawless dessert experience:
Prepare the Batter in Advance
We can mix the batter up to 24 hours ahead. After folding in the apples and optional add-ins like nuts or dried fruits, cover the bowl tightly with plastic wrap or transfer the batter to an airtight container and refrigerate. Chilling the batter enhances flavor melding while maintaining moisture.
| Step | Details |
|---|---|
| Mix batter | Combine dry and wet ingredients as instructed |
| Fold in apples & add-ins | Gently fold in to prevent apple breakage |
| Store | Cover tightly, refrigerate up to 24 hours |
Bake When Ready
When we’re ready, bring the batter to room temperature for about 30 minutes before baking. This step promotes even baking and a consistent crumb texture. Grease and prepare the pan just before pouring in the batter to avoid sticking.
Cooling and Storage
After baking, allow the cake to cool in the pan for 15–20 minutes. Next, invert the cake onto a wire rack, letting it cool completely for 1 to 2 hours. For make-ahead convenience:
- Wrap the cooled cake tightly with plastic wrap then aluminum foil.
- Store it at room temperature for up to 2 days or in the refrigerator for up to 5 days.
- For longer storage, freeze the wrapped cake for up to 3 months; thaw overnight in the fridge before serving.
Serving on the Day Of
If we refrigerate or freeze the cake, bring it back to room temperature before serving to fully enjoy its tender and moist texture. Warm slices slightly in the microwave (10–15 seconds) to revive the comforting fall spices and juicy apple flavors.
Pro Tip:
“For extra moistness, brush the cooled cake with a thin layer of apple juice or warm caramel sauce before wrapping for storage.”
Using these make-ahead tips, we can savor our Harvest Apple Cake any time with minimal effort while preserving its seasonal charm and rich flavor.
Storage Recommendations
Proper storage is essential to preserve the moist texture and warm flavors of our Harvest Apple Cake. Follow these steps to keep your cake fresh and delicious for days or even weeks.
Short-Term Storage: Room Temperature
- After the cake has completely cooled, wrap it tightly in plastic wrap or place it in an airtight container.
- Store at room temperature, ideally in a cool, dry place away from direct sunlight.
- The cake will stay fresh for up to 3 days without refrigeration.
- Before serving, bring the cake to room temperature for the best flavor and texture.
- Pro tip: Brush the cake lightly with warm apple juice or caramel sauce before wrapping to enhance moistness.
Medium-Term Storage: Refrigeration
- To extend freshness, store the cake in an airtight container or wrap it well with plastic wrap and aluminum foil.
- Refrigerate for up to 7 days.
- Allow the cake to sit at room temperature for about 30 minutes before serving to revive its soft crumb and spice aroma.
- Heating slices slightly in the microwave for 10-15 seconds can intensify the fall spices and juicy apple flavors.
Long-Term Storage: Freezing
- Wrap the completely cooled cake tightly in plastic wrap, then cover with aluminum foil to prevent freezer burn.
- Place the wrapped cake in a heavy-duty freezer bag or airtight container.
- Freeze for up to 3 months without significant loss of flavor or texture.
- To thaw, transfer the cake to the refrigerator overnight.
- Bring to room temperature before serving, and optionally warm in the microwave for 15-20 seconds per slice.
| Storage Method | Wrapping | Duration | Serving Tips |
|---|---|---|---|
| Room Temperature | Plastic wrap or airtight container | Up to 3 days | Bring to room temp; brush with apple juice |
| Refrigeration | Airtight container + foil | Up to 7 days | Warm slices slightly before serving |
| Freezing | Plastic wrap + foil + freezer bag | Up to 3 months | Thaw overnight; warm before eating |
“Keeping your Harvest Apple Cake properly stored ensures every bite remains as satisfying as the first — full of moistness and cozy apple spice flavors that define this fall favorite.”
By following these Storage Recommendations, we guarantee our Harvest Apple Cake stays fresh and perfect for sharing at any autumn gathering or for enjoying as a comforting treat any day.
Conclusion
This Harvest Apple Cake recipe is a wonderful way to bring the flavors of fall right into our kitchens. With its moist texture and warm spices, it’s sure to become a favorite for any occasion.
By following the simple steps and tips we’ve shared, we can create a dessert that’s both comforting and impressive. Whether we’re baking for family or friends, this cake offers a delicious slice of autumn in every bite.
Let’s enjoy the process and savor the results together—this cake is more than just a treat, it’s a celebration of the season’s best flavors.
Frequently Asked Questions
What ingredients are needed for the Harvest Apple Cake?
You need dry ingredients like all-purpose flour, baking powder, baking soda, salt, granulated sugar, and light brown sugar. Wet ingredients include eggs, vegetable oil, vanilla extract, and buttermilk. The recipe also calls for apples and warm spices like cinnamon, nutmeg, and cloves, plus optional nuts or dried fruits.
Which apples are best for this cake?
Crisp and tart apples like Granny Smith, Honeycrisp, or Fuji are ideal. These varieties provide balanced sweetness and firmness that hold up well in baking.
How should I prepare the apples before adding to the batter?
Peel, core, and slice the apples uniformly. Toss the slices in lemon juice to prevent browning and enhance flavor.
What baking equipment do I need?
Mixing bowls, an electric mixer or whisk, measuring cups and spoons, apple peeler/corer/slicer, silicone spatula, a 9-inch round or Bundt pan, cooling rack, and optionally, an oven thermometer.
What temperature and baking time are recommended?
Preheat your oven to 350°F (175°C). Bake the cake for 50 to 60 minutes, checking doneness with a toothpick starting at 50 minutes.
How can I tell when the cake is done?
Insert a toothpick or cake tester into the center of the cake. It should come out clean or with a few moist crumbs when fully baked.
How should the cake be cooled after baking?
Cool in the pan for 15 to 20 minutes, then invert onto a cooling rack for 1 to 2 hours to set and avoid sogginess.
What toppings go well with Harvest Apple Cake?
Try cream cheese frosting, powdered sugar, toasted chopped nuts, caramel sauce, fresh apple slices, or whipped cream for extra flavor and visual appeal.
Can I prepare the batter ahead of time?
Yes, you can make the batter up to 24 hours in advance and refrigerate it. Bring it to room temperature before baking for best results.
How should I store leftover cake?
Store at room temperature for up to 3 days, refrigerate for up to 7 days, or freeze for up to 3 months. Warm slices before serving to revive flavors.