
Hanukkah is a time for celebration filled with rich traditions and delicious foods that bring families together. For those of us following a gluten-free lifestyle, finding festive recipes that honor these customs can be a bit challenging. Luckily, there are plenty of flavorful gluten-free Hanukkah recipes that keep the spirit alive without compromising on taste.
From crispy latkes to sweet sufganiyot, we’ve gathered a collection of gluten-free dishes that everyone can enjoy. These recipes use simple ingredients and clever substitutions to ensure your Hanukkah menu is both safe and satisfying. Let’s dive into these tasty options that make celebrating this joyful holiday easier and more inclusive than ever.
Hanukkah Recipes Gluten Free: Essential Ingredients
When preparing Hanukkah recipes gluten free, selecting the right ingredients is crucial for maintaining flavor and tradition without compromising dietary needs. Below, we highlight the essential staples and smart substitutions that help us create festive dishes everyone can enjoy.
Common Gluten-Free Ingredients for Hanukkah
To create authentic and delicious gluten-free Hanukkah recipes, we rely on a core group of ingredients. These components embody classic flavors while ensuring safety for those avoiding gluten.
- Potatoes – The foundation for crispy latkes, providing the perfect texture and taste.
- Gluten-Free Flours – Such as almond flour, rice flour, and chickpea flour, essential for binding and batter consistency.
- Eggs – Act as a natural binder and add richness to our recipes.
- Dairy – Milk, sour cream, and cheese used in sufganiyot and latkes for moisture and flavor.
- Cooking Oils – Traditionally we use vegetable or canola oil for frying.
- Sugar and Sweeteners – Granulated sugar, honey, or powdered sugar for sweet Hanukkah treats.
- Spices – Nutmeg and cinnamon add warm notes to desserts.
| Ingredient | Purpose | Notes |
|---|---|---|
| Potatoes | Base for latkes | Use russet for best results |
| Almond Flour | Gluten-free flour option | Adds a nutty flavor |
| Chickpea Flour | Binding agent | Adds protein and structure |
| Eggs | Binder and richness | Use large eggs |
| Vegetable Oil | Frying latkes & donuts | Neutral flavor, high smoke point |
| Sugar | Sweetness | Adjust to taste |
| Cinnamon | Flavor enhancement | Use ground cinnamon |
Substitutes for Traditional Gluten-Containing Ingredients
Traditional Hanukkah recipes often include wheat flour or breadcrumbs, which are not suitable for gluten-free diets. We substitute these with carefully chosen alternatives that preserve texture and mouthfeel without gluten.
- Wheat Flour → Gluten-Free Flour Blends
We use high-quality, all-purpose gluten-free flour blends designed for baking and frying. These often combine rice flour, tapioca starch, and potato starch to mimic wheat’s properties.
- Breadcrumbs → Crushed Gluten-Free Crackers or Almond Meal
To maintain crispy coatings or binding, we replace breadcrumbs with almond meal or finely crushed gluten-free crackers.
- Regular Soy Sauce → Tamari or Gluten-Free Soy Sauce
Some Hanukkah recipes, such as those with savory marinades or dipping sauces, benefit from gluten-free soy sauce options like tamari.
- Flour Tortillas → Corn or Gluten-Free Wraps
For recipes incorporating wraps, we choose certified gluten-free corn tortillas or gluten-free seed-based wraps.
By choosing these substitutes mindfully, we ensure Hanukkah recipes gluten free remain flavorful, festive, and accessible to all celebrating the holiday with us.
Necessary Tools and Equipment
To create delicious Hanukkah recipes gluten free we need the right tools. Choosing the proper kitchen gadgets and equipment ensures our dishes turn out perfect every time, preserving traditional flavors without gluten worries.
Kitchen Tools for Gluten-Free Baking
Baking gluten free requires precision and specific utensils to handle delicate batters and doughs without contamination from gluten.
- Mixing Bowls — Use multiple bowls to keep ingredients separate; stainless steel or glass are ideal.
- Measuring Cups and Spoons — Accurate measurement of gluten-free flours and leavening agents is essential for texture.
- Whisk and Electric Mixer — To blend gluten-free batters smoothly avoiding lumps, while incorporating air.
- Silicone Spatulas — Flexible and non-stick for folding and scraping every bit of batter.
- Baking Pans and Sheets — Non-stick or lined with parchment paper to prevent sticking without added flour.
- Cooling Racks — To cool baked goods evenly and maintain their structure without sogginess.
- Sifter or Fine Mesh Strainer — For aerating gluten-free flour blends to avoid heavy dense results.
Equipment for Frying and Baking Latkes and Donuts
The signature crispy texture of Hanukkah latkes and sufganiyot depends on the right frying and baking equipment.
| Equipment | Purpose | Notes |
|---|---|---|
| Heavy-Bottomed Skillet | Provides even heat for frying latkes in oil without hot spots | Cast iron preferred for consistent heat |
| Deep Fryer | Controls temperature for perfectly cooked sufganiyot | Use thermometer to maintain 350°F (175°C) |
| Slotted Spoon | For safely lifting fried items, allowing excess oil to drain | Preferably stainless steel with long handle |
| Cooling Rack | Drains excess oil post-frying, keeping latkes crisp | Place over a baking sheet |
| Baking Sheet & Parchment | For baking gluten-free latkes or donuts when avoiding frying | Use unbleached parchment for best results |
| Kitchen Thermometer | Monitors oil temperature precisely to avoid greasy or undercooked food | Essential for gluten-free frying success |
Preparation Tips for Gluten-Free Hanukkah Recipes
To ensure our gluten-free Hanukkah recipes turn out perfect, careful preparation is essential. Let’s focus on strategies that maintain safety and enhance flavor for a joyful celebration.
How to Avoid Cross-Contamination
Cross-contamination can ruin gluten-free dishes. We must be vigilant when handling ingredients and kitchen tools:
- Use separate utensils and cookware exclusively for gluten-free preparation.
- Thoroughly clean surfaces before starting to cook.
- Keep gluten-free ingredients stored separately from gluten-containing ones.
- When frying latkes or sufganiyot, use fresh oil or ensure the fryer is thoroughly cleaned if shared.
- Avoid shared toaster ovens or grills unless properly cleaned.
- Always read labels carefully to avoid hidden gluten sources.
“Cross-contamination prevention is as important as choosing the right gluten-free ingredients.”
| Action | Reason | Tip |
|---|---|---|
| Separate utensils | Prevent gluten residue transfer | Label or color-code gluten-free tools |
| Clean surfaces thoroughly | Remove all traces of gluten | Use hot, soapy water or disinfectant |
| Store ingredients separately | Avoid accidental mix-ups | Use airtight containers |
| Use fresh frying oil | Prevent gluten exposure from crumbs | Change oil between batches |
Preparing Ingredients in Advance
Advance prep makes cooking during Hanukkah smoother and reduces stress:
- Wash, peel, and grate potatoes for latkes early. Store in cold water to prevent browning.
- Mix gluten-free flour blends with spices and salt in a bowl to save time.
- Prepare fillings or toppings for sufganiyot ahead of time, storing them in sealed containers.
- Pre-measure dry ingredients for baking to streamline the process.
- Chill doughs as required to improve texture and make handling easier.
“Thoughtful preparation ensures that our gluten-free Hanukkah dishes stay fresh, flavorful, and stress-free.”
| Ingredient Prep | Storage Tip | Timeframe |
|---|---|---|
| Grated potatoes | Submerge in cold water | Up to 24 hours |
| Flour blends + spices | Store in airtight container | Several days |
| Fillings / toppings | Refrigerate in sealed containers | 1 to 2 days |
| Dry ingredients measured | Keep in labeled bowls | Ready to use |
| Dough chilling | Wrap tightly in plastic wrap | 30 minutes to overnight |
By following these tips, we preserve the integrity of our gluten-free Hanukkah recipes while simplifying our cooking process.
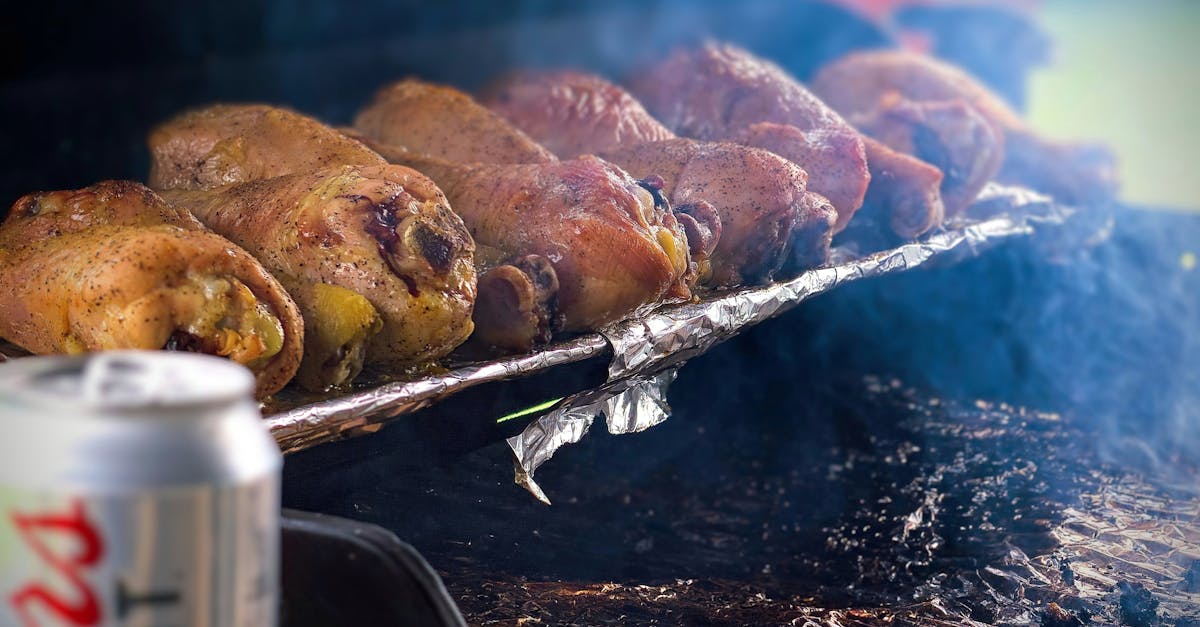
Gluten-Free Latkes Recipe
Gluten-free latkes capture the crispy golden tradition of Hanukkah while keeping the dish safe and satisfying for those avoiding gluten. Follow our detailed guide to create perfectly textured latkes that honor this festive classic.
Ingredients for Gluten-Free Latkes
- 4 large russet potatoes, peeled and grated
- 1 medium yellow onion, grated
- 2 large eggs, beaten
- 1/4 cup gluten-free flour blend
- 1 teaspoon baking powder (gluten-free)
- 1 teaspoon kosher salt
- 1/2 teaspoon freshly ground black pepper
- 1/2 cup vegetable oil (for frying)
Instructions for Preparing Latkes
- Grate potatoes and onion: Using a large-holed grater, shred the potatoes and onion. Place them in separate clean kitchen towels and squeeze out excess moisture to ensure crispiness.
- Combine ingredients: In a large bowl, mix the grated potatoes and onion. Add beaten eggs, gluten-free flour blend, baking powder, salt, and pepper. Stir until ingredients are well integrated.
- Form latkes: Use a spoon to scoop a heaping tablespoon of the mixture. Shape it into a flat patty about 3 inches wide and 1/2 inch thick. Repeat with remaining batter.
- Prepare for frying: Heat vegetable oil in a heavy-bottomed skillet over medium heat. The oil should reach approximately 350°F (177°C) for optimal frying.
Cooking and Serving Tips
- Fry in small batches: Avoid overcrowding the pan to maintain the oil temperature and achieve even browning.
- Cook latkes for 3-4 minutes per side until golden brown and crisp.
- Drain excess oil by placing latkes on paper towels immediately after frying.
- Serve warm: Top latkes with classic accompaniments like sour cream or apple sauce for authentic Hanukkah flavor.
- Storage tip: Store cooled latkes in an airtight container in the refrigerator for up to 2 days. Reheat in a skillet to restore crispness.
| Step | Temperature | Time per Side | Notes |
|---|---|---|---|
| Frying oil | 350°F (177°C) | 3-4 minutes | Maintain consistent heat |
| Latke thickness | ~1/2 inch | – | Ensures even cooking |
| Serving temperature | Serve immediately warm | – | Enhances flavor and texture |
Gluten-Free Hanukkah Donuts
Delight in the classic Hanukkah treat with our Gluten-Free Hanukkah Donuts recipe. These light fluffy donuts celebrate tradition while keeping them safe and delicious for gluten-sensitive friends and family.
Ingredients for Gluten-Free Donuts
To ensure perfect texture and flavor, we carefully selected these essential ingredients:
- 2 cups gluten-free all-purpose flour blend (with xanthan gum included)
- ½ cup granulated sugar
- 2 tsp baking powder
- ½ tsp baking soda
- ½ tsp salt
- 1 tsp ground cinnamon
- 2 large eggs, at room temperature
- 1 cup buttermilk, lukewarm
- 2 tbsp unsalted butter, melted
- 1 tsp pure vanilla extract
- Vegetable oil (for frying)
Note: Use a gluten-free flour blend designed for baking to achieve the best results.
| Ingredient | Quantity | Notes |
|---|---|---|
| Gluten-free flour blend | 2 cups | Must contain xanthan gum |
| Granulated sugar | ½ cup | |
| Baking powder | 2 teaspoons | Gluten-free certified |
| Baking soda | ½ teaspoon | |
| Salt | ½ teaspoon | |
| Ground cinnamon | 1 teaspoon | |
| Eggs | 2 large | Room temperature |
| Buttermilk | 1 cup | Lukewarm |
| Unsalted butter | 2 tablespoons | Melted |
| Vanilla extract | 1 teaspoon | Pure |
| Vegetable oil | For frying | Neutral-flavored |
Step-by-Step Directions for Donut Dough
- Combine dry ingredients: In a large bowl, whisk together the gluten-free flour blend, sugar, baking powder, baking soda, salt, and ground cinnamon until evenly mixed.
- Mix wet ingredients: In a separate bowl, beat the eggs with lukewarm buttermilk, melted butter, and vanilla extract until smooth and combined.
- Incorporate wet into dry: Gradually pour the wet mixture into the dry ingredients. Stir with a wooden spoon or silicone spatula until the dough comes together. The batter will be thick but slightly sticky.
- Rest the dough: Let the mixture rest for 10 minutes. This step helps hydrate the gluten-free flour fully and improves the dough’s texture.
“Resting the dough is key for light fluffy donuts that hold together during frying.”
- Prepare for shaping: Lightly flour a clean surface with gluten-free flour. Turn the dough onto this surface and gently pat it to about ½-inch thickness. Avoid overworking to keep the texture tender.
Frying and Glazing Instructions
- Heat oil: Pour vegetable oil into a heavy-bottomed skillet or deep fryer to about 2-3 inches deep. Heat to a consistent 350°F (175°C). Use a kitchen thermometer for accuracy.
- Cut donuts: Using a floured donut cutter or two round cutters (one large about 3 inches and a small one for the center hole about 1 inch), cut out donuts and donut holes. Gently gather scraps, reroll, and cut more shapes.
- Fry in batches: Carefully place 2-3 donuts into the hot oil without overcrowding. Fry for about 1-2 minutes per side until golden brown, flipping once. Use a slotted spoon to transfer cooked donuts onto a paper towel-lined tray to drain excess oil.
- Prepare glaze: Mix powdered sugar with warm water or milk 1 tablespoon at a time until a smooth thin glaze forms. Add vanilla or lemon zest for extra flavor if desired.
- Glaze the donuts: While donuts are still slightly warm, dip the tops into the glaze. Place on a wire rack to let excess drip off and glaze set. Repeat dipping for thicker coating if desired.
- Serve: Enjoy your Gluten-Free Hanukkah Donuts fresh and warm for the best taste and texture.
| Frying & Glazing Method | Details |
|---|---|
| Oil Temperature | 350°F (175°C) |
| Frying Time | 1-2 minutes per side |
| Oil Depth | 2-3 inches |
| Glaze Consistency | Thin enough to coat but not drip off completely |
| Glaze Flavors | Vanilla or lemon zest optional |
“Frying at the right temperature ensures a crispy exterior while maintaining a light tender crumb inside.”
With these clear steps and precise measurements we craft Gluten-Free Hanukkah Donuts that bring joy and tradition to every festive bite.
Gluten-Free Rugelach Recipe
Rugelach is a beloved Hanukkah treat, and making it gluten-free does not mean sacrificing flavor or texture. Our Gluten-Free Rugelach Recipe delivers tender flaky pastries filled with sweet, festive fillings perfect for the holiday table.
Ingredients for Gluten-Free Rugelach
To achieve the perfect gluten-free rugelach, we use carefully chosen ingredients that ensure a tender, flaky dough and rich, flavorful filling.
- 2 cups gluten-free all-purpose flour blend (with xanthan gum included)
- 1/4 cup granulated sugar
- 1/4 teaspoon salt
- 1 cup (2 sticks) cold unsalted butter, cut into cubes
- 8 oz cream cheese, cold and cubed
- 1 teaspoon pure vanilla extract
Filling:
- 1/2 cup fruit preserves (apricot or raspberry preferred)
- 1/2 cup finely chopped walnuts or pecans
- 1/4 cup brown sugar
- 1 tablespoon ground cinnamon
- Optional: 1/4 cup mini dark chocolate chips or raisins
Finishing:
- 1 large egg, beaten (for egg wash)
- 2 tablespoons coarse sugar (for sprinkling)
| Ingredient | Quantity |
|---|---|
| Gluten-free flour blend | 2 cups |
| Granulated sugar | 1/4 cup |
| Salt | 1/4 teaspoon |
| Unsalted butter (cold) | 1 cup (2 sticks), cubed |
| Cream cheese (cold) | 8 oz, cubed |
| Vanilla extract | 1 teaspoon |
| Fruit preserves | 1/2 cup |
| Chopped nuts | 1/2 cup |
| Brown sugar | 1/4 cup |
| Ground cinnamon | 1 tablespoon |
| Egg (for wash) | 1 large |
| Coarse sugar (optional) | 2 tablespoons |
Preparing the Dough
- In a large mixing bowl, whisk together the gluten-free flour blend, sugar, and salt.
- Add the cold cubed butter and cream cheese.
- Use a pastry cutter or your hands to cut the butter and cream cheese into the flour until the mixture resembles coarse crumbs with some pea-sized pieces.
- Add vanilla extract and knead gently just until the dough forms a ball. Avoid overworking to keep the dough tender.
- Divide the dough into two equal disks, wrap each in plastic wrap, and refrigerate for at least 1 hour before rolling.
Filling and Rolling the Rugelach
- On a lightly floured gluten-free surface, roll each chilled dough disk into a 12-inch circle.
- Spread half of the fruit preserves evenly over the dough, leaving a 1/2-inch border.
- Sprinkle half of the chopped nuts, brown sugar, and cinnamon evenly over the preserves. Add chocolate chips or raisins if using.
- Using a sharp knife or pizza cutter, cut the circle into 12 equal wedges like a pizza.
- Starting from the wide end, roll each wedge up tightly toward the point.
- Place the rolled rugelach on a parchment-lined baking sheet with the tip tucked underneath to prevent unrolling.
Baking Guidelines
- Preheat the oven to 350°F (175°C).
- Brush each rugelach generously with the beaten egg.
- Sprinkle with coarse sugar for a sparkling, crispy finish.
- Bake the rugelach for 22 to 25 minutes or until golden brown and puffed.
- Remove from the oven and transfer to a wire rack to cool completely.
“The key to flaky gluten-free rugelach is keeping the dough cold and handling it gently.” Our step-by-step method assures every batch turns out tender and filled with festive flavor.
Gluten-Free Sufganiyot (Jelly-Filled Donuts)
Gluten-Free Sufganiyot bring the beloved Hanukkah tradition of jelly-filled donuts to the table without compromising on flavor or texture. Let’s make these soft, airy, and perfectly golden treats that everyone can enjoy safely.
Ingredients List
Here is a detailed list of ingredients for our gluten-free sufganiyot dough and filling:
| Ingredient | Quantity | Preparation Notes |
|---|---|---|
| Gluten-free all-purpose flour blend | 2 ½ cups | Ensure blend contains xanthan gum |
| Granulated sugar | ¼ cup | |
| Active dry yeast | 2 ¼ teaspoons | One packet |
| Warm milk | ¾ cup | About 110°F for yeast activation |
| Unsalted butter | 3 tablespoons | Melted |
| Large eggs | 2 | Room temperature |
| Salt | ½ teaspoon | |
| Vanilla extract | 1 teaspoon | |
| Gluten-free cornstarch | 2 tablespoons | For dusting |
| Vegetable oil | For frying | Use neutral oil like canola or sunflower |
| Jelly or fruit preserves | ¾ cup | Choose your favorite gluten-free variety |
| Powdered sugar | For dusting | After frying |
Preparing the Dough
- Activate the yeast: In a small bowl, whisk the warm milk, 1 tablespoon sugar, and yeast together. Let it sit for 5–10 minutes until frothy.
- Combine dry ingredients: In a large mixing bowl, whisk gluten-free flour blend, remaining sugar, and salt.
- Mix wet ingredients: Beat eggs, melted butter, and vanilla extract in another bowl.
- Form the dough: Slowly pour the yeast mixture and wet ingredients into the dry mixture. Stir with a wooden spoon or dough hook until a smooth, sticky dough forms. Avoid overmixing.
- First rise: Cover the bowl with a clean towel or plastic wrap. Let the dough rise in a warm place for 1 to 1 ½ hours, until doubled in size.
- Prepare for shaping: Dust a clean surface with gluten-free cornstarch. Turn the dough onto the surface and gently pat it out to about ½-inch thickness using your hands or a rolling pin dusted with cornstarch.
Frying and Filling Instructions
- Cut the sufganiyot: Using a 2 ½-inch round cutter, press into the dough to create circles. Gather scraps, gently reshape, and cut until all dough is used.
- Rest before frying: Place cut dough on a parchment-lined tray and let rest 15 minutes to puff slightly.
- Heat oil: Heat vegetable oil in a deep heavy-bottomed skillet or fryer to 350°F (use a thermometer for accuracy).
- Fry the donuts: Carefully place donuts in hot oil, 3–4 at a time, without crowding. Fry for about 2 minutes per side or until golden and puffed. Use a slotted spoon to flip gently.
- Drain: Remove and place on paper towels to drain excess oil.
- Fill sufganiyot: Fit a pastry bag with a small round tip and fill with jelly. Insert tip into the side of each donut and gently squeeze to fill about 2 tablespoons of jelly per donut.
- Dust with powdered sugar: Lightly dust the filled sufganiyot with powdered sugar before serving for an authentic touch.
Pro Tip: Maintain oil temperature between 340°F and 360°F to ensure even frying and avoid greasy donuts.
With these steps, our Gluten-Free Sufganiyot will be a highlight of your Hanukkah celebration—crispy on the outside, tender inside, and bursting with sweet festive flavor.
Additional Tips for a Gluten-Free Hanukkah Celebration
To make our gluten-free Hanukkah celebration truly memorable and safe, we must pay attention to more than just recipes. Proper pairing and storage play a crucial role in enhancing the festive experience while maintaining gluten-free integrity.
Pairing Sides and Dips
Selecting the right gluten-free sides and dips complements our main dishes and enriches the overall flavor profile. Here are some tips to create perfect pairings:
- Choose naturally gluten-free vegetables like roasted carrots, sautéed spinach, or beet salad to brighten the plate.
- Prepare dips using gluten-free ingredients such as sour cream, yogurt, or avocado to accompany latkes and sufganiyot.
- Avoid store-bought dips that may contain hidden gluten—always check labels or make your own.
- Consider traditional options like apple sauce, sour cream, or homemade hummus which pair well with crispy latkes.
- Use gluten-free crackers or vegetable sticks instead of bread or wheat-based chips for dipping.
| Side/Dip | Gluten-Free Option | Flavor Notes |
|---|---|---|
| Latkes | Applesauce, sour cream, chive dip | Sweet, creamy, or tangy |
| Sufganiyot | Fruit preserves, whipped cream | Sweet and rich |
| Rugelach | Fresh fruit slices or a light fruit compote | Refreshing balance |
| Crispy Sides | Roasted root vegetables, steamed green beans | Earthy and vibrant |
By thoughtfully pairing sides and dips, our gluten-free Hanukkah dishes will shine on the festive table while keeping everyone safe and delighted.
Storing Leftovers Safely
Proper storage is vital to maintain both gluten-free safety and freshness during and after Hanukkah celebrations. Follow these best practices:
- Store all gluten-free leftovers in airtight containers clearly labeled to avoid cross-contamination.
- Keep baked goods and fried foods separate from gluten-containing items in the refrigerator or freezer.
- Use dedicated storage areas or shelves exclusively for gluten-free products.
- For latkes and sufganiyot, wrap leftovers loosely in paper towels before placing them in containers to preserve texture.
- Reheat with care using stovetop or oven methods instead of microwaving to regain crispness without sogginess.
- Consume leftovers within 2-3 days for optimal taste and safety or freeze for up to 1 month.
| Food Item | Storage Method | Shelf Life | Reheating Tip |
|---|---|---|---|
| Latkes | Airtight container + paper towel | 2-3 days refrigerated 1 month frozen |
Oven at 350°F for 10-12 mins |
| Sufganiyot | Airtight container | 2-3 days refrigerated 1 month frozen |
Warm in oven or stovetop |
| Rugelach | Airtight container | 3-4 days at room temperature | Bring to room temp or low oven |
By following these storage guidelines, our gluten-free Hanukkah treats will stay safe and delicious long after the celebration ends.
Conclusion
Celebrating Hanukkah with gluten-free recipes opens up a world of delicious possibilities that everyone can enjoy. By choosing the right ingredients and using thoughtful preparation techniques, we can honor tradition while keeping our meals safe and flavorful.
With a bit of care and creativity, gluten-free latkes, sufganiyot, and rugelach become just as festive and satisfying as their classic counterparts. This holiday season, let’s embrace inclusive cooking that brings family and friends together around the table without compromise.
Frequently Asked Questions
What is Hanukkah and why is food important in its celebration?
Hanukkah is a Jewish festival that lasts eight days, commemorating the rededication of the Second Temple. Food plays a key role, bringing families together and celebrating tradition through special dishes like latkes and sufganiyot.
Are gluten-free Hanukkah recipes possible without losing traditional flavors?
Yes, gluten-free recipes use simple ingredients and clever substitutions to maintain authentic Hanukkah flavors while accommodating dietary needs.
What are essential gluten-free ingredients for Hanukkah dishes?
Key gluten-free staples include potatoes, gluten-free flours, eggs, dairy, cooking oils, sugars, and spices. These ingredients help create traditional dishes safely.
How can I avoid gluten cross-contamination in my kitchen?
Use separate utensils, clean surfaces thoroughly, and store gluten-free ingredients separately to prevent cross-contamination and keep dishes safe.
What kitchen tools do I need for gluten-free Hanukkah cooking?
Essential tools include mixing bowls, measuring cups, whisks, silicone spatulas, heavy-bottomed skillets, deep fryers, slotted spoons, and kitchen thermometers.
How do I make crispy gluten-free latkes?
Use grated potatoes, gluten-free flour blends, and fry in hot oil using a heavy skillet. Avoid overloading the pan and keep oil at the right temperature for crispiness.
Can I make gluten-free sufganiyot at home?
Yes, by using gluten-free flour blends and carefully controlling frying temperature, you can create delicious jelly-filled gluten-free sufganiyot.
Is it possible to bake gluten-free rugelach with traditional flavor and texture?
Absolutely. Keeping the dough cold and handling it gently ensures tender, flaky gluten-free rugelach filled with festive flavors.
What tips help with preparing gluten-free Hanukkah dishes in advance?
Pre-measure dry ingredients, wash and grate potatoes early, and store items separately to save time and maintain freshness.
How should I store leftover gluten-free Hanukkah foods?
Store leftovers in clean, airtight containers away from gluten-containing foods to prevent contamination and maintain taste.