
Groundhog cookies bring a fun twist to celebrating Groundhog Day or any time you want a playful treat. These charming cookies capture the spirit of the holiday with a sweet and simple recipe that’s perfect for all ages. Whether you’re baking with family or prepping for a themed party, these cookies add a delightful touch to your dessert table.
We love how easy it is to customize these cookies with different decorations or flavors while keeping the classic taste everyone enjoys. Groundhog cookies are not just delicious but also a creative way to engage with this quirky tradition. Let’s dive into a recipe that’s sure to become a favorite in your baking rotation.
Ingredients
To bake our Groundhog Cookie recipe perfectly, we’ll need a combination of precise dry and wet ingredients, along with some fun optional toppings for decoration. Gather everything before starting to ensure a smooth baking experience.
Dry Ingredients
We rely on these key dry components to provide structure and flavor to our Groundhog Cookies.
| Ingredient | Amount | Preparation Notes |
|---|---|---|
| All-purpose flour | 2 ½ cups (312 g) | Sifted |
| Baking powder | 1 teaspoon | |
| Ground cinnamon | ½ teaspoon | Adds warm spice notes |
| Salt | ½ teaspoon | Enhances flavor balance |
| Brown sugar | ¾ cup (150 g) | Packed |
Wet Ingredients
The wet ingredients bring moisture and richness, helping the dough come together smoothly.
- 1 cup (227 g) unsalted butter, softened
- 1 large egg
- 1 teaspoon pure vanilla extract
- 2 tablespoons honey (for subtle sweetness and chewy texture)
Optional Toppings and Mix-Ins
We encourage customizing our Groundhog Cookies with these toppings to add texture, color, and personality.
- Mini chocolate chips or chunks
- Chopped walnuts or pecans
- Raisins or dried cranberries
- Colored sugar sprinkles for festive appeal
- Melted chocolate drizzle after baking
“Pro tip: For a classic groundhog look, use chocolate chips for eyes and mini pretzels for whiskers.”
With these ingredients ready, we’re set to start crafting these delightful Groundhog Cookies that will impress at any gathering.
Equipment Needed
To bake our Groundhog Cookie Recipe perfectly, having the right equipment on hand is essential. Here’s what we recommend to ensure smooth preparation and baking:
- Mixing Bowls: Use a large bowl for combining dry ingredients and a separate medium bowl for the wet ingredients. This helps achieve even mixing and prevents clumping.
- Electric Mixer or Stand Mixer: We prefer an electric mixer for creaming the butter and sugar to the perfect fluffy consistency. A stand mixer makes the process hands-free and efficient.
- Measuring Cups and Spoons: Accurate measurements are crucial. Use standard measuring cups for solids and liquids and a precise set of measuring spoons for baking powder, cinnamon, salt, and vanilla extract.
- Rubber Spatula: Ideal for scraping down the sides of the bowls to incorporate every bit of batter.
- Baking Sheet(s): Use an ungreased or parchment-lined baking sheet for even baking and easy cookie removal.
- Parchment Paper or Silicone Baking Mats: These provide a non-stick surface, preventing the cookies from sticking and making cleanup easier.
- Cooling Rack: Essential for cooling cookies evenly and preventing sogginess.
- Cookie Scoop or Tablespoon: To portion dough uniformly, ensuring consistent cookie size and even baking.
- Small Bowls or Plates: Useful for organizing optional toppings like mini chocolate chips, nuts, and colored sugar sprinkles for easy decorating.
| Equipment | Purpose | Notes |
|---|---|---|
| Mixing Bowls | Separate dry and wet ingredients mixing | Large and medium sizes preferred |
| Electric Mixer / Stand Mixer | Cream butter & sugar | Optional but recommended |
| Measuring Cups & Spoons | Accurate ingredient measurement | Essential for baking accuracy |
| Rubber Spatula | Scraping batter from bowl sides | Ensures nothing goes to waste |
| Baking Sheet(s) | Baking the cookies | Use parchment paper or silicone mat |
| Parchment Paper/Silicone Mats | Non-stick baking surface | Reusable mats reduce waste |
| Cooling Rack | Cool cookies evenly | Prevents soggy bottoms |
| Cookie Scoop / Tablespoon | Uniform cookie dough portions | Promotes consistent baking times |
| Small Bowls/Plates | Organize optional decorations | Helps streamline decorating step |
Prep Work
Before we dive into mixing and baking, getting our workspace and ingredients perfectly prepped sets us up for success with our Groundhog Cookie Recipe. The following steps ensure accurate measurements, optimal baking temperature, and ready baking sheets for seamless cookie creation.
Measuring Ingredients
Precision is key for perfect, consistent cookies. We recommend measuring all ingredients exactly as listed to maintain the balance of flavors and textures in our Groundhog Cookies.
| Ingredient | Amount | Notes |
|---|---|---|
| All-purpose flour | 2 ½ cups | Sifted for even texture |
| Baking powder | 1 teaspoon | Fresh for proper rising |
| Ground cinnamon | 1 teaspoon | Adds warm spice |
| Salt | ½ teaspoon | Enhances flavor |
| Brown sugar | 1 cup | Packed firmly |
| Unsalted butter | 1 cup (2 sticks) | Softened to room temperature |
| Egg | 1 large | At room temperature |
| Vanilla extract | 1 teaspoon | Pure for best aroma |
| Honey | 2 tablespoons | Adds moisture and sweetness |
| Optional toppings | As desired | Mini chocolate chips, nuts, etc |
For best results, we use measuring cups and spoons with level fills, avoiding packed flour or loosely scooped sugar unless specified. Using a kitchen scale can enhance accuracy even more.
Preheating the Oven
Our groundhog cookies bake perfectly when the oven is preheated to the right temperature upfront.
- Set the oven to 350°F (175°C).
- Allow it to fully heat before baking; this usually takes 15 minutes.
- Use an oven thermometer if possible to verify the accurate temperature.
“Starting with the perfect temperature ensures our cookies bake evenly with golden edges and chewy centers.”
Preparing Baking Sheets
Proper preparation of baking sheets helps prevent sticking and ensures an even bake for every cookie.
- Line baking sheets with parchment paper or a silicone baking mat.
- Avoid greasing the sheets directly as it can cause excessive spreading.
- Use a cookie scoop or tablespoon to portion dough evenly, spacing cookies at least 2 inches apart to allow room for spreading.
- Arrange optional decorations like mini chocolate chips or colored sugar in small bowls nearby for easy access during shaping.
This prep creates a smooth workflow and flawless groundhog cookies ready to impress.
Instructions
Let’s walk through each step carefully to create perfect Groundhog Cookies. Follow these clear instructions for making the dough, shaping the cookies, and baking them to golden perfection.
Making the Dough
- Cream the Butter and Sugar:
In a large mixing bowl, combine unsalted butter (softened) and brown sugar. Use an electric mixer to beat them together on medium speed for 2-3 minutes until the mixture is light and fluffy.
- Add Wet Ingredients:
Crack in 1 large egg and pour 1 teaspoon of vanilla extract along with 2 tablespoons of honey. Beat again until fully incorporated.
- Mix Dry Ingredients:
In a separate bowl, whisk together the following dry ingredients:
| Ingredient | Measurement | Notes |
|---|---|---|
| All-purpose flour | 2 ½ cups | Sifted |
| Baking powder | 1 teaspoon | |
| Ground cinnamon | 1 teaspoon | |
| Salt | ½ teaspoon |
- Combine Dry into Wet:
Gradually add the dry ingredient mixture to the wet mixture in thirds. Mix on low speed using a rubber spatula or mixer until the dough just comes together. Avoid overmixing to keep the cookies tender.
- Optional Mix-ins:
Gently fold in optional additions like mini chocolate chips, chopped nuts, or colored sugar sprinkles to infuse extra flavor and texture.
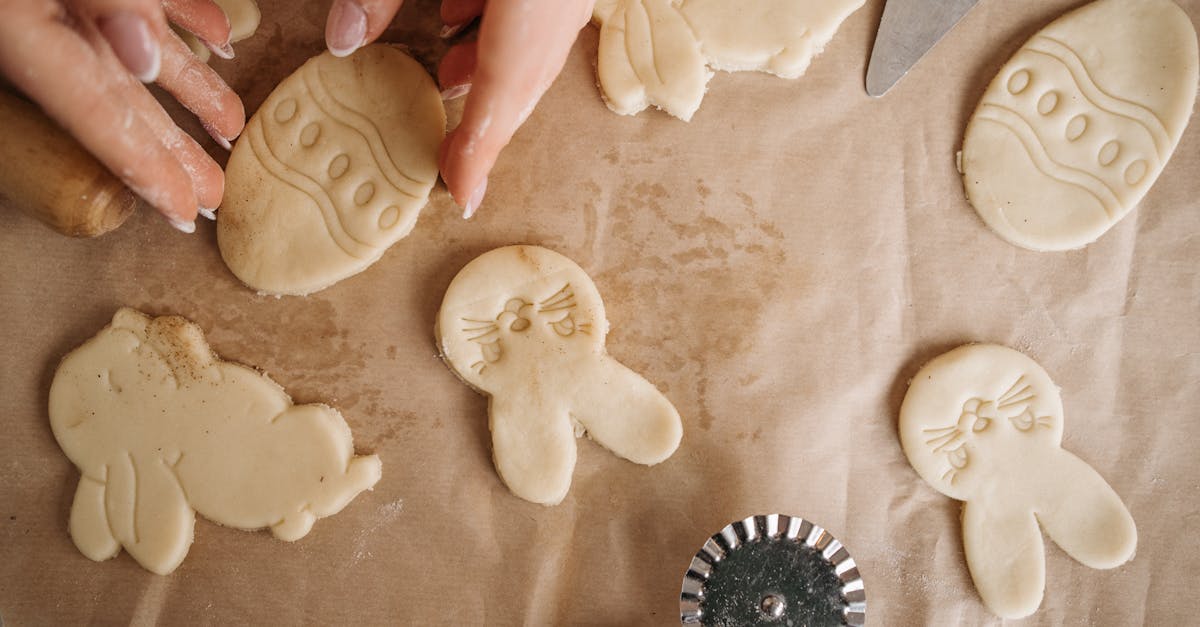
Shaping the Groundhog Cookies
- Portion Dough:
Using a cookie scoop or tablespoon, portion out uniform balls of dough about 1.5 inches in diameter. This ensures even baking across all cookies.
- Form Groundhog Shape:
Gently flatten each dough ball slightly on the prepared baking sheet. Shape the dough into a rounded oval to mimic the groundhog’s body.
- Add Decorative Features:
For a classic Groundhog look, press mini chocolate chips into the dough for eyes and use mini pretzels or thinly sliced almonds as whiskers. This step creates playful and recognizable cookie faces.
Baking the Cookies
- Preheat Oven:
Ensure the oven is preheated to 350°F (175°C) for consistent baking.
- Prepare Baking Sheets:
Line baking sheets with parchment paper or silicone mats to prevent sticking and allow for even heat distribution.
- Bake Time:
Place the shaped cookies on the baking sheets, leaving about 2 inches between each cookie for spreading. Bake for 10-12 minutes or until the edges turn a light golden brown.
- Cooling:
Remove the cookies from the oven and transfer them to a wire cooling rack immediately. Cooling on racks prevents sogginess and helps cookies set perfectly.
“Baking the perfect Groundhog Cookies requires patience and attention to detail,” but following these steps will reward you with festive treats ready for any celebration.
Decorating the Groundhog Cookies
Decorating our Groundhog Cookies transforms them from simple treats into delightful edible art. Let’s explore how to add personality and festive charm to these playful cookies.
Icing and Frosting Ideas
For a smooth and vibrant finish, we recommend using royal icing or buttercream frosting. These icings hold shape well and provide a perfect canvas for detailed designs.
- Royal Icing: Mix powdered sugar, meringue powder, and water to reach a thick but spreadable consistency. Ideal for outlining and flooding cookie surfaces.
- Buttercream Frosting: Cream butter with powdered sugar and a splash of milk for creamy texture. Perfect for softer, textured decorations.
Use gel food coloring to create earthy tones like brown, tan, and green that mimic the groundhog’s natural shades.
| Icing Type | Texture | Best For | Drying Time |
|---|---|---|---|
| Royal Icing | Hard, smooth | Detailed piping, vibrant colors | 4-6 hours to fully dry |
| Buttercream | Soft, creamy | Textured surfaces, swirls | 30 minutes to set |
Using Edible Decorations
Elevate the cookies using a variety of edible elements that add texture and playful details:
- Mini Chocolate Chips: Use for the groundhog’s eyes and nose to create expressive features.
- Mini Pretzels: Perfect for crafting whiskers or adding rustic charm.
- Colored Sugar Sprinkles: Add shimmer and color on the frosting.
- Candy Melts or Edible Markers: Detail facial expressions and outlines with precision.
These decorations help emphasize the groundhog theme while keeping the cookies fun and interactive for all ages.
Tips for Creative Designs
To make decorating enjoyable and unique, keep these handy tips in mind:
- Outline First: Use a piping bag to outline the cookie shape with royal icing, then flood the inside for clean edges.
- Layer Colors: Allow base layers to dry before adding details to prevent colors from blending.
- Use Toothpicks: Manipulate small areas or smooth icing edges using toothpicks for precision.
- Mix Textures: Combine smooth icing with crunchy edible decorations for visual and tactile interest.
Storage and Shelf Life
Proper storage is essential to keep our Groundhog Cookies fresh and delicious for as long as possible. Here are the best practices to extend their shelf life while preserving their texture and flavor.
At Room Temperature
- Store the cookies in an airtight container to prevent moisture loss.
- Place a piece of parchment paper between layers to avoid sticking.
- Keep the container in a cool, dry place away from direct sunlight.
Stored this way, our Groundhog Cookies will stay fresh for up to 5 days.
Refrigeration
- If you want to keep them longer, store the cookies in an airtight container in the refrigerator.
- Bring the cookies to room temperature before serving for the best taste and texture.
Refrigerated cookies last for about 2 weeks, but note that the texture may become slightly firmer.
Freezing
- To freeze, wrap each cookie individually in plastic wrap to prevent freezer burn.
- Place the wrapped cookies in a freezer-safe airtight container or heavy-duty freezer bag.
- Label with the date for easy tracking.
Our Groundhog Cookies will maintain their quality in the freezer for up to 3 months.
Storage and Shelf Life Table
| Storage Method | Container Type | Duration | Notes |
|---|---|---|---|
| Room Temperature | Airtight container | Up to 5 days | Keep in a cool, dry place away from sunlight |
| Refrigeration | Airtight container | Up to 2 weeks | Texture may firm; bring to room temp before serving |
| Freezing | Individually wrapped in plastic + airtight container | Up to 3 months | Thaw at room temperature before serving |
Pro Tip: For extra freshness when storing at room temperature, adding a small slice of bread to the cookie container can help maintain moisture without affecting flavor.
By following these storage guidelines, we ensure our Groundhog Cookies taste just as delightful days or even weeks after baking, perfect for sharing or enjoying over time.
Conclusion
Making Groundhog Cookies is a wonderful way to bring a bit of fun and creativity to any celebration. With simple ingredients and easy steps, we can all enjoy baking and decorating these charming treats together. Whether for a family activity or a festive party, these cookies offer a perfect blend of taste and playful design.
By customizing decorations and flavors, we keep the process exciting and unique every time. Plus, with proper storage, our efforts can be enjoyed well beyond the day we bake them. Let’s keep this delightful tradition alive and share the joy of Groundhog Cookies with everyone around us.
Frequently Asked Questions
What are Groundhog Cookies?
Groundhog Cookies are festive, playful treats inspired by Groundhog Day. They’re simple to make, customizable, and perfect for family baking or themed parties.
What ingredients do I need to make Groundhog Cookies?
You’ll need all-purpose flour, baking powder, ground cinnamon, salt, brown sugar, unsalted butter, an egg, vanilla extract, and honey. Optional add-ins include mini chocolate chips, nuts, and colored sugar sprinkles.
What equipment is required for baking these cookies?
Basic baking tools include mixing bowls, an electric mixer, measuring cups and spoons, a rubber spatula, baking sheets lined with parchment paper or silicone mats, a cooling rack, and a cookie scoop or tablespoon.
How do I shape the Groundhog Cookies?
Shape the dough into rounded ovals to resemble groundhogs. Add decorations like chocolate chip eyes and mini pretzel whiskers for a classic look.
What is the best temperature to bake Groundhog Cookies?
Preheat your oven to 350°F (175°C) and bake until golden. This ensures your cookies have the perfect texture and flavor.
Can I decorate Groundhog Cookies with frosting?
Yes! Use royal icing or buttercream frosting. Both require proper consistency and drying time. You can also add mini chocolate chips, pretzels, and colored sprinkles for extra fun.
How do I store Groundhog Cookies to keep them fresh?
Store in an airtight container at room temperature for up to 5 days, refrigerate for about 2 weeks, or freeze wrapped individually up to 3 months. Adding a slice of bread helps maintain moisture.
Are Groundhog Cookies suitable for all ages and skill levels?
Absolutely! The recipe is simple and fun, making it a great activity for bakers of all ages and skill levels.
Can I customize the flavor of Groundhog Cookies?
Yes, you can add mix-ins like nuts, chocolate chips, or flavored extracts to personalize the cookies while keeping their classic taste.
How long do I need to decorate the cookies after baking?
Allow cookies to cool completely before decorating. Royal icing and buttercream frosting vary in drying time, typically ranging from 30 minutes to a few hours depending on thickness.