
Granola with dates is a delicious way to start our day with a boost of natural sweetness and energy. This recipe combines crunchy oats, nuts, and seeds with the rich, caramel-like flavor of dates, creating a perfect balance of texture and taste. It’s a wholesome alternative to store-bought granola that often contains added sugars and preservatives.
We love how easy it is to customize this granola to suit our preferences, whether adding coconut flakes, cinnamon, or a pinch of sea salt. Plus, it’s packed with fiber and nutrients, making it a smart choice for breakfast or a healthy snack. Let’s dive into making this simple yet satisfying granola with dates that’ll keep us fueled and craving more.
Ingredients
To create our delicious homemade granola with dates, we combine a mix of dry and wet ingredients that blend perfectly for that ideal crunch and natural sweetness. Below you will find everything we use for this wholesome, nutrient-packed recipe.
Dry Ingredients
Our dry ingredients form the crunchy base of the granola. Each component contributes texture, flavor, and nutrition.
- 3 cups old-fashioned rolled oats (gluten-free if preferred)
- 1 cup raw nuts, chopped (e.g., almonds, walnuts, pecans)
- ½ cup raw seeds (such as pumpkin seeds, sunflower seeds, or chia seeds)
- 1 tsp ground cinnamon
- ¼ tsp fine sea salt
- ½ cup unsweetened shredded coconut flakes (optional but adds great texture)
Wet Ingredients
Wet ingredients bind the granola ingredients together and provide that perfect natural sweetness from dates.
- ½ cup pitted dates, finely chopped or processed into a paste
- ¼ cup pure maple syrup or raw honey for a natural sweetener
- ⅓ cup melted coconut oil (or another neutral oil)
- 1 tsp pure vanilla extract
Optional Add-Ins
We often customize our granola with dates by adding a few extras to boost flavor and nutrition.
| Add-On | Amount | Purpose |
|---|---|---|
| Dark chocolate chips | ¼ cup | Adds richness and slight bitterness |
| Dried fruits | ⅓ cup (e.g., raisins, cranberries) | Provides extra chewiness and sweetness |
| Chia seeds | 2 tbsp | Increases fiber and omega-3 content |
| Hemp hearts | 2 tbsp | Adds protein and healthy fats |
Tip: Add dried fruits or chocolate chips after baking to preserve their texture and flavor.
This combination of dry, wet, and optional add-ins creates a nutrient-dense, fiber-rich granola with dates that energizes us for the day or fuels us during a snack break.
Equipment Needed
To prepare our Granola With Dates recipe perfectly, we need the right tools to ensure even mixing, baking, and cooling. Here’s a list of essential equipment we recommend:
- Large Mixing Bowl
For combining all the dry and wet ingredients thoroughly. Choose a bowl with enough capacity to toss and coat the oats and dates evenly.
- Measuring Cups and Spoons
Accuracy is vital; use standard measuring cups and spoons to portion ingredients like oats, nuts, maple syrup, and cinnamon precisely.
- Sharp Knife and Cutting Board
To finely chop the dates and any nuts we include, ensuring uniform size and texture throughout our granola.
- Wooden Spoon or Silicone Spatula
A sturdy wooden spoon or silicone spatula helps us mix the granola ingredients well without breaking the oats or nuts.
- Baking Sheet or Tray
Use a rimmed baking sheet lined with parchment paper or a silicone baking mat to bake the granola evenly and prevent sticking.
- Oven Mitts
Essential for safely removing the hot tray from the oven once baking is complete.
- Cooling Rack
After baking, we spread the granola on a cooling rack to allow air circulation and avoid sogginess.
Optional Equipment
- Food Processor (if you prefer finely chopping dates and nuts quickly)
- Airtight Storage Container for keeping the granola fresh after cooling.
| Equipment | Purpose | Notes |
|---|---|---|
| Large Mixing Bowl | Mixing dry and wet ingredients | Should be large enough to toss |
| Measuring Cups & Spoons | Accurate portions of ingredients | Essential for balance |
| Sharp Knife & Cutting Board | Chopping dates and nuts | Ensure fine, even pieces |
| Wooden Spoon or Silicone Spatula | Mixing ingredients gently | Prevents breaking ingredients |
| Baking Sheet or Tray | Baking granola | Use parchment or silicone mat |
| Oven Mitts | Handling hot trays | Safety first |
| Cooling Rack | Cooling granola to crisp | Prevents moisture buildup |
With these tools perfectly aligned, we set ourselves up for a smooth granola making process that delivers a crunchy, flavorful, and perfectly baked batch every time.
Instructions
Follow these precise steps to create our Granola with Dates that is both crunchy and naturally sweet. We’ll guide you from prep work through baking to perfectly incorporating the dates.
Prep Work
- Preheat your oven to 325°F (163°C) for optimal, even baking.
- Line a large baking sheet with parchment paper or a silicone baking mat to prevent sticking.
- Chop raw nuts into uniform pieces, aiming for about 1/2 inch size for consistent texture.
- Finely chop the pitted dates to small pieces that will bind smoothly but remain noticeable in the granola.
- Measure and separate all dry and wet ingredients to ensure a seamless mixing process.
Mixing the Ingredients
- In a large mixing bowl, combine the following dry ingredients:
| Ingredient | Measurement |
|---|---|
| Old-fashioned oats | 3 cups |
| Chopped raw nuts | 1 cup |
| Raw seeds (e.g., sunflower, pumpkin) | 1/2 cup |
| Ground cinnamon | 1 tsp |
| Sea salt | 1/2 tsp |
| Shredded coconut (optional) | 1/2 cup |
- In a separate bowl, whisk together the wet ingredients:
| Ingredient | Measurement |
|---|---|
| Finely chopped dates | 1 cup |
| Pure maple syrup or honey | 1/4 cup |
| Melted coconut oil | 1/4 cup |
| Vanilla extract | 1 tsp |
- Pour the wet mixture over the dry ingredients.
- Use a wooden spoon or silicone spatula to mix thoroughly, ensuring all oats and nuts are well coated.
Baking the Granola
- Spread the granola mixture evenly on the prepared baking sheet in a thin layer.
- Bake for 25–30 minutes, stirring every 10 minutes to promote even toasting.
- Keep a close eye on the color: the granola should turn a warm golden brown but not burn.
- Remove from the oven and transfer granola to a cooling rack immediately to prevent sogginess.
- Let cool completely.
Adding the Dates
- Once the granola has cooled, gently fold in additional chopped dates or any optional add-ins like dark chocolate chips or dried fruits.
- This step preserves the freshness and softness of the dates while maintaining the signature crunch.
- Store your granola with dates in an airtight container at room temperature.
- Enjoy as a breakfast topping or a nutritious snack throughout the week.
Serving Suggestions
Our Granola With Dates is incredibly versatile, perfect for energizing breakfasts and wholesome snacks. Here are some delicious ways to enjoy it:
- Classic Yogurt Parfait
Layer our crunchy granola with Greek yogurt and fresh berries for a creamy, tangy contrast that complements the natural sweetness of the dates. This combination provides protein, fiber, and antioxidants, making it ideal for a balanced morning meal.
- Milk or Plant-Based Milk Bowl
Pour cold milk or your favorite plant-based alternative over a bowl of granola for a quick and satisfying breakfast. The oats and nuts absorb the milk slightly, creating a softer texture while preserving the crunch.
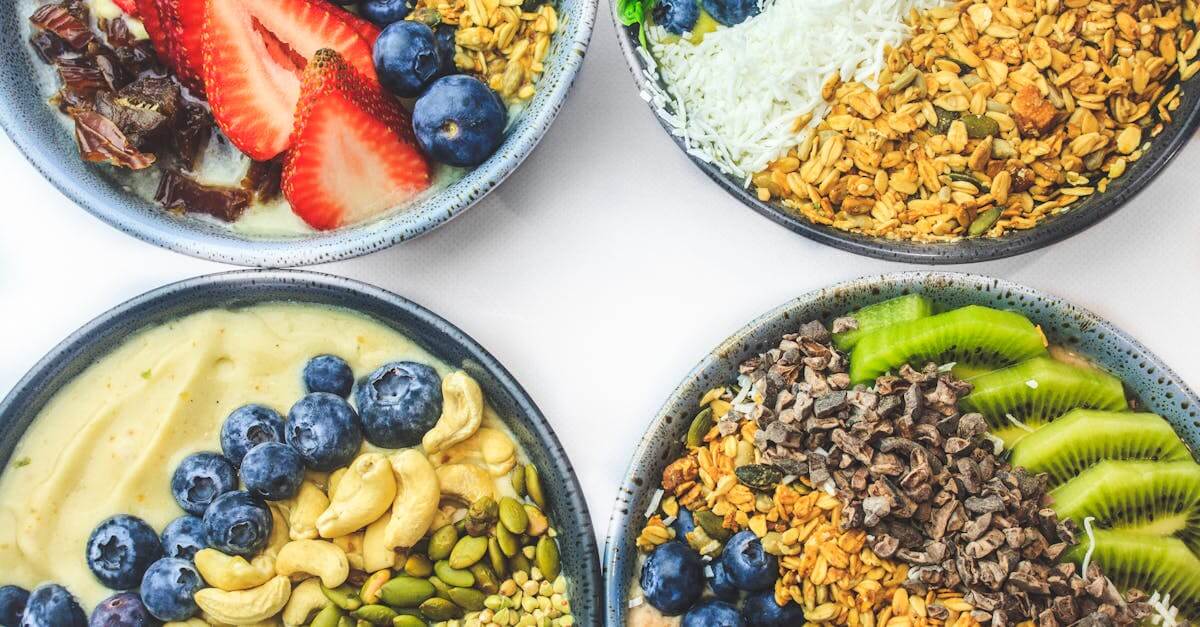
- Smoothie Topping
Sprinkle granola on top of your smoothie bowls to add texture and a nutty flavor. It enhances the visual appeal and gives a satisfying crunch with every bite.
- Snack On-the-Go
Grab a handful of granola straight from the jar when you need a healthy, fiber-rich snack during the day. The chewy dates provide natural sweetness and energy to keep you going.
- Baking Ingredient
Incorporate the granola into muffin or cookie batter for added nutrition and depth of flavor. It works especially well in recipes that pair with nuts or cinnamon.
Nutritional Boost Table
| Serving Style | Key Benefits | Texture Experience |
|---|---|---|
| Yogurt Parfait | Protein, probiotics, antioxidants | Creamy with crunch |
| Milk or Plant-Based Bowl | Calcium, vitamin D (depending on choice) | Crunchy yet softened |
| Smoothie Topping | Added fiber and healthy fats | Crunchy and nutty |
| Snack On-the-Go | Natural sugars, energy, fiber | Chewy and crunchy |
| Baking Ingredient | Enhanced flavor, added nutrients | Textural variety |
“Our recipe’s natural sweetness and crunchy texture create endless possibilities to customize every bite according to your taste and nutritional needs.”
Storage Tips
To keep our granola with dates fresh and crunchy, proper storage is essential. Here are the best practices to maximize flavor and texture:
- Use an airtight container. Transfer the cooled granola into a glass or BPA-free plastic container with a tight-sealing lid to prevent moisture and air from softening the granola.
- Store at room temperature. Keep the granola in a cool dry place, away from direct sunlight or heat sources. Ideal storage temperature ranges between 65°F and 75°F (18°C – 24°C).
- Avoid refrigeration unless necessary. Refrigeration can cause oats to absorb moisture and lose crispness. Only refrigerate if your kitchen tends to be very warm and humid to prevent spoilage.
- Keep dried fruits and chocolate separate. If you added dried fruits or chocolate chips after baking, store them in a separate sealed bag or container and mix in just before serving. This preserves their distinct texture and taste.
Shelf Life of Granola With Dates
| Storage Method | Shelf Life | Notes |
|---|---|---|
| Airtight container, room temperature | 1–2 weeks | Maintains optimal crunch and freshness |
| Airtight container, refrigerated | Up to 1 month | May lose some crunch due to moisture |
| Frozen in airtight bag/container | 3–6 months | Thaw at room temperature before serving |
“To keep granola at its best, always make sure it’s completely cooled before storing. Warm granola traps steam inside the container, which can cause sogginess and spoilage.”
For extended freshness, consider dividing your granola into smaller portions and sealing them separately. This way, only the portion you plan to consume is exposed to air at any one time.
By following these storage tips, we ensure every bite of our nutrient-packed, naturally sweet granola with dates stays irresistibly crunchy and delicious.
Conclusion
Making granola with dates at home lets us enjoy a wholesome snack packed with natural sweetness and satisfying crunch. It’s a versatile treat that fits perfectly into our busy mornings or afternoon breaks without the extra sugars found in store-bought options.
With simple ingredients and easy steps, we can customize the recipe to suit our tastes and nutritional needs. Keeping it fresh is just as important, and by storing it properly, we make sure every bite stays deliciously crisp.
This granola isn’t just food—it’s a nourishing habit that fuels us throughout the day. Let’s keep experimenting and savoring the goodness in every handful.
Frequently Asked Questions
What makes homemade granola with dates healthier than store-bought granola?
Homemade granola with dates uses natural sweeteners and avoids added sugars, preservatives, and artificial ingredients commonly found in store-bought versions, making it a healthier choice.
Can I customize the granola recipe?
Yes, the recipe is highly customizable. You can add ingredients like coconut flakes, cinnamon, dark chocolate chips, dried fruits, chia seeds, or hemp hearts to suit your taste and nutritional needs.
What are the main ingredients needed for this granola?
The granola includes rolled oats, raw nuts, seeds, cinnamon, sea salt, chopped dates, maple syrup or honey, melted coconut oil, and vanilla extract. Optional add-ins enhance flavor and nutrition.
How should I store homemade granola to keep it fresh?
Store granola in an airtight container at room temperature. Avoid refrigeration unless necessary, as moisture can cause sogginess. Keep dried fruits and chocolate separate until serving.
What equipment is necessary to make this granola?
Essential tools include a large mixing bowl, measuring cups and spoons, a sharp knife and cutting board, a spatula or wooden spoon, a baking sheet, oven mitts, and a cooling rack.
Can I add dried fruits or chocolate chips during baking?
It’s best to add dried fruits and chocolate chips after baking to preserve their texture and prevent them from melting or becoming too hard.
How do I know when the granola is done baking?
Bake at 325°F (163°C), stirring periodically, until the granola turns a golden brown color and is crunchy.
What are some serving ideas for this granola?
Enjoy it with Greek yogurt and fresh berries, in a milk or plant-based milk bowl, as a topping for smoothie bowls, as a quick snack, or mixed into muffin or cookie batter.
How long does homemade granola last?
Stored properly at room temperature in an airtight container, homemade granola remains fresh and crunchy for about 1 to 2 weeks.
Is this granola high in nutrients and fiber?
Yes, it is high in fiber, healthy fats, and essential nutrients from oats, nuts, seeds, and dates, making it a nutritious breakfast or snack option.