
Goat’s milk yogurt offers a creamy tangy twist on traditional yogurt that’s both delicious and nutritious. It’s a fantastic option for those who find cow’s milk hard to digest or want to explore new flavors in their dairy routine. Plus it’s packed with probiotics that support gut health and boost immunity.
Making goat’s milk yogurt at home is simpler than you might think. With just a few ingredients and some patience we can create a fresh batch that’s free from additives and tailored to our taste. This recipe will guide us through the process step-by-step so we can enjoy smooth thick yogurt that’s perfect for breakfast snacks or cooking.
Whether you’re a yogurt lover or new to goat’s milk this recipe opens up a world of creamy goodness that’s wholesome and satisfying. Let’s dive in and discover how easy it is to make our own goat’s milk yogurt right in our kitchen.
Ingredients
To make our Goat’s Milk Yogurt creamy and flavorful, we rely on a simple yet precise list of ingredients. Each component plays a crucial role in achieving the perfect texture and tang that defines this wholesome treat.
- 4 cups (1 quart) of fresh whole goat’s milk
Fresh milk ensures the best consistency and natural flavor. We recommend using whole milk for creaminess, but you can opt for low-fat if preferred.
- 2 tablespoons of plain yogurt starter culture (preferably live active cultures)
This can be a store-bought plain yogurt with active cultures or a freeze-dried yogurt starter designed specifically for fermentation. It initiates the fermentation process that develops the yogurt’s probiotics.
- Optional: 1 teaspoon of pure vanilla extract or a small amount of honey for flavor enhancement
These add subtle sweetness and aroma if desired, but keep the yogurt’s signature tang intact.
- Optional: 1 tablespoon of powdered milk (goat or cow milk)
Adding powdered milk increases milk solids, helping achieve thicker yogurt, especially if your goat’s milk is naturally thin.
| Ingredient | Quantity | Purpose |
|---|---|---|
| Fresh whole goat’s milk | 4 cups (1 quart) | Base liquid for yogurt |
| Plain yogurt starter culture | 2 tablespoons | Fermentation starter, probiotic source |
| Pure vanilla extract (optional) | 1 teaspoon | Adds flavor |
| Honey (optional) | To taste | Natural sweetener |
| Powdered milk (optional) | 1 tablespoon | Enhances thickness and creaminess |
Note: Using live cultures marked “active” or “live” is essential to guarantee effective fermentation and authentic probiotic benefits in our goat’s milk yogurt.
With these ingredients ready, we are set to create a delicious, nutrient-rich homemade yogurt that brings out the unique qualities of goat’s milk.
Equipment Needed
To craft the perfect Goat’s Milk Yogurt, having the right equipment is essential for both the texture and safety of our homemade yogurt. Here is a detailed list and description of the tools we rely on throughout the process:
- Heavy-bottomed pot or saucepan
We use this to gently heat the goat’s milk without scorching it. The heavy bottom ensures even heat distribution.
- Instant-read or candy thermometer
Precise temperature control is crucial. We monitor the milk temperature accurately to ensure proper culture activation.
- Whisk
We use a whisk to blend the starter culture evenly into the warm milk for consistent fermentation.
- Glass or stainless steel yogurt container
Non-reactive containers keep the yogurt pure. We recommend glass or stainless steel for safe incubation.
- Warm incubation environment
A yogurt maker, warm oven, or insulated cooler helps maintain the ideal incubation temperature (around 110°F) for 6 to 12 hours.
- Clean kitchen towels or lids
Covering the container traps heat and prevents contamination.
- Measuring spoons
Accurate measurements for the yogurt starter and optional flavorings like vanilla or honey are important.
- Strainer or cheesecloth (optional)
If we want thicker yogurt, these are used to strain whey and achieve a creamier consistency.
| Equipment | Purpose | Recommended Material |
|---|---|---|
| Heavy-bottomed pot | Heat milk evenly | Stainless steel |
| Instant-read thermometer | Monitor milk temperature | Digital or analog |
| Whisk | Mix starter culture uniformly | Stainless steel |
| Yogurt container | Incubate yogurt safely | Glass or stainless steel |
| Warm incubation source | Maintain proper fermentation temperature | Yogurt maker or oven |
| Clean kitchen towels/lids | Cover yogurt during incubation | Cotton towels or lids |
| Measuring spoons | Measure starter and flavor ingredients precisely | Stainless steel or plastic |
| Strainer/cheesecloth (optional) | Strain yogurt for thicker texture | Fine mesh or muslin cloth |
By preparing these essential tools beforehand, we create the ideal environment for our Goat’s Milk Yogurt to develop its signature creamy texture and tangy flavor. Proper equipment directly influences the consistency and probiotic quality of our final product.
Make-Ahead Instructions
To get the best results with our goat’s milk yogurt recipe, planning ahead is essential. By following these make-ahead steps, we ensure the yogurt develops its characteristic creamy texture and tangy flavor while maintaining optimal probiotic activity.
Step 1: Prepare the Starter Culture in Advance
- Measure out 2 tablespoons of your yogurt starter culture or reserve yogurt from a previous batch.
- For best results, allow the starter to come to room temperature before mixing it with warm milk.
- Store the starter in an airtight container in the refrigerator for up to 7 days if not using immediately.
Step 2: Heat and Cool the Goat’s Milk Early
- Use a heavy-bottomed pot to heat 1 quart of fresh whole goat’s milk to 180°F (82°C). This kills undesirable bacteria and improves texture.
- Remove from heat and cool to 110°F (43°C), the ideal temperature for adding your starter culture.
- To cool quickly, place the pot in a cold water bath while stirring gently.
- Cover the pot and refrigerate overnight if you want to prepare the base ahead of time.
Step 3: Combine Milk and Starter When Ready
- When ready to incubate, whisk the warmed milk (110°F) and starter culture together until fully blended.
- Avoid adding the starter directly to cold milk as it will not ferment properly.
Step 4: Plan the Incubation Period
- Pour the mixture into your non-reactive yogurt container.
- Maintain a constant incubation temperature of 105°F to 110°F (40°C to 43°C) for 8 to 12 hours.
- Set up your incubation environment and cover your container with a clean kitchen towel or lid to retain warmth.
- Longer incubation yields tangier yogurt; shorter produces milder flavor.
Make-Ahead Timing Summary
| Step | Action | Timing Options |
|---|---|---|
| Starter Culture | Prepare or thaw starter | Up to 7 days before initiation |
| Milk Heating & Cooling | Heat milk to 180°F and cool | Night before or few hours before incubating |
| Mixing Starter & Milk | Combine at 110°F | Immediately before incubation |
| Incubation | Maintain warm environment | 8 to 12 hours |
“Consistency is key: Preparing your ingredients and environment ahead helps maintain stable temperatures and creates perfect conditions for our goat’s milk yogurt to ferment beautifully.”
By planning these steps ahead, we can streamline the yogurt-making process allowing us to enjoy rich, creamy, and probiotic-packed homemade goat’s milk yogurt with ease.
Instructions
Follow these straightforward steps to craft rich and creamy goat’s milk yogurt that delights the senses and nourishes the body.
Prep the Ingredients
- Measure 4 cups of fresh whole goat’s milk
- Prepare 2 tablespoons of yogurt starter culture (live active cultures)
- Optional: 1 teaspoon vanilla extract or 1 tablespoon honey for flavor
- Optional: 2 tablespoons powdered milk to enhance creaminess
Ensure all utensils and containers are thoroughly sanitized to maintain the purity and safety of our yogurt.
Heat the Goat’s Milk
Pour the goat’s milk into a heavy-bottomed pot. Heat gently over medium heat, stirring occasionally to prevent scorching. Use an instant-read thermometer to monitor temperature closely.
| Step | Temperature | Purpose |
|---|---|---|
| Heat milk | 180°F (82°C) | Kill undesirable bacteria and improve texture |
Heat until the milk reaches 180°F. Once achieved, remove the pot from heat immediately.
Cool the Milk to the Right Temperature
Allow the milk to cool naturally, stirring occasionally. Use the thermometer to track progress.
| Step | Temperature | Purpose |
|---|---|---|
| Cool milk | 110°F (43°C) | Optimal temperature for culturing |
At 110°F, the milk is warm enough to activate the cultures yet cool enough to avoid killing them.
Add the Yogurt Starter Culture
Place the 2 tablespoons of starter culture in a small bowl. Add a few tablespoons of the cooled milk and whisk until smooth.
Slowly whisk the starter mixture back into the pot of cooled milk, ensuring even distribution.
If using optional ingredients like vanilla or honey, stir them in gently now to infuse flavor.
Incubate the Yogurt
Pour the inoculated milk into a non-reactive container. Cover with a clean kitchen towel or lid to maintain warmth.
Maintain a stable incubation environment between 105°F and 110°F for 8 to 12 hours.
“Patience during incubation is key to developing the signature tang and creamy texture.”
Use a yogurt maker or an oven with the light on for consistent temperature control.
Chill and Set the Yogurt
After incubation, move the yogurt to the refrigerator. Chill for at least 4 hours to fully set.
| Step | Time | Result |
|---|---|---|
| Refrigeration | Minimum 4 hours | Thickens and enhances flavor |
For thicker consistency, strain the yogurt using cheesecloth or a fine strainer.
Our homemade goat’s milk yogurt is now ready to enjoy—creamy, tangy, and packed with probiotics.
Serving Suggestions
Enjoying our homemade goat’s milk yogurt is as versatile as it is delicious. Here are some ways we recommend to serve and savor this rich nutritious treat:
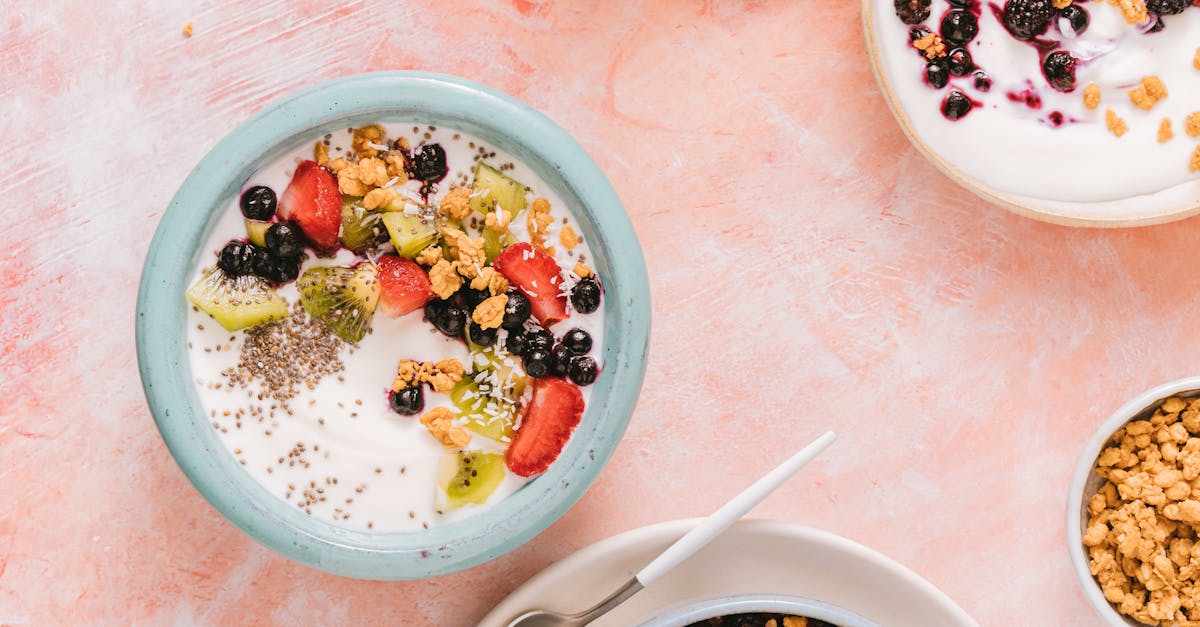
Classic Breakfast Bowl
- Spoon creamy goat’s milk yogurt into a bowl
- Top with fresh berries such as blueberries strawberries or raspberries for natural sweetness
- Sprinkle with granola or chopped nuts for crunch and texture
- Drizzle raw honey or pure maple syrup to enhance flavor and add subtle sweetness
Savory Twist
- Use as a base for a tangy dip by mixing with minced garlic chopped fresh herbs like dill or chives and a pinch of salt and pepper
- Pair with fresh vegetable sticks like cucumbers carrots and bell peppers for a healthy snack
- Substitute in recipes calling for sour cream to add probiotics and a subtle tang
Smoothie Ingredient
- Blend a quarter cup of goat’s milk yogurt with your favorite fruits such as banana mango and spinach
- Add a splash of almond milk or coconut water to reach desired consistency
- Boost your morning energy or post-workout recovery with a probiotic-rich smoothie
Dessert Base
- Layer goat’s milk yogurt with fruit compotes or pureed mango and pineapple to create a refreshing parfait
- Top with dark chocolate shavings or cinnamon for added indulgence
Table: Serving Portion Suggestions
| Serving Style | Portion Size | Typical Toppings/Additions |
|---|---|---|
| Breakfast Bowl | 6 oz (3/4 cup) | Fresh berries, granola, honey |
| Savory Dip | 4 oz (1/2 cup) | Garlic, fresh herbs, salt, pepper |
| Smoothie Base | 1/4 cup | Mixed fruits, spinach, almond milk |
| Dessert Parfait | 6 oz (3/4 cup) | Fruit compote, chocolate, cinnamon |
As we embrace these serving suggestions, we unlock numerous ways to enjoy the probiotic goodness and creamy texture of our homemade goat’s milk yogurt. Experimenting with flavors and toppings makes every serving a nourishing delight crafted uniquely for our tastes.
Storage Tips
To keep our goat’s milk yogurt fresh and flavorful, proper storage is essential. Follow these steps to maintain the creamy texture and probiotic benefits:
- Refrigerate Promptly: After the yogurt has set and chilled, transfer it to the refrigerator immediately. Store it at a consistent temperature between 36°F and 40°F to slow bacterial growth and preserve freshness.
- Use Airtight Containers: Store the yogurt in a clean, airtight container to prevent contamination and absorption of other fridge odors. Glass or BPA-free plastic containers work best for maintaining purity and flavor.
- Label with Date: Always label your container with the date of preparation. Homemade goat’s milk yogurt typically stays fresh for 7 to 10 days in the fridge.
- Avoid Cross-Contamination: Use a clean spoon each time you scoop yogurt to prevent introducing unwanted bacteria that can spoil the batch.
- Freeze for Longer Storage: For extended preservation, freeze the yogurt in portioned containers. Thaw in the refrigerator and stir well before serving. Note that freezing can slightly alter texture, but it maintains probiotics and flavor well.
| Storage Method | Temperature Range | Duration | Notes |
|---|---|---|---|
| Refrigerator | 36°F to 40°F | 7 to 10 days | Keep in airtight containers |
| Freezer | 0°F or below | Up to 2 months | Texture may change, stir after thaw |
“Proper storage ensures our homemade goat’s milk yogurt stays delicious and nutritious, ready to enjoy any time.”
By following these storage guidelines we maximize the shelf life and retain the creamy texture and tangy flavor unique to our goat’s milk yogurt.
Troubleshooting Common Issues
When crafting homemade goat’s milk yogurt, occasional issues may arise that can affect texture, flavor, or consistency. Below we tackle common problems to help us achieve creamy, tangy, probiotic-rich yogurt every time.
Yogurt Not Setting Properly
If your goat’s milk yogurt remains runny or fails to thicken, the likely causes include:
- Milk temperature too high or too low when adding the starter culture. Milk must cool to 110°F (43°C) before mixing in the culture to avoid killing beneficial bacteria or slowing fermentation.
- Insufficient incubation time or inconsistent warmth during fermentation. Maintain the incubation temperature steadily between 105°F – 110°F (40°C – 43°C) for 8 to 12 hours.
- Starter culture too old or inactive. Use fresh yogurt starter or a reliable commercial culture for best results.
| Possible Cause | Solution |
|---|---|
| Milk temperature errors | Use an instant-read thermometer; cool milk to exactly 110°F before adding starter |
| Incubation time/heat | Incubate 8–12 hrs at stable 105°F–110°F; check warm spot |
| Weak starter culture | Use fresh, active starter; reserve some yogurt as future starter |
“Temperature control is the foundation of thick, tangy goat’s milk yogurt.“
Yogurt Tastes Too Sour or Not Tangy Enough
The balance of tartness reflects incubation length and culture activity.
- Too sour: Incubate longer than 12 hours or at higher temperatures, which increases acidity.
- Too mild or bland: Shorten incubation time or gently shake yogurt after culturing to redistribute flavor.
Tip: We recommend starting with 8 hours and adjusting by 30-minute increments in future batches to fine-tune sourness.
Grainy or Lumpy Texture
Graininess or lumps can result from:
- Insufficient stirring or improper mixing of starter culture into milk.
- Using ultra-pasteurized milk or milk with additives that reduce bacterial activity.
- Overheating milk during heating stage, which affects protein structure.
To ensure smooth, creamy texture:
- Gently whisk the starter into milk until evenly combined.
- Use fresh whole goat’s milk, preferably raw or pasteurized but not ultra-pasteurized.
- Heat milk slowly and evenly, avoiding boiling.
Surface Liquid (Whey) Separation
A thin layer of whey can form atop the yogurt indicating natural separation.
- This is normal; whey is the liquid part rich in protein.
- Simply stir whey back in for a creamier texture or strain it out for thicker yogurt.
Mold or Off-Smells
Presence of mold or sour, unpleasant odors means contamination.
- Use sterilized utensils and containers.
- Store yogurt promptly between 36°F and 40°F (2°C–4°C).
- Discard any batches showing mold or foul smell to avoid illness.
| Problem | Likely Cause | Preventative Step |
|---|---|---|
| Mold growth | Contamination from utensils or environment | Sterilize all equipment; cover yogurt during incubation |
| Off smell or bad taste | Improper refrigeration or old starter | Refrigerate promptly; use fresh starter culture |
We trust these troubleshooting tips guide us toward consistently successful batches of goat’s milk yogurt packed with creamy texture and probiotic benefits.
Conclusion
Making goat’s milk yogurt at home is a rewarding way to enjoy a creamy, tangy, and probiotic-rich treat. With the right ingredients, equipment, and attention to temperature, we can create a delicious yogurt that supports digestion and immunity. By experimenting with flavors and storage techniques, we ensure every batch is fresh and satisfying. Whether you’re new to yogurt-making or a seasoned pro, this recipe offers a simple path to nourishing homemade goodness.
Frequently Asked Questions
What are the benefits of goat’s milk yogurt compared to cow’s milk yogurt?
Goat’s milk yogurt is easier to digest for many people, has a creamy texture, tangy flavor, and contains probiotics that support gut health and immunity. It’s a nutritious alternative for those sensitive to cow’s milk.
What ingredients do I need to make goat’s milk yogurt at home?
You’ll need fresh whole goat’s milk, a yogurt starter culture, and optionally vanilla extract, honey, or powdered milk for extra creaminess.
What equipment is essential for making goat’s milk yogurt?
Key tools include a heavy-bottomed pot, instant-read thermometer, whisk, non-reactive yogurt container, clean towels or lids, measuring spoons, and optional strainers or cheesecloth for thicker yogurt.
How do I prepare the milk before culturing?
Heat the goat’s milk to 180°F to kill unwanted bacteria, then cool it down to 110°F, which is the ideal temperature for adding the starter culture.
How long should I incubate the yogurt?
Maintain a steady temperature between 105°F and 110°F for 8 to 12 hours to develop the yogurt’s texture and tangy flavor.
How do I store homemade goat’s milk yogurt?
Refrigerate in airtight containers between 36°F and 40°F, label with the prep date, use clean utensils, and optionally freeze portions for longer storage.
What causes yogurt to not set properly and how can I fix it?
Improper temperature or inactive starter culture can prevent setting. Ensure heating to 180°F, cooling to 110°F, and using fresh starter for best results.
Can I make the yogurt thicker?
Yes, you can strain the yogurt through cheesecloth or use powdered milk in the recipe to enhance thickness and creaminess.
What are some serving ideas for goat’s milk yogurt?
Enjoy it in breakfast bowls with berries and granola, as a savory dip with garlic and herbs, blended in smoothies, or layered in dessert parfaits.
How do I avoid mold or contamination in homemade yogurt?
Always sanitize all equipment, use fresh ingredients, keep incubation and storage areas clean, and refrigerate yogurt promptly to prevent mold growth.