
Gluten-free baking doesn’t have to mean missing out on classic treats. Our gluten free nut roll recipe brings the beloved nut roll tradition to everyone’s table without compromising on flavor or texture. This delightful dessert combines a tender, gluten-free dough with a rich, nutty filling that’s perfect for any occasion.
We’ve crafted this recipe to be simple yet authentic, ensuring you get that perfect balance of sweet and nutty in every bite. Whether you’re gluten intolerant or just looking to try something new, this nut roll will quickly become a favorite. Let’s dive into a recipe that’s as comforting as it is delicious and easy to make at home.
Ingredients
To create our Gluten Free Nut Roll with perfect texture and rich flavor, we carefully select each ingredient. Below, you’ll find what we need for a tender dough, a flavorful nut filling, and a few extras that make this dessert truly outstanding.
Dough Ingredients
For our gluten-free dough that balances softness and structure, gather these ingredients:
- 2 ½ cups gluten-free all-purpose flour blend (make sure it contains xanthan gum)
- ¼ cup granulated sugar
- 1 teaspoon baking powder
- ½ teaspoon salt
- 2 ¼ teaspoons active dry yeast (one packet)
- ¾ cup warm milk (about 110°F)
- ½ cup unsalted butter, melted and slightly cooled
- 2 large eggs, room temperature
- 1 teaspoon pure vanilla extract
Nut Filling Ingredients
The nut filling defines the nut roll’s character with warm spices and natural sweetness. Here is what we use:
| Ingredient | Quantity | Notes |
|---|---|---|
| Walnuts | 2 cups | Finely chopped or ground |
| Brown sugar | ½ cup | For deep, caramelized sweetness |
| Honey | 3 tablespoons | Adds natural sweetness and moisture |
| Unsalted butter | 3 tablespoons | Melted, enriches the filling |
| Ground cinnamon | 1 teaspoon | Brings warm spice notes |
| Vanilla extract | 1 teaspoon | Enhances flavor depth |
| Pinch of salt | 1/8 teaspoon | Balances sweetness |
Additional Ingredients
To complete our Gluten Free Nut Roll and prepare it for baking and finishing touches, here’s what we add:
- 1 egg yolk (for egg wash to give a golden gloss)
- 1 tablespoon milk (to mix with egg yolk for brushing)
- Powdered sugar (optional, for dusting after baking)
Each ingredient plays a crucial role in crafting a delicious gluten-free nut roll that bursts with flavor and satisfies both gluten-sensitive and traditional palates alike.
Tools and Equipment
To master our Gluten Free Nut Roll Recipe, having the right tools and equipment is essential. These items ensure precision, ease, and perfect results every time we bake this delightful dessert.
Baking Tools
We rely on a few key Baking Tools that help the nut roll develop its tender crumb and evenly browned crust:
- 9×13 inch baking pan or a similar sized sheet pan to shape and bake the roll evenly
- Parchment paper to line the pan and prevent sticking
- Cooling rack to allow the nut roll to cool completely without condensation ruining the texture
- Pastry brush for applying an egg wash to produce a glossy golden finish
| Baking Tool | Purpose |
|---|---|
| Baking pan | Holds and shapes the nut roll |
| Parchment paper | Prevents sticking and facilitates cleanup |
| Cooling rack | Allows airflow to cool baked roll |
| Pastry brush | Applies egg wash for color and shine |
Mixing Tools
Our Mixing Tools help combine ingredients thoroughly while maintaining a smooth dough that holds together without gluten:
- Large mixing bowl for combining dry and wet ingredients comfortably
- Whisk for blending eggs, milk, and vanilla before mixing into the dough
- Electric hand mixer or stand mixer with paddle attachment to knead the dough for the perfect consistency without overworking it
- Spatula to scrape down sides and fold ingredients gently, especially the nut filling
Preparation Tools
Preparation is seamless with these tools designed to shape, fill, and finish the nut roll:
- Rolling pin to roll the gluten-free dough evenly into a rectangle perfect for spreading the nut filling
- Measuring cups and spoons for accurate ingredient portions—critical in gluten-free baking
- Small bowl for mixing the nut filling ingredients thoroughly before spreading
- Sharp knife for slicing the finished roll into neat, even pieces
By equipping ourselves with these essential tools and equipment, we make the baking process smoother and guarantee our gluten-free nut roll turns out moist, flavorful, and beautifully presented.
Prep Work
Before we start assembling our gluten free nut roll, precise preparation is key. Let’s get both the nut filling and dough ready, ensuring every element contributes to a perfect, flavorful roll.
Preparing the Nut Filling
To create the signature rich and aromatic filling for our gluten free nut roll, follow these steps:
- Toast the walnuts lightly in a dry pan over medium heat for 3–4 minutes. This enhances their aroma and crunch.
- In a small mixing bowl, combine the toasted walnuts, brown sugar, honey, melted butter, ground cinnamon, vanilla extract, and a pinch of salt.
- Stir thoroughly until the mixture is evenly coated and glossy.
- Cover the bowl and set the filling aside at room temperature, allowing flavors to meld while we prepare the dough.
| Ingredient | Quantity | Preparation |
|---|---|---|
| Walnuts | 1 1/2 cups | Toasted |
| Brown Sugar | 1/2 cup | — |
| Honey | 2 tablespoons | — |
| Melted Butter | 2 tablespoons | — |
| Ground Cinnamon | 1 teaspoon | — |
| Vanilla Extract | 1 teaspoon | — |
| Salt | Pinch | — |
Preparing the Dough
Our gluten free dough needs careful attention to ensure softness and structure:
- Warm milk to about 110°F (warm to the touch, not hot). Pour into a large mixing bowl.
- Add yeast and a teaspoon of sugar to the milk. Stir gently and let sit for 5–10 minutes until foamy and active.
- In a separate bowl, whisk together the gluten-free all-purpose flour, sugar, baking powder, and salt.
- Add melted butter, eggs, and vanilla extract to the yeast mixture. Beat with an electric mixer on medium speed until just combined.
- Gradually add dry ingredients to the wet mixture, stirring continuously with a spatula or mixer on low speed.
- The dough should be soft, slightly sticky but manageable—adjust with a tablespoon of flour or milk to reach the right consistency.
- Cover the dough with a clean towel and let it rise in a warm spot for 45–60 minutes until it doubles in size.
| Dough Ingredient | Quantity | Preparation |
|---|---|---|
| Gluten-Free All-Purpose Flour | 3 cups | Sifted |
| Sugar | 1/4 cup | — |
| Baking Powder | 1 teaspoon | — |
| Salt | 1/2 teaspoon | — |
| Yeast | 2 1/4 teaspoons | Active dry, proofed in milk |
| Warm Milk | 1 cup | 110°F |
| Melted Butter | 1/4 cup | — |
| Eggs | 2 large | Room temperature |
| Vanilla Extract | 1 teaspoon | — |
Directions
Follow these detailed steps to create our gluten free nut roll recipe with a tender dough and rich nut filling. Precision and care in each stage ensure a flawless, delicious result.
Making the Dough
- Activate the yeast: In a small bowl, combine 1 cup warm milk (about 110°F) with 2 ¼ teaspoons active dry yeast and 1 tablespoon sugar. Stir gently and let sit for 5–10 minutes until frothy.
- Mix dry ingredients: In a large bowl, whisk together 2 ½ cups gluten-free all-purpose flour, 1 teaspoon baking powder, and ½ teaspoon salt.
- Combine wet ingredients: In a separate bowl, whisk 2 large eggs, ½ cup melted butter, and 1 teaspoon vanilla extract.
- Form the dough: Pour the activated yeast mixture and wet ingredients into the dry ingredients. Use an electric mixer or spatula to blend until smooth and elastic.
- First rise: Cover the bowl with a clean towel. Place in a warm spot and let the dough rise until doubled in size, approximately 1 to 1.5 hours.
Rolling Out the Dough
- Lightly flour a clean surface with gluten-free flour.
- Punch down the dough softly to release air.
- Using a rolling pin, roll the dough into a 16×12-inch rectangle about ¼-inch thick.
Adding the Nut Filling
- Spread the prepared nut filling evenly over the dough, leaving a ½-inch margin on the edges.
- The filling includes toasted walnuts, brown sugar, honey, melted butter, ground cinnamon, and vanilla extract for a rich, aromatic taste.
Rolling and Shaping the Nut Roll
- Starting from the longer edge, gently roll the dough into a tight log shape.
- Pinch the seam and ends securely to seal the filling inside.
- Transfer the roll seam-side down onto a parchment-lined 9×13 inch baking pan.
Baking Instructions
| Step | Temperature | Time | Notes |
|---|---|---|---|
| Preheat oven | 350°F (175°C) | — | Make sure oven is fully heated |
| Bake nut roll | 350°F (175°C) | 35 to 40 minutes | Brush top with egg yolk wash before baking for a golden crust |
- Apply an egg yolk wash using a pastry brush before baking to achieve a glossy, golden exterior.
Cooling and Slicing
- Remove the nut roll from the oven once golden brown and fully baked.
- Let it cool in the pan for 15 minutes.
- Transfer the nut roll to a cooling rack to cool completely.
- Slice into 1-inch pieces using a sharp knife.
- Optionally dust with powdered sugar for an elegant finish.
Make-Ahead and Storage Tips
Proper storage and make-ahead strategies ensure our Gluten Free Nut Roll stays fresh, flavorful, and moist for days. Let’s explore the best ways to store and freeze this delightful treat.
Storing the Nut Roll
To preserve the nut roll’s texture and taste, we recommend these storage steps:
- Allow the nut roll to cool completely on a cooling rack to prevent condensation.
- Wrap the roll tightly in plastic wrap or place it in an airtight container to maintain moisture.
- Store at room temperature for up to 2 days.
- For longer storage, refrigerate up to 5 days, ensuring the nut roll is well wrapped to avoid drying out.
- Before serving refrigerated nut roll, bring it to room temperature or warm slightly in the oven at 300°F for 5–7 minutes to refresh softness and flavor.
| Storage Method | Duration | Temperature | Notes |
|---|---|---|---|
| Room Temperature | Up to 2 days | 68–72°F (20–22°C) | Keep wrapped tightly for moisture retention |
| Refrigeration | Up to 5 days | 35–40°F (2–4°C) | Wrap airtight, warm before serving |
Freezing Instructions
Freezing is an excellent option to extend the shelf life of our Gluten Free Nut Roll without compromising quality. Follow these steps:
- Cool the nut roll completely.
- Wrap the entire roll or individual slices tightly in plastic wrap.
- Place the wrapped roll or slices in a freezer-safe zip-top bag or airtight container.
- Label with date for easy tracking.
Our nut roll freezes well for up to 3 months.
To thaw:
- Transfer from freezer to refrigerator and thaw overnight.
- Alternatively thaw at room temperature for 2 to 3 hours wrapped to avoid drying.
- Warm in an oven preheated to 300°F for 7–10 minutes to restore freshness before serving.
| Freezing Step | Detail | Time / Temperature |
|---|---|---|
| Wrap | Plastic wrap tightly + freeze-safe container | |
| Storage Duration | Freeze | Up to 3 months |
| Thawing in Fridge | Overnight thawing | 8–12 hours |
| Thawing at Room Temp | 2 to 3 hours, wrapped | 68–72°F (20–22°C) |
| Refreshing Warmth | Oven warming | 300°F for 7–10 minutes |
By following these Make-Ahead and Storage Tips, our Gluten Free Nut Roll remains a delicious and convenient treat whenever the craving strikes.
Serving Suggestions
To fully enjoy our Gluten Free Nut Roll, we recommend serving it warm or at room temperature. The tender crumb and rich nut filling come alive with these simple accompaniments and presentation ideas:
- Warm with a cup of tea or coffee: Heat slices in the microwave for 10 to 15 seconds. This enhances the soft texture and releases the nutty aroma. Pairing with herbal tea, black coffee, or a mild latte complements the nut roll’s sweetness without overpowering it.
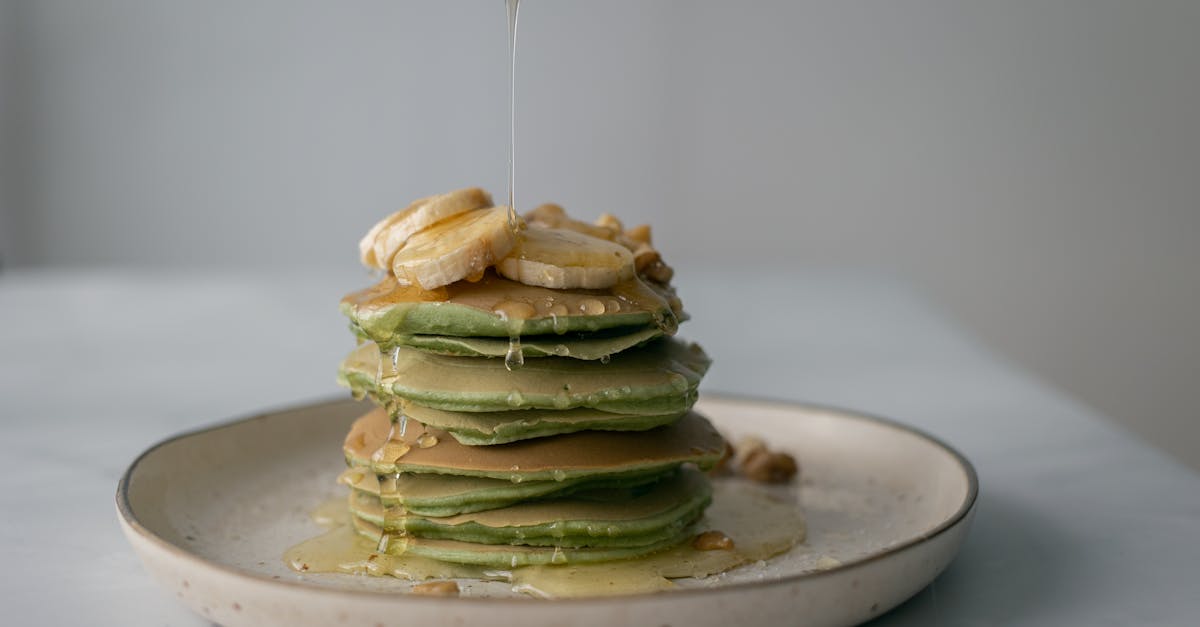
- Dust with powdered sugar: For an elegant touch, lightly sprinkle powdered sugar just before serving. This adds a delicate sweetness and creates a visually appealing presentation.
- Add a dollop of whipped cream or vanilla ice cream: For a dessert upgrade, serve a slice alongside fresh whipped cream or a scoop of vanilla ice cream. The creamy texture balances the nutty richness perfectly.
- Top with fresh berries: Enhance flavor and color by garnishing the plate with fresh berries such as raspberries, blueberries, or sliced strawberries. Their slight tartness contrasts beautifully with the sweet filling.
- Serve family-style: Slice the nut roll into 1-inch pieces and arrange them on a large platter. This encourages sharing and allows everyone to indulge at their own pace.
Serving Temperature Guide
| Serving Style | Temperature | Recommended Pairings |
|---|---|---|
| Warm | 95°F to 105°F | Black coffee, chai tea, hot chocolate |
| Room Temperature | 68°F to 72°F | Milk, herbal tea, fruit compote |
| With Ice Cream | Slightly cooled | Vanilla, caramel drizzle |
“Serving our Gluten Free Nut Roll warm enhances the flavors and brings out the natural nutty aroma, making every bite memorable.”
By experimenting with these serving options we can bring out the best qualities of this classic treat and create an inviting dessert experience for all our guests.
Conclusion
This gluten-free nut roll recipe opens up a world of delicious possibilities for anyone avoiding gluten without missing out on classic flavors. With the right ingredients, tools, and careful preparation, we can create a tender, flavorful treat that shines on any dessert table.
Whether you’re baking for family gatherings or simply treating yourself, this nut roll offers a comforting and satisfying experience. Its versatility in serving options means it can easily become a favorite in our gluten-free baking repertoire. Let’s get baking and enjoy every bite!
Frequently Asked Questions
Is this nut roll recipe completely gluten-free?
Yes, this recipe uses gluten-free all-purpose flour and other gluten-free ingredients, making it safe for those with gluten intolerance or celiac disease.
What nuts are used in the nut filling?
The recipe calls for walnuts, which are toasted and mixed with brown sugar, honey, cinnamon, and other ingredients to create a rich filling.
What tools are essential for baking this nut roll?
Key tools include a 9×13 inch baking pan, parchment paper, cooling rack, pastry brush, mixing bowls, electric mixer, rolling pin, measuring cups, and a sharp knife.
How long does it take to bake the nut roll?
Bake the nut roll at 350°F for 35 to 40 minutes, until the crust is golden and the filling is set.
Can I make the nut roll ahead of time?
Yes, you can make it in advance. Cool completely, then store wrapped in plastic or airtight containers. It keeps 2 days at room temp, 5 days refrigerated, or frozen for longer storage.
How should I serve the gluten-free nut roll?
Serve warm or at room temperature, alone or with tea or coffee. For a dessert upgrade, add whipped cream, vanilla ice cream, or fresh berries.
Does the dough need to rise before baking?
Yes, after mixing, the dough should rise until doubled in size to ensure a tender and fluffy texture in the final roll.
Can I substitute walnuts with other nuts?
While walnuts are recommended for flavor, you can substitute pecans or almonds to suit your preference, keeping the texture similar.
Is powdered sugar necessary for the final presentation?
Powdered sugar is optional and used for an elegant dusting, enhancing appearance and adding a light sweetness to the nut roll.
How do I thaw a frozen nut roll?
Thaw frozen nut roll or slices in the refrigerator overnight or at room temperature for a few hours before serving to restore freshness.