
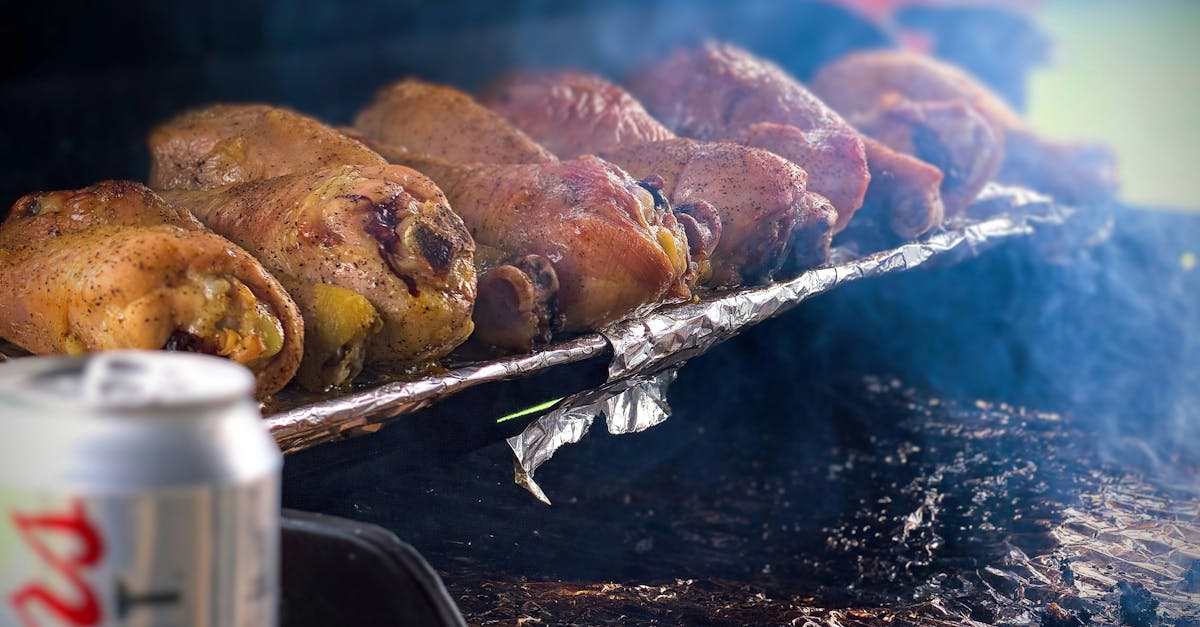
Beef brisket is a classic comfort food that’s perfect for family dinners or special occasions. When it’s cooked low and slow, the meat becomes incredibly tender and full of rich flavor. Our gluten free beef brisket recipe lets everyone enjoy this hearty dish without worrying about hidden gluten ingredients.
We’ve crafted this recipe using simple gluten free seasonings and sauces that enhance the natural taste of the brisket. Whether you’re gluten sensitive or just looking for a wholesome meal, this dish is sure to satisfy. Let’s dive into a foolproof way to make a delicious gluten free beef brisket that will become a staple in your kitchen.
Ingredients
To create a perfectly tender and flavorful Gluten Free Beef Brisket, we gather simple yet robust ingredients. Each element plays a vital role in enhancing the dish while keeping it entirely gluten-free and wholesome.
For the Beef Brisket
- 4 to 5 pounds beef brisket, trimmed of excess fat
- 1 tablespoon olive oil (for searing)
For the Dry Rub
Our dry rub is a gluten-free blend that infuses the brisket with deep smoky and savory flavors. The balance of herbs and spices ensures a rich taste without added gluten.
| Ingredient | Measurement | Notes |
|---|---|---|
| Paprika | 2 tablespoons | Smoked paprika preferred |
| Garlic powder | 1 tablespoon | |
| Onion powder | 1 tablespoon | |
| Ground black pepper | 1 tablespoon | Freshly ground |
| Kosher salt | 1 tablespoon | Adjust to taste |
| Ground cumin | 1 teaspoon | Adds warmth |
| Dried thyme | 1 teaspoon | Optional but recommended |
For the Cooking Liquid
This gluten-free cooking liquid tenderizes the brisket while imparting subtle sweetness and acidity. It forms the base for a luscious sauce to accompany our dish.
- 1 cup gluten-free beef broth
- 1/2 cup apple cider vinegar
- 1/4 cup gluten-free Worcestershire sauce
- 2 tablespoons brown sugar (light or dark depending on preference)
- 2 cloves garlic, minced
- 1 large onion, sliced
Each component is carefully selected to maintain the rich essence of the brisket while ensuring it remains safe for gluten sensitivities. With these ingredients ready, we can move forward to crafting our delicious Gluten Free Beef Brisket.
Equipment Needed
To prepare our Gluten Free Beef Brisket perfectly, having the right equipment is essential. Each tool helps us achieve that tender, flavorful result that makes this dish a standout.
Here is the essential equipment list:
- Large heavy-bottomed skillet or cast iron pan
We use this for searing the brisket to lock in flavors with a beautiful crust.
- Roasting pan or oven-safe Dutch oven
Ideal for slow roasting the brisket, allowing the meat to cook evenly over low heat.
- Meat thermometer
This helps us monitor the internal temperature, ensuring the brisket reaches the perfect doneness without guessing.
- Mixing bowl
We use this to combine the gluten-free dry rub and prepare the cooking liquid ingredients.
- Tongs
For safely handling and turning the brisket during searing.
- Aluminum foil or lid
Covering the brisket during cooking helps retain moisture and tenderness.
| Equipment | Purpose |
|---|---|
| Large skillet or cast iron pan | Searing brisket to develop rich crust and flavor |
| Roasting pan/Dutch oven | Slow roasting for even heat distribution and tenderness |
| Meat thermometer | Checking internal temperature for perfect doneness |
| Mixing bowl | Combining dry rub and cooking liquid ingredients |
| Tongs | Handling brisket safely during cooking |
| Aluminum foil or lid | Retaining moisture throughout cooking |
Using these tools ensures our gluten-free beef brisket process is efficient and yields delicious results every time. We recommend gathering all the equipment beforehand so we can focus on cooking without interruption.
Prep Work
Before diving into cooking, thorough prep work is essential for ensuring our gluten free beef brisket delivers tender flavor and perfect texture. Let’s get everything ready step-by-step.
Preparing the Brisket
- Trim Excess Fat
Use a sharp knife to trim any thick fat cap on the brisket, leaving about ¼ inch for moisture and flavor. Removing excess fat helps the dry rub penetrate and prevents greasy results.
- Pat Dry
Use paper towels to pat the brisket dry. This step guarantees a better sear when we brown the meat, locking in juices.
- Bring to Room Temperature
Allow the brisket to sit out for 30 minutes. This promotes even cooking and consistent tenderness throughout.
- Score the Fat (Optional)
For extra flavor absorption, lightly score the fat in a diamond pattern without cutting into the meat.
Making the Dry Rub
Combining our gluten free dry rub is key to bold, balanced brisket flavor. Measure and mix the following spices thoroughly in a bowl:
| Ingredient | Amount | Notes |
|---|---|---|
| Paprika | 2 tbsp | Adds smoky warmth |
| Garlic powder | 1 tbsp | Deep aromatic touch |
| Onion powder | 1 tbsp | Sweet savory foundation |
| Black pepper | 1 tbsp | Freshly ground for best taste |
| Kosher salt | 2 tsp | Essential seasoning balance |
| Ground cumin | 1 tsp | Earthy undertone |
| Dried thyme (opt) | ½ tsp | Adds herbaceous nuance |
“We recommend mixing the dry rub just before applying to preserve spice potency and aromas.”
Once combined, massage the dry rub evenly over all surfaces of the brisket. Use gentle pressure to help the rub adhere and infuse flavor deeply.
With the brisket prepped and the rub applied, we’re ready to move on to searing and cooking, ensuring our gluten free beef brisket recipe delivers rich, tender results every time.
Cooking Instructions
Follow these precise steps to achieve a perfectly tender and flavorful gluten-free beef brisket. Our method combines expert searing and low-and-slow cooking to bring out the best in this cut.
Searing the Brisket
- Preheat a large heavy-bottomed skillet or cast iron pan over medium-high heat until it’s shimmering.
- Add 2 tablespoons of olive oil and swirl to coat the pan evenly.
- Place the brisket fat side down carefully into the pan. Sear for 4 to 5 minutes without moving it. This creates a deeply browned crust.
- Flip and sear the other side for another 4 minutes, ensuring both sides develop a rich, golden-brown color.
- Sear the edges briefly for 1 to 2 minutes each to lock in juices.
- Transfer the brisket to your prepared roasting pan or Dutch oven.
“Searing caramelizes the natural sugars and proteins in the meat, locking in flavors and creating a beautiful crust that enhances the final dish.“
Slow Cooking the Brisket
- Preheat your oven to 275°F (135°C) for slow roasting.
- In a mixing bowl, combine the cooking liquid ingredients as listed:
| Ingredient | Quantity |
|---|---|
| Gluten-free beef broth | 2 cups |
| Apple cider vinegar | 1/4 cup |
| Gluten-free Worcestershire sauce | 2 tbsp |
| Brown sugar | 2 tbsp |
| Minced garlic | 3 cloves |
| Chopped onion | 1 small |
- Pour the mixture evenly over and around the brisket in the roasting vessel.
- Cover the roasting pan tightly with aluminum foil or secure the Dutch oven lid to retain moisture.
- Place the brisket in the oven and cook low and slow for 4 to 5 hours, or until the meat is fork-tender.
- Check halfway through to baste the brisket with the juices, aiding moisture and flavor absorption.
- Once cooked, remove the brisket from the oven and let it rest covered for 20 minutes to allow juices to redistribute.
Checking for Doneness
To ensure your gluten-free beef brisket is perfectly cooked:
- Insert a meat thermometer into the thickest part of the brisket.
- Look for an internal temperature of 195°F to 205°F (90°C to 96°C) for ideal tenderness.
- Alternatively, test doneness by inserting a fork; it should slide in easily and the meat should pull apart without resistance.
“Remember, patience is key. Cooking brisket at a low temperature slowly breaks down the connective tissue making it melt-in-your-mouth delicious.”
| Doneness Indicator | Internal Temperature | Texture Description |
|---|---|---|
| Medium Rare | 135°F (57°C) | Pink center, firm texture |
| Medium Well | 150°F (65°C) | Slight pink, tender |
| Well Done (Ideal for brisket) | 195-205°F (90-96°C) | Extremely tender, shreddable |
Following these detailed cooking instructions guarantees a classic gluten-free beef brisket that is juicy, tender, and bursting with flavor.
Resting and Serving
Allowing the gluten free beef brisket to rest and slicing it correctly ensures maximum tenderness and flavor. Here’s how we finish our perfect brisket for an unforgettable meal.
Resting the Brisket
After the brisket reaches an internal temperature between 195°F and 205°F (90°C to 96°C), remove it from the oven and transfer it carefully to a clean cutting board.
- Tent the brisket loosely with aluminum foil to retain heat.
- Let it rest for at least 30 minutes, ideally up to 45 minutes.
- This step allows the juices to redistribute, preventing them from running out when slicing, which preserves moistness and tenderness.
“Resting is key to unlocking the full flavor and succulence of our gluten free beef brisket.”
Slicing Tips
Slicing the brisket properly maximizes tenderness and improves texture. Remember these essential tips:
- Always slice against the grain of the meat to break up muscle fibers.
- After resting, identify the direction of the grain by examining the meat closely.
- Use a sharp slicing knife for clean cuts that maintain the meat’s juices.
- Aim for slices about ¼ inch thick for balanced tenderness and flavor.
| Slicing Guidelines | Details |
|---|---|
| Direction | Against the grain |
| Knife | Sharp slicing knife |
| Slice Thickness | ~ ¼ inch (0.6 cm) |
| Rest Time Before Slicing | 30 to 45 minutes |
Serving Suggestions
Our gluten free beef brisket pairs wonderfully with a variety of sides that complement its rich, smoky flavor without overpowering it:
- Serve with roasted garlic mashed potatoes for creamy comfort.
- Add a side of steamed green beans or sautéed spinach for freshness and color.
- Consider a simple gluten-free BBQ sauce or a drizzle of the reserved cooking juices to elevate flavor.
- Accompany with a crisp gluten-free coleslaw for texture contrast.
We like to plate several slices of the brisket alongside these dishes for a well-rounded, satisfying meal. Use warm serving platters to keep everything hot and appetizing.
Make-Ahead Tips
Preparing the gluten free beef brisket ahead of time not only saves us valuable time on busy days but also enhances the flavor and tenderness. Here are our top make-ahead tips to ensure a hassle-free cooking experience and a delicious result.
1. Seasoning and Marinating in Advance
Apply the gluten-free dry rub to the brisket at least 12 to 24 hours before cooking. Wrap the seasoned meat tightly in plastic wrap or place it in an airtight container. Refrigerate during this time to allow the spices to penetrate deeply, resulting in a richer flavor profile.
2. Preparing the Cooking Liquid Early
Mix the cooking liquid ingredients (gluten-free beef broth, apple cider vinegar, gluten-free Worcestershire sauce, brown sugar, garlic, and onion) a day before. Store in the fridge in a sealed container. This lets the flavors meld and ensures they are ready to pour over the brisket when it’s time to cook.
3. Searing Ahead
For convenience, we can sear the brisket the night before. After cooling, wrap it securely and refrigerate. This step jumpstarts the Maillard reaction creating the signature crust and locks in juices. Before roasting, bring the brisket to room temperature to ensure even cooking.
4. Slow Cooking and Holding
Cook the brisket as directed and after it reaches the ideal internal temperature (195°F to 205°F / 90°C to 96°C). If not serving immediately, let it rest as usual then refrigerate wrapped in foil. When ready to serve, gently reheat in a low oven (250°F / 120°C), covered, with a splash of the reserved cooking liquid to maintain moisture.
| Step | Timeframe | Storage Tips | Benefit |
|---|---|---|---|
| Dry Rub Application | 12-24 hours before cooking | Wrap tightly, refrigerate | Deeper spice penetration |
| Cooking Liquid Prep | Up to 24 hours before cooking | Airtight container, refrigerate | Enhanced blend of flavors |
| Searing | Night before or day of | Cool, wrap, refrigerate | Perfect crust, juicy meat |
| Reheating Cooked Brisket | After cooking, as needed | Wrap in foil, low oven reheating | Retains moisture, ready to serve anytime |
5. Slicing and Serving Prep
Slice the brisket just before serving to preserve moisture and texture. However, if we want to prep in advance, slice thinly against the grain, layer slices in a dish, cover with foil and store refrigerated for up to 24 hours. Reheat gently with some cooking liquid to revive tenderness.
“Allowing the brisket to marinate and rest properly before and after cooking makes all the difference in achieving that melt-in-your-mouth gluten free beef brisket we crave.”
By following these make-ahead tips, we ensure our gluten free beef brisket is tender, flavorful, and ready to impress any guest with minimal last-minute effort.
Storing and Reheating Leftovers
Properly storing and reheating our gluten free beef brisket leftovers ensures the meat stays tender and flavorful for future meals. Follow these step-by-step guidelines to maintain the brisket’s quality while enjoying it later.
Storing Leftovers
- Cool brisket completely at room temperature for no longer than 2 hours after cooking to prevent bacterial growth.
- Slice brisket against the grain if not already done. This eases portioning and reheating.
- Place sliced brisket and any remaining cooking juices in an airtight container or tightly wrap in aluminum foil or plastic wrap.
- Refrigerate leftovers promptly. Stored properly, brisket lasts in the refrigerator for up to 4 days.
- For longer storage, freeze the brisket in vacuum-sealed bags or airtight containers to prevent freezer burn. Label with the date.
- Frozen brisket maintains best quality for up to 3 months.
| Storage Method | Duration | Tips |
|---|---|---|
| Refrigerator | Up to 4 days | Store with cooking juices to keep moist |
| Freezer | Up to 3 months | Use vacuum seal or airtight container |
Reheating Leftovers
To preserve the tender, juicy texture of our gluten free beef brisket, follow these reheating methods carefully:
Oven Reheating (Recommended)
- Preheat oven to 300°F (150°C).
- Place brisket slices in an oven-safe dish.
- Add a splash of leftover cooking liquid or beef broth.
- Cover tightly with foil to lock in moisture.
- Heat for 20-30 minutes, until brisket is warmed through.
- Use a meat thermometer to ensure reheated brisket reaches 165°F (74°C) internally.
Stovetop Reheating
- Place brisket slices in a covered skillet or saucepan.
- Add a few tablespoons of broth or cooking juices.
- Warm over low heat, turning occasionally to heat evenly.
- Heat for 10-15 minutes until thoroughly warm.
Microwave Reheating (Quickest)
- Arrange brisket slices on a microwave-safe plate.
- Drizzle with a small amount of cooking juice or broth.
- Cover with a microwave-safe lid or plastic wrap with a vent.
- Heat on medium power in 1-minute increments, checking for warmth.
- Avoid overheating to prevent drying out the meat.
Important Tips for Best Results
- Always reheat leftovers once only. Repeated reheating risks food safety and diminishes flavor.
- Rest brisket a few minutes after reheating to allow juices to redistribute before serving.
- To keep the gluten free brisket moist, never reheat without some liquid added.
- For added flavor, brush with gluten-free BBQ sauce after reheating.
By storing and reheating carefully, we extend the enjoyment of our tender, flavorful gluten free beef brisket with every serving.
Conclusion
This gluten-free beef brisket recipe is a reliable way to bring bold flavors and tender texture to your table. With straightforward ingredients and a simple cooking process, it fits perfectly into any meal plan, whether for weeknight dinners or special gatherings.
By following the steps carefully, we can enjoy a dish that’s both satisfying and safe for those avoiding gluten. It’s a recipe that invites us to slow down, savor the cooking journey, and share a hearty meal with loved ones.
Frequently Asked Questions
Is this beef brisket recipe completely gluten-free?
Yes, the recipe uses gluten-free seasonings, sauces, and broth to ensure it is safe for those with gluten sensitivities or celiac disease.
What is the best cooking temperature and time for the brisket?
Slow cook the brisket at 275°F (135°C) for 4 to 5 hours until it reaches an internal temperature of 195°F to 205°F (90°C to 96°C) for tenderness.
Why is it important to sear the brisket before cooking?
Searing creates a rich, golden-brown crust that enhances flavor and locks in juices during slow cooking.
Can I prepare the brisket ahead of time?
Yes, you can season and marinate the brisket in advance, and even sear it the night before to deepen flavors.
How should I store and reheat leftover brisket?
Cool leftovers quickly, store in airtight containers, and reheat gently in the oven or stovetop with added liquid to keep it moist.
What tools do I need to make this recipe successfully?
Essential tools include a heavy-bottomed skillet or cast iron pan, roasting pan or Dutch oven, meat thermometer, mixing bowl, tongs, and aluminum foil or lid.
How do I ensure the brisket is tender when sliced?
Rest the brisket for 30-45 minutes after cooking to redistribute juices and slice against the grain with a sharp knife.
What are good side dishes to serve with this brisket?
Try roasted garlic mashed potatoes, steamed green beans, gluten-free BBQ sauce, and coleslaw for a complete meal.
Can I use a different cut of meat instead of brisket?
Brisket is ideal for low and slow cooking due to its toughness and fat content. Other cuts may not yield the same tender results.
Is scoring the fat on the brisket necessary?
Scoring is optional but it helps seasoning penetrate better and allows fat to render more evenly during cooking.