
Managing gestational diabetes doesn’t mean you have to give up on enjoying delicious desserts. We understand how challenging it can be to find sweet treats that satisfy cravings without spiking blood sugar levels. That’s why we’ve gathered a collection of tasty and diabetes-friendly dessert recipes designed specifically for expectant moms.
These recipes focus on balanced ingredients that help maintain stable glucose levels while still delivering on flavor and satisfaction. Whether you’re craving something creamy, fruity, or chocolatey, you’ll find options that fit your nutritional needs and keep things exciting in the kitchen. Let’s dive into these guilt-free desserts that make managing gestational diabetes a little sweeter.
Ingredients
To create delicious gestational diabetes dessert recipes, we focus on ingredients that balance flavor and nutrition. These choices help keep blood sugar stable while satisfying sweet cravings.
Common Ingredients for Gestational Diabetes Desserts
Our recipes rely on wholesome components that slow sugar absorption and provide essential nutrients:
- Whole grain flours (almond, coconut, oat) for fiber-rich bases
- Nuts and seeds (chia, flaxseed, walnuts) to add texture and healthy fats
- Unsweetened cocoa powder for rich chocolate flavor without added sugar
- Spices like cinnamon and nutmeg that enhance sweetness naturally
- Eggs or flax eggs to bind ingredients and add protein
- Unsweetened applesauce as a moistening agent without extra sugar
Sweeteners Suitable for Gestational Diabetes
Choosing the right sweeteners is crucial to keeping our desserts safe and enjoyable. Here’s a list of diabetes-friendly sweeteners with their key attributes:
| Sweetener | Glycemic Index | Notes |
|---|---|---|
| Stevia | 0 | Natural, plant-based zero-calorie |
| Erythritol | 0 | Sugar alcohol, low-calorie |
| Monk Fruit | 0 | Natural, no impact on blood sugar |
| Xylitol | 7 | Sugar alcohol, use in moderation |
| Allulose | 0-15 | Rare sugar, minimal blood sugar effect |
“Using low glycemic sweeteners allows us to indulge without the glucose spike.”
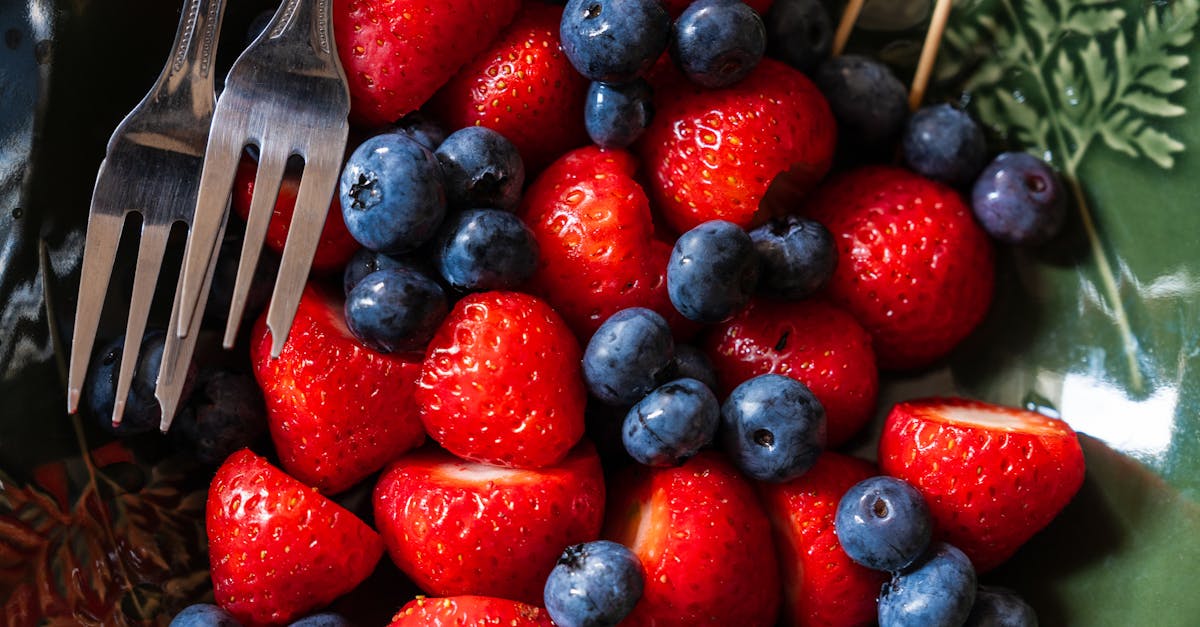
Low-Glycemic Fruit Options
Fruits contribute natural sweetness and nutrients but selecting low-glycemic options helps control blood sugar:
- Berries (blueberries, raspberries, strawberries) are high in fiber and antioxidants
- Cherries offer a sweet and tart flavor with a low glycemic index
- Green apples provide crunch and subtle sweetness
- Peaches and plums can be used in moderation due to moderate glycemic impact
Dairy and Alternative Ingredients
Creaminess in desserts can come from healthy dairy or plant-based alternatives that maintain balanced carbohydrate content:
- Greek yogurt (unsweetened) adds protein and creaminess
- Cottage cheese for texture in some recipes
- Unsweetened almond milk or coconut milk as low-carb dairy substitutes
- Ricotta cheese for light, fluffy desserts
Integrating these gestational diabetes-friendly ingredients ensures our desserts remain safe and satisfying for expectant mothers managing their blood glucose effectively.
Tools and Equipment
To create delicious and safe gestational diabetes dessert recipes, having the right Tools and Equipment is essential. These help us prepare desserts quickly, accurately, and with perfect results every time.
Essential Baking Tools
For baking diabetes-friendly desserts, these fundamental tools ensure precision and ease in following recipes:
- Measuring Cups and Spoons: Accurate measurement of low-glycemic sweeteners, whole grain flours, and dairy substitutes is key.
- Mixing Bowls: Use medium to large bowls for combining dry and wet ingredients thoroughly.
- Whisk and Silicone Spatula: Whisks help blend ingredients smoothly; a flexible spatula scrapes the sides effectively.
- Baking Pans: Non-stick cake pans, muffin tins, or loaf pans in various sizes accommodate different dessert styles.
- Cooling Racks: Proper airflow cools desserts evenly avoiding soggy textures.
- Food Scale: Weighing ingredients enhances accuracy especially for controlling portion sizes and carb counts.
Recommended Appliances for Quick Preparation
Using the right appliances speeds up our dessert-making process while keeping it under control for gestational diabetes management:
| Appliance | Purpose | Benefit for Gestational Diabetes Desserts |
|---|---|---|
| Stand Mixer | Mixes batter and dough effortlessly | Ensures smooth texture and evenly distributed sweeteners |
| Blender or Food Processor | Purees fruits and nuts or blends wet ingredients | Creates creamy bases without added sugar or unhealthy fats |
| Microwave | Melts ingredients like unsweetened chocolate or butter | Quick preparation step without overheating sensitive ingredients |
| Air Fryer | Bakes and crisps desserts with less oil | Reduces fat content and controls cooking temperature precisely |
| Instant Read Thermometer | Checks internal temperature of baked goods | Ensures safe baking without overcooking which can affect texture |
Equipped with these tools and appliances, we can confidently prepare delectable, balanced desserts that respect the needs of gestational diabetes while delighting the palate.
Preparation Steps
To craft delicious gestational diabetes dessert recipes that balance flavor and blood sugar control, precise preparation is essential. Let’s walk through the steps to measure, prepare, and combine ingredients effectively for the best results.
Measuring and Preparing Ingredients
Accurate measuring guarantees consistent texture and taste while keeping glycemic impact in check. Use standard measuring cups and spoons for dry and liquid ingredients. Always level off flour and sweeteners with a straight edge for precision.
- Flours: Sift whole grain flours like whole wheat or almond flour to remove lumps and ensure even mixing.
- Liquid ingredients: Measure at eye level using clear containers for accuracy (milk, vanilla extract, oils).
- Spices and leavening agents: Measure precisely as these affect texture and rising without impacting blood sugar.
| Ingredient Category | Tools for Measurement | Preparation Tips |
|---|---|---|
| Whole grain flours | Dry measuring cups | Sift before use |
| Sweeteners (stevia, erythritol) | Measuring spoons | Level for consistent sweetness |
| Liquids | Liquid measuring cups | Measure at eye level |
| Nuts (chopped) | Kitchen scale or spoons | Chop uniformly for even texture |
Preparing Sugar Substitutes
Using low glycemic sugar substitutes like stevia or erythritol demands extra attention to avoid bitter aftertaste or inconsistent sweetness.
- For powdered erythritol, pulse in a blender to achieve finer texture like confectioners’ sugar.
- For stevia liquid drops, add gradually and taste test to reach desired sweetness without over-sweetening.
- Always mix sugar substitutes with dry ingredients before combining with liquids to ensure even distribution.
Pro tip: “Balancing sugar alternatives with natural spices such as cinnamon or vanilla can enhance sweetness perception naturally.”
Prepping Fruits and Nuts
Selecting and prepping fruits and nuts aids in maintaining low glycemic impact while adding natural flavor and texture.
- Low glycemic berries (blueberries, raspberries): Rinse gently, pat dry, and remove stems before folding into batters. Use fresh or frozen without added sugars.
- Cherries: Pit and chop finely to integrate smoothly within desserts.
- Nuts (walnuts, almonds): Toast lightly in a dry skillet to boost flavor without adding salt or sugar. Chop evenly for consistent texture.
| Fruit/Nut Type | Preparation Method | Serving Benefit |
|---|---|---|
| Berries | Rinse, dry, stem removal | Low glycemic, natural sweetness |
| Cherries | Pit and chop | Adds fiber and antioxidants |
| Walnuts/Almonds | Lightly toast and chop | Healthy fats, crunch texture |
By carefully measuring, preparing low glycemic sweeteners, and prepping fruits and nuts properly, we set a strong foundation for crafting safe and satisfying gestational diabetes dessert recipes that delight both palate and health.
Instructions
Follow these precise steps to create delightful, gestational diabetes-friendly desserts that balance taste and blood sugar control. Our method ensures consistent results with every recipe.
Making Gestational Diabetes-Friendly Cakes
- Preheat the Oven
Set your oven to 350°F (175°C). Preheating ensures even cooking and a perfect rise in texture.
- Prepare Baking Pans
Lightly grease your cake pans with a small amount of olive oil or line with parchment paper. This prevents sticking without adding unnecessary sugars.
- Measure Ingredients Accurately
Use dry measuring cups for flours and sweeteners; liquid measuring cups for oils and dairy. Measure at eye level for precision.
- Sift Whole Grain Flours and Cocoa Powder
Sifting aerates flours and unsweetened cocoa powder for a lighter cake crumb and avoids clumps.
- Mix Dry Ingredients Thoroughly
| Dry Ingredients | Measurement |
|---|---|
| Whole grain flour (sifted) | 1½ cups (180g) |
| Unsweetened cocoa powder (sifted) | ¼ cup (25g) |
| Low-glycemic sweetener (e.g., erythritol) | ¾ cup (150g) |
| Baking powder | 1 tsp |
| Baking soda | ½ tsp |
| Ground cinnamon or spices | ½ tsp (optional) |
Combine all in a large bowl. Mixing evenly distributes leavening agents for consistent rise.
- Blend Wet Ingredients Separately
In a separate bowl, whisk together:
- Eggs (2 large)
- Unsweetened Greek yogurt (½ cup)
- Olive oil or melted coconut oil (⅓ cup)
- Vanilla extract (1 tsp)
Whisk until smooth to help incorporate air and improve cake texture.
- Combine Wet and Dry Mixtures
Gradually add the wet mixture to dry ingredients. Stir gently using a spatula until just combined. Avoid overmixing to keep the cake tender.
- Add Low-Glycemic Fruit or Nuts (Optional)
Fold in ½ cup chopped nuts (e.g., walnuts) or fresh berries like blueberries or raspberries for natural sweetness without a sugar spike.
- Pour Batter into Prepared Pans
Spread batter evenly using a spatula, ensuring no air pockets.
- Bake and Test for Doneness
Bake for 25–30 minutes. Check doneness with a toothpick inserted in the center. It should come out clean or with a few moist crumbs.
- Cool Properly
Let cakes cool in pans for 10 minutes. Remove to wire racks to cool completely. Proper cooling sets the crumb and prevents sogginess.
“Precision in measurement and gentle mixing are key to crafting delicious, gestational diabetes-friendly cakes that satisfy without compromising glucose levels.“
Following these instructions allows us to enjoy rich, flavorful cakes while maintaining balanced blood sugar, perfect for managing gestational diabetes.
Preparing Sugar-Free Cookies
Crafting gestational diabetes-friendly sugar-free cookies is both simple and rewarding. We focus on precise techniques to ensure these cookies deliver rich flavor and a satisfying texture without compromising blood sugar control.
Dough Preparation
- Measure Ingredients Accurately
Use digital scales or measuring cups for precision. For low glycemic impact, choose whole grain flour, almond flour, and natural sugar substitutes like erythritol or stevia.
- Sift Dry Ingredients
Combine and sift the flours, baking powder, salt, and sweetener to aerate the mixture. This yields a lighter cookie texture.
- Mix Wet Ingredients Separately
Whisk together unsweetened applesauce, egg whites, vanilla extract, and a small amount of olive or coconut oil. These binders and fats create moisture without added sugar or excess saturated fat.
- Combine Wet and Dry Mixtures
Gently fold the wet ingredients into the dry mix. Mix just until combined to avoid overworking the dough, which can tighten gluten and toughen cookies.
- Add Optional Low-Glycemic Ingredients
Enhance flavor and nutrition by folding in chopped nuts, unsweetened shredded coconut, or low-glycemic fruits like blueberries or raspberries.
| Ingredient Category | Recommended Options | Purpose |
|---|---|---|
| Flours | Whole wheat, almond, oat | Base structure |
| Sweeteners | Erythritol, stevia, monk fruit | Low glycemic sweetness |
| Wet Bindings | Egg whites, unsweetened applesauce | Moisture and binding |
| Fats | Coconut oil, olive oil | Texture and richness |
| Add-ins | Nuts, berries, coconut | Flavor and nutrient boost |
Baking and Cooling
- Preheat Oven to 350°F (175°C)
Ensure the oven is fully heated for consistent baking.
- Prepare Baking Sheet
Line with parchment paper or a silicon mat to prevent sticking and promote even cooking.
- Shape Cookies Evenly
Use a cookie scoop or tablespoon to portion dough uniformly. Space cookies 2 inches apart as they will spread slightly.
- Bake for 12 to 15 Minutes
Cookies should turn light golden brown around edges. Avoid overbaking which dries them out and affects softness.
- Cool on Wire Rack
Transfer cookies to a wire rack immediately after removing from oven to cool. This prevents steam buildup and helps achieve the desired crisp exterior with a tender center.
“Patience during cooling ensures the best texture—cookies firm up and flavors deepen as they cool.”
| Baking Step | Detail | Tips |
|---|---|---|
| Oven Temperature | 350°F (175°C) | Preheat fully |
| Baking Time | 12–15 minutes | Edges lightly golden |
| Cookie Spacing | 2 inches apart | Allow for spreading |
| Cooling | On wire rack post-bake | Prevent moisture buildup |
By following these focused steps, we create delicious sugar-free cookies perfectly suited for managing gestational diabetes without sacrificing taste or texture.
Creating Low-Glycemic Puddings
We can enjoy rich gestational diabetes dessert recipes by crafting delicious low-glycemic puddings. These treats provide creamy satisfaction while helping maintain stable blood sugar levels—perfect for expectant mothers managing gestational diabetes.
Cooking Steps
- Prepare Ingredients
Gather low-glycemic ingredients including:
- 2 cups unsweetened almond milk or low-fat milk
- ¼ cup chia seeds or 3 tablespoons unsweetened cocoa powder (depending on pudding type)
- 2 tablespoons natural sweetener such as stevia or erythritol
- 1 teaspoon pure vanilla extract
- Pinch of salt
- Combine Dry Ingredients
In a medium mixing bowl, whisk the chia seeds or cocoa powder with the sweetener and salt for even distribution.
- Add Liquid Components
Gradually stir in the almond milk and vanilla extract. Use a whisk to blend everything smoothly, eliminating clumps.
- Cook (if using cocoa powder pudding)
Pour the mixture into a small saucepan and heat over medium heat. Stir continuously for 5–7 minutes until the mixture slightly thickens. Avoid boiling.
- Set with Chia Seeds (for chia pudding)
If using chia seeds, simply combine the mixture, then cover and refrigerate without cooking to let the pudding thicken naturally.
Cooling and Serving
- Refrigerate for 2–4 hours or overnight to allow maximum pudding thickening and flavor melding. Cooling enhances texture and ensures the pudding sets smoothly without added thickening agents.
- Serve chilled in small bowls or parfait glasses. Garnish with low-glycemic fruits such as fresh blueberries, sliced strawberries, or a sprinkle of crushed nuts to add texture without boosting glycemic load.
- For portion control and consistent glycemic impact, measure servings carefully. A typical low-glycemic pudding serving should be about ½ cup (120 ml).
| Step | Time Required | Temperature | Notes |
|---|---|---|---|
| Cooking cocoa pudding | 5–7 minutes | Medium heat | Stir continuously |
| Refrigeration | 2–4 hours or overnight | 35–40°F (2–4°C) | For thickening and flavor boost |
| Serving size | N/A | Chilled | About ½ cup per serving |
“Low-glycemic puddings are a delicious way to satisfy dessert cravings without compromising gestational diabetes management.” We recommend keeping a thermometer handy to monitor cooking temperature and using precise measuring tools for sweeteners to maintain control over carb content.
Directions
Follow these step-by-step directions carefully to create delicious and gestational diabetes-friendly desserts that satisfy your sweet cravings without compromising blood sugar stability. Accurate measurement, gentle mixing, and proper baking or chilling times are key to achieving the perfect texture and flavor.
Serving Suggestions
- Serve cookies or pudding slightly chilled or at room temperature for best taste and texture.
- Pair desserts with a small cup of unsweetened herbal tea or black coffee to complement sweetness without extra carbs.
- Add a dollop of plain Greek yogurt topped with fresh, low-glycemic berries to enhance creaminess and nutrition.
- Portion desserts into small servings to maintain blood glucose balance and prevent overeating.
- For pudding, sprinkle a pinch of cinnamon or crushed nuts on top to add flavor and healthy fats.
“Balance and portion control are essential when enjoying desserts with gestational diabetes.”
Storing and Reheating Tips
| Aspect | Recommendation |
|---|---|
| Storage | Store baked cookies in an airtight container at room temperature for up to 4 days or refrigerate for up to 7 days. Puddings should be refrigerated in sealed containers for 3-4 days. |
| Freezing | Freeze cookies layered with parchment paper in a freezer-safe container up to 1 month. Defrost at room temperature before serving. |
| Reheating Cookies | Warm cookies in a low oven (300°F) for 5-7 minutes to restore softness without drying out. Avoid microwaving to maintain texture. |
| Reheating Pudding | Serve pudding cold or at room temperature; avoid reheating to preserve creamy texture and prevent curdling. |
| Tips | Always check for any signs of spoilage before consuming stored desserts to ensure freshness and safety. |
Adhering to these serving and storage guidelines helps us enjoy our gestational diabetes dessert recipes safely and at peak quality without risking blood sugar spikes.
Make-Ahead Instructions
Preparing gestational diabetes dessert recipes ahead of time helps us enjoy delicious treats while carefully managing blood sugar levels. Here are essential tips on storing and handling these desserts to maintain their quality and safety.
How to Store Desserts Safely
To keep our sugar-free cookies, low-glycemic puddings, and other desserts fresh and safe, follow these key storage guidelines:
- Use airtight containers to protect desserts from moisture and air exposure, preserving texture and flavor.
- Store cookies at room temperature for up to 5 days or refrigerate for longer shelf life.
- Puddings and chilled desserts should always be kept in the refrigerator, ideally for 3 to 4 days.
- Label containers with the preparation date to ensure freshness and avoid accidental consumption after spoilage.
- Avoid cross-contamination by keeping desserts separate from other foods, especially strong-smelling items.
| Dessert Type | Storage Method | Storage Duration | Temperature |
|---|---|---|---|
| Sugar-free Cookies | Airtight container | Up to 5 days | Room temperature |
| Low-glycemic Pudding | Sealed container | 3 to 4 days | Refrigeration (34-40°F) |
| Chopped Nuts & Berries (optional additions) | Airtight container | 1 week (nuts) / 3 days (berries) | Room temp (nuts)/ Refrigerated (berries) |
Pro Tip: Always allow warm desserts to cool completely before storing to prevent condensation buildup inside containers.
Freezing and Thawing Tips
Freezing is an excellent way to extend the shelf life of our gestational diabetes dessert recipes while maintaining their nutritional integrity and texture.
- Freeze cookies in a single layer on a baking sheet first. Once frozen, transfer them to a freezer-safe airtight container or bag.
- For puddings, use freezer-safe containers leaving at least 1/2 inch of headspace to allow expansion.
- Label all frozen desserts with the date and type for easy rotation.
- Freeze desserts for up to 3 months for best quality.
- To thaw, move desserts to the refrigerator overnight; avoid thawing at room temperature to reduce bacterial risk.
- Re-crisp cookies by warming them in a preheated 300°F oven for 5-7 minutes after thawing.
- Gently stir chilled puddings after thawing to restore creamy texture.
| Freezing Guidelines | Recommended Duration | Thawing Method | Notes |
|---|---|---|---|
| Sugar-free Cookies | Up to 3 months | Refrigerator overnight | Reheat to restore crispness |
| Low-glycemic Pudding | Up to 3 months | Refrigerator overnight | Stir after thawing |
| Berries (optional dessert add-in) | Up to 6 months | Refrigerator overnight | Use promptly after thawing |
Remember: Consistent portion control and storage practices help us enjoy gestational diabetes-friendly desserts safely without compromising blood glucose stability.
Conclusion
Enjoying desserts while managing gestational diabetes is entirely possible with the right recipes and mindful preparation. By focusing on low-glycemic ingredients and precise measurements, we can create treats that satisfy our sweet cravings without compromising blood sugar control.
With thoughtful portioning and proper storage, these desserts become a safe and delicious part of our pregnancy journey. Let’s keep exploring and experimenting with these options to make managing gestational diabetes a little sweeter every day.
Frequently Asked Questions
Can I still enjoy desserts if I have gestational diabetes?
Yes, you can enjoy desserts by choosing diabetes-friendly recipes that use low-glycemic ingredients and natural sweeteners to help maintain stable blood sugar levels.
What ingredients are best for gestational diabetes desserts?
Use whole grain flours, nuts, unsweetened cocoa, natural spices, low-glycemic fruits like berries, and sweeteners such as stevia or erythritol for diabetes-friendly desserts.
How do I avoid blood sugar spikes when making desserts?
Measure ingredients accurately, use low-glycemic sweeteners, combine fiber-rich components, and control portion sizes to prevent blood sugar spikes.
Are there simple dessert options for gestational diabetes?
Yes, options like sugar-free cookies and low-glycemic puddings made with ingredients like chia seeds and unsweetened almond milk are simple and safe choices.
What tools do I need for making gestational diabetes desserts?
Essential tools include measuring cups and spoons, mixing bowls, baking sheets, wire racks, and appliances like mixers or food processors for consistent results.
How can I store gestational diabetes-friendly desserts safely?
Store them in airtight containers, label with preparation dates, refrigerate or freeze as needed, and avoid cross-contamination to maintain freshness and safety.
What are tips for baking sugar-free cookies?
Sift dry ingredients, mix wet and dry components gently, avoid overworking dough, shape cookies evenly, preheat the oven, and cool on wire racks for best texture.
Can I prepare desserts ahead of time?
Yes, many desserts can be made in advance and stored properly in airtight containers in the fridge or freezer to maintain quality and convenience.
What beverages pair well with gestational diabetes desserts?
Unsweetened herbal tea or black coffee complement these desserts well, adding flavor without affecting blood glucose levels.
How important is portion control with these desserts?
Portion control is crucial for managing blood sugar; enjoy desserts in small, measured servings to maintain glucose stability while satisfying cravings.