
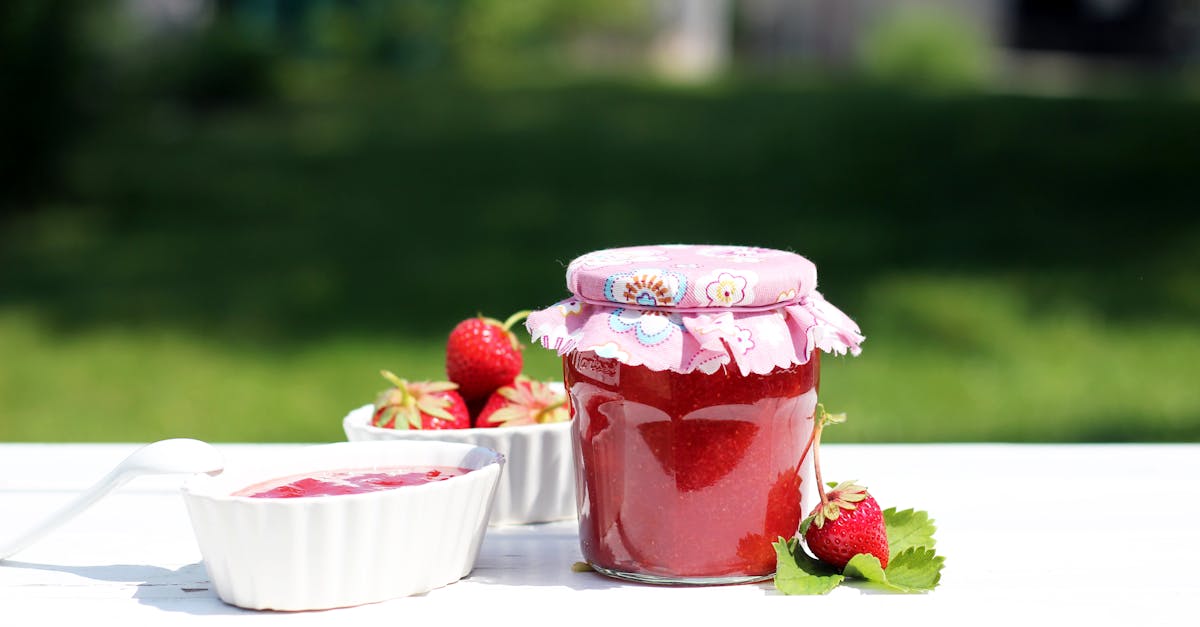
Garden huckleberry jam is a delightful way to capture the unique flavor of this lesser-known berry. Unlike traditional huckleberries, garden huckleberries have a slightly tart taste that transforms beautifully when cooked down with sugar. This jam offers a perfect balance of sweet and tangy, making it a versatile addition to toast, desserts, or even savory dishes.
We love how simple it is to make this jam at home using fresh garden huckleberries. With just a few ingredients and minimal effort, you can enjoy a homemade spread that’s bursting with natural flavor. Whether you’re a seasoned canner or new to preserving, this recipe will guide you through the process to create a delicious, shelf-stable treat.
Ingredients
To make our Garden Huckleberry Jam burst with vibrant flavor and perfect texture, we use simple, fresh ingredients. Each component plays a critical role in balancing the jam’s sweet and tangy profile while ensuring it sets beautifully for long-term storage.
Here’s what we need:
- 4 cups garden huckleberries, washed and stems removed
- 3 cups granulated sugar – the key to sweetness and preservation
- 2 tablespoons fresh lemon juice – adds acidity to help gel formation and brighten flavor
- 1 teaspoon fruit pectin (optional) – aids in thickening if you prefer a firmer jam
| Ingredient | Quantity | Preparation |
|---|---|---|
| Garden huckleberries | 4 cups | Washed, stems removed |
| Granulated sugar | 3 cups | Measured precisely |
| Fresh lemon juice | 2 tablespoons | Squeezed fresh |
| Fruit pectin (optional) | 1 teaspoon | Powdered, for thickening |
We recommend using ripe garden huckleberries for the best flavor intensity, noting that their natural tartness distinguishes this jam from traditional berry preserves. Fresh lemon juice is critical not just for taste but also to balance the pH—helping the jam set perfectly.
If you prefer a looser, spreadable jam, you can omit the pectin, but adding it guarantees a thicker consistency that holds well on toast or in recipes.
Tip: Always measure sugar accurately to ensure proper preservation and sweetness balance. Too little sugar can prevent the jam from setting, while too much can overpower the huckleberries’ natural tartness.
Equipment Needed
To make Garden Huckleberry Jam successfully and efficiently, we rely on essential equipment that ensures safety, precision, and great results. Here’s what we need for the perfect jam-making process:
- Large heavy-bottomed pot
Use a pot with a capacity of at least 6 quarts. This prevents spillage when the jam boils and allows even heat distribution to avoid burning the garden huckleberries.
- Mixing spoon or heat-resistant spatula
A long-handled spoon or spatula helps us stir the jam frequently, avoiding scorching and ensuring all ingredients combine evenly.
- Measuring cups and spoons
Accurate measurements guarantee the right sugar-to-fruit ratio, which is critical for proper gelling and flavor balance.
- Canning jars with lids and bands
Opt for sterilized glass jars designed for canning. We recommend half-pint or pint sizes to store the jam conveniently.
- Jar lifter
This tool safely lifts hot jars from boiling water during the sterilization and processing stages, preventing burns.
- Ladle
A ladle helps transfer the hot jam from the pot into jars smoothly, reducing mess and heat exposure.
- Canning funnel
This wide-mouthed funnel ensures that jam goes directly into jars without spills.
- Candy or jam thermometer (optional)
To monitor the jam temperature precisely—aim for the setting point of 220°F for proper gel formation.
| Equipment | Purpose |
|---|---|
| Large heavy-bottomed pot | Even heat distribution and prevents spillage |
| Mixing spoon or spatula | Stirring jam frequently to avoid burning |
| Measuring cups and spoons | Accurate ingredient measurement |
| Canning jars with lids | Safe storage and preservation |
| Jar lifter | Safe handling of hot jars |
| Ladle | Transferring jam into jars without spills |
| Canning funnel | Easy filling of jars |
| Candy thermometer | Monitoring jam temperature for perfect gel consistency |
With this equipment checklist ready, we can proceed through the Garden Huckleberry Jam recipe confidently knowing our tools are fit for the task and designed to produce outstanding results every time.
Preparation
Before we start cooking our Garden Huckleberry Jam, proper preparation is key to achieving the best flavor and texture. Here is how we get everything ready.
Washing and Sorting the Garden Huckleberries
First, we wash and sort the garden huckleberries thoroughly. This step ensures the jam is clean and free of any debris or unripe berries.
- Place the 4 cups of garden huckleberries in a large bowl.
- Gently rinse them under cool running water. Avoid soaking to prevent losing their natural flavor and juice.
- Spread the berries on a clean kitchen towel or paper towels and pat dry.
- Inspect the berries carefully and remove any stems, leaves, or damaged berries.
- Discard any unripe or overly soft berries to maintain the jam’s tart and vibrant taste.
This process readies the berries for cooking, preserving their unique character in the final jam.
Preparing Jars and Lids
To safely store our Garden Huckleberry Jam and ensure it stays fresh, sterilizing the jars and lids is essential.
| Steps for Preparing Jars and Lids | Details |
|---|---|
| Sterilize jars: | Boil clean glass jars in a large pot for 10 minutes. |
| Sterilize lids: | Simmer lids (do not boil) for 5 minutes to soften seals. |
| Keep warm: | Keep jars and lids in warm water until ready to fill to prevent cracking from hot jam. |
| Work area setup: | Clear an area with a clean towel to place sterilized jars. Use a jar lifter for safety. |
Remember: Proper sterilization prevents contamination and promotes a longer shelf life for our homemade jam.
With our berries washed and jars prepared, we are set to move on to cooking that luscious Garden Huckleberry Jam.
Making the Jam
Now that our garden huckleberries are washed and our jars sterilized, it’s time to transform these vibrant berries into a luscious jam. We will walk through each critical step to ensure a perfect balance of flavor, texture, and shelf stability.
Cooking the Huckleberries
We start by placing 4 cups of washed garden huckleberries into a large heavy-bottomed pot. Using medium heat helps release their natural juices slowly without scorching. Stir the berries gently as they warm, breaking them up slightly with a wooden spoon to encourage even cooking.
Within about 5 to 7 minutes, the berries soften and begin to release a rich, dark-purple juice, filling the kitchen with their signature tart aroma. This initial cooking phase is essential to develop the jam’s base flavor and ensure the fruit breaks down properly for thickening.
Adding Sugar and Pectin
Once the huckleberries have softened, we incorporate 3 cups of granulated sugar evenly over the fruit, stirring to combine. Sugar is crucial not only for sweetness but also for preserving the jam and promoting gelling.
Next, add 2 tablespoons of fresh lemon juice, which brightens the flavor and provides the acidity needed for proper pectin setting. If you prefer a thicker consistency or have less naturally high-pectin berries, sprinkle in 1 teaspoon of fruit pectin now.
| Ingredient | Measurement | Purpose |
|---|---|---|
| Garden huckleberries | 4 cups (washed) | Base fruit |
| Granulated sugar | 3 cups | Sweetening, preservation |
| Fresh lemon juice | 2 tablespoons | Acidification, gel setting |
| Fruit pectin (optional) | 1 teaspoon | Additional thickening agent |
Boiling and Thickening the Jam
After adding sugar and pectin, increase the heat to bring the mixture to a rolling boil—one that cannot be stirred down. We maintain this boil for approximately 10 to 15 minutes, stirring frequently with a spatula to prevent sticking.
Use this time to observe the jam’s transformation from liquid to thickened gloss. For those using a candy thermometer, reaching 220°F (104°C) signals the correct gel point.
To test without a thermometer, place a small amount of hot jam on a chilled plate. Let it sit for a minute then push it gently with your finger. If it wrinkles and holds shape, the jam is ready.
Once done, immediately ladle the hot jam into the sterilized jars using a canning funnel to prevent spills. Leave about ¼ inch headspace, wipe rims clean, apply lids, and proceed with canning or refrigeration.
Canning and Storing
Proper canning and storing are essential to preserve the fresh flavor and vibrant color of our Garden Huckleberry Jam. Following precise steps ensures safety, extends shelf life, and maintains the jam’s quality.
Sterilizing Jars
Before we fill our jars, thorough sterilization is crucial to prevent spoilage and bacterial growth:
- Wash jars and lids in hot soapy water. Rinse well.
- Place jars in a large pot or canner filled with water, ensuring jars are fully submerged.
- Bring to a boil and maintain a rolling boil for 10 minutes to sterilize.
- Keep jars hot in the water until ready to fill to prevent cracking when filling with hot jam.
- Lids should be simmered in hot water (not boiling) for 5 minutes to soften the sealing compound.
“Sterilizing jars eliminates microbes that could spoil the jam and ensures a safe long-term preserve.”
Filling and Sealing Jars
Accurate filling and sealing guarantee a proper vacuum seal and jam freshness:
| Step | Instruction |
|---|---|
| Ladle hot jam | Use a hot sterilized ladle to fill jars, leaving 1/4 inch headspace |
| Remove air bubbles | Slide a non-metallic spatula around the jar to release trapped air |
| Clean jar rims | Wipe rims with a clean damp cloth to ensure a clean seal |
| Apply lids and rings | Place sterilized lids on top, screw on rings fingertip tight—not too tight |
We recommend working efficiently while the jam is hot to create a strong vacuum seal as it cools.
Cooling and Storing
- Place sealed jars upright on a clean towel, spaced apart for air circulation.
- Let jars cool undisturbed for 12 to 24 hours.
- After cooling, check seals by pressing the center of each lid; it should not flex or pop back.
- Label jars with date and contents for easy identification.
- Store in a cool dark place, ideally between 50°F and 70°F, for up to one year.
- Once opened, keep jam refrigerated and consume within a month.
| Storage Tips | Details |
|---|---|
| Location | Cool dark pantry or cellar |
| Temperature | 50°F to 70°F (10°C to 21°C) |
| Shelf Life (unopened) | Up to 1 year |
| Shelf Life (opened) | Refrigerate and consume within 1 month |
Serving Suggestions
Our Garden Huckleberry Jam offers a vibrant and tangy flavor profile that pairs beautifully with a variety of dishes. Here are our favorite ways to showcase this delightful jam:
- Spread on Warm Toast or Biscuits: The sweetness and tartness of garden huckleberry jam make it perfect for spreading on freshly toasted bread or warm flaky biscuits. The jam melts slightly adding a luscious texture that elevates each bite.
- Swirl into Yogurt or Oatmeal: Add a spoonful of jam into plain Greek yogurt or your morning oatmeal to introduce a natural burst of fruity flavor and color. This simple addition transforms an everyday breakfast into something special.
- Drizzle over Cheese Platters: Our jam complements soft cheeses like brie, goat cheese, or cream cheese remarkably well. Arrange small dollops beside cheese and crackers to impress guests with a sophisticated sweet-tart contrast.
- Glaze for Roasted Meats: Use the jam as a base for a glaze on roasted pork or chicken. Simply warm some jam with a splash of balsamic vinegar and brush over meats in the last 10 minutes of roasting for a shiny, flavorful finish.
- Ingredient in Desserts: Incorporate garden huckleberry jam into dessert recipes such as thumbprint cookies, layered cakes, or parfaits. Its natural pectin helps maintain a firm texture while adding depth of flavor.
| Serving Idea | Recommended Pairings | Usage Notes |
|---|---|---|
| Toast or Biscuits | Butter, cream cheese | Spread liberally for best flavor impact |
| Yogurt or Oatmeal | Plain or vanilla varieties | Stir gently to retain some jam texture |
| Cheese Platter | Brie, goat cheese, crackers | Serve at room temperature |
| Glaze for Meat | Pork, chicken | Warm jam with vinegar before glazing |
| Desserts | Cookies, cakes, parfaits | Use as a filling or topping |
“A spoonful of garden huckleberry jam adds a fresh, sweet-tart punch that enhances the natural flavors of any dish.“
We recommend trying a few of these Serving Suggestions to experience the full versatility of our handcrafted jam. The balance of sweet and tangy notes will elevate both simple snacks and gourmet creations.
Conclusion
Making garden huckleberry jam is a rewarding way to capture the unique tartness of these berries in a sweet, versatile spread. With just a few simple ingredients and basic equipment, we can create a delicious jam that enhances everything from breakfast to dinner.
By following the right steps for preparation, cooking, and canning, we ensure a safe and flavorful result that lasts. Whether enjoyed fresh or stored for later, this jam brings a vibrant touch to our kitchen creations.
Let’s embrace the joy of homemade preserves and savor the distinct taste of garden huckleberries anytime we want.
Frequently Asked Questions
What is garden huckleberry jam, and how does it differ from traditional huckleberry jam?
Garden huckleberry jam is made from garden huckleberries, which have a more tart flavor than traditional wild huckleberries. This gives the jam a unique sweet-tangy balance, making it versatile for various culinary uses.
What ingredients are needed to make garden huckleberry jam?
You need 4 cups of washed garden huckleberries, 3 cups of granulated sugar, 2 tablespoons of fresh lemon juice, and optionally 1 teaspoon of fruit pectin to help thicken the jam.
Can beginners easily make garden huckleberry jam?
Yes, the recipe is simple with minimal steps and basic ingredients, making it accessible for both beginners and experienced canners.
How do I prepare the garden huckleberries before cooking?
Wash the berries thoroughly, sort through them to remove any unripe or damaged ones, and dry them completely before starting the cooking process.
What equipment is essential for making garden huckleberry jam?
You’ll need a large heavy-bottomed pot, mixing spoon or spatula, measuring cups and spoons, sterilized canning jars with lids, jar lifter, ladle, canning funnel, and optionally a candy thermometer.
How do I know when the jam is ready during cooking?
The jam is ready when it reaches a rolling boil for 10–15 minutes and passes the gel test—either by temperature (around 220°F) or by placing a small amount on a chilled plate to check if it thickens.
Why is sterilizing jars and lids important?
Sterilizing prevents contamination and bacteria growth, ensuring a longer shelf life and safe consumption of the jam.
How should I store garden huckleberry jam after canning?
Store sealed jars in a cool, dark place for up to one year. Once opened, keep the jam refrigerated and consume it within one month.
What are some serving suggestions for garden huckleberry jam?
Spread it on warm toast or biscuits, mix into yogurt or oatmeal, drizzle on cheese platters, use as a glaze for meats, or add it to cookies and cakes.
Is fruit pectin necessary to make garden huckleberry jam?
Pectin is optional. It can help thicken the jam faster and improve gel consistency, but the jam will still set well without it using the lemon juice and sugar balance.