
Funeral biscuits are a unique and heartfelt tradition that dates back centuries. These simple yet meaningful cookies were often made to honor the memory of loved ones and shared at wakes or funerals as a symbol of comfort and community. Their humble ingredients and delicate sweetness make them a timeless treat that connects us to the past.
In this recipe, we’ll guide you through making authentic funeral biscuits that capture the essence of this historic custom. Whether you’re interested in traditional recipes or want to explore a piece of culinary heritage, these biscuits offer a comforting taste and a story worth sharing. Let’s dive into a recipe that’s as rich in history as it is in flavor.
Ingredients
To create authentic Funeral Biscuits, we gather simple pantry staples that reflect the tradition’s humble origins. Each ingredient plays a crucial role in crafting biscuits that are tender, subtly sweet, and perfect for sharing.
Here is the list of ingredients with their specific preparations:
| Ingredient | Quantity | Preparation |
|---|---|---|
| All-purpose flour | 3 cups (360 g) | Sifted |
| Baking powder | 1 teaspoon | |
| Salt | 1/2 teaspoon | |
| Unsalted butter | 1 cup (226 g) | Cold, cut into cubes |
| Granulated sugar | 1 cup (200 g) | |
| Brown sugar | 1/2 cup (100 g) | Packed |
| Large eggs | 2 | At room temperature |
| Milk | 1/2 cup (120 ml) | Whole milk preferred |
| Vanilla extract | 1 teaspoon | |
| Ground cinnamon | 1/2 teaspoon | Optional |
Notes on Ingredients:
- We use cold unsalted butter to ensure the biscuit texture is flaky and tender.
- The combination of granulated and brown sugar offers subtle sweetness alongside a hint of caramel flavor consistent with traditional funeral biscuits.
- Adding ground cinnamon enhances the warming, comforting aroma associated with these cookies, but it remains optional depending on taste preferences.
By focusing on these carefully chosen ingredients, we honor the spirit of the original funeral biscuits—simple yet meaningful, connecting us to a culinary heritage rooted in comfort and community.
Equipment Needed
To achieve the perfect texture and flavor in our Funeral Biscuits, having the right equipment is essential. Each tool plays a specific role in ensuring our biscuits come out flaky, tender, and evocative of tradition.
- Mixing Bowls
Use at least two—one for combining dry ingredients like flour and sugar, and another for creaming butter with sugar. Preferably choose glass or stainless steel for easier cleaning.
- Measuring Cups and Spoons
Accurate measuring tools guarantee the right balance of ingredients. Use dry measuring cups for flour and sugars, and a teaspoon for spices such as cinnamon.
- Pastry Cutter or Fork
To cut cold butter into the flour mixture efficiently, we rely on a pastry cutter or a sturdy fork. This creates the flaky layers characteristic of funeral biscuits.
- Rolling Pin
A smooth rolling pin helps us roll the dough evenly to the right thickness—about 1/4 inch is ideal.
- Baking Sheet
Use a heavy-duty, rimmed baking sheet lined with parchment paper or a silicone baking mat to prevent sticking and ensure even baking.
- Cooling Rack
After baking, transfer biscuits to a wire rack for cooling. This keeps bottoms from becoming soggy, preserving crispness.
- Sharp Knife or Biscuit Cutter
Depending on your biscuit shape preference, a sharp knife can cut rectangles or diamonds. For traditional round biscuits, use a biscuit cutter or a glass rim.
| Equipment | Purpose |
|---|---|
| Mixing Bowls | Combine ingredients |
| Measuring Tools | Precise ingredient measurement |
| Pastry Cutter/Fork | Cut cold butter for flakiness |
| Rolling Pin | Roll dough to even thickness |
| Baking Sheet | Bake biscuits evenly |
| Cooling Rack | Cool biscuits without sogginess |
| Knife/Biscuit Cutter | Shape biscuits |
Make-Ahead Instructions
To ensure our funeral biscuits stay fresh and maintain their signature crisp texture, proper advance preparation is key. Follow these steps to make the process smooth and effortless:
- Prepare the Dough in Advance
Mix all ingredients as directed and shape the dough into a flat disk. Wrap it tightly in plastic wrap. Refrigerate for at least 1 hour or up to 24 hours. This rest period allows the dough to firm, making it easier to roll and helping develop the flavor.
- Rolling and Cutting Ahead of Baking
For convenience, roll the chilled dough between two sheets of parchment paper to the recommended thickness. Use a biscuit cutter or sharp knife to shape the biscuits. Place the cut biscuits on a parchment-lined baking sheet. Cover the tray with plastic wrap or a clean kitchen towel and keep it refrigerated overnight if you prefer.
- Freezing for Longer Storage
To extend shelf life, freeze unbaked biscuits in a single layer on a baking sheet until firm (about 1–2 hours). Transfer them to an airtight container or freezer bag. Label with date and bake directly from frozen by adding a few minutes to the baking time.
| Step | Storage Method | Duration | Notes |
|---|---|---|---|
| Dough preparation | Refrigerator | Up to 24 hours | Ensures better handling and flavor |
| Rolled and cut biscuits | Refrigerator | Up to 24 hours | Keep covered to prevent drying |
| Unbaked biscuits frozen | Freezer | Up to 1 month | Bake directly from frozen, add 2-3 minutes |
- Baking from Make-Ahead Stage
When ready to bake, preheat the oven to the specified temperature. If baking from refrigerated dough or cut biscuits, bake as directed until edges turn golden. For frozen biscuits, add a slight time adjustment, monitoring closely for the same golden color and firm texture.
By following these make-ahead instructions, we streamline the baking process while preserving the delicate buttery flavor and melt-in-your-mouth texture that make our funeral biscuits so comforting and timeless.
Instructions
Follow these clear steps to prepare funeral biscuits that honor tradition and deliver a comforting, buttery flavor with every bite.
Preparing the Dough
- Chill the butter: Cut cold unsalted butter into small cubes. Keeping the butter cold ensures a flaky, tender biscuit texture.
- Mix dry ingredients: In a large bowl, combine all-purpose flour, granulated sugar, brown sugar, ground cinnamon, baking powder, and a pinch of salt.
- Cut in the butter: Use a pastry cutter or fork to incorporate the cold butter into the dry mixture. Work quickly until the mixture resembles coarse crumbs with pea-sized butter bits.
- Add wet ingredients: In a separate bowl, whisk together beaten egg and cream or milk. Gradually add to the flour-butter mixture, stirring gently with a wooden spoon until a soft dough forms. Do not overmix.
- Chill the dough: Shape the dough into a flat disk, wrap it tightly in plastic wrap, and refrigerate for at least 1 hour or up to 24 hours to develop flavor and make rolling easier.
Shaping the Biscuits
- Prepare the surface: Lightly flour a clean surface and rolling pin.
- Roll the dough: Roll the chilled dough to about 1/4 inch (0.6 cm) thickness for delicate, crisp biscuits.
- Cut shapes: Use a sharp knife or biscuit cutter to cut dough into rectangles or traditional shapes. Aim for uniform size to ensure even baking.
- Transfer to baking sheet: Place cut biscuits on a parchment-lined baking sheet leaving space to allow expansion.
Baking the Biscuits
- Preheat the oven: Set to 350°F (175°C) for perfectly baked biscuits.
- Bake time: Place the tray in the oven and bake for 12–15 minutes until edges turn golden brown.
- Watch closely: Baking times may vary depending on thickness and oven. Start checking at 10 minutes.
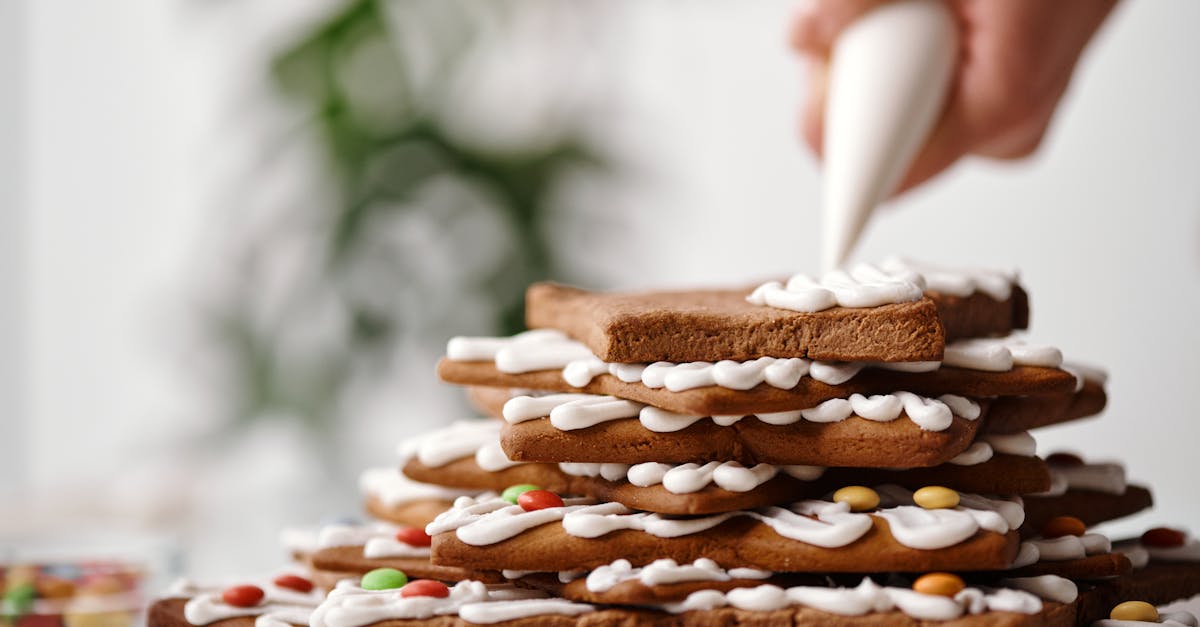
- Optional glazing: For a subtle shine, brush slightly with warm honey or a simple sugar syrup immediately after baking.
Cooling and Storing
- Cool on rack: Transfer biscuits carefully to a wire cooling rack to maintain crispness and prevent sogginess.
- Storage table:
| Storage Method | Duration | Notes |
|---|---|---|
| Room temperature | Up to 1 week | Store in an airtight container |
| Refrigerated dough | Up to 24 hours | Keep wrapped tightly to prevent drying |
| Frozen dough | Up to 2 months | Thaw in refrigerator before rolling |
| Baked biscuits | Up to 2 weeks | Store sealed and cool, or freeze for longer |
- Make ahead tip: Roll and cut dough beforehand, then store shapes in fridge or freezer to bake fresh when needed. This preserves the biscuits’ delicate texture and buttery aroma.
Serving Suggestions
To truly honor the tradition behind Funeral Biscuits, serving them with thoughtful accompaniments enhances their comforting and symbolic nature. Here are our top recommendations for presenting these delicate, buttery biscuits:
- Pair with warm beverages: Serve Funeral Biscuits alongside hot tea, coffee, or spiced cider. The warmth of the drink complements the biscuits’ subtle sweetness and flaky texture, creating a soothing experience.
- Add soft cheeses or preserves: Offer mild cream cheese, ricotta, or a dollop of homemade fruit preserves such as apricot or blackberry. This introduces a smooth or fruity contrast that elevates the simple biscuit.
- Use vintage floral plates: Presenting the biscuits on vintage or heirloom-style plates respects the historical roots and adds an elegant touch to any gathering.
- Accompany with fresh herbs: Garnish the serving platter with sprigs of fresh rosemary or thyme. This subtle aroma ties back to the traditional flavor notes often found in funeral gatherings.
- Serve at room temperature: Let the biscuits sit out for 15 to 20 minutes before serving. This allows their delicate crumb and texture to reveal their full flavor potential.
Suggested Pairings Table
| Pairing Item | Description | Serving Tip |
|---|---|---|
| Hot Tea (Earl Grey) | Citrusy and floral notes | Brew fresh and serve warm |
| Coffee (Medium roast) | Balanced, slightly nutty flavor | Use freshly ground beans |
| Spiced Cider | Warm citrus and cinnamon blend | Serve in small mugs with cinnamon sticks |
| Cream Cheese Spread | Mild and creamy texture | Soften for easy spreading |
| Fruit Preserves | Sweet and tangy | Opt for seasonal fresh preserves |
| Fresh Rosemary | Earthy and piney flavor | Use as garnish for aroma and visual |
“Serving Funeral Biscuits with these thoughtful touches not only respects tradition but also transforms them into a meaningful shared experience.”
We encourage serving Funeral Biscuits in ways that invite conversation and comfort, reinforcing the sense of community and remembrance these biscuits represent.
Tips for Perfect Funeral Biscuits
Achieving the perfect texture and flavor in our funeral biscuits requires attention to a few key details. Here are essential tips to ensure every batch turns out beautifully flaky, tender, and full of comforting flavor.
1. Use Cold, Unsalted Butter
Cold butter is critical for that melt-in-your-mouth flaky texture. Keep your butter chilled until the moment you cut it into the flour. Avoid softened or melted butter to prevent greasy or dense biscuits.
2. Measure Ingredients Precisely
Accurate measurements keep the dough balanced. Use measuring cups and spoons for flour, sugars, and spices to maintain consistency throughout. Too much flour can toughen the biscuits; too little sugar can dull their classic sweetness.
| Ingredient | Measurement Accuracy Tip |
|---|---|
| All-purpose flour | Spoon and level for exact quantity |
| Butter | Weigh or use firm tablespoon scoops |
| Brown sugar | Pack lightly, avoid clumps |
| Ground cinnamon | Use a fresh spice grinder if possible |
3. Mix Dry and Wet Ingredients Separately
Combine dry ingredients thoroughly before adding wet ingredients. This ensures even distribution of leavening agents and spices. Mixing too vigorously once combined can develop gluten that toughens biscuits, so mix gently until just combined.
4. Chill the Dough
Refrigerate the dough for at least 30 minutes before rolling. This step firms up the butter, making dough easier to roll and preserving a flaky structure when baked. For best results, chill up to 24 hours wrapped tightly in plastic wrap.
5. Roll to the Right Thickness
Roll dough to about 1/4 inch thickness. Thinner dough can bake too crisp or brittle, while thicker dough may become dense. Use a light dusting of flour on your surface and rolling pin to prevent sticking without drying out the dough.
6. Cut Uniformly
Use a sharp biscuit cutter or knife to create even, consistent shapes. Uneven biscuits bake unevenly, leading to some overdone edges or underbaked centers. Dip the cutter in flour to prevent sticking for clean cuts.
7. Bake with Parchment or Silicone Mats
Always line your baking sheets with parchment paper or silicone mats. This prevents sticking and allows even heat circulation, enhancing crispness and golden-brown color.
8. Monitor Baking Time Closely
Funeral biscuits typically bake at 350°F (175°C) for 12 to 15 minutes. Start checking at 12 minutes to avoid overbaking, which can dry out the biscuits and reduce their tender crumb.
9. Cool Completely on Wire Racks
Once baked, transfer biscuits to a cooling rack to allow air circulation and prevent sogginess. Cooling fully preserves crisp edges and soft centers.
Summary Table: Key Tips at a Glance
| Tip | Why It Matters | Quick Reminder |
|---|---|---|
| Cold Butter | Creates flaky layers | Keep in fridge until use |
| Precise Measurement | Balance flavor and texture | Use appropriate measuring tools |
| Mix Gently | Avoids tough biscuits | Combine just until dough forms |
| Chill Dough | Firms dough for easier handling and flakiness | At least 30 minutes cold rest |
| Roll 1/4 Inch Thickness | Ensures ideal bite size and texture | Use flour lightly when rolling |
| Even Cutting | Prevents uneven baking | Dip cutter in flour |
| Bake on Parchment or Mat | Prevents sticking, promotes even baking | Use every time |
| Bake at 350°F 12–15 Minutes | Achieves perfect golden color and texture | Check at 12 minutes |
| Cool on Wire Rack | Keeps biscuits crisp | Don’t skip cooling step |
“Patience and precision transform simple ingredients into timeless comfort.”
Following these tips guarantees our funeral biscuits will honor tradition with every bite — tender, delicate, and full of the warmth that makes them so meaningful.
Conclusion
Exploring the funeral biscuits recipe connects us to a meaningful tradition that blends simplicity with heartfelt comfort. By following the tips and techniques shared, we can create biscuits that honor the past while bringing warmth to present moments.
These biscuits are more than just cookies—they’re a symbol of community and remembrance. Baking them with care ensures every bite carries that special blend of history and tenderness.
Let’s embrace this culinary heritage and share these delicate treats with loved ones, keeping the spirit of comfort and connection alive.
Frequently Asked Questions
What are funeral biscuits?
Funeral biscuits are simple, sweet cookies traditionally made to honor deceased loved ones. They are shared at wakes or funerals as a symbol of comfort and community.
What ingredients are needed for authentic funeral biscuits?
The key ingredients include all-purpose flour, unsalted butter, white and brown sugars, and optionally ground cinnamon for aroma.
Why is cold butter important in the recipe?
Cold butter helps create a flaky texture by preventing the dough from becoming too soft during mixing and rolling.
What equipment is essential for making funeral biscuits?
You need mixing bowls, measuring cups and spoons, a pastry cutter or fork, rolling pin, baking sheet lined with parchment, cooling rack, and a sharp knife or biscuit cutter.
Can I prepare the dough ahead of time?
Yes, you can prepare the dough in advance and refrigerate it for up to 24 hours or freeze shaped biscuits for longer storage.
How should funeral biscuits be stored?
Store baked biscuits in an airtight container at room temperature for up to a week or freeze them for extended freshness.
What are the best serving suggestions for funeral biscuits?
Pair them with tea or coffee, soft cheeses, fruit preserves, and serve on vintage plates. Adding fresh herbs as garnish enhances the experience.
What tips ensure perfect funeral biscuits?
Use cold, unsalted butter, measure ingredients precisely, chill dough before rolling, roll to 1/4 inch thickness, and bake on parchment for even crispness.
How long and at what temperature should I bake funeral biscuits?
Preheat the oven as directed, typically bake at moderate temperature, monitoring closely until they turn lightly golden for best results.
Why are funeral biscuits meaningful?
They embody tradition, offering comfort through food and encouraging a sense of remembrance and community during difficult times.